1/35 Tamiya Chieftain Mk. 5 from CFB Suffield, 1970's

Joined
Sep 25, 2011
Messages
804
Canadian Forces Base Suffield is located in the southeastern tip of the Province of Alberta, in Canada. It's the largest Army training area in the entire Commonwealth. In 1971, the British Army started using the base for extensive armoured and infantry training, and has been there ever since, rotating units in and out on a regular basis. Its rolling hills and prairies have made many a British soldier into "keen-eyed Prairie Men", a famous quote attributed to Maj-Gen. Worthington speaking fondly of his beloved recce battalion, the South Alberta Regiment (my old regiment).

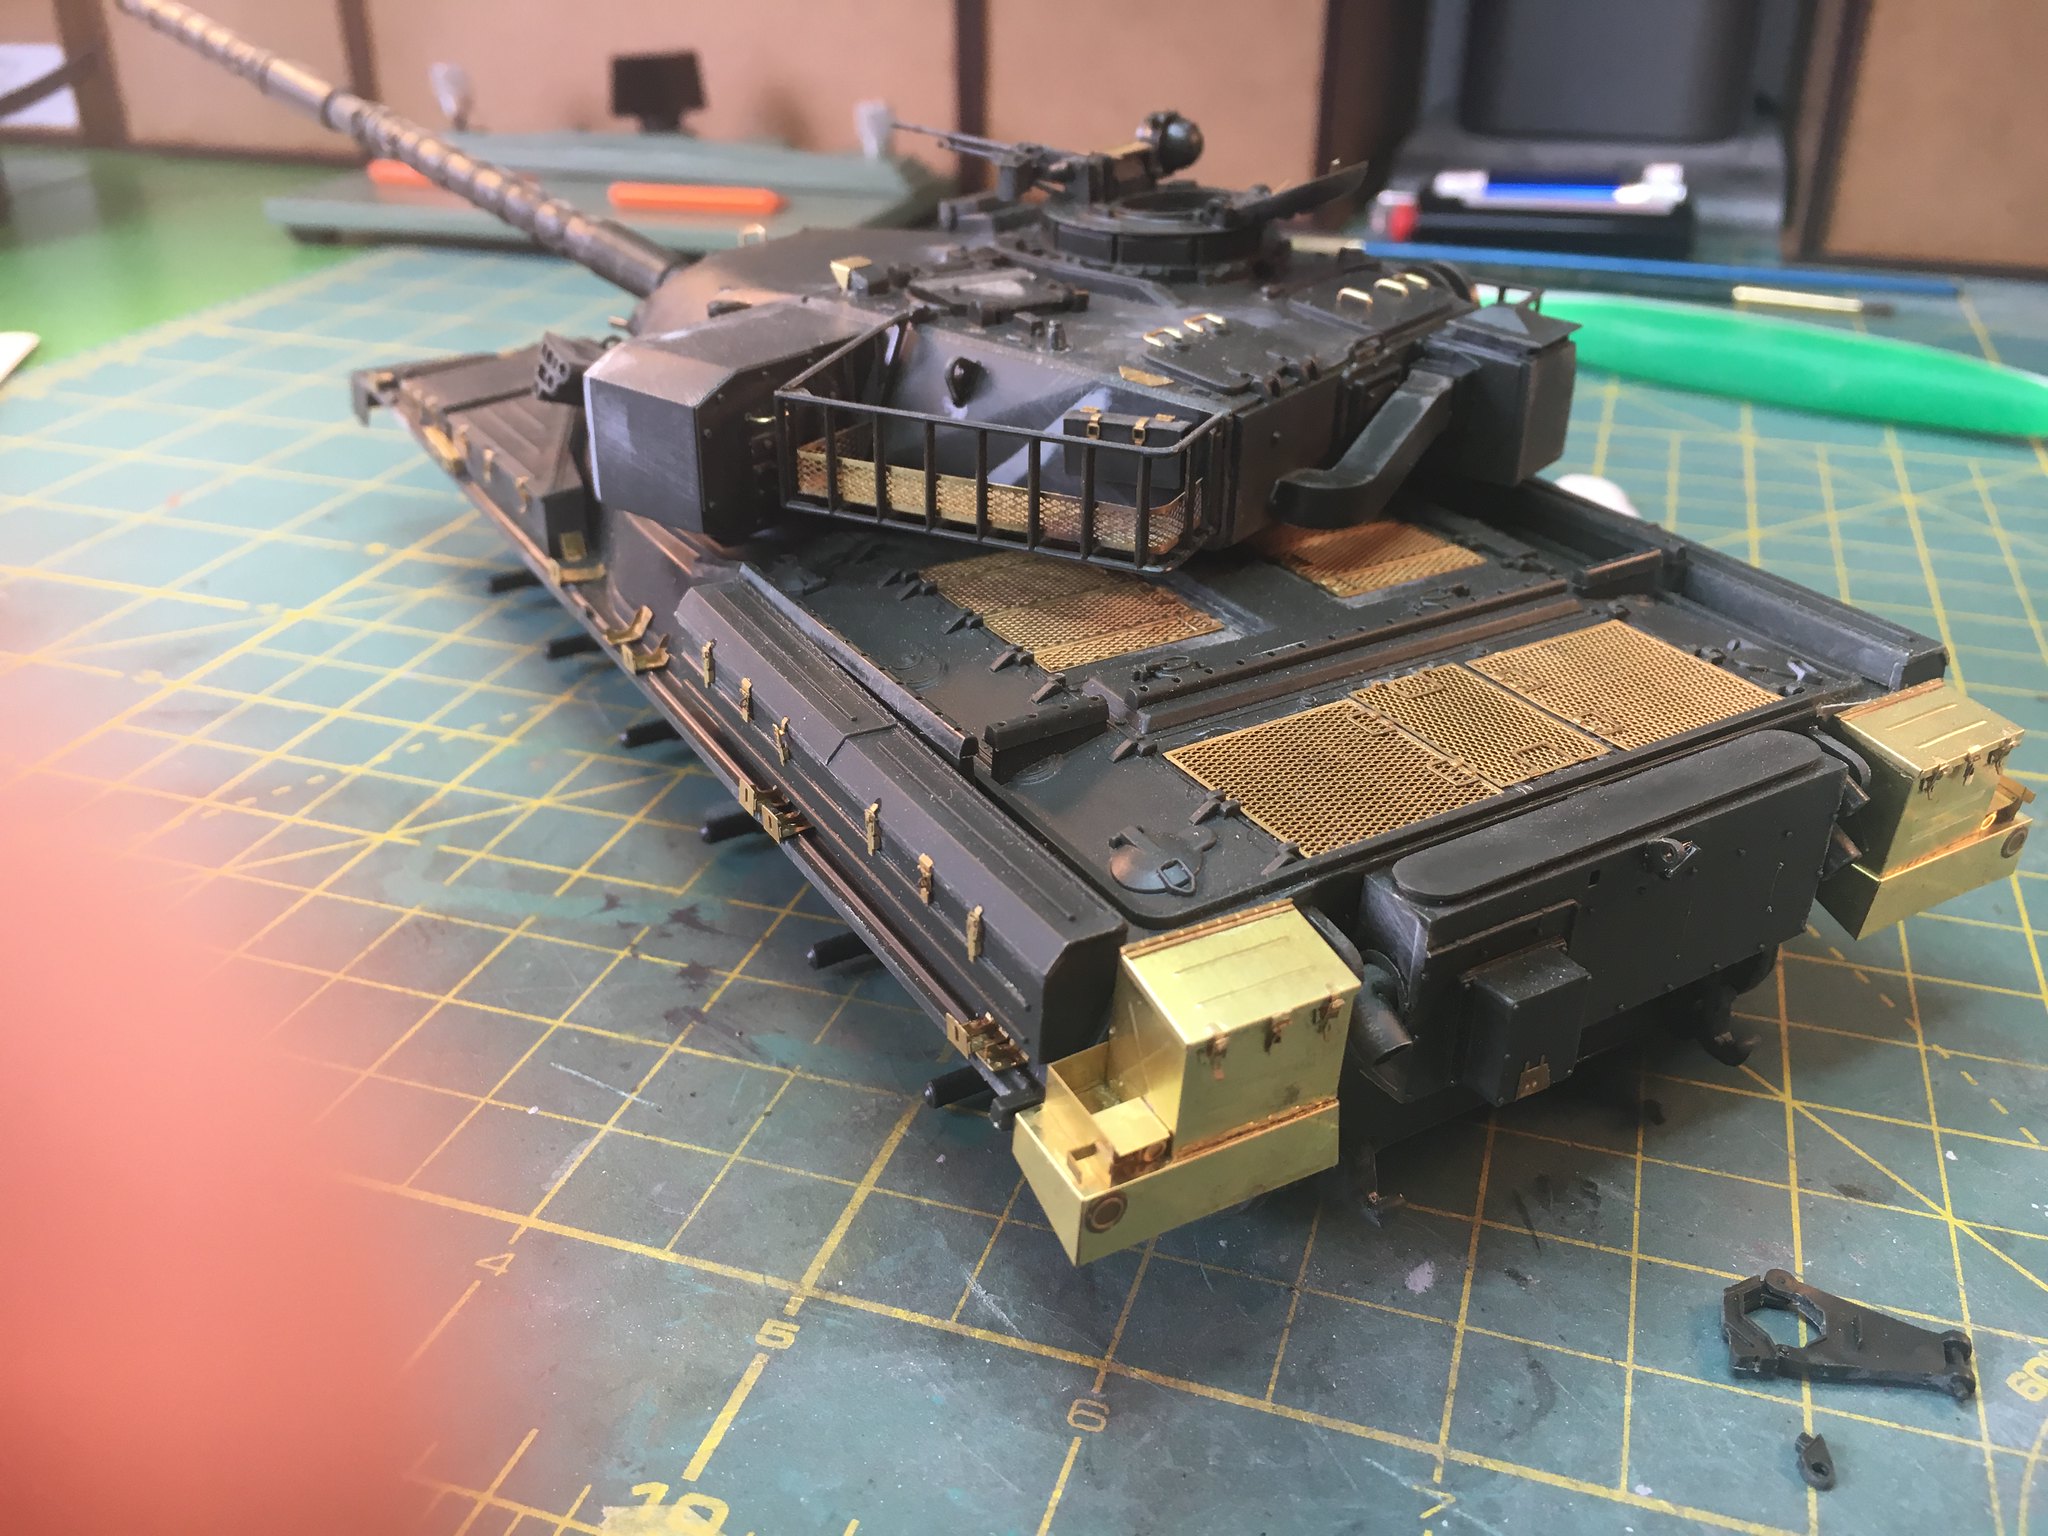
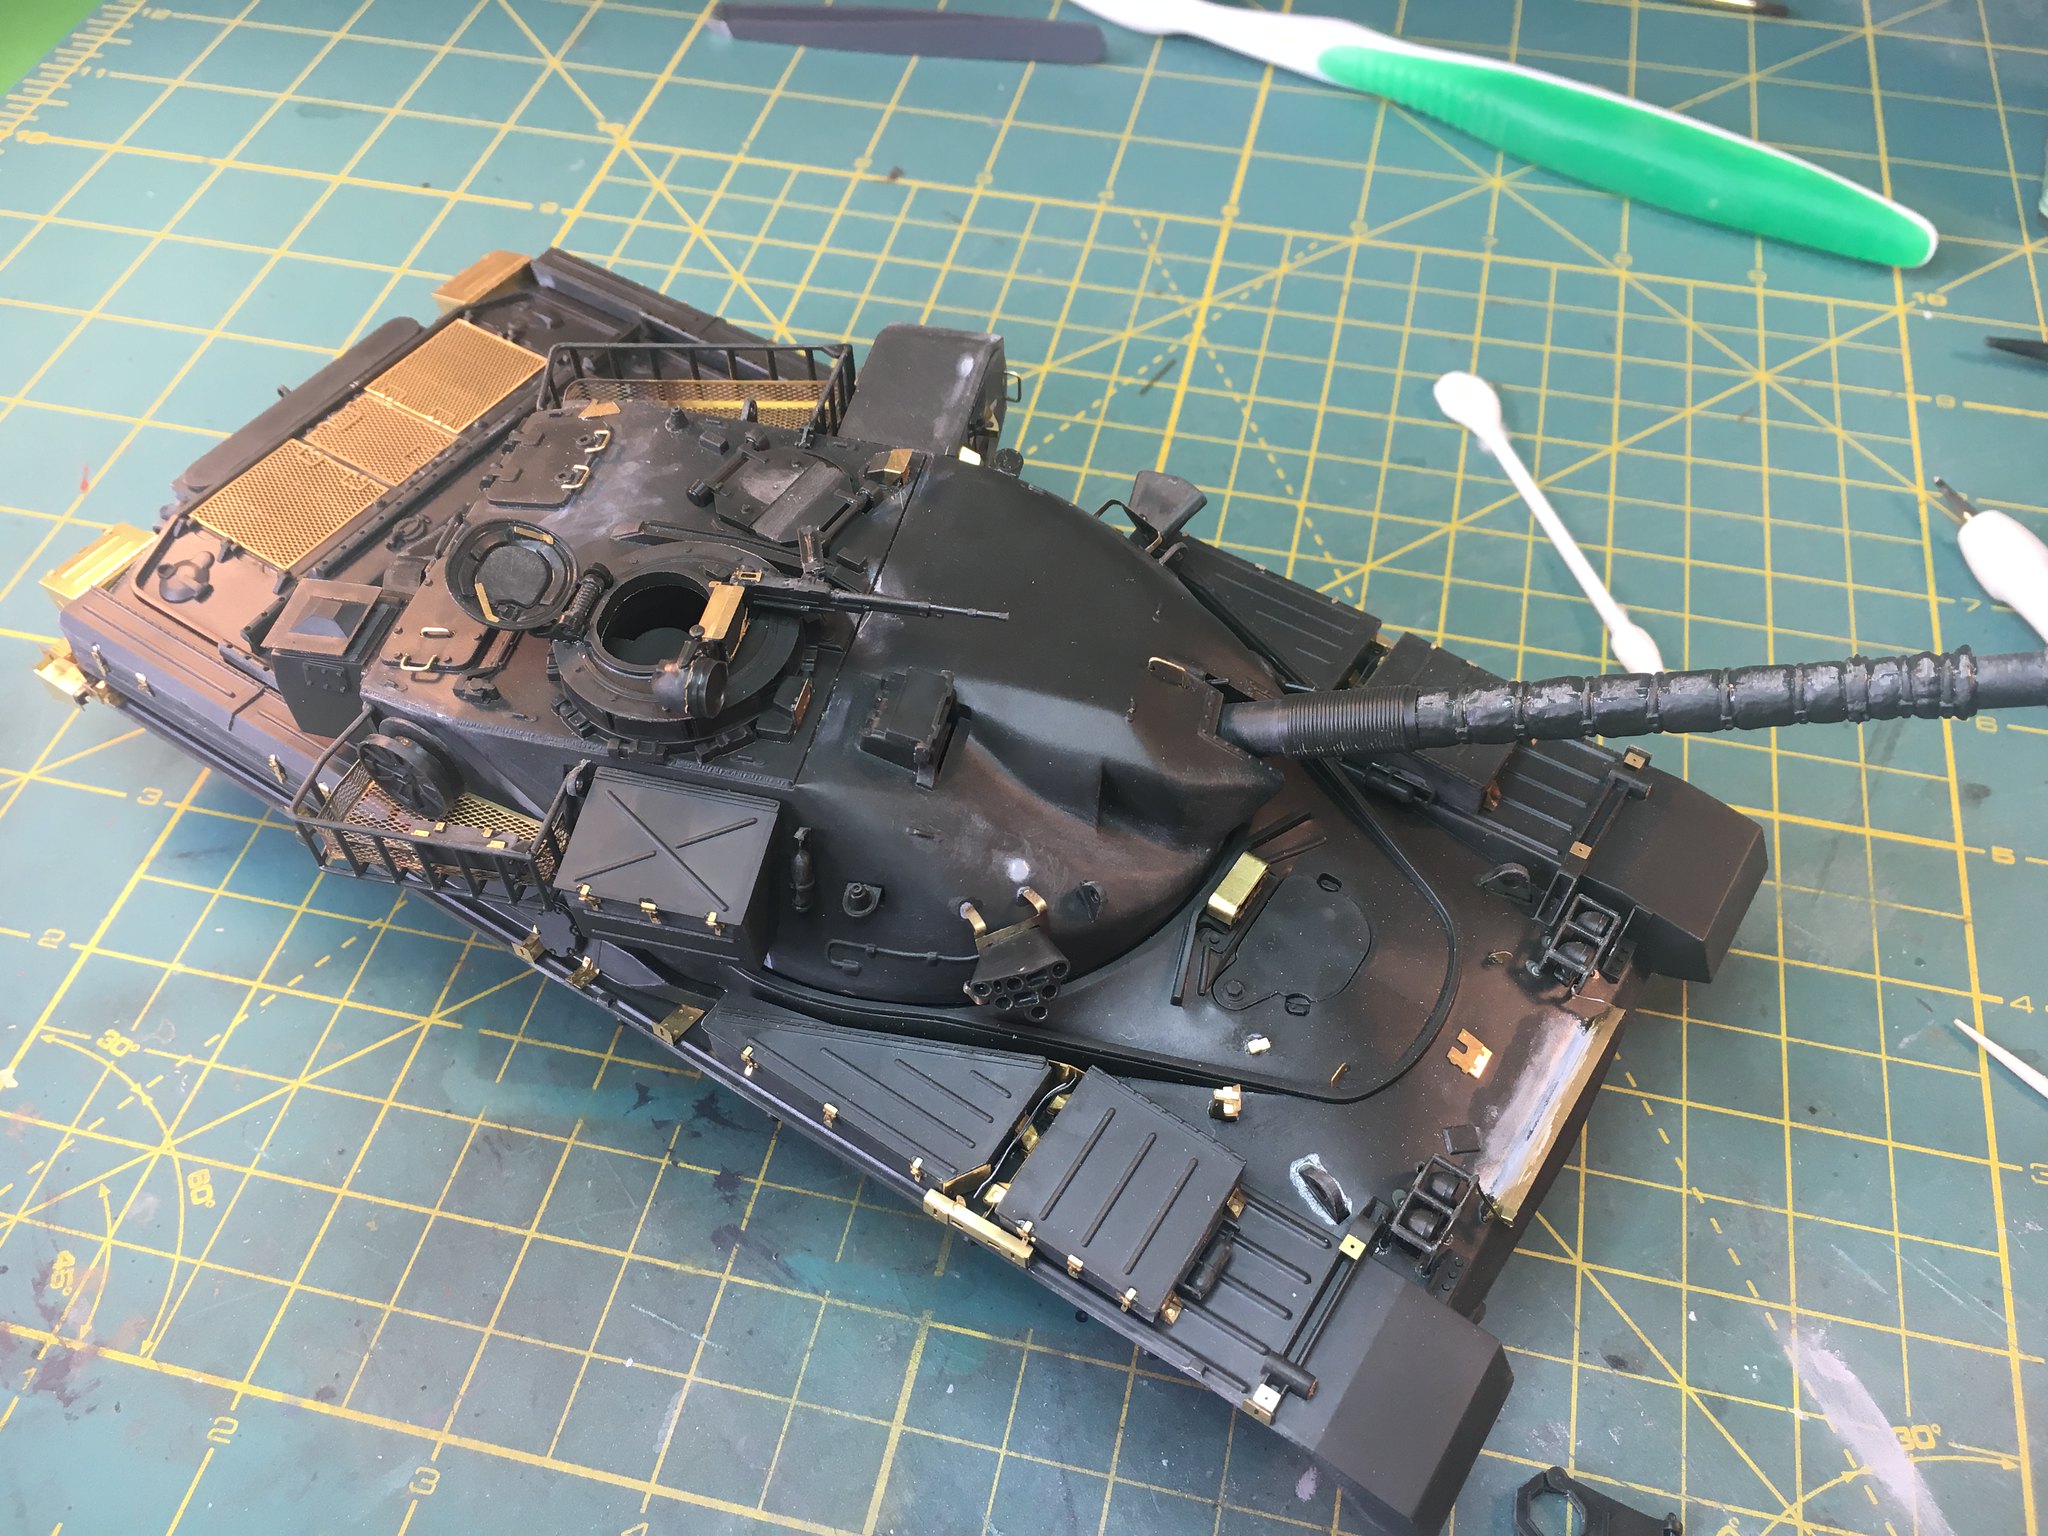
I'll be building one of the Chieftain main battle tanks that the British Army trained with at CFB Suffield in the late 1970's.

IMG_1513 by Brett Watt, on Flickr
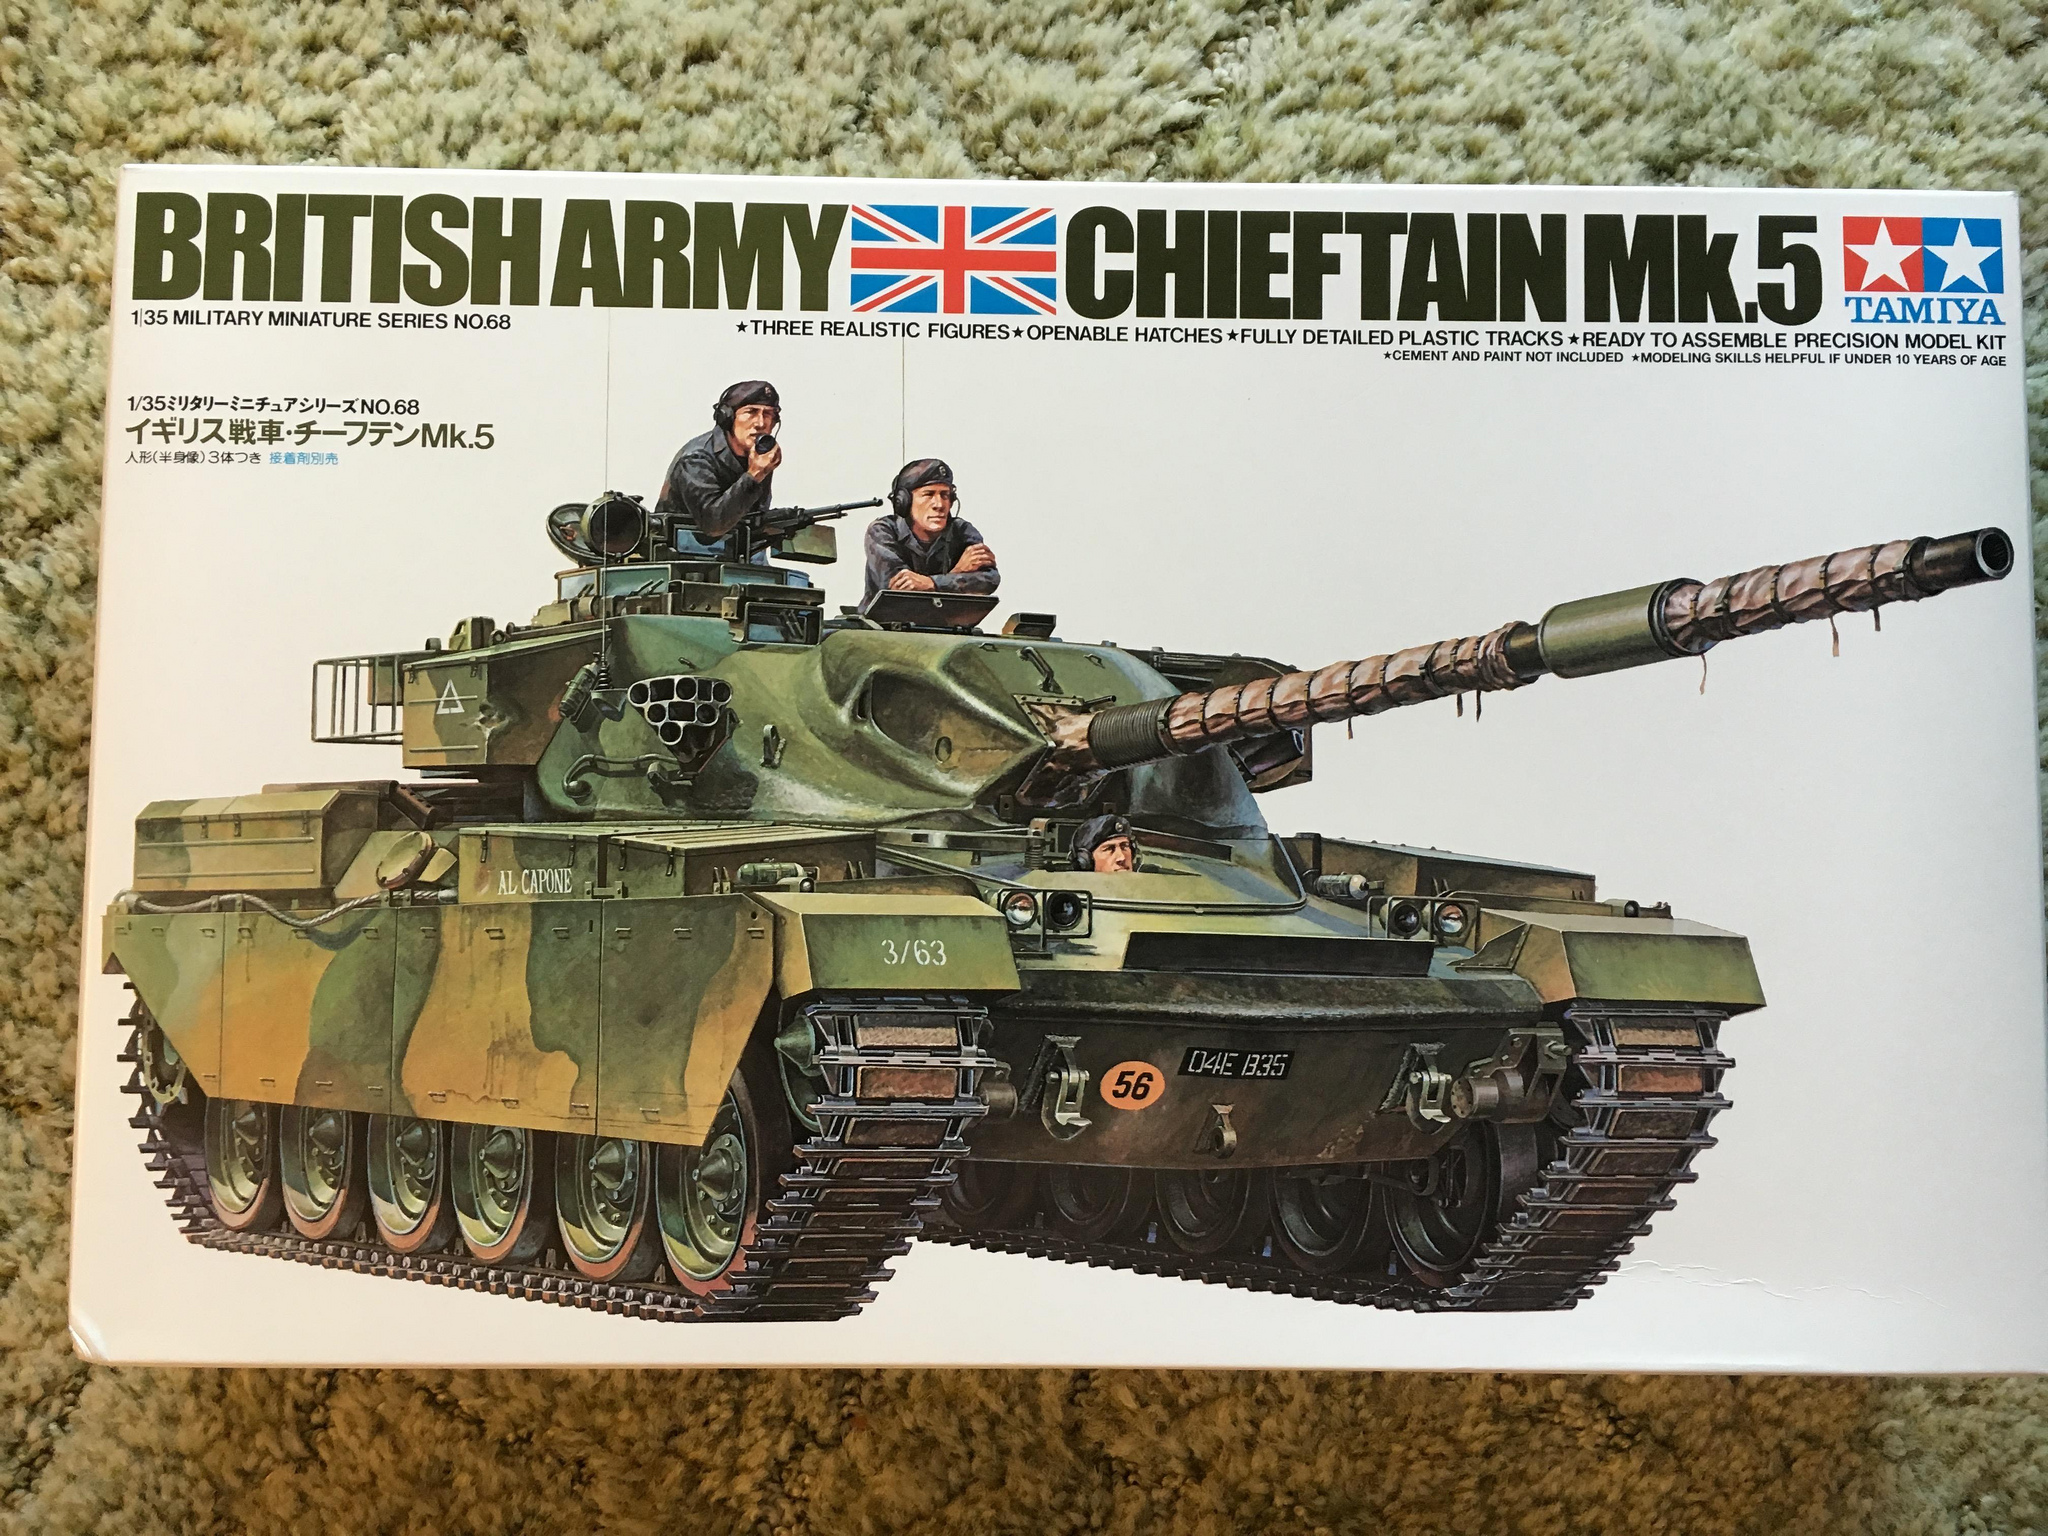
I'll be using the 1975 vintage Tamiya Chieftain MBT kit for my build. This build is part of a SIG over at Flory Models, but I'd like to share it with my peeps here! ;D

IMG_1519 by Brett Watt, on Flickr
I'm also using Eduard's PE set for this, to build it into a cool Chieftain Mk. 5, appropriate to the era and the mark of Chieftain used at CFB Suffield.
 
28042793101_8667805dd1_z.jpgIMG_1550 by Brett Watt, on Flickr
I do love me some cool PE on a tank. I really find it therapeutic!

27505685093_7fc71ecec4_z.jpgIMG_1552 by Brett Watt, on Flickr
This, in addition to the assembly and extensive sanding of all 12 road wheels, is where I am at. I've put in about 8 hours a day at the workbench yesterday and today. I'll be able to put in about another 6 hours tomorrow, but after that I'm off to a 10-day summer employment opportunity in the Canadian Rockies. $$$

Like I said, this build is part of a group build for British Tanks. Most participants that have chosen to build a Chieftain have elected to use Takom's brand-new tooling and release of the Chieftain: Mk.2, Mk.5, Mk.10, and Mk.11. However, at $80-$100 CDN for one of these kits, I elected to go the cheap route: buy the kit second-hand for $30, and add $20 in PE. We'll see if my sweat-equity pays off, because I am very interested to see how a souped up vintage kit stacks up against a modern version. Besides, I didn't relish assembling and gluing together 160-odd individual Takom tracks. That sort of thing killed my mojo for my old Tamiya Merkava bench queen.
 
Cool - I'm curious to see the difference in the new vs old myself ;)

I assume this will be rubber-band track ? Or is it link and length ? Two piece barrel ?

Go Go Tamiya ! ;D
 
Other than the PE you see, everything else is OOB. I'll be using the kit barrel, but I'm going to drape it in camo netting to hide the nasty seam line over the thermal wrapping and buckles.

As for the tracks, I'll be using the rubber band tracks, unless...

Lots of the Takom Chieftain kit builders in the group have elected to go for Masterbox cast metal tracks with plastic track pads. So... I politely asked if any of them would be willing to part with the Takom individual link tracks that come with the kit. :p
 
LOL - heh heh , I was hoping to see your results with the band tracks ;)

I think it really depends on the vehicle / kit , but I've seen some that look stellar .
Personally , I think the Tamiya bands look kinda lame -
I debated getting the Bronco workables for the current Panther but went with the Friuls only because I had experience with neither . eenie meenie meiny ;D
The Broncos are less than half the price .. I'm definitely using them on the next one .

I'm really curious how they cast the Friuls . It seems to me it would need to be some kinda investment casting ???
They gave me 42 extra links --- not that I'm complaining but that's way more extra than I would have expected .
You almost get a free set with every 4 purchased 8)

Your PE work has me wanting to get back to some of it on the tanks -- soon as I get this one group of guys standing .
 
I'll keep me eye out for this build,I did a tour over there in the 90's,in scimitars for the chieftain's.
I was in the 5th Royal inniskilling dragoon guards.
Keep up the great work buddy
 
29329095985_8d7cc888f6_z.jpgChieftain by Brett Watt, on Flickr
BATUS painted their armoured vehicles in a desert yellow color, with green semi-hard-edged camouflage to break up the silhouette and profile. I started this paint job by applying a coat of Tamiya Yellow Green XF-4, over Stynylrez Black primer (yes, mine is not toothpaste consistency yet). My hope was that I would have a green-tinted darker yellow to provide shadow tones for the desert yellow main color. As you can see, it's rather bright and not very shadow-like. Oh well.

28708310143_298a9a5706_z.jpgChieftain by Brett Watt, on Flickr
I sprayed on Tamiya Desert Yellow XF-60 as the main color. I painted it on in a zenith pattern at about a 45 degree angle while slowly spinning the assemblies. I think it turned out just fine: sand-colorer, with a slightly green tint to it. That tint is more pronounced in the areas in shade.

29295449016_89f8a8fac9_z.jpgChieftain by Brett Watt, on Flickr
I used Tamiya NATO Green XF-67 for the camouflage pattern. I used my H&S Infinity with a 0.15 needle to spray this on. I thinned the paint to an almost ink-like consistency, and did several passes from many different angles to catch all of the angles of each painted relief piece on the hull and turret. The 0.15 allowed me to get pretty close and do a semi-hard edge for the camo. Some camo ref pics had a hard edge, some were soft-edge, and some were in between. However, it appears to be touched up frequently in the field. That allowed me some artistic license with the camo. When finished, I did a light pass of the camo color mixed with the main color in the centre of the camo stripes, just to add some tonal variation.
 

Latest posts

Back
Top