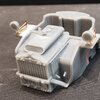
Pavesi P4-100 Gun tractor 2025-06

Had a few cycles with paint drying on the WC55, so did more cleanup, and repair of some parts.
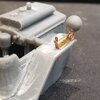
The foot rest was a solid piece with a corner missing, so cut it off and repurposed WC51 grill!
Painted up should look good.

There were three curly doodads missing on wheels, so heated and bent styrene strips.
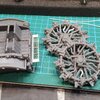
20250623_213853.jpg

I will replace the tiedowns and canvas top post anchor blobs with some brass and wire.
The adjustable angle headlights are a mess, so will fix those too.
 
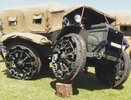
... so here is a photo of the paddles folded up (mine are molded down) for rolling on the rubber.
You can also see why there are so many channels for the tarp roof supports on the sides of the body.
The rear fenders are actually lipped like a tray for stowage, with their own protective tarps!

The photo also shows how the vehicle was hinged in the middle to negotiate awkward terrain.

pavesi.jpg
 
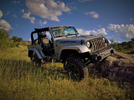
That articulation would make Jeep (I should say "Wrangler" the only real Jeep) owners envious. This was about all the articulation I could get from the factory suspension on mine, long wheel-base versions could get more. I guess my example is about suspension-flex, your tractor has chassis flex :)

1750794999568.png
(left-front wheel is almost 3 feet higher than right)
 
So some prototyping:
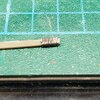
Folding light wire or lead wire.
The light wire is hard to fold square, but is rigid.
The lead wire is super easy to shape, but could easily get shmushed handling the model.
At this size, the light wire digs into the plastic piece. Free hand on flat tipped pliers is equally hard.
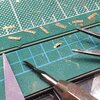
Wrapping the lead, gently persuading a rectangular shape, and one cut up the middle gives me plenty of near identical parts.

20250624_160504.jpg

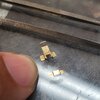
Before I do a bunch, with copper tape plates, better make sure it looks okay.
The blob next to it is the do nothing alternative...

20250624_163410.jpg
 
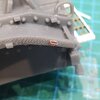
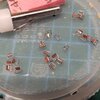
Another prototype: need 6 of these selected from this batch for the rear, 4 from another batch for the front section. Cut from my roll of .1mm brass. Rounded up the dimensions to closest mm. (So slightly larger)

17508778841068237959389773264298.jpg
 
added details
Thanks for the praise...

We often enjoy our hobby for different reasons... I have to say that I get a kick out of approximating details, not necessarily technically or historically accurate, and it is the fabrication process that I enjoy the most!

I really like understanding how things work, and the research, selection and manipulation of materials for building particular widgets somehow brings me closer to the subject matter, and adds to my overall satisfaction.

Looking back at my builds over the years, it is more often a particular detail or technique that worked out nicely that makes me smile, more than the completed model as a whole. :cool:
 
There's nothing wrong with that at all, there's generally always something about a build that we all like above everything else.
 
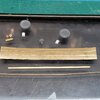
Some prep work on the adjustable headlamps.
Hope to turn this stuff into a reasonable facsimile of the real thing.

But it will have to wait, on deck for granddaughter babysitting!

17509691506726954229589541672397.jpg
 
Wow :)

One thing your photos have me wondering is how much of those print lines will be visible after painting. I think I'd give a few parts of the model a quick coat to see if they can be seen through it or not, and if they are, sand them down where I can.
 
print lines
Ya, they look like fingerprints, zoomed in like this. Wondering the same thing... now that I've removed the blobs that were supposed to be detail, it will make sanding easier. But I don't want to remove what little actual surface detail is left.
My experience with partial and full resin kits somewhat prepared me for 3Dprint, but there still is a learning curve.

All in all, going with a less expensive €79 vs €150, but not cheap kit (before shipping and any duty), means a lot more work just to bring it up to snuff, plus the scratch detailing.
I justified the expense as providing a base vehicle (not available elsewhere) to build upon, so that was kind of expected...

However, being my first 3Dprint full model, I was taken aback by how much prep and fussing was required just to get it to the assembly stage.
With my limited experience with this type of kit, I don't know if the complexity of the subject was a stretch for the manufacturer, or just that their quality is comparatively poor...

Am I enjoying the build? Absolutely.
Am I impressed with the kit? Not so much.


Write your reply...
Back
Top