
You are using an out of date browser. It may not display this or other websites correctly.
You should upgrade or use an alternative browser.
You should upgrade or use an alternative browser.
Border IJA tiger I 1/35.
- Thread starter Ron2
- Start date

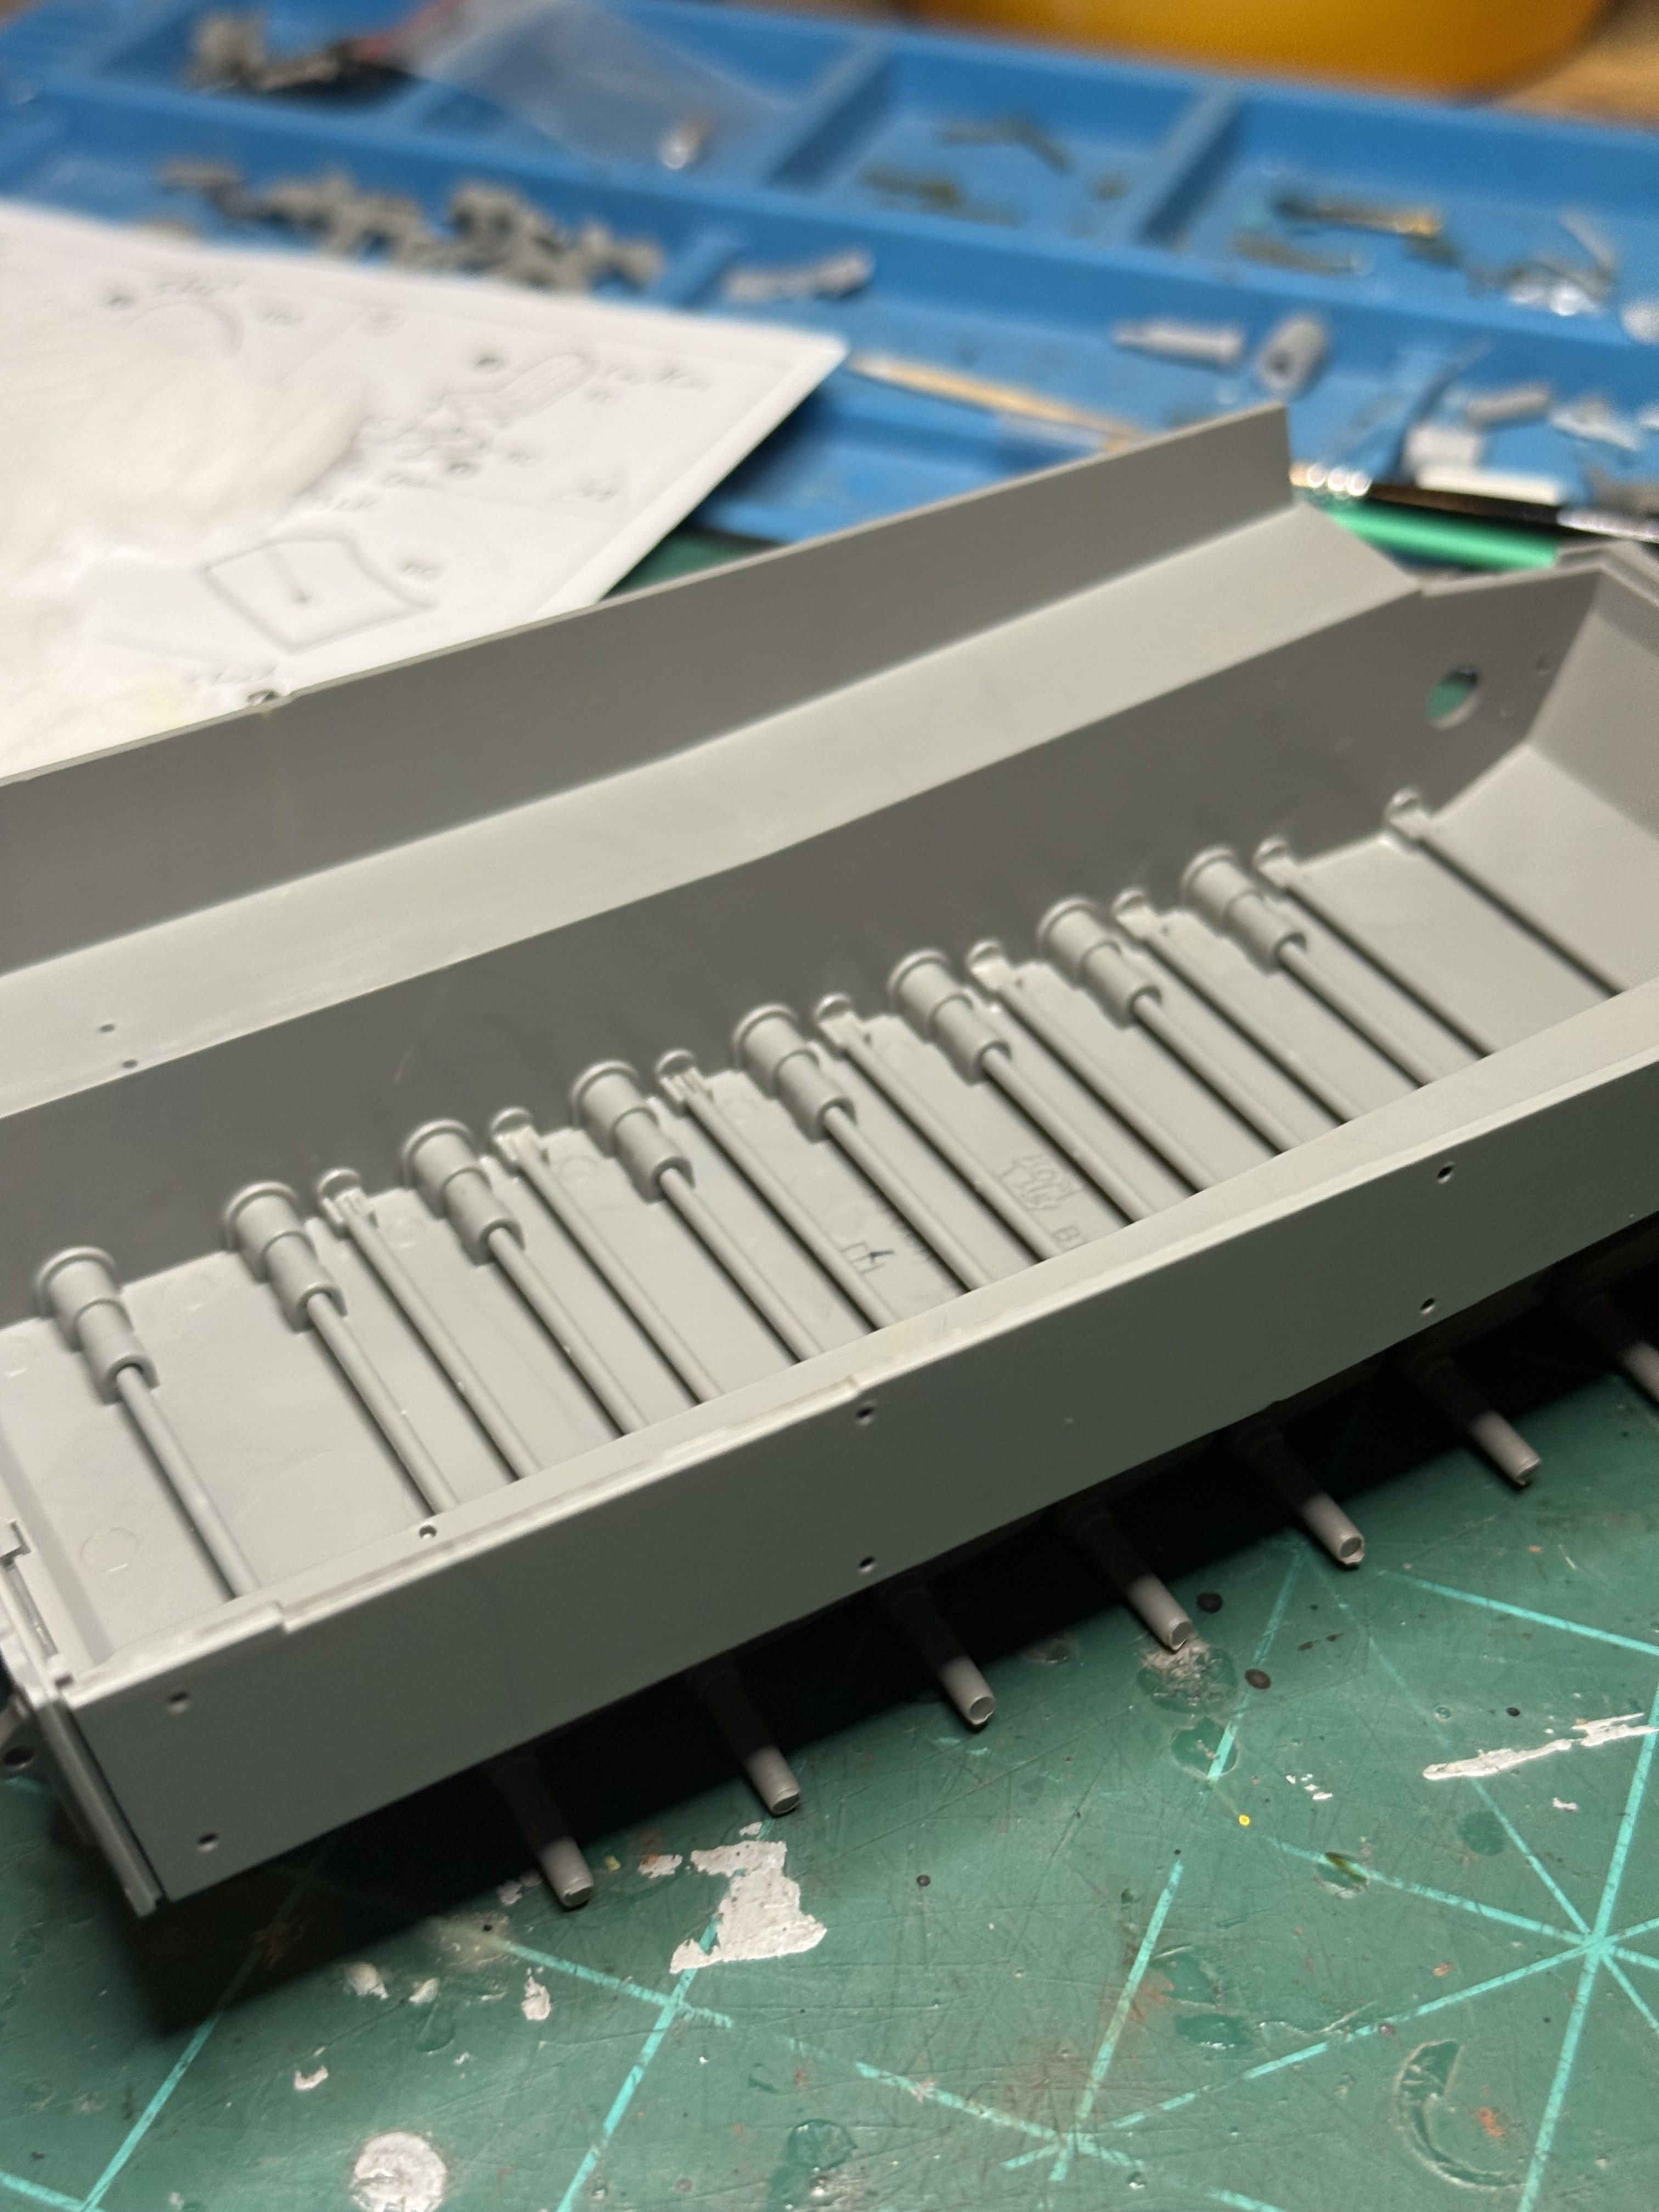
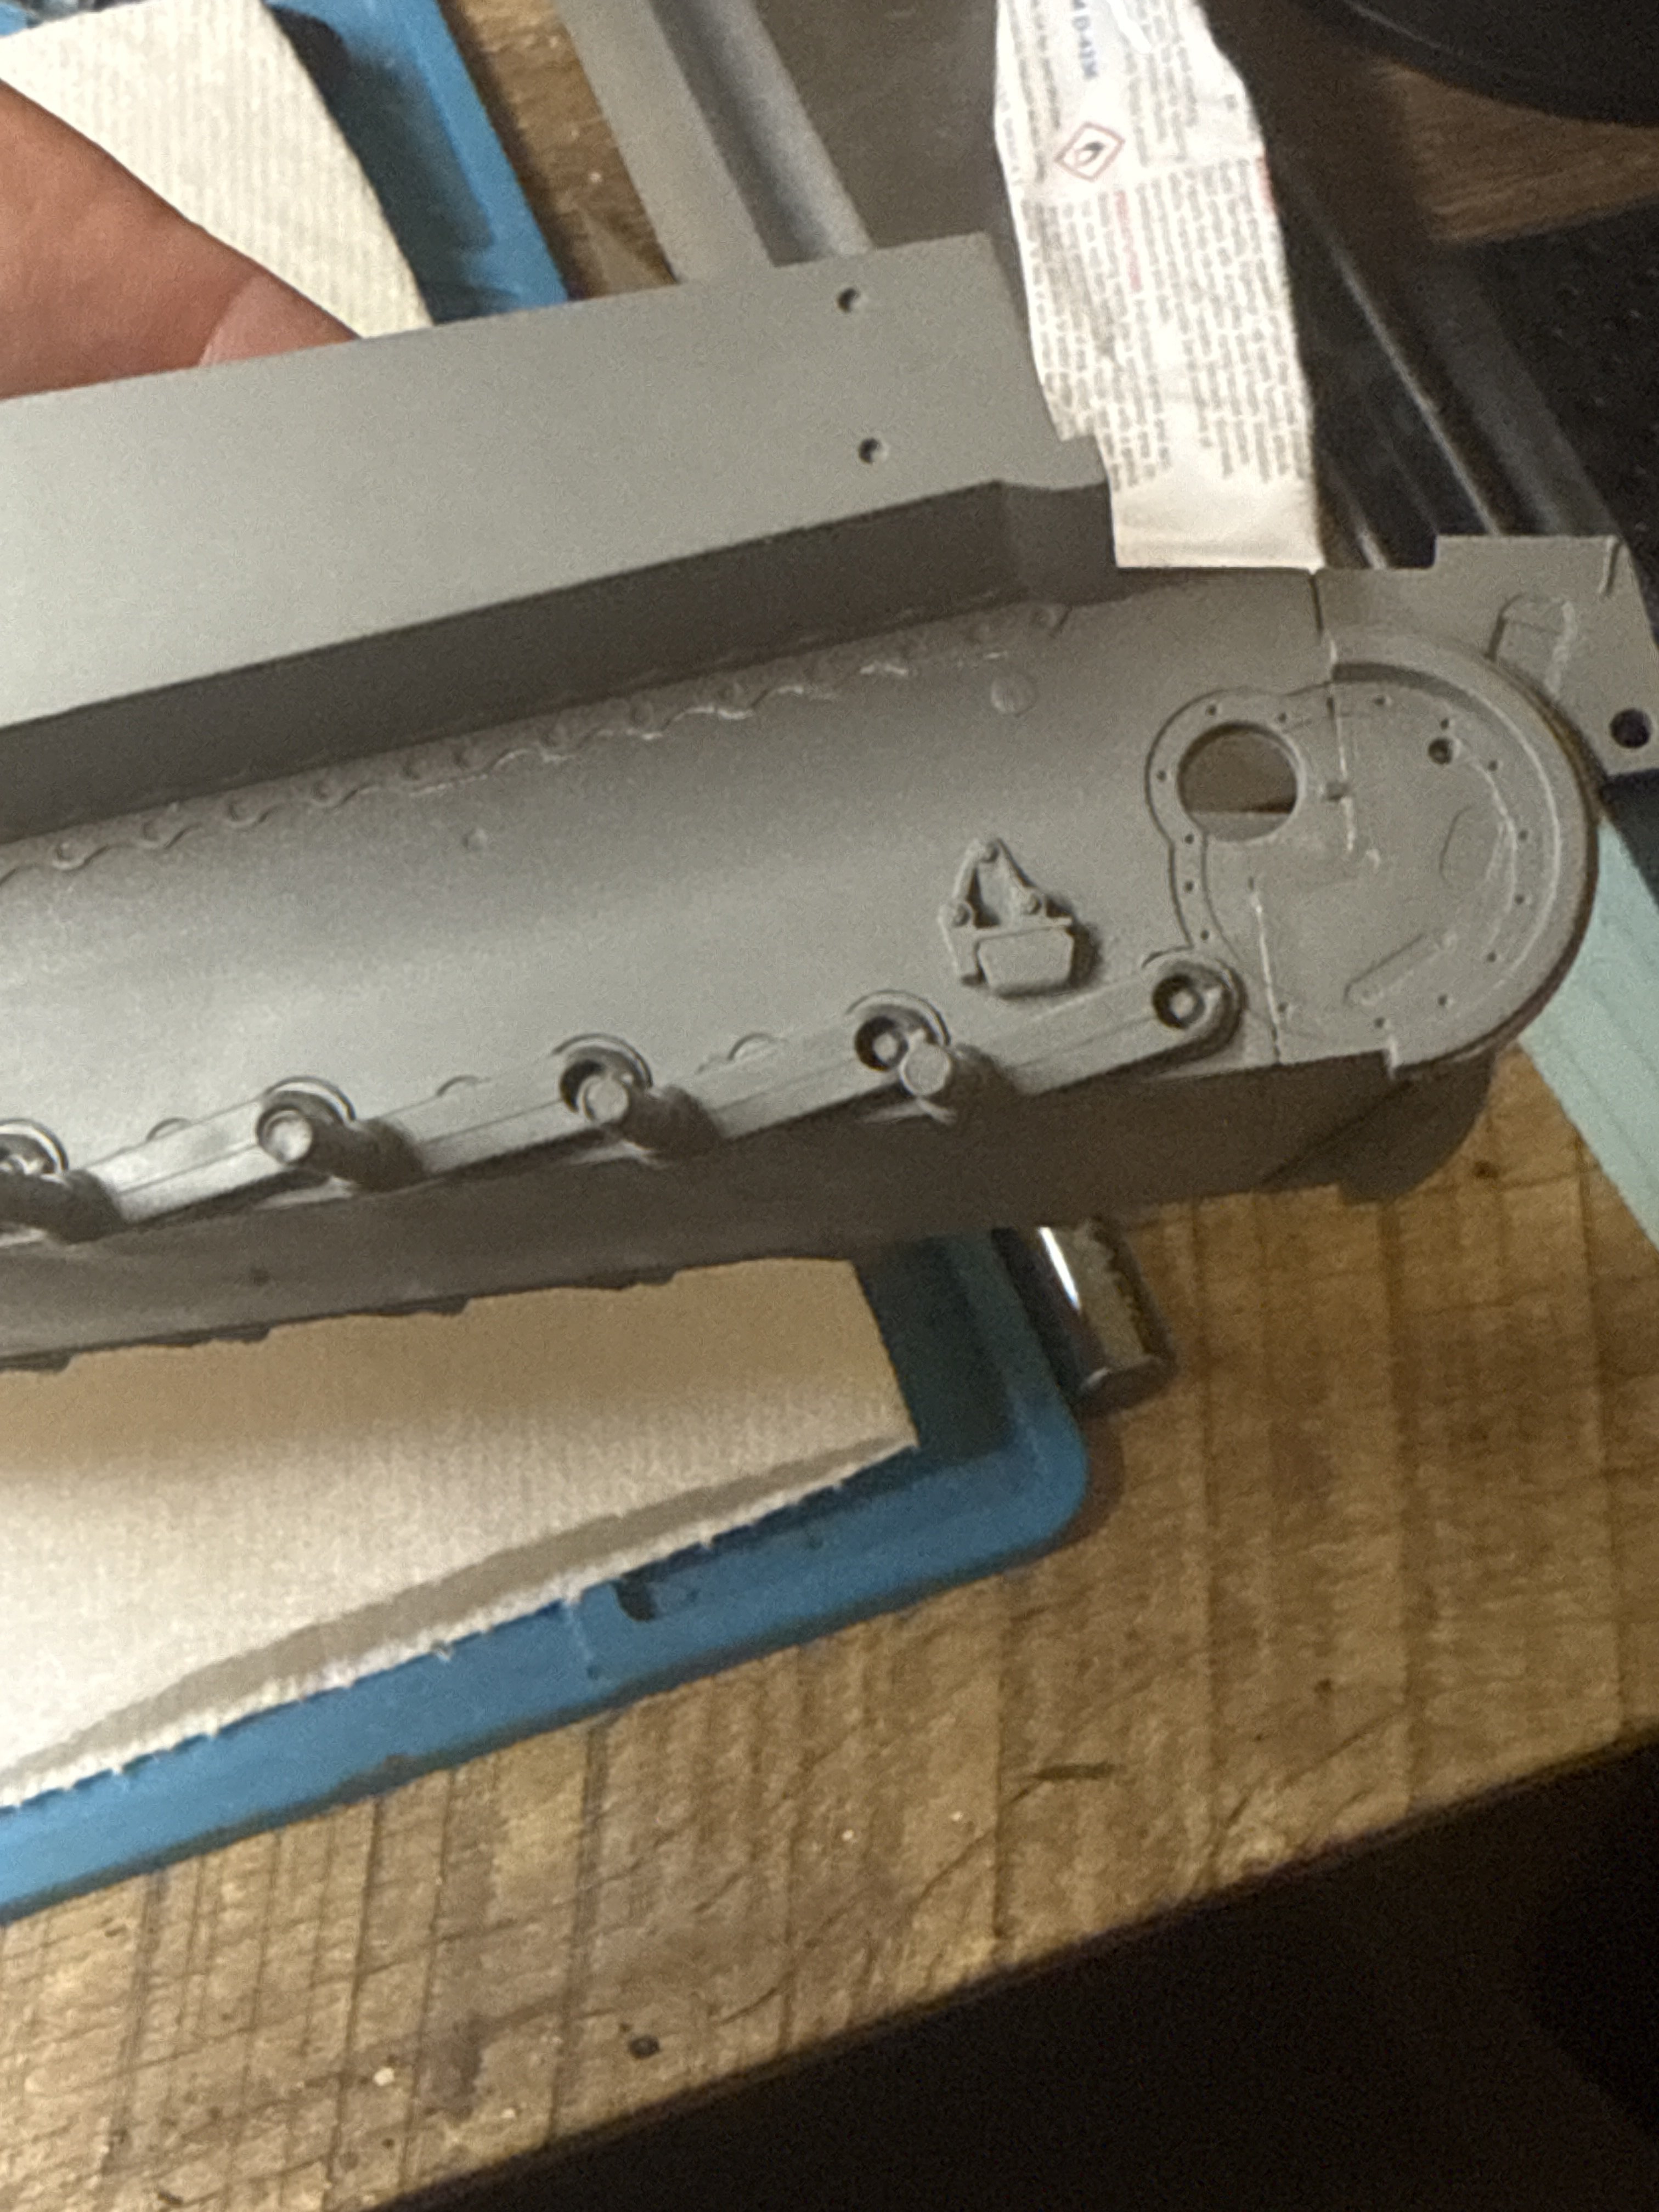
I realized I screwed these hatches up last night. Everything is glued solid I'm not going to be able to unglue and adjust. I must have gotten confused looking at the diagram and installed the hatches from the wrong side. I'll figure something out. Suggestions? I installed the hatches from the inside so they're a bit low.
Attachments

Jakko
Well-Known Member
Oh, the driver and radio operator's hatches? I was looking at the engine deck to see what was wrong 
Do you have the tools to make plastic card discs the diameter of the hatches? Because if you do, that's a relatively easy way out: those hatches are really just discs with a bevelled edge and a slight flat on one side, plus a blocky periscope guard on top. The hard part is making the discs, everything else is straightforward.
Do you have the tools to make plastic card discs the diameter of the hatches? Because if you do, that's a relatively easy way out: those hatches are really just discs with a bevelled edge and a slight flat on one side, plus a blocky periscope guard on top. The hard part is making the discs, everything else is straightforward.
Well that's what I was trying to figure out. There's tools to make discs? I was picturing me trying to free hand a circle and thought that would look awful. I can easily pop the scope out but I just couldn't figure out how to make perfect circle cuts.Oh, the driver and radio operator's hatches? I was looking at the engine deck to see what was wrong
Do you have the tools to make plastic card discs the diameter of the hatches? Because if you do, that's a relatively easy way out: those hatches are really just discs with a bevelled edge and a slight flat on one side, plus a blocky periscope guard on top. The hard part is making the discs, everything else is straightforward.
Jakko
Well-Known Member
The number one tool for it is a lathe, of course Lacking one of those (or knowing someone who does), this is a good alternative:

… though rather expensive if you just need two discs There's also hollow punches like these:

(source)
… but they don't work well on plastic card, is my experience, especially not with the thickness you need for those Tiger hatches.
Using a compass cutter or a regular drawing compass is really a last resort, IMHO. It can be done, but it's difficult to do well. I usually draw spirals with a compass cutter instead of circles
Perhaps your best bet is to ask around if anyone has these hatches spare. For all I know, there's a Sturmtiger kit that also includes the regular Tiger's hatches?
Lacking one of those (or knowing someone who does), this is a good alternative:
… though rather expensive if you just need two discs
There's also hollow punches like these:
(source)
… but they don't work well on plastic card, is my experience, especially not with the thickness you need for those Tiger hatches.
Using a compass cutter or a regular drawing compass is really a last resort, IMHO. It can be done, but it's difficult to do well. I usually draw spirals with a compass cutter instead of circles
Perhaps your best bet is to ask around if anyone has these hatches spare. For all I know, there's a Sturmtiger kit that also includes the regular Tiger's hatches?
I ordered a dspiae circle cutter. This should be a fairly straight forward fix. I'm learning to slow down and pay closer attention - can't believe I got confused with this one.The number one tool for it is a lathe, of course
… though rather expensive if you just need two discs
(source)
… but they don't work well on plastic card, is my experience, especially not with the thickness you need for those Tiger hatches.
Using a compass cutter or a regular drawing compass is really a last resort, IMHO. It can be done, but it's difficult to do well. I usually draw spirals with a compass cutter instead of circles
Perhaps your best bet is to ask around if anyone has these hatches spare. For all I know, there's a Sturmtiger kit that also includes the regular Tiger's hatches?
Jakko
Well-Known Member
I must admit it's one of the more unlikely mistakes I've seen made
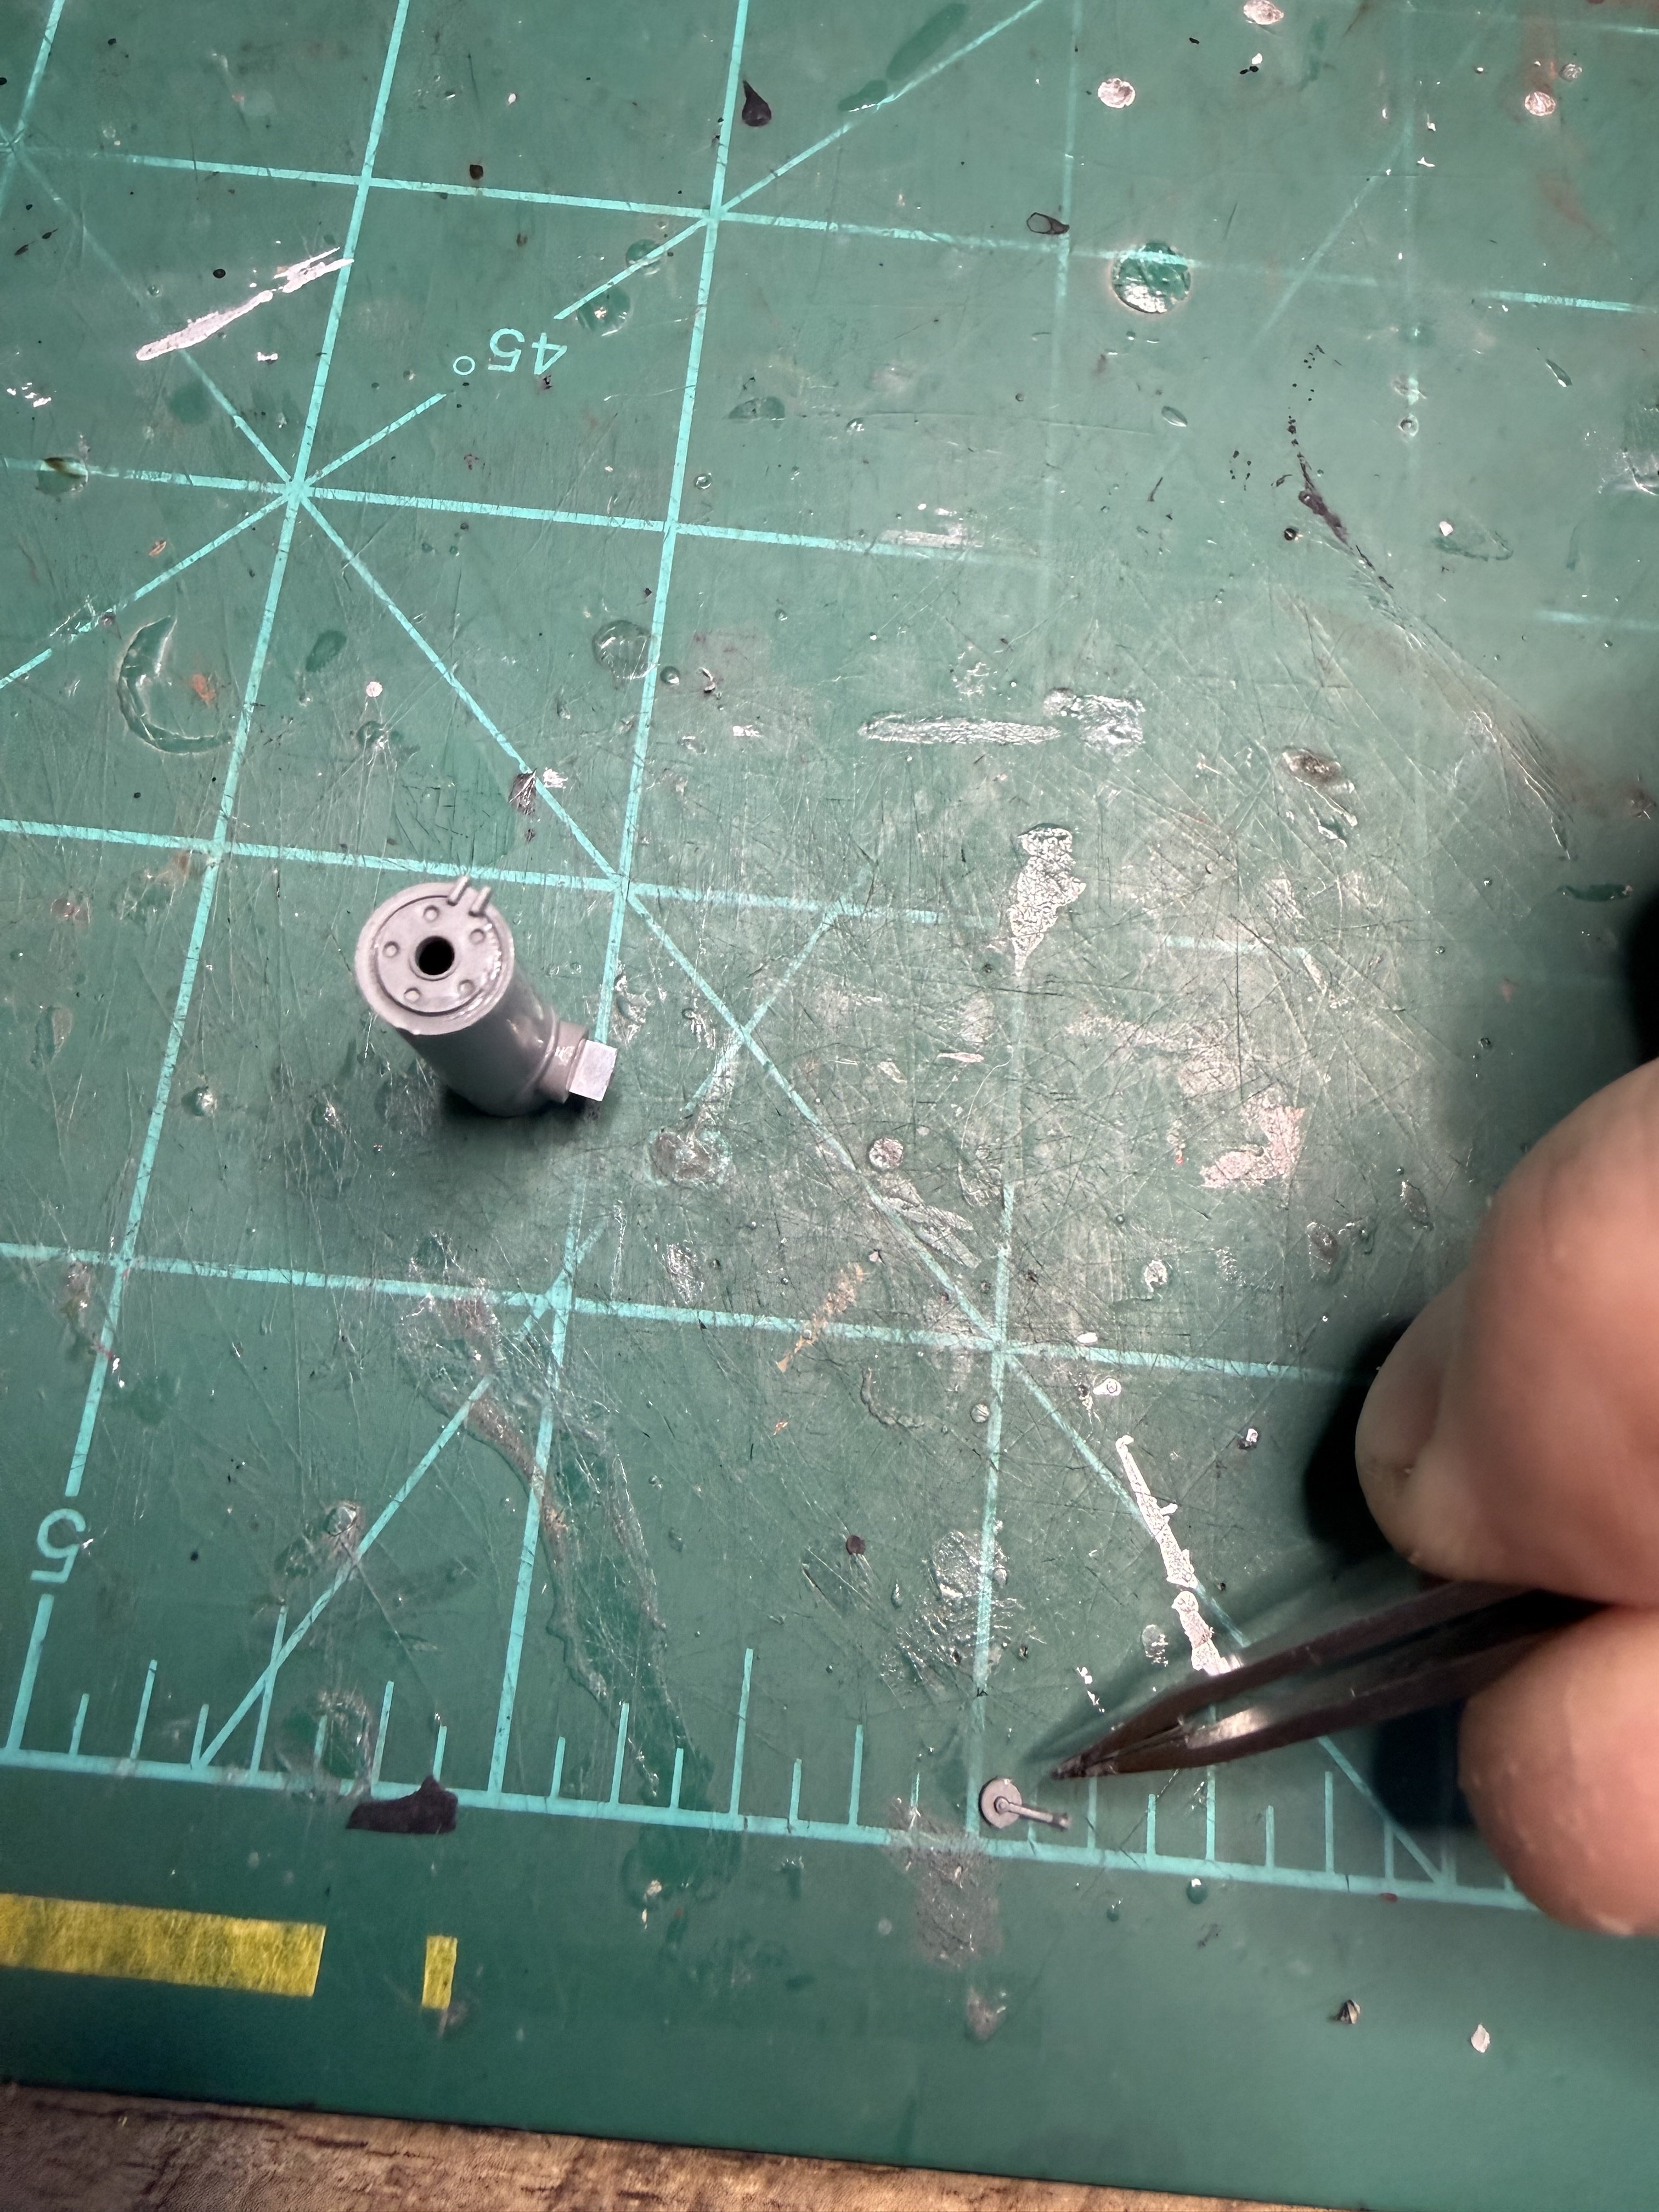
Some of these parts are ridiculously small. I spent 15 mins on this simply because my tweezers kept sending the part into oblivion and then I was searching for it. 14 mins searching 1 min building. It'll be nice detail provided I don't knock them off before I'm done. Need to order a wax pen.
Attachments
Jakko
Well-Known Member
Cheaper and always-available solution: lick your finger and pick up the part that way
Question. As is my habit I'm into the build so now I was searching for pics and imagine my surprise when I learned Japan never received this tank! So my question is, would this have been painted camouflage? I would think it would be sent to them with factory paint, im assuming panzer grey, and they would have painted the camo in Japan. The box directions call for camo.Cheaper and always-available solution: lick your finger and pick up the part that way

kevin
Well-Known Member
The video doesn't answer your question about paint scheme, but its still interesting.
Jakko
Well-Known Member
It's a straight-from-the-box what-ifimagine my surprise when I learned Japan never received this tank!
There was talk of Japan importing a Tiger and a Panther (IIRC) as well as the drawings etc. so they could make them, but that never happened.Off the top of my head, Japan did own one Tiger, though. It was purchased by a Japanese delegation in Germany for the reason I mentioned above, but never left the country.
That depends on how you view the tank. If you see it as a German-built machine exported to Japan for trials, it would almost certainly have left the factory in German paint. Not sure what timeframe of Tiger this particular model represents, but it could have been dark grey or dark yellow. OTOH, if you view it as a licence-produced tank, so made in Japan, it would almost certainly have had Japanese three-colour camouflage (which was a greenish tan, dark green and red-brown). And, of course, a trials tank in Japan would probably have been repainted in those as well, or at least in the greenish tan base colour.So my question is, would this have been painted camouflage?
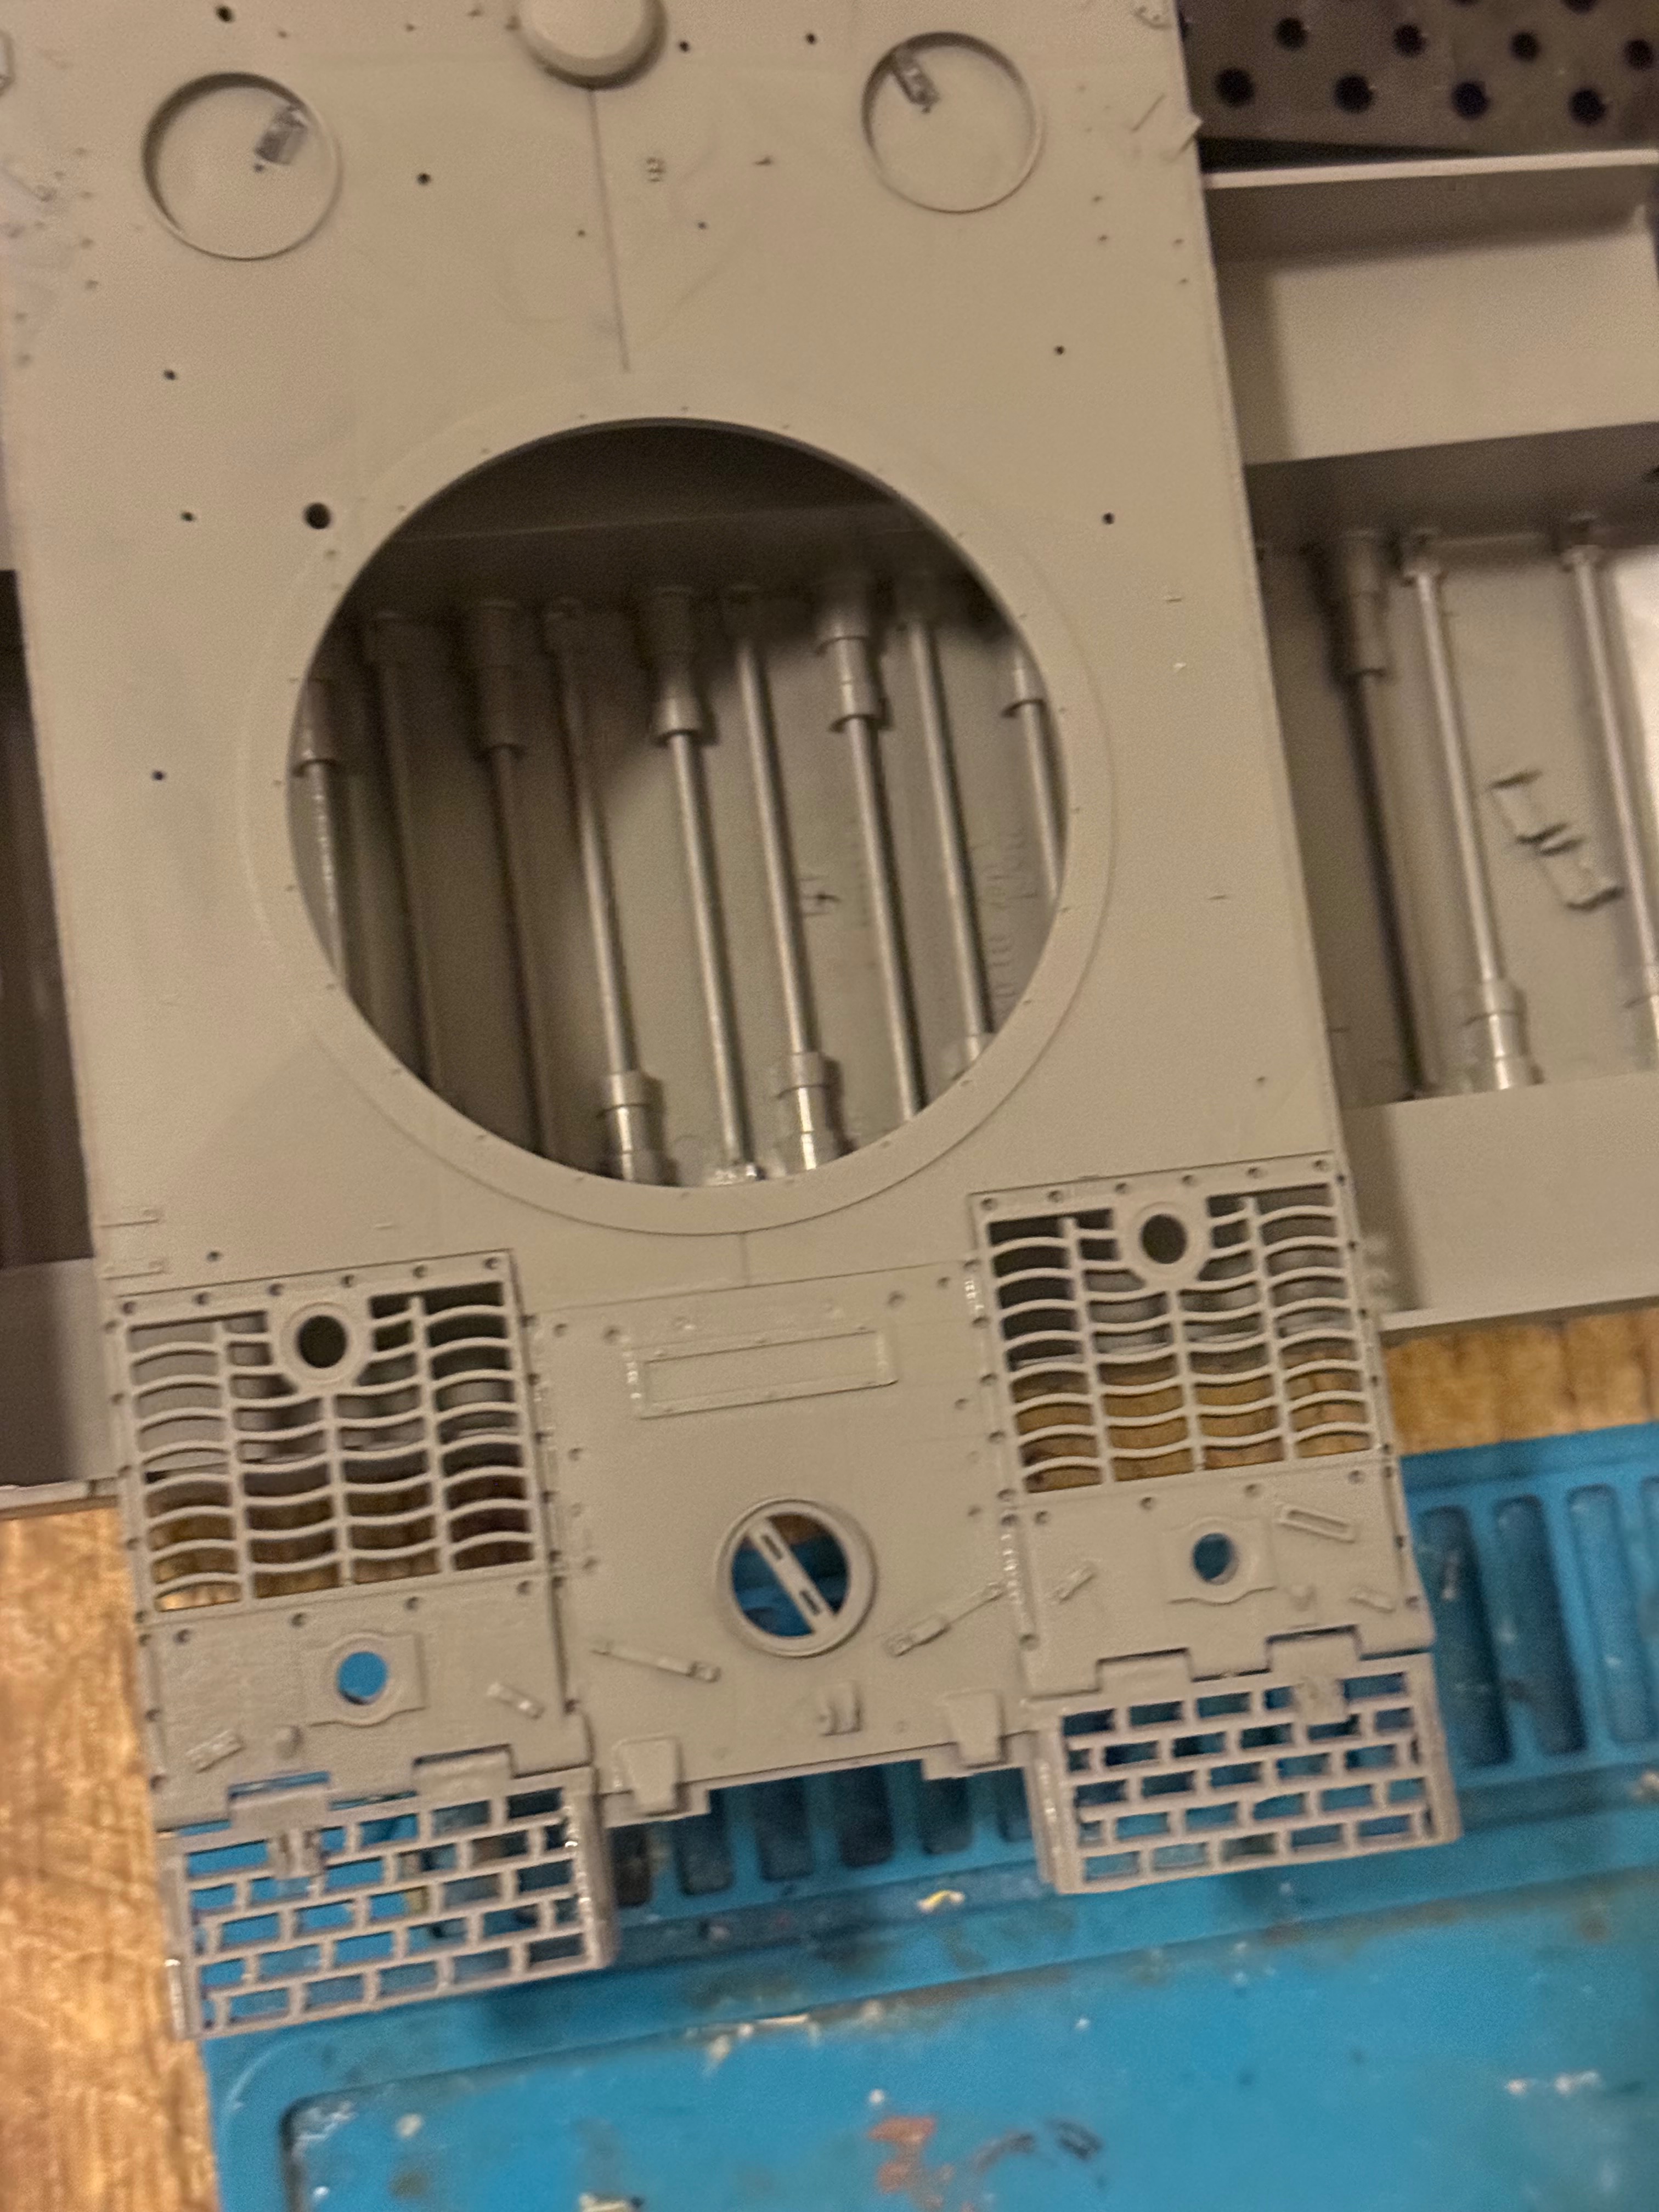
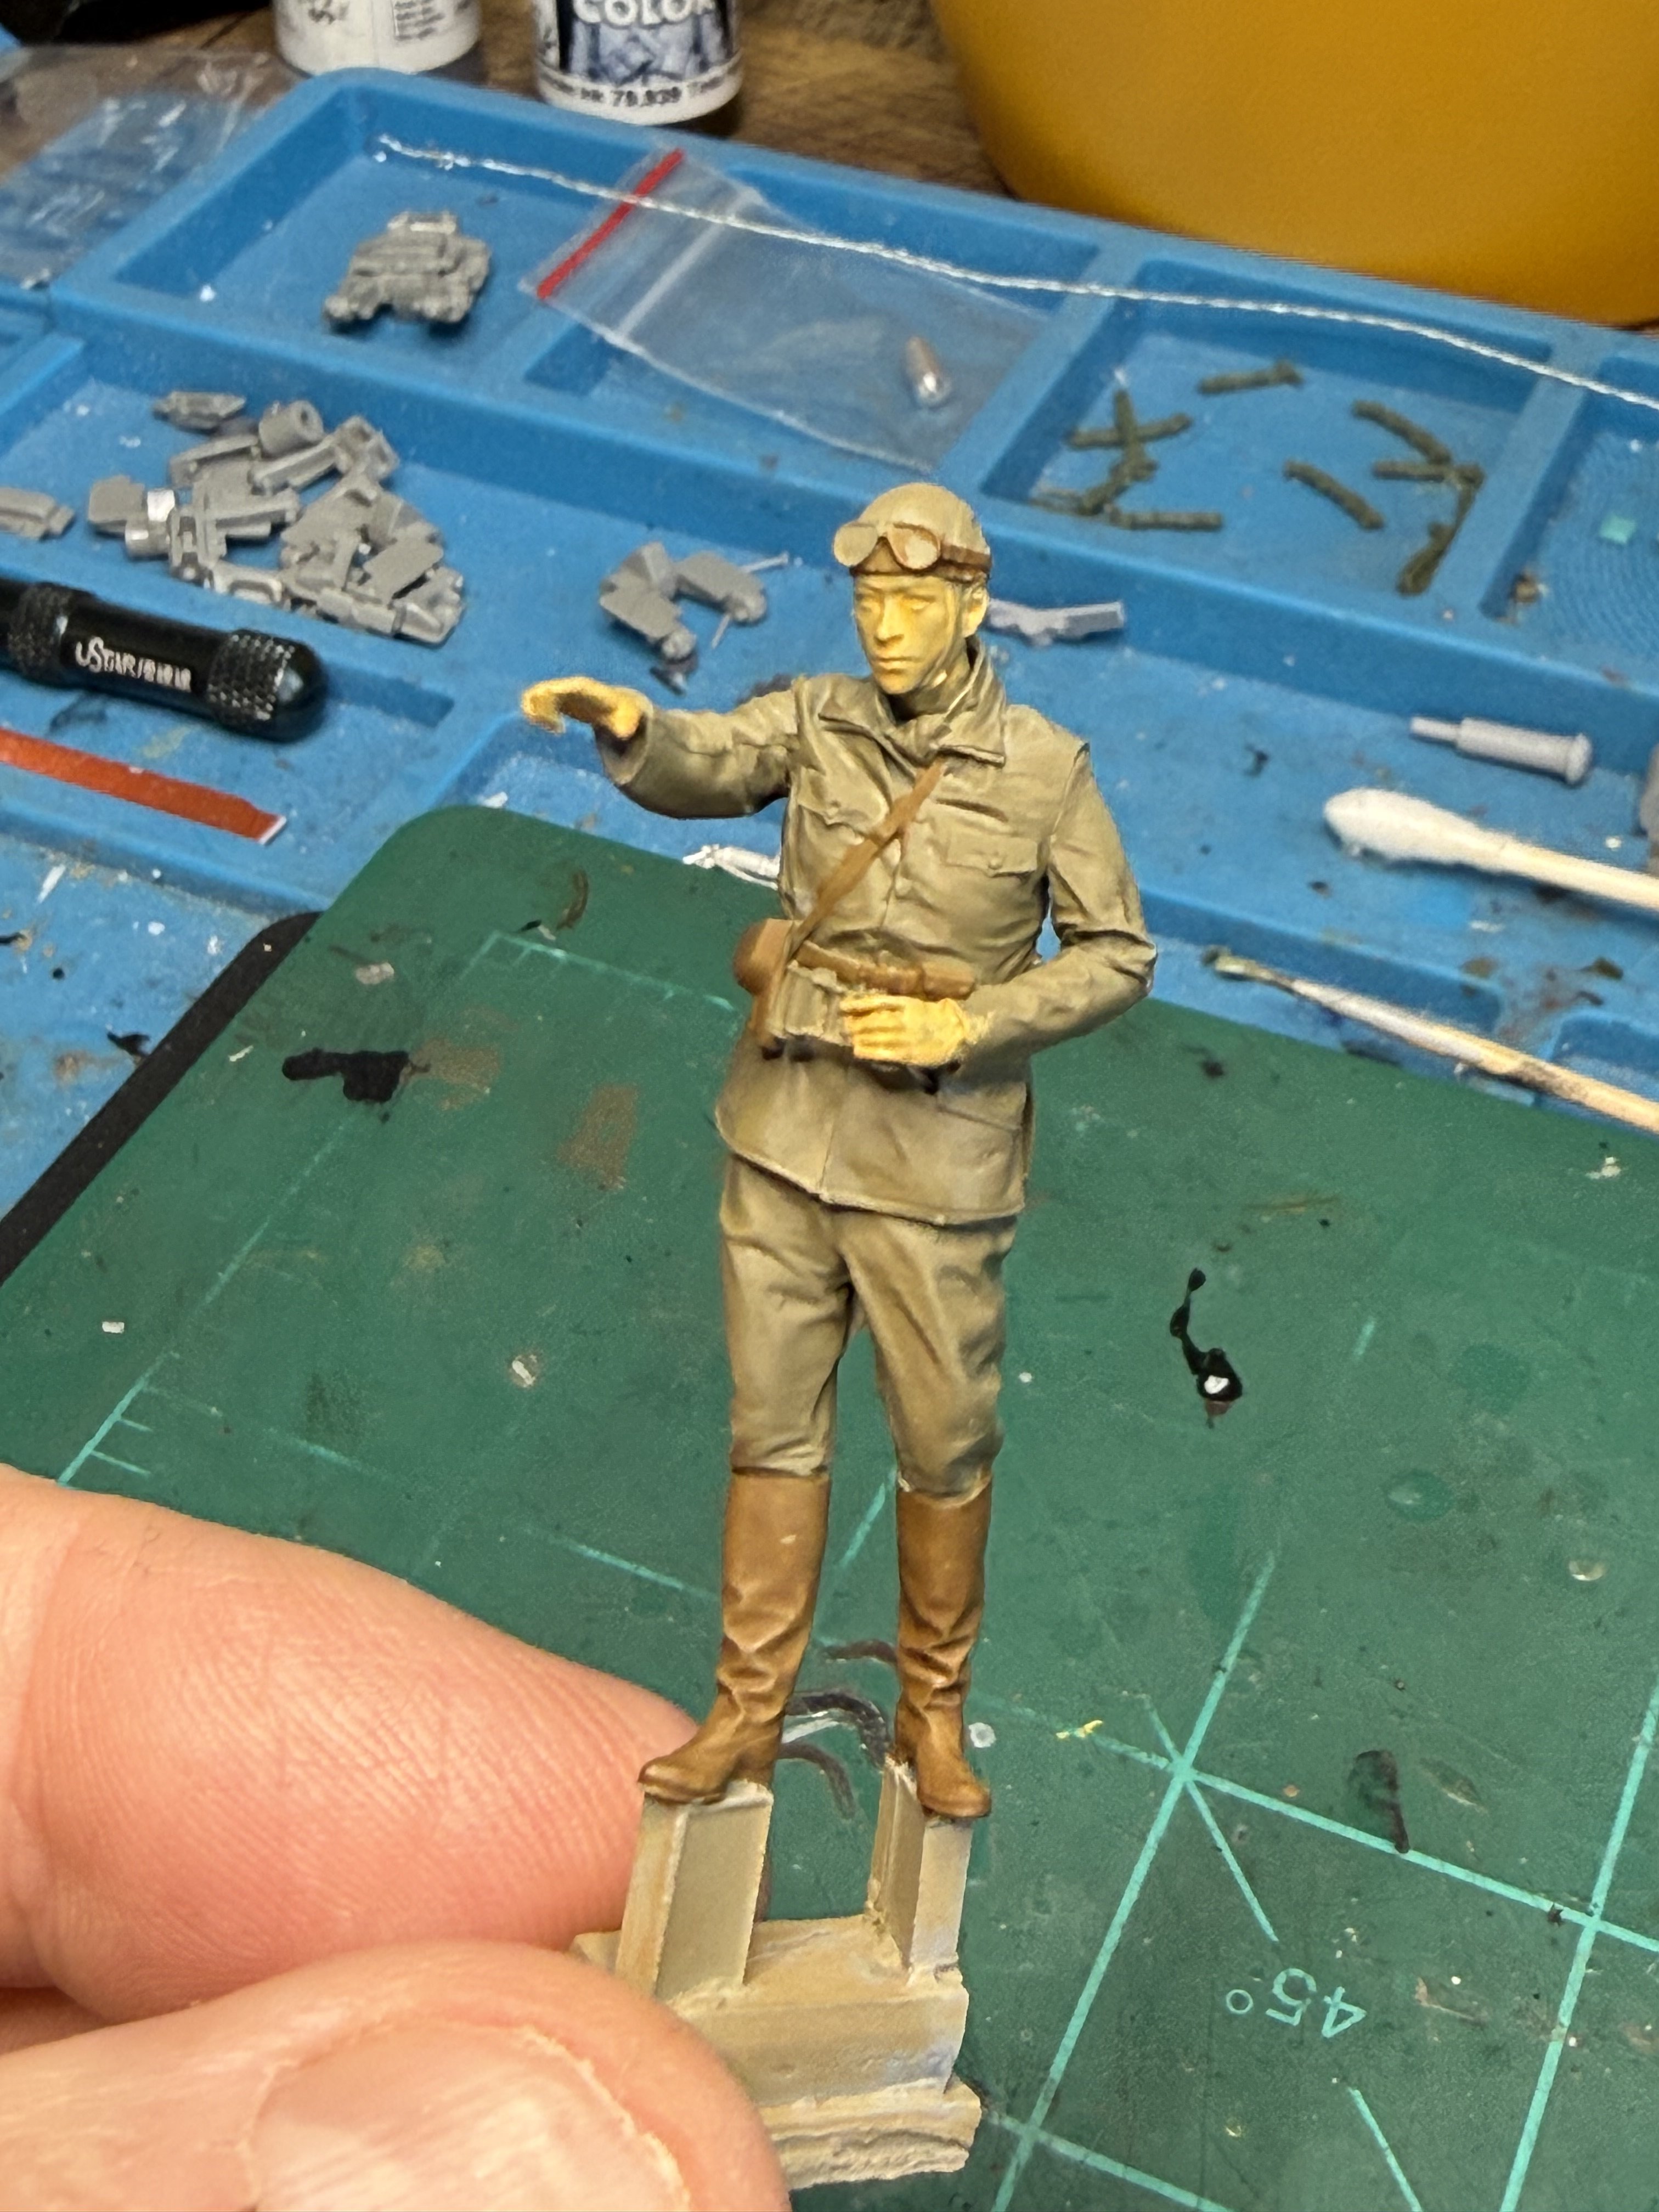
Worked on this a little last night. I'm finding the diagrams very misleading and not sure how I feel about this kit at this point. As an example the interior shot at step 8 shows nothing but axles, suddenly at step 10 there are some assemblies inside when nothing has been built! The highlighted area is what I'm referring to. It looks like it's the coolant fans that would sit over the motor. No motor on the sprues or directions, but I did find some parts that would make up one of those fan assemblies. Unsure what the other assemblies are or if they correspond to parts included. I was so disgusted I stopped working on it. Anyway, here's my figure so far.
Attachments
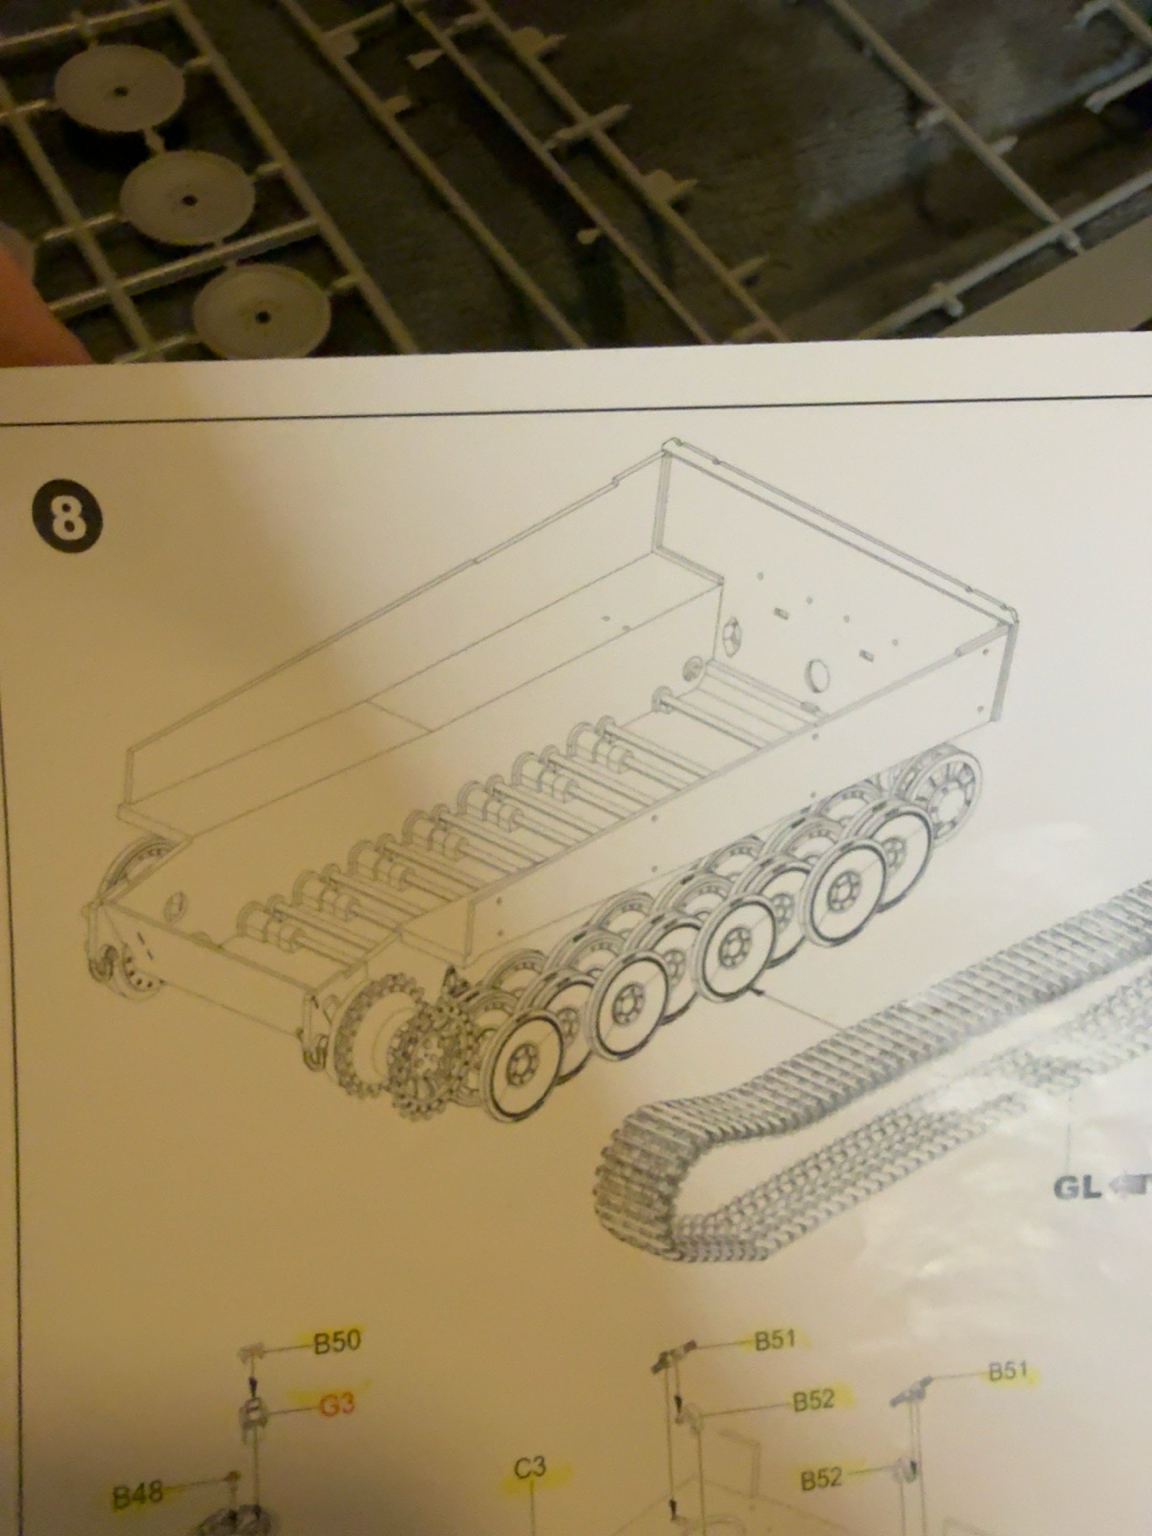
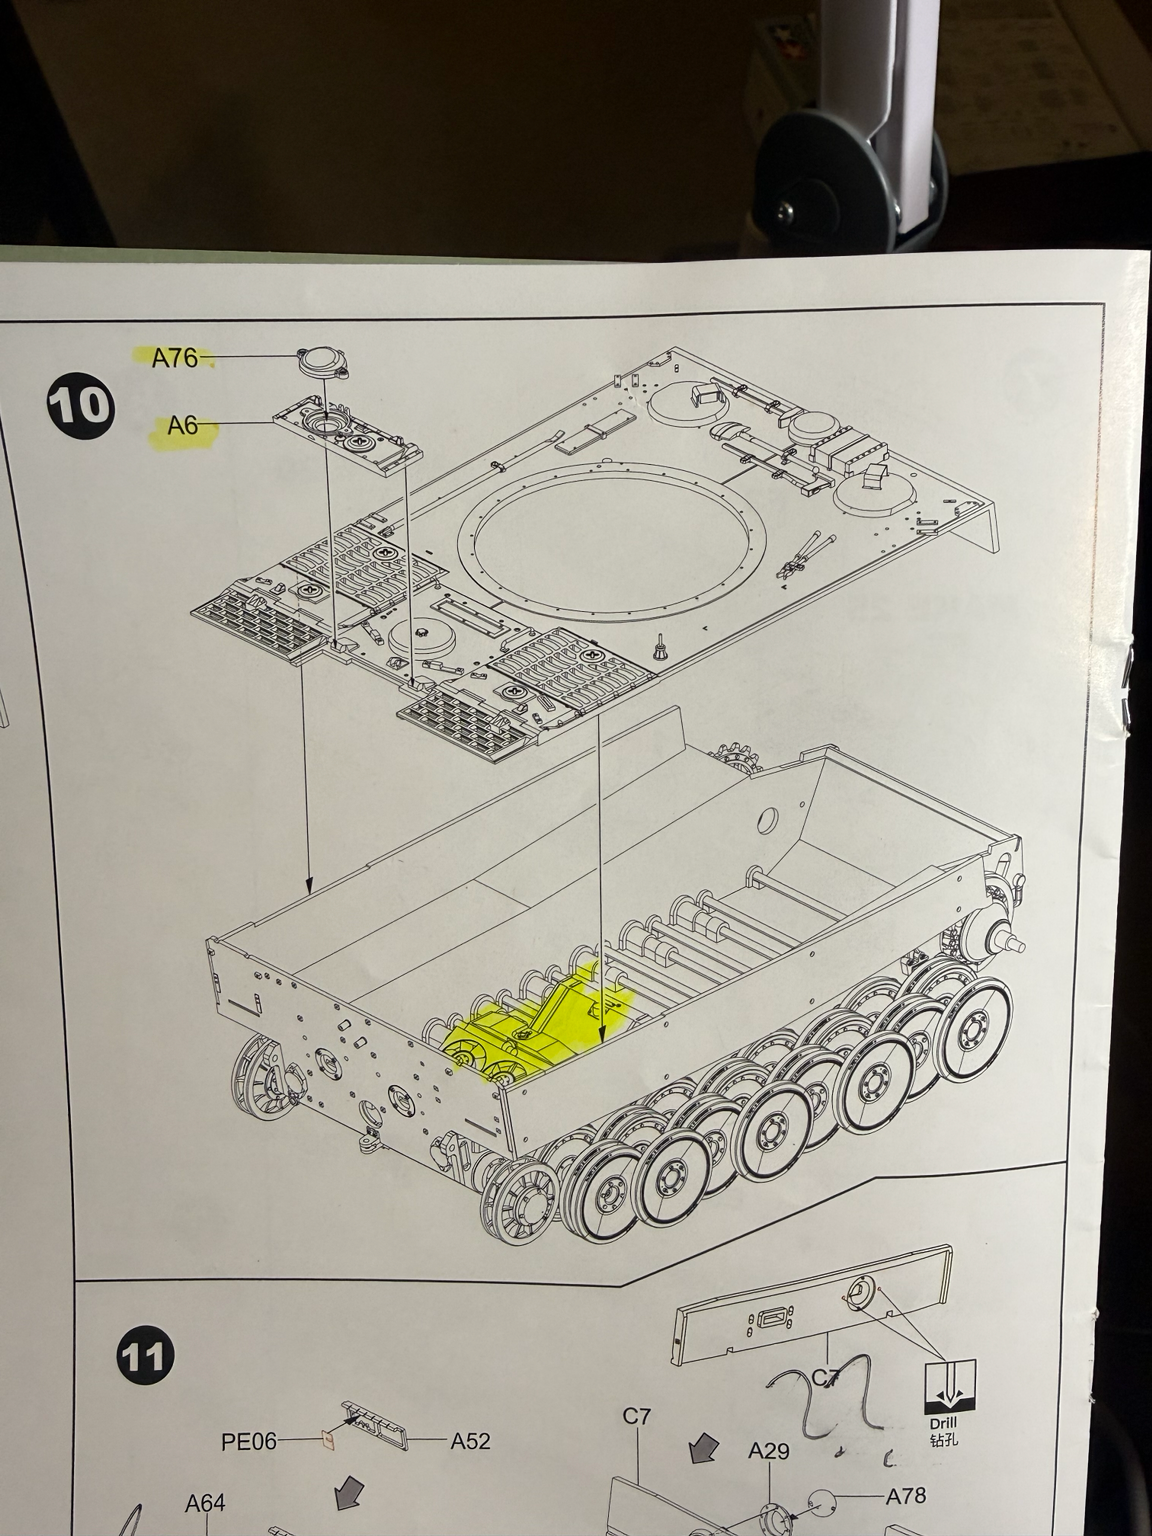

That is disconcerting...No motor on the sprues
I'm anxious enough of forgetting a step or an assembly without having hallucinating instructions!

- Joined
- Apr 29, 2024
- Messages
- 1,595
You should have used thinset right? Instead of CA? Just add more thinset wait half a minute and push it down it should come right out after you soften up the plastic a little. They may not be pristine but that's what dry fitting is for..I realized I screwed these hatches up last night. Everything is glued solid I'm not going to be able to unglue and adjust. I must have gotten confused looking at the diagram and installed the hatches from the wrong side. I'll figure something out. Suggestions? I installed the hatches from the inside so they're a bit low.
Jakko
Well-Known Member
That is odd. I just looked at the instructions on Scalemates, and indeed, they're not shown anywhere except in this drawing. I suspect they're a leftover from another version of the kit, that someone forgot to remove for this one. Ah, yes, in Border's first Tiger kit, the instructions have this:As an example the interior shot at step 8 shows nothing but axles, suddenly at step 10 there are some assemblies inside when nothing has been built! The highlighted area is what I'm referring to.
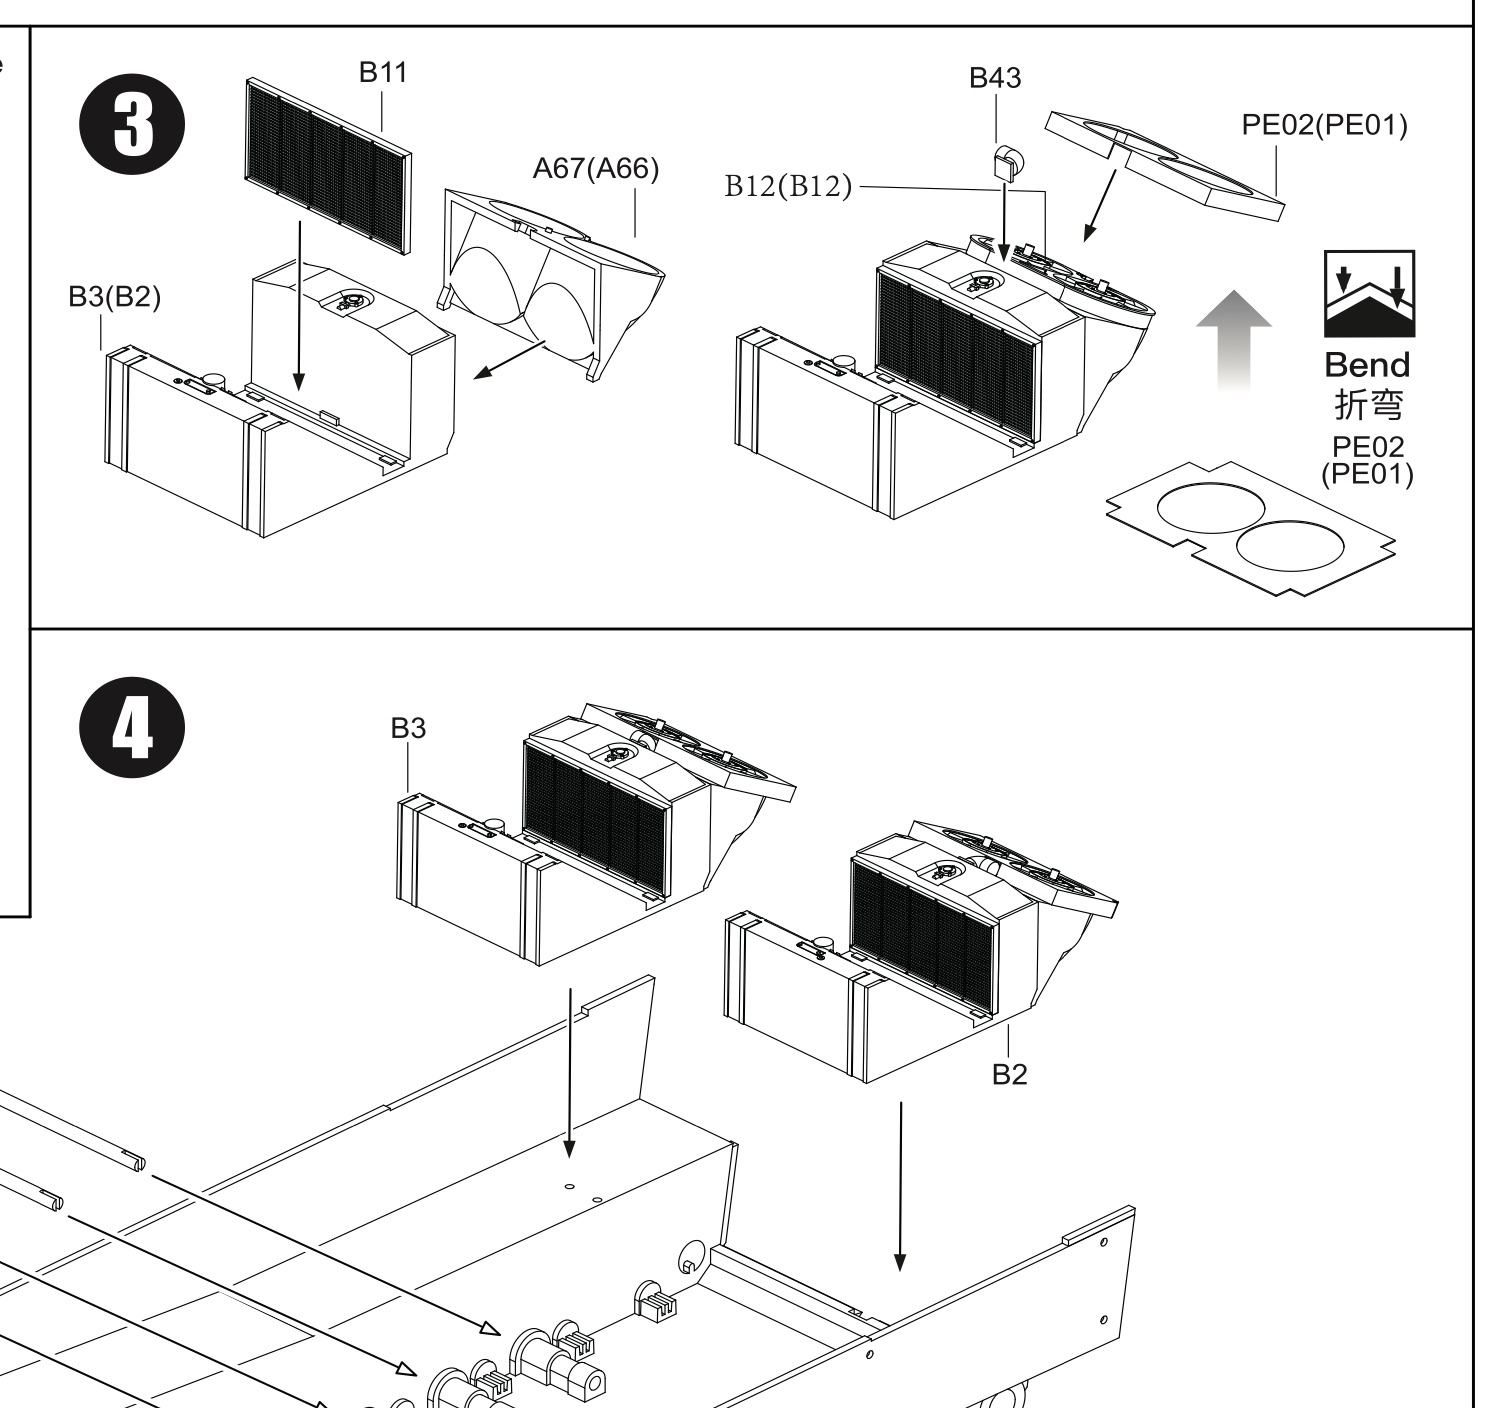
Oddly, all of the illustrations in that kit's instructions seem to be different from yours, even though the two are essentially the same kit. It makes me suspect somebody forgot to hide a layer in the software from which they exported the illustrations.
Fuel tank, radiator and cooling fan. They sit in the sponsons, on both sides, with the engine between them in the hull proper. The fuel tank is wedge-shaped so that its top surface forms an air duct towards the radiator.It looks like it's the coolant fans that would sit over the motor.
You can kind of see these parts through the grilles on the engine deck, though if you were to completely ignore them, hardly anybody is going to notice they're not there.
Thanks! I was going to go through all the instructions tonight and see what parts weren't accounted for- this will save me a lot of time!That is odd. I just looked at the instructions on Scalemates, and indeed, they're not shown anywhere except in this drawing. I suspect they're a leftover from another version of the kit, that someone forgot to remove for this one. Ah, yes, in Border's first Tiger kit, the instructions have this:
View attachment 197139
Oddly, all of the illustrations in that kit's instructions seem to be different from yours, even though the two are essentially the same kit. It makes me suspect somebody forgot to hide a layer in the software from which they exported the illustrations.
Fuel tank, radiator and cooling fan. They sit in the sponsons, on both sides, with the engine between them in the hull proper. The fuel tank is wedge-shaped so that its top surface forms an air duct towards the radiator.
You can kind of see these parts through the grilles on the engine deck, though if you were to completely ignore them, hardly anybody is going to notice they're not there.
Oh no I used thinset. I don't use ca too much anymore for this reason. It was just late and I got confused with the diagram- which is easy on this kit, at least for me. I bought a circle cutter, cut some discs on card, and redid the periscope. No one will ever know. Anyway, I could not get it to loosen up with more thinset. Very weird.You should have used thinset right? Instead of CA? Just add more thinset wait half a minute and push it down it should come right out after you soften up the plastic a little. They may not be pristine but that's what dry fitting is for..
- Joined
- Apr 29, 2024
- Messages
- 1,595
I imagine it only works for a certain amount of time. I think it would have to be fairly fresh cuz I have done that and it does work especially for like repositioning a piece just a little bit. But if you let it dry all night and then try to fix it? No way JoseOh no I used thinset. I don't use ca too much anymore for this reason. It was just late and I got confused with the diagram- which is easy on this kit, at least for me. I bought a circle cutter, cut some discs on card, and redid the periscope. No one will ever know. Anyway, I could not get it to loosen up with more thinset. Very weird.


