Doughnuts and burning rubber

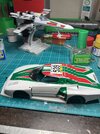
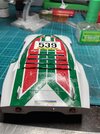
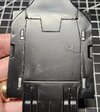
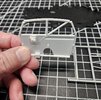
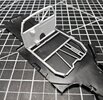
Seams and sinkmarks...ugh. I know most of it is on the bottom, but I would never forgive myself if I just left them there.
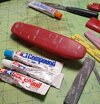
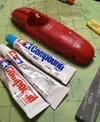
QUESTION: Does anyone polish their plastic with compounds BEFORE painting? I'm concerned that the primer wont stick to a surface that used a polishing compound.

thumbnail (16).jpg
thumbnail (17).jpg
 
I'm a bit slow in many regards, I will never argue that. I might argue about WHAT I am slow with but...yeah.

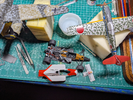
I think I do have something for this GB. To prove it is something in-progress, here it is next to current threads in the aircraft section.

1749511002705.png
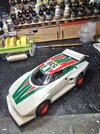
(yeah, that thing with big tires in the middle there)
 
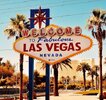
Going for work so I will be busy at convention during the day. Be in my room at night. I have never been impressed with Vegas.
I kinda guessed, that is the only reason I've been to the city where there are no drinking fountains and a bottle of water costs $10.
 
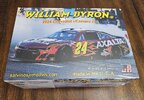
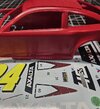
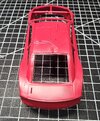
I have to say these Salvino JR kits a pretty amazing. They have really put together a complex kit of these Next Gen cars. First things first. The body color for this scheme is a "Ruby Red" that all four Cup cars from Hendrick Motorsports ran in their 40th year as a team. The kit body is molded in red, but it's not a true match to the Ruby Red that this beast needs. As you can see, the Powerslide decals show a closer match to the real color this car will need.
1000016957.jpg
1000016958.jpg

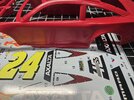
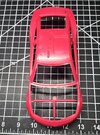
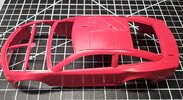
On the decal sheet, you can see decals 40 and 41 cover the vented back panel windows, they are super close to the actual color, so I will be mixing a custom paint for this project to make it right the best I can. Here is a look at the body itself. The two photos above look a bit darker than the actual color of the models body. It is a nice red, however, not the right one for this build.
1000016959.jpg
1000016960.jpg
1000016961.jpg
The body lines and contours are pretty much spot on to the real Cup Camaro. The are several seem lines from the multi slide molds used. There are slight pin marks on the A pillars which was a little surprising, but they will sand flush easily.

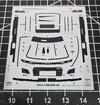
As fas a the decals go, there are two sheets. The standard Camaro sheet for all the windows and standard Camaro and Chevy markings.
1000016963.jpg
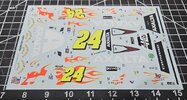
The livery set of decals is extensive and are on point with actual car.
1000016962.jpg
 
I have to say these Salvino JR kits a pretty amazing. They have really put together a complex kit of these Next Gen cars. First things first. The body color for this scheme is a "Ruby Red" that all four Cup cars from Hendrick Motorsports ran in their 40th year as a team. The kit body is molded in red, but it's not a true match to the Ruby Red that this beast needs. As you can see, the Powerslide decals show a closer match to the real color this car will need.
View attachment 150345
View attachment 150346

On the decal sheet, you can see decals 40 and 41 cover the vented back panel windows, they are super close to the actual color, so I will be mixing a custom paint for this project to make it right the best I can. Here is a look at the body itself. The two photos above look a bit darker than the actual color of the models body. It is a nice red, however, not the right one for this build.
View attachment 150347
View attachment 150348
View attachment 150349
The body lines and contours are pretty much spot on to the real Cup Camaro. The are several seem lines from the multi slide molds used. There are slight pin marks on the A pillars which was a little surprising, but they will sand flush easily.

As fas a the decals go, there are two sheets. The standard Camaro sheet for all the windows and standard Camaro and Chevy markings.
View attachment 150350
The livery set of decals is extensive and are on point with actual car.
View attachment 150351
That is going to be a really nice red!
 
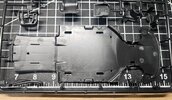
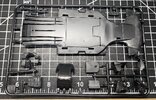
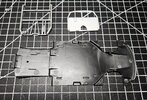
As I mentioned, the fit tolerance is very tight and the chassis must be built up in three sections and have to fit precisely to the under tray for the body to fit correctly. This is a huge difference from the old Cup cars. Even the cage is very intricate with tight tolerances. Here is the base that all must build up on precisely.
1000016966.jpg
1000016965.jpg
Luckily the styrene used on these parts are very flexible to get them flat as needed. More to follow soon as the chassis build will start.
 
So off we go building the 2024 NASCAR Camaro...
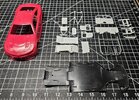
1000016995.jpg
(All the components for the base of the chassis build. Note there is flash and seam lines that need to be cleaned up all along the way with this build.)

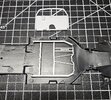
We start off getting the under tray to sit as flat as possible with the front and rear slightly elevating which will later line up and mesh with the body. When building these Next Gen cars, the chassis has to line up and square up to the under tray. So when building the sections of the chassis, you need to use the under tray as a jig. First we have the center frame. Test fit with the tray revealed a nice tight centered fit. The back firewall will be attached to start the build. Nothing at this point will actually be glued to the under tray, it's strictly a jig.
1000016997.jpg
1000016998.jpg
1000016999.jpg
There is a lot of clean up needed on most of the parts. Salvinos uses some crazy molds and you can tell they have to inject the hot styrene under a lot of pressure to get in all the details. The plastic is pretty forgiving and somewhat soft, so clean up with a new #11 exato and a flat file make easy work of it.

I will say, dry fit, dry fit, dry fit all the parts before you start thinking about any glue. The chassis system on these Next Gen's is pretty complex and good fitment is key. You will have to do very slight trimming on alignment pins and the like to get a solid fit with the major chassis components. The back firewall needs to be cleaned of seam lines all along the sides, bottom, and upper roll bars.
1000017001.jpg
The bottom center chassis frame is molded in metallic silver, but should be white like the rest. I will probably paint it after initial chassis build up, as well as the under tray within the center frame. After test fits, yes I mean test fits (more than once) I got a perfect connection and glued the back firewall to the lower frame. You have to make sure it is at 90 degrees up and down so the rear chassis fits correctly as well as the center door frame that attach to the front and rear bulkhead.
1000017002.jpg
Next up will be the test fitting and slight adjustments needed for the front firewall. Stay tuned...


Write your reply...

Latest posts

Back
Top