27 year old A-6E repair

GaryG64

Well-Known Member
Joined
Sep 8, 2022
Messages
2,275
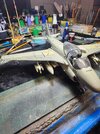
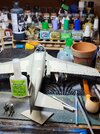
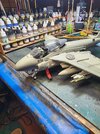
This is a model I build for rehab of my right arm nerve surgery in 1997.
For the panel lines i used a pencil.

She has been mothballed in a box for 27 years.

The Intruder is by far my favorite jet. Such a versatile workhorse. I was sad when they were all replaced. However, they did see action in Desert Storm.

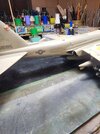
Is there a way to remove the decals? They are not sealed with any top coat.
20240125_020230.jpg

20240125_020254.jpg

20240125_020307.jpg

20240125_020350.jpg
 
This is a model I build for rehab of my right arm nerve surgery in 1997.
For the panel lines i used a pencil.

She has been mothballed in a box for 27 years.

The Intruder is by far my favorite jet. Such a versatile workhorse. I was sad when they were all replaced. However, they did see action in Desert Storm.

Is there a way to remove the decals? They are not sealed with any top coat.
View attachment 112905

View attachment 112906

View attachment 112907

View attachment 112908
That looks a nice kit. Who is the manufacturer ? I might have to add it to my stash list. Pantherman
 
That looks a nice kit. Who is the manufacturer ? I might have to add it to my stash list. Pantherman
It's a 1/72 Monogram kit manufactured in 1988.

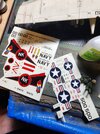
It makes me sad to replace the decals since I used the ones for the Saratoga, which is one of the carriers my dad was on.
I didn't know about setting solution or that I should spray a top coat over it to seal them resulting by several decals coming off with handling it.
Over time the 'ol Testors glue gave out causing the parts to separate.
 
Decal solution works too , of course .
Both will soften the film and adhesive - rub em off with a swab
 
Vinegar will soften them up and you can rub them off .
Blob some vinegar atop the decal like when using setting solution .
Which type of vinegar?

Did you get a lot of rain on your side last night. I think more is to come tomorrow.
 
Just 5% white vinegar .
I imagine you can just soak the whole model in warm water and they'll all just eventually come loose in one piece .
That adhesive doesn't cure , it gets sticky when it's dry .

Yes , we got a bunch of rain here .
The rain gauge said 3 inches .
Tomorrow should be just scattered , light rain . It was nice to see the sun again today .
Nice ideas.

Yes it was a pretty day. I guess our winter is now over. :p
 
:D yeah , Feb. is always the worst .
Going to be really nice this weekend and all next week though .
 
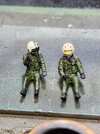
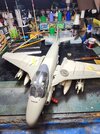
I removed the pilot and the BN. I didn't do too much to them and added black wash to them. I still need to add a skin wash to the pilot's face the BN is fine he has his visor down.
The left wing is on and holding. I used Zap-A-Gap medium CA+.

Oh, the pipe in the pic is an old pipe I got at an antique store I believe it's from the 1950s. I love estate pipes they are already broken in and usually smoke smooth.
This one looks like a Meerschaum, but it's just an old briar smoothed over.
I have 7 pipes, and this little one is probably my favorite...

Sorry for chasing rabbits and getting completely off topic...

Ok, where was I? Oh yeah, Zap-A-Gap. It did what is says it filled in the slight gap on the left wing at the fuselage.
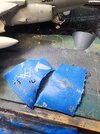
The left stabilizer broke off leaving the tab inside, so I'm going to have a bit of trouble fitting it back on the plane. (any suggestions)?

Changing this jet from an A-6E TRAM to an A-6E might be a challenge as the paint scheme is very different.

Then adding the new decals which are the original ones from the kit. These have color instead of the subtle gray.

20240126_012304.jpg

20240126_012523.jpg

20240126_014452.jpg
 
It's a 1/72 Monogram kit manufactured in 1988.

It makes me sad to replace the decals since I used the ones for the Saratoga, which is one of the carriers my dad was on.
I didn't know about setting solution or that I should spray a top coat over it to seal them resulting by several decals coming off with handling it.
Over time the 'ol Testors glue gave out causing the parts to separate.
It just looks too big to be 1/72. Going to have to get one now. Pantherman
 
It just looks too big to be 1/72. Going to have to get one now. Pantherman
I was wrong on the manufacturer it"s Revell. I'll double check the scale once more.
It is pretty big. After disassembling some o the cockpit I seen a 3oz fishing weight in the nose. It's a heavy plane now. :p
 
I was wrong on the manufacturer it"s Revell. I'll double check the scale once more.
It is pretty big. After disassembling some o the cockpit I seen a 3oz fishing weight in the nose. It's a heavy plane now. :p
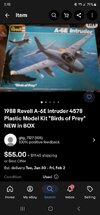
This is the kit I have, although I didn't pay that for it.

Screenshot_20240126_032839_eBay.jpg
 

Latest posts

Back
Top