"What a piece of junk" 1/72 FM M.F.

fblanton

New Member
Joined
Feb 18, 2011
Messages
289
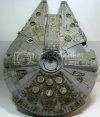
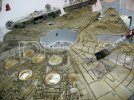
Ok I wish to submit images of my build for the Falcon group build. This is the Fine Molds 1/72d scale kit. I have been working on it off and on for 10 months. It goes together well and the styrene is what you might find in a Hasegawa kit. Hard brittle texture and just a tad bit of flash here and there. So far I have the major portions of the kit built and the following images are the ship primed with Tamiya grey and then a sepia wash brushed over the entire hull. Following the wash I used a 0.05 art pen to "trace" around the notched panels to create a shadow among the panel lines. I also used this black ink pen to create chipped paint/scratches on the various panels. Following this I then sprayed a very thin mixture of Tamiya paints of various shades of grey and white on the model to tone down the shadow and paint chips. Further I then sprayed each panel using a standard ratio of Tamiya paint to thinner. Finally I also have drybrushed with Windsor and Newton titanium white oil paint. I still have some damage to add as depicted on the actual model.

Basecoat.jpg

Sepiawash1.jpg
washingtheGirl.jpg
IMG_5298.jpg

IMG_5255.jpg
 
Looking very nice, so far. Thinking about building the 1/72 FMMF myself, once I finish my other build. Is the ring of panels around the engine exhaust supposed to be blue, or are you going for a 'paint simulating light cast-off' effect?
 
Blue Ring

Not it is not light simulation. It is intended to be metal that has blued from heat. I am not happy with this and I plan on a redo. Erik, Panerace 007" has shared some techniques and product info with me last week. I am going try a suggestion he made using Alclad paints.
 
That underbelly looks super, fblanton. How are you planning to display the finished model? In flight?

BTW, if you've never used Alcad paint, you're in for a pleasant surprise.
 
Nice looking build !...i like the way the wash really pops out detail on these things .

Chris.
 
FRANK,

Very Cool Lookin' ! Yeah Dude , I think that AlClad is gonna make that Rear PoP .... after you shoot that .. You may just find some other uses further around th Falcon !!!
 
Landing Gear parts

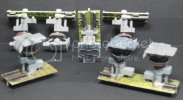
Here are the parts for the landing gear on the FM kit. I plan on displaying my model "In Flight" by using a thick length of clear acrylic rod. I just need to find a source. Of note the way the FM kit is engineered one has the option of being able to remove the gear bay doors and install the landing gear if you do not use glue. Surface tension and multiple guide pins keep everything steady.

IMG_5298.jpg


Landinggearpainted.jpg
 
I haven't gotten deep into my FM Falcon yet. Is that zinc chromate color your choice or does it say that in the instructions?
 
Landing Gear bay color

I chose the Aircraft interior green or Zinc Chromate just for fun. Instructions reference grey.
 
I like it too. I will maybe adopt it for my next build, mixed with some grey should work our really good.

I like your progress.... :)
 
UPDATED "What a piece of junk" 1/72 FM M.F.

Fellow Falcon Modelers and members of SMA.
Some new images of the FM M.F. I did cheat a bit. I have not fully installed the glass canopy and face for the cockpit or the upper and lower turret guns and glazing. I also have added a few patches of yellow which are not present on the studio model. I have tons more weathering to do on the top as well as re-paint the engines and the engine trim with the Alclad paints.
IMG_5359.jpg


IMG_5255-1.jpg


IMG_5354.jpg


IMG_5353.jpg
 
Coming along nicely. The yellow and red patches are a bit bright though...might want to try something a little paler on the yellow and a little more rust/maroon leaning on the reds.
 

Latest posts

Back
Top