Voyager from Fantastic Voyage Cartoon

trekriffic

Well-Known Member
Joined
Jan 6, 2012
Messages
953
This is my build of the Voyager flying submarine from the cartoon, Fantastic Voyage...


Box Art:
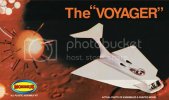
voyagerBoxArt1.jpg

I originally built this kit back as a kid when Aurora first issued it.
When I heard Moebius was re-issuing it I had to have it!
Then and now, I have always loved the design of this ship although how the thing could be steered was a mystery as it had no perceivable rudder or flaps.
This never bothered me as a kid though, if any model was made for zooming around the house this was it!


Anyway, here are some pics of my build progress...

Instructions:
IMG_1707.jpg

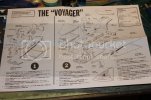
Pretty straightforward although it recommends gluing the turret flloor to the upper hull ceiling before gluing in the instrument desk and clear bubble.
Test fitting proved to me that the desk and bubble need to be glued to the floor first (along with Busby Birdwell in his seat) and then the whole assembly can be glued to the upper hull opening.


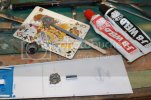
TSDS Decals:
IMG_1700.jpg

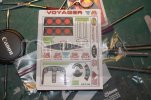
I got these from TSDS for the instrument panels mostly.
Now I've decided to use the ones included for the motor intakes and exhaust ports.
I plan to install a 9V battery and light up the interior and the bubble.
The exhaust ports will be lit as well but first I'll either have to fill the ports with resin or cover them over with clear styrene discs as the decal needs to go on over a flat surface.


Painted parts:
IMG_1703.jpg

Lower hull and Seats:
IMG_1702.jpg

Upper hull:
IMG_1701.jpg

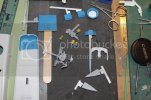
All surfaces were primed with Tamiya white Fine Surface Primer.
I used MM Bright Blue for the interior surfaces and walls.
The seats are Insignia Yellow on top and will get a coat of Testors Dark Blue for the undersides.


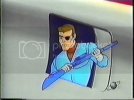
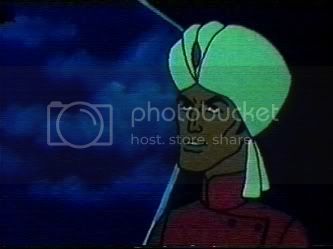
I'm going to do some work on the figures to make them resemble the cartoon characters more.

First up is Guru, the man of "mystical powers"...
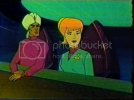
fantvoy6.jpg


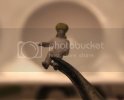
The kit figure after I worked on it a little:
IMG_1706.jpg

I used AVES Apoxy Sculpt to give him a turban.
He's just about ready for paint.
Still need to do more work on his face though, mainly I want to give him a little more chin.


Anyway, that's all for now.
Hope you guys enjoyed the narrative and the pics.

;D
 
Though I'm not familiar with the cartoon, this looks like a really cool design. The big long tail fin is most interesting.

Great work with that turban!
 
I helped some kids build these at the Make-n-Take at WF a couple of years ago. Unless you're going to open it up or modify it in some way, don't bother building anything beyond that wall with the two doors on it. When the hull is sealed up, you can't see anything back there anyway.
 
LOL...struggling to remember that one myself!! Looking good though...you seem to be moving right along here!! Keep it coming!!! ;)
 
ScreamingSamuraiStudio said:
Wow..I have never seen this cartoon..aside from it being a little before my time.

Is this an animated revamp of the movies?

The cartoon is only loosely based on the movie. For one thing, the design of the "Voyager" has nothing in common with the "Proteus" from the movie.

From Wikipedia:

"Fantastic Voyage is the story of the C.M.D.F. (Combined Miniature Defense Force), a secret United States government organization which possessed the ability to reduce people to microscopic size.

The main characters were Commander Jonathan Kidd; biologist Erica Lane; scientist Busby Birdwell; and a "master of mysterious powers" known as Guru. The team was reduced in size—for 12 hours only—and traveled around in a microscopic flying submarine, the Voyager, doing battle against the unseen, unsuspecting enemies of the free world (both criminal and germinal matter). The series featured the voices of Marvin Miller, Jane Webb, and Ted Knight. The producers were Lou Scheimer and Norm Prescott, the director was Hal Sutherland, and the music was provided by Gordon Zahler.

Changes from the film, aside from the ship's crew, include the duration of miniaturization (60 minutes in the film) and the acronym (here D is "Defense", there it is "Deterrent")."
 
Pics from this past weekend...

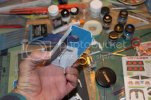
Spent about 5-6 hours on these guys. A lot of closeup work under the magnifier. My neck had a nice crick in it by Sunday afternoon!
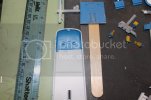
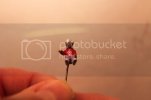
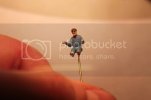
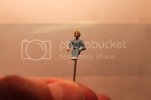
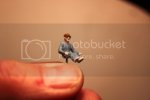
The "as molded" kit figures were rather soft on detail so first I filed and sanded them to make their arms, necks, and torsos not quite so thick.
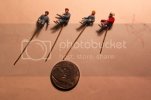
They were soooooo small I had to drill holes in their hind ends and insert brass rods to make it easier to work on them and paint.
So, yes, you guessed it, they all had sticks up their butts! :eek:


TheCrew-1.jpg

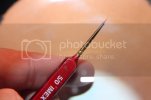
Fine tipped paintbrush. Just the thing for painting eyebrows and Erica's red lips! :)
Finetippedbrush.jpg

Guru, Master of Mysterious Powers:
Guru-1.jpg

I'm rather proud that I was able to paint the whites of his eyes.
The pupils were made using the end of a round toothpick dipped in black enamel paint. "Dotting the eyes" so to speak. 8)


Jonathan Kidd, mission Commander:
JonathanKidd-1.jpg
14.jpg

I tried to make the eyepatch using wire but ended up just painting it on. I used epoxy putty to make his chin stronger.

Erica Lane, biologist:
EricaLane.jpg
fantvoy3.jpg

Some delicate work with the brush on her eyes and lips.
Her hair is Gulden's Mustard yellow, at least it looks that way in the pic. She has a pony tail!


And the figure I'm probably proudest of...

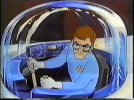
Busby Birdwell, scientist and pilot:
BusbyBirdwell.jpg
3.jpg

After adding putty and shaping his ears and chin I painted his face and light brown hair adding black pupils and eyebrows.
The glasses were made jusing a strand of tinned copper wire painted black.
His glasses have clear lenses made from drops of CA applied with a toothpick.


Work proceeed on the cockpit...

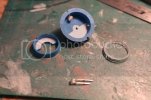
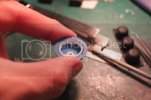
I sanded down the top and one side of a 3mm clear LED (cut from a christmas tree light string) so it will fit snug against the floor and sidewalll of the cockpit.
A ring was cut from a clear acylic tube (with aluminum foil tape along it's outside rim to reflect light back into the cockpit) fits flush inside the circumference of the floor walls underneath the instrument panel ring.
The LED will light the ring and cast light upwards to illuminate Busby's face from below:

LEDforcockpitlighting-1.jpg
Clearacrylicringinplaceforlighting.jpg

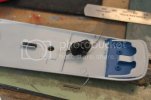
A hole was drilled into the lower hull half behind the rear interior wall.
A pushbutton switch, pirated from a Dollar Tree booklight, will be attached:

Pushbuttonswitch.jpg

I had to use JB Weld in place of CA as the pushbutton plastic would not stick to the styrene plastic otherwise:
JBWeldtocementswitchinplace.jpg

And that was it for the weekend's work.
The JB Weld should have dried enough by now for me to proceeed with the next phase which is figuring out how to mount the battery and make it accesible.
I'll have to cut a removeable rectangular panel out of the underside I think.


Thanks for reading along!


P.S. I just noticed I forgot to paint the little circle and triangle insignias on their left breasts! Oh man! More work to do!
 
Tell us the truth, you painted them full size and then shrunk them down to the size you showed us.

Nice work!
 
Grendels said:
Tell us the truth, you painted them full size and then shrunk them down to the size you showed us.

Nice work!

You know I tried that but the problem was, after 12 hours, they expanded back to full size!
 
trekriffic said:
Grendels said:
Tell us the truth, you painted them full size and then shrunk them down to the size you showed us.

Nice work!

You know I tried that but the problem was, after 12 hours, they expanded back to full size!

LOL!
 
Man you're putting us miniature figure painters to shame with those microscopic details! Nice!

That moebius company is making some cool stuff, I've got their flying sub kit and it's a fun little build.
 
Excellent fig painting!!! Nice use of the card too!!! Keep it rolling!! ;)
 
Grendels said:
Tell us the truth, you painted them full size and then shrunk them down to the size you showed us.

Nice work!
Shrinky Dinks? Not going to kid ya....Erica is looking mighty sassy.
 
Thanks guys! Got a lot done this weekend.
The bubble cockpit is now fully assembled with Busby inside and cemented into the upper hull.
I tested the light under his instrument console and it is pretty cool looking.
The engine exhaust vents are wired in series with red LEDs.
The battery box and pushbuttion switch are connected. The battery will be held in place with a red velcro tie inside the rear of the fuselage.
Gotta finsih soldering the cabin, cockpit, and engine wiring to the battery leads before I cement the hull together. Picks to follow shortly.
 

Latest posts

Back
Top