Splashcoat
New Member
- Joined
- Oct 9, 2010
- Messages
- 421
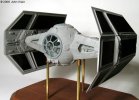
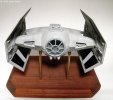
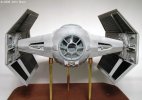
Here are a few pictures of my build-up of MPC’s 1/32 scale TIE X-1 Advanced Fighter (a.k.a. Darth Vader’s TIE Fighter). Much has already been written about this kit’s notorious fit problems so I won’t go into detail regarding that area. I eliminated many of the gaps resulting from poor alignment/warping of the hull halves with heavy clamping during initial glue-up and used filler on the rest of the gaps. I also needed to fill in a chunk which had been broken off of the upper edge of one of the solar panels; I simply glued in a piece of thin styrene and sanded it to blend in with the surrounding plastic.
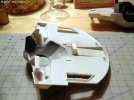
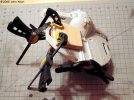
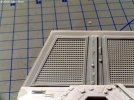
I built the kit mostly out of the box; I just filled in the holes used to locate the conjectural landing gear and replaced the troll-like Darth Vader figure with a seat from a Jeep Cherokee kit dressed-up with bits of plastic and a few greebles from the parts box. I also scribed panel lines around the front and sides of the cockpit ball as these are totally absent from the kit molding yet clearly visible in photos of the studio model.
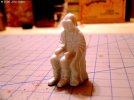
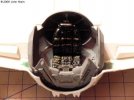
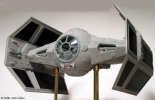
I agree with most modelers that Imperial hardware is generally more well maintained then that of the Rebel Forces (especially Darth Vader’s personal ride) and therefore should be finished “cleanâ€, ie, without excessive weathering. Though I do feel that a degree of variation in the final paint scheme is necessary to impart a scale appearance and avoid the toy-like look of a uniform colour coat. To this end I pre-shaded all recessed areas and panel lines with flat black paint after first priming the entire airframe flat white. After this was dry I applied light layers of Tamiya XF-19 Sky Grey until the desired level of coverage was achieved. I then highlighted the centre of each panel with lightened base colour and deepened some of the shadow areas with darkened base colour. The cockpit framing and several raised details were sprayed in the base colour tinted with light blue. The solar panels were masked off and sprayed gloss black.
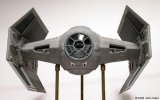
To make attaching the solar panels a bit easier, I drilled a small hole through the panel an into the wing support pylon underneath. After applying glue I drove a small self-tapping screw through this hole to keep the solar panels in alignment until the glue set.
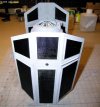
The screw head is conveniently hidden under a “hub†used to detail the face of the solar panel.
