Tie Fighter Revell Easy kit

YOULI

That which does not kill us makes us stronger !
Joined
Nov 28, 2011
Messages
947
Here is a kit I received in my mountains.

Don't have much with me but enough tools to build it and wait to receive all my stuff here.
Some pictures.

The "art" box.


Rear.


The scale indicated here is WRONG. No way for the pilot to be 1/65, he's more like a 1/35 for me.


Be aware that the Vaer's tie is but the same proportion thatn this Tie. SO they can tag along for some rebel target practice.

 
I think Grendels just did a video build of this kit last week or the week before at a single sitting. Banged it out in 40 minutes or so. I'm in between builds so it will be nice to watch the long version here.
 
Thanks Dark kyp

You're right Glorfindel.

It's the same one.
There is some upgrade to do on it (a tank track, a sherman I think, will do arund the cockpit, 1/72 scale), and even if it's not an obligation, I will glue here and there in order to fill the gap with Plastic Mastic from PRINCE AUGUST and sand too.

But that will wait a little since I've got a lot to do (life, administration, settle down in a new spot in is not as easy as many can think). :)
 
I'm looking forward to following this build, hope this helps...

YOULI said:
There is some upgrade to do on it (a tank track, a sherman I think, will do arund the cockpit, 1/72 scale), and even if it's not an obligation, I will glue here and there in order to fill the gap with Plastic Mastic from PRINCE AUGUST and sand too.

The Sherman(?) "T" shaped part is the only part I did scratch build for this. It really does make a nice difference to how it looks in the back
IMG_1510.jpg

Vader's tie is missing the same part as well as its engines and panels lines on the cockpit ball. Also the parts at 12:00 on the cockpit are missing/way oversimplified. They definitely did a better job of detailing the regular tie

speaking of which...

YOULI said:
Be aware that the Vader's tie is but the same proportion thatn this Tie. SO they can tag along for some rebel target practice.

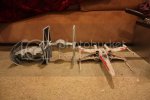
The MPC X-Wing is also a good fit scale wise for a diorama. Here is a shot of all 3 of them together
IMG_1769.jpg


gaps were a little bit of an issue, but not too bad
 
Nice to see all three side by side, I didn't bother to make mine more accuate, just built it out of box.
 
Here we go with pictures and comments... A lot :)

What we got.
The solar panels are HUGE ! That's the most part taken in the box.


The pilot is mold in rubber but is fairly painted. The pose is good. THat can be better but since you don't see mutch in the cockpit, I let him this way.
The clear parts are in different bags to avoid any casualties.


Here are the panels. Huge isn't it ? My hand for reference.


THe building notice is precise, with drawing like in the old days.


First thing first. The cockpit. Cut, sand, you put the parts together and you're good.


Still, can't do this part without some glue here and there. Don't want any surprise after the all thing.
Notice that the parts are made to be "unique" and can't be assembled in any other ways than the good one. You really want to check what you do and the snap-fit thing is a good thing here...
The cockpit is clearly the same one than the AMT ERTL model kit. Not a bad thing, simply not accurate with the movie.


Now the "bulb". Notice here that you can't do anything good without tools. Ripping apart the parts with only hands and strength will lead to some horrible fate. Use an X-acto knife or a cutter. You really want to be prudent here.


Here, on the Solar panels, is the rare step when I used a big sand tool to remove some plastic. The other parts are hidden when you assemble the kit. A good point for Revell here.


The weapons are two little parts, pre-painted. That would have been a good thing to do the same for the Ion engines, Revell.


The cockpit is in place, you snap all this together.


Here are the twin Ion engines. A very bad gap here.


The solar panels are not easy to cut. Be extra careful !


The two heavy parts snap together well even though I will use some Tamiya Thin cement in the future to assure the fit even more.


Here it is ! The Tie Fighter is finished.
It was done in less than an hour, 30 minutes if I didn't take the time to take pictures.
I'll see for some updates, with paints and extra parts later. But as is this Tie Fighter is impressive, huge, even though some details are to be improved by a confirmed modeler.


More pictures taken with the natural daylight.
:)


It defenitly need a good paint job, some washes, and some tiny parts here and there, but it's fairly good to be in an exhibition in february. I like to proove to people that they can build model kits easily with good results, with their own hands. That, and doing "simple" projects with toys and gifts from cereal boxes.
Stay tune for an update ! :D
 
Thanks Dark Kyp :)

You had the opportunity to discover my last scratch-built model, a Trident Starship from the animated TV series Ulysses 31.

I still don't know how to present that one here. Maybe some links of the show ?
 
I have this kit and repainted it. It does have a nice size and some great detail. The paint I used was too blue and I'm not really happy with my paint job.. I would however purchase this kit again and repaint. Nice build and info.
 
Hey Youli,
that's a kewl model. I got my brother 3 of them for Christmas.
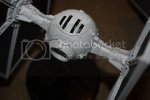
I am just wondering why the Ball part of the fuselage has scratches all over it?
Did it come scratched up like that?
 
There are a little update.
One of the solar panel didn't look too good, with huge gaps... So I used some clamps, and Tamiya Thin cement.


I used some washes from Citadel Games Workshop, Blue and black for the engraved details. Let it dry, next step is dry-brushing.


Write your reply...

Latest posts

Back
Top