The Ships of Firadis Pt 1.

Primen

New Member
Joined
Jun 1, 2014
Messages
27
Hello SMA!
I hope you all are well.
I've been a ship modeler for most of my adult life, specializing almost exclusively in 1/700th scale ships. I've been fortunate enough to join IPMS and compete regionally and nationally with my builds. I have many friends in the modeling community all over the world who share my interest in all things Naval and Maritime. You can see some of my work here:

http://www.modelshipgallery.com/gallery/users/Neal-Clarke/user-index.html


here:

http://www.modelshipgallery.com/gallery/dio/ru/still-700-nc/nc-index.html


and here:

http://www.shipmodels.info/mws_forum/viewtopic.php?f=13&t=82601&hilit=Solferino

What most people don't know is that I've nursed the ambition to write Science Fiction as well. I've even thought once or twice about modeling Science Fiction subjects over the years, but, until now, I have not attempted it. Well...

In 2012 I began working on a novel called Firadis. (fir-AH-dihs) It has since become 3 novels and as I am nearing completion of the first book in the series I've begun thinking of how I could promote the book, which is the critical factor for any new author. I eventually came up with the idea of a website featuring additional information about the world, the characters, the ideas, and (why not?) the hardware. To that end, I decided I ought to probably think seriously about doing some modeling in support of the book.

The purpose of the models I'm going to attempt on this forum will be props for photo-realistic shots of the space ships, for promotional art on the website and possibly for book cover material.

The ship in question is the Vaal Ilaan a first rate War Dredge of the Urodamic Armada commanded by Faragn Elegren (far-AHN el-EH-gren) on Day One of the Interstellar Year 6119...

Perfect gobbldy-gook without a story, of course. ::) But the story is in the works and will be out very soon. In the mean time, it begs the question, what the (insert expletive) is a 'war dredge?'
;D
 
So first off... what is a 'War Dredge?'

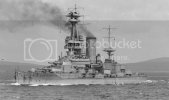
To understand War Dredges, you have to love and admire these:

HMS_Canada_IWM_SP_1938.jpg

you have to be familiar with how big this is:

Haro_110_captured_by_the_Hubble_Space_Telescopetif.jpg

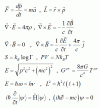
and have a healthy respect for this:

PhysicsEqs01.gif
(i.e. Physics)

I can remember reading Arthur C. Clarke's 2001 and 2010 when I was a kid. Up until that point I assumed if you really wanted to have fun in Science Fiction you needed FTL and Death Rays, etc. But Clarke's books were as riveting as anything I'd ever imagined. Not long after that, I read Frank Herbert's Dune, and that made me want to write SF.

Eventually I began to ponder certain assumptions about SF. Why do we always have to go faster than the Speed of Light? Why shields and forcefields and artificial gravity? Why can't we imagine realistic interstellar war? Is it possible to do that? If so, what would it look like?

Having grown up in love with Battleships, above all the denizens of Militaria, I conceived of a universe in which futuristic space dreadnoughts could battle each other infinitely to my hearts content. I was about 14 at the time and big into inventing very loose open ended RPGs with my buddies. I decided to call my space dreadnought a 'gun dreg' having no idea what a dreg was. When I realized the next day that a dreg was wine sludge in the bottom of the glass I changed it to 'gun dredge.' And then realizing that 'gun' was maybe a bit archaic, I changed it to War Dredge. Much later (early adulthood, I realized that the Bussard Insterstellar Ramjet concept could be alternately described as 'dredging interstellar dust.' And so, by happy coincidence the term 'dredge,' which I'd chosen for its similarity to the term 'dreadnought' might actually refer to something tangible and plausible for my creations.

Out of these late adolescent musings I began in college and as a young adult to fashion a universe round my dredges, which I called 'Urodamis.' Twenty years later, Urodamis has finally emerged as a genuine Science Fiction series called Firadis, shortly to be published on Amazon Prime. If you are on Facebook and would like to know more about Firadis, you can check out the page here:

https://www.facebook.com/pages/Firadis-by-Callen-Clarke/563824547004414?ref=br_tf


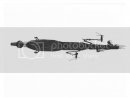
As part of the Firadis effort, I wanted to create some impressive space images to help promote my story, but a few weekends struggling with Photoshop, I quickly learned it would probably be easier to actually build a dredge than try to paint one. Which brings me to these:

FiradisDredgeArt105.jpg

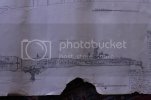
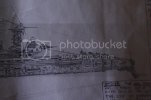
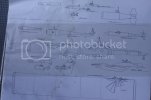
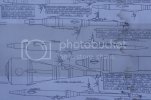
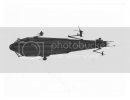
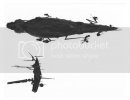
These are technical drawings I created in the mid 90s, when I first began writing Urodamis stories, including the novel that would eventually become Firadis. The challenge now was how to translate these 2D drawings into actual photo-realistic models.
 
More of the old war dredge drawings...

FiradisDredgeArt99.jpg
FiradisDredgeArt98.jpg
FiradisDredgeArt95.jpg
FiradisDredgeArt92.jpg
FiradisDredgeArt78-1.jpg
FiradisDredgeArt72-1.jpg
FiradisDredgeArt49-1.jpg
FiradisDredgeArt46-1.jpg
FiradisDredgeArt40-1.jpg
FiradisDredgeArt3-1.jpg

The challenge now would be how to translate 2d technical drawings into an actual photo model capable of giving me a realistic 'cinematic' image for use with the promotion of the book.
 
Here is some recent work, created for Photoshopping. I was hoping to pen the basic silhouette, upload it to Photoshop, and then hopefully fill in the details. This proved beyond my beginner skills with Photoshop, however. Just pondering how to paint a curved paneled surface just about drove me mad. These are closer to the shape I had chosen for the dredges in the book, which, uses a boom-mounted spotting top and a smooth ovoid hull. I will be referring back to the older pics for details as well, though.

WDstbdbeam.jpg

WDstbdbeam.jpg.html


WDstbdqt.jpg

WDstbdqtst.jpg


WDventralstbdqt_Page_1.jpg
 
Looking spectacular!
A fascinating project, indeed. I'll be following you with great interest!
Cheers,
Guido
 
Guido!
You're up, I see. Very good. I'm just about to go to bed, but in case anyone was wondering whether there is an actual model involved in this thread...


FiradisDredgeArt1.jpg

This was my 2nd attempt at a Dredge Hull. The first attempt (which I haven't photographed) involved cobbling together various plastic cones, PVC and styrene. Working with several disparate kinds of plastics and shapes, etc. didn't seem to quite work out for me. In addition, I realized if I attempted to build an entire dredge (4 ft or more for a proper studio model) entirely from plastic, I would quickly burn through all my sheet styrene. Not good.

I decided therefore to proceed with wood and cardboard.


FiradisDredgeArt2.jpg

The problem here was that the posterboard warped rather disastrously once the glue had cured. Also, posterboard is very unforgiving. It can't be sanded or smoothed in any way. Once it's marred, it's marred. I was very dissatisfied with this first effort, and knew I'd have to start over if I wanted a decent model. Plus, I wasn't too keen on the shape. Just seemed kind of boring to me.

2nd attempt:

FiradisDredgeArt16.jpg

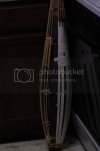
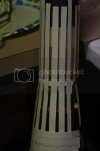
A new tube, actually a repurposed document carrier. These are nice as they are cheap, fairly sturdy, and come in different sizes. The plan this time around was to use the cardboard tube as the spine and create a shape using radial longitudinal basswood strips. I would create a gentle bend with the wood and allow the shape to emerge in tension. The wood and paper elements would then be clad in sheet styrene.

FiradisDredgeArt17.jpg

Forward set of basswood strips glued in place. I felt much better about this approach.

Close up of structure. Wood and paper are very friendly, non toxic, and you have some working time before they set. But they were unfamiliar materials for me, used to styrene as I am.

FiradisDredgeArt25.jpg

Establishing the shape with bent wood, glued and fixed with rubber bands at each end while it cures. Rubber bands are essential for this project.

Clamps also were helpful at this stage.

FiradisDredgeArt24.jpg

Apologies about the lighting. This is far and away the largest model I've ever constructed. This is the first internal 'midships support beam.'

FiradisDredgeArt27.jpg

Hull frame taking shape. I bought a Macro lens for my SLR when I started documenting my 700th Scale builds. I thought it was the only lens I'd ever need for modeling. To take this shot I had to stand on the other side of the room.

FiradisDredgeArt29.jpg

More soon. :)
 
Yeah already up on this beautiful Saturday morning.
These are going to be huge, dude!
Have considered plastic plumbing or ventilation tubes for the larger shapes? These are readily available from the local hardware store and come in various sizes and shapes...
Cheers,
Guido
 
Guido, I have to tell you... these ships have been lurking in my imagination for more than twenty years. There were times when I had no real plans to resume writing SF, but still would daydream about modeling a dredge at some point, not for anything as productive as a novel website, but just for my own amusement. I would often find myself casting a glance towards the air duct section, or eying a discarded carpet roll tube thinking: yeah, I could start with that...

I have bought a few odds and ends over the years, pvc pipes, other plastic pipes, etc. Also document tubes, both plastic and paper, have their uses. So, yes, that's been a part of my thinking for a while.

Actually the plastic ducts are made of vinyl, which is difficult to work with. And the metal ones are a bit rough, lacking a precise cylindrical shape. Any kind of tubing is useful, though, as long as it is not too heavy.

I'll also be doing a bit of kit-bashing with this as well, which you'll see below. I've got loads of leftover kits from Model Club meetings, tanks and aircraft (and a few ships) that I will never build. They'll all come in handy.
 
The completed internal structure...

FiradisDredgeArt31.jpg

FiradisDredgeArt36.jpg
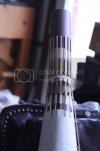
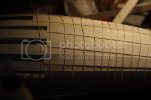
The next question was: how to skin the beast? My problems with posterboard warping in the past were due, at least in part to two factors: 1. lack of support beneath and 2. using too large a piece of poster. I had the tendency to want to cover as large a shape as possible with a single piece. This was a mistake. I realized eventually that if I used smaller pieces I would have less warpage, or at least, the warpage would not be apparent. It also gave me more control over the shape, although it was more time consuming. So I decided I would begin by facing the ribs with strips of rough posterboard, and then covering them with smaller perpendicular strips.
FiradisDredgeArt38.jpg
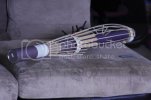
You'll also notice some ribs missing in this shot. I decided I was bored with the 'green onion' shape I'd created, and thought it might be fun to make things a bit more interesting by taking one rib out of each side to create upper and lower halves of the outer hull with a channel running down the middle on either side.
FiradisDredgeArt39.jpg
No attempt to be neat or symmetrical here. The underskin would eventually be refaced with styrene strips. I was amazed how strong this structure was when it dried. The glued bits of posterboard, when combined with the basswood strips became like a hard shell that reminded me of aircraft structure, light but durable.
FiradisDredgeArt42.jpg
Working here to blend the basswood rib structure into the forward hull.
FiradisDredgeArt43.jpg
FiradisDredgeArt46.jpg
FiradisDredgeArt41.jpg
I was beginning to notice warpage again with the posterboard once it had dried. Not as serious as before, but still not perfectly smooth. I was beginning to learn that paper doesn't behave like styrene, and I had been treating it as if it would. How would the hull surface look when done? Would it be smooth enough? Or was I wasting my time with this method? Also, how would it respond to paint? And interface with styrene?

To answer these questions, I decided to begin a 'test tube' facing an extra bit of cardboard tubing I'd had lying around with some of the techniques I was planning, to see how they would turn out when finished and painted.

FiradisDredgeArt47.jpg
FiradisDredgeArt48.jpg
FiradisDredgeArt49.jpg
 
Good development coming along. These last photos are pretty impressive.
 
Hi Primen.
Posterboard because it has a clay coated surface and a softer core, is fine for straight runs, but does not curve well. Usually kinks. I think 110lb card would work better.
Always preshape your piece before attaching. For curved pieces, roll a round tool ( pen, piece of dowel ) over the piece on a soft surface, an old mouse pad works great, till you get your required curve. Test fit. Then glue in place when you are happy. You will like your results better, with a smoother resultant surface. I don't know what glue you are using, but a PVA type would be preferred.
I hope this is helpful.

Jim
 
Hey Guys.

Thanks for dropping by and thanks for the support!

I'll try to keep it interesting for you. I want to share my mistakes, not just what works. I think one learns more that way.

Jim, I appreciate your tips regarding posterboard in particular. It has been a bit of a learning curve, as you will see.

All of this (so far) is back dated by about two weeks. I should be able to get this thread caught up to the present in the next couple of days, but I have to shift gears to (naval) ship modeling this week, as my local club's yearly con is next Saturday. I've got to have something ready to go for that.

But this is a real work in progress. It's the largest most complex build I've ever attempted and I'm not entirely sure of the outcome yet. But there's no motivation like the potential of public humiliation. :eek:

;D
Ok, so one way that I preserve and perpetuate the Dreadnought Ethos with my ships is in the concept of a 'Spotting Top.' Warfare in Space would be in three dimensions, not two, so conventional battleship turrets are a non-starter if we want to be plausible.

As a matter of choice, I dispensed entirely with the idea of any sort of external gun-like device, since the 'guns' in question would probably be of the magnetic accelerator type (a 'rail-gun') and thus, quite fragile, actually, something you would want to protect inside the hull as much as possible. So instead of external guns, we would have internally protected casemates, with only a blast port to let the shell through. But the idea of a spotting top still stands. You still have to have a device for targeting the enemy, either many spread all over the ship, or at the very least, a minimum of two, covering a tactical hemisphere each.

For both practical and aesthetic reasons I chose the latter concept—two heavily protected boom-mounted spotting tops, one 'dorsal' and one 'ventral.' The look of a War Dredge is supposed to communicate the panorientation of Space—flip it 'upside down' and it looks much the same. The idea of the boom is that the spotting top can actually move freely, both to facilitate targeting and to 'dodge' incoming salvos.

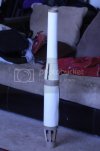
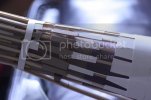
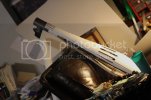
1st Attempt at a spotting top. The general idea is a cylinder shape with various sensor-like objects attached to it.
FiradisDredgeArt65.jpg

FiradisDredgeArt67.jpg

Not too happy with this. Seems too thin and insubstantial.
Try again...

FiradisDredgeArt72.jpg

Here's a bit of water tubing picked up from the local hardware store for a different project. A bit more substantial diameter.

FiradisDredgeArt73.jpg

Here is the upper half faced in styrene with CA and with two patches of steel sheet glued to the back. The boom will be attached to the actual spotting top using magnets, for reasons which I will explain later.

FiradisDredgeArt77.jpg

I feel like I'm 'riffing' on some of my favorite historical battleships with these shapes. You can see something of a conning tower effect developing here. It's important though to not be too slavish in imitation, a difficult balance. You'll have to tell me when it's done if you think I pulled it off.

FiradisDredgeArt78.jpg

Look rough? This is the internal column which will join the upper and lower half of the spotting top structure.

IMG_3096.jpg

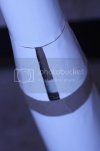
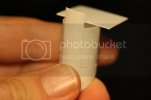
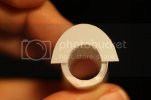
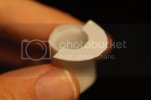
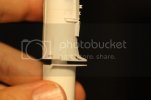
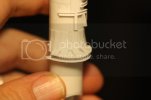
Fashioning the lower half, which terminates in a diagonal cut creating an opportunity for complex detail on the underside. The rough vinyl-like tube had to be faced with styrene sheet, which would then be cut and sanded to shape.

IMG_3099.jpg
 
IMG_3100.jpg
IMG_3103.jpg
IMG_3105.jpg

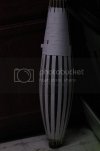
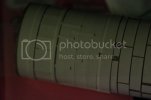
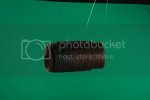
Shifting gears for a minute. My buddy J Christopher Little, heavily implicated in the Firadis effort was kind enough to open his studio to me one Saturday morning so that we could begin some test shots both for texture and color. This is the 'test cylinder' incorporating various styles of texture here, including raised rectangular panels. It's all white styrene and white posterboard... the effect is quite Kubrickian (?) if that's a word. No attempt to create actual features that I intend for the final model, just experimenting with how to face the surface.

10348373_10201900443625310_2530799633465497262_n.jpg
10352752_10201900443665311_964539473014545438_n.jpg
10382991_10201900443185299_1837206644171170478_n.jpg
1525273_10201900441385254_1725601644166693774_n.jpg
Notice that, although the tube is faced in white, we were able to get a shot that makes it look more or less black. In the Firadis novel, the dredges are black, for obvious reasons.
10154304_10201900444185324_8557774591782331918_n.jpg
This is the first painting test cylinder. I was experimenting with partially opaque black over metallic colors, and also with raised panels, seen here very rough without any attempt at symmetry.
10308874_10201900444225325_3936661722749526658_n.jpg
Green screen. This will be the eventual method used to create the final composite images.

We had good fun doing these, but in the end I wasn't overwhelmed with these images. My first attempt at creating something 'original' looked like a leftover prop from 2001... which is fine if you want to evoke 2001, otherwise, not so much. The black/metallic combo, rather than looking interesting and subtle, looked well... burned. :p

More tomorrow. ;)
 
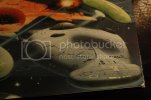
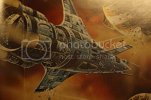
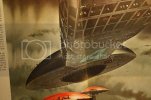
When I think about modeling Science Fiction subjects I often find myself going back to the inspiring SF art of my childhood. A few details here...

FIRADISVI52.jpg
FIRADISVI55.jpg
FIRADISVI57.jpg
FIRADISVI58.jpg
Isn't that one cool? How amazing would it be to model something like that?
FIRADISVI59.jpg

There are so many great artists, then and now. One of the current guys I really like is Sparth (Nicolas Bouvier).
At any rate the point is that there are more possibilities than the typical grey kitbash greebleship one usually sees on screen and on the model table. Don't get me wrong. I love Joe Johnston, Ralph McQuarrie and all the artists who contributed to Star Wars and Star Trek and the other great onscreen SF franchises. (In fact I'd like to do some sort of 'tribute' to Joe Johnston at some point) It's just that I don't want my world and my ships to look like theirs. I want them to have their own look, if that makes sense. This is complicated by the fact that I have limited means and materials for creating my models. I don't know if I will succeed at this or not, first impressions of the texture test cylinders indicate I seem to be traveling rather well-worn paths...

But back to modeling.
FIRADISVI12.jpg
Even with the small transverse strips I was getting a little bit of warping skinning the hull, and wasn't sure if my final texture would hide all of the imperfections in the underlying structure. I decided therefore to use long longitudinal strips, hoping I could eventually hide the 'airship skin' effect with transverse styrene plates.

FIRADISVI25.jpg

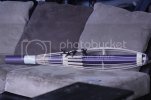
Here's a look at most of the hull propped in my modeling chair. You can see the forward half is skinned in rough transverse strips, while the latter half in both hemispheres is skinned longitudinally... changing my methods as I go, hoping for the best. ;D
One of the features will be a 'chin island' (don't know what else to call it) which will have some forward-pointing spines that will project out in front of the bow. I thought a bit of wing from an old P-61 Black Widow would be a nice basis, but test-taping the bit to the bow of the hull showed it to be too large.


FIRADISVI26.jpg

Progress on the dorsal foretop.
Facing the lower half:
IMG_3134.jpg
Adding the extension (shield?) to the lower half.
IMG_3139.jpg
Leaping without a net! Eyeballing everything for symmetry... :eek:
IMG_3137.jpg
Joining upper and lower half.
IMG_3135.jpg
IMG_3136.jpg
IMG_3140.jpg
FIRADISVI27.jpg
IMG_3141.jpg
So I collect cheap plastic Christmas ornaments because they have interesting (spherical and ellipsoid) shapes. Here's one that's about to go under the dremel...
FIRADISVI31.jpg
FIRADISVI32.jpg
FIRADISVI33.jpg
FIRADISVI34.jpg
A nice 3-D ellipse, suitible for modeling one of the 'iris' ports on the forward hull. Functionally these 'iris ports' depict armored docking bays which blister out slightly from the hull. Aesthetically, in combination with the bow shape they will evoke the ancient Mediterranean trireme, in keeping with the Ancient Near-East aesthetic that runs through the Novel and its ideas.

 
How to find out if a random piece of plastic is styrene? Glue a piece of styrene to it with model cement and wait... Doesn't take long...
FIRADISVI35.jpg
Lo and behold! They're styrene! Now I wish I'd bought more of them...
Creating the secondary attachment arm for the spotting top...
FIRADISVI38.jpg
FIRADISVI40.jpg
FIRADISVI41.jpg
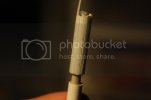
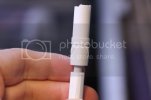
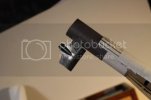
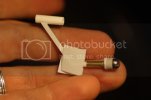
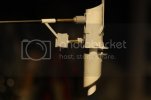
Here is the spotting top with its magnetic attachment arm, the end of the boom. It consists of a piece of piano wire glued to a small lego into which is inserted a single buckyball. This then connects to the steel plates on the back of the spotting top.
FIRADISVI42.jpg
By itself the single buckyball is strong enough to hold the weight of the whole spotting top, which I have tried to keep as light as possible. But it is not secure.
FIRADISVI41.jpg
A second attachment point will make for a better hold.
FIRADISVI43.jpg
FIRADISVI44.jpg
FIRADISVI46.jpg
FIRADISVI49.jpg
FIRADISVI51.jpg
Spotting top with both attachment points. Nothing has been trimmed or faced yet. The lower point swivels round the piano wire. This is because the towers are actually able to traverse across the surface of the ship, according to the technology of the book. This enables them to maximize survivability and targeting angles etc. by embedding strips of steel just under the surface of the hull skin, I hope also to create different attachment points for the boom towers so that they can be posed in different ways, adding interest and uniqueness to the design. I've also decided to create multiple towers so that more than one dredge can be represented with this model.
 

Latest posts

Back
Top