trekriffic
Well-Known Member
- Joined
- Jan 6, 2012
- Messages
- 953
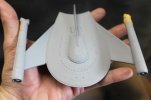
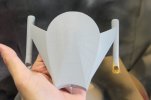
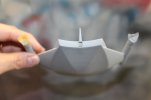
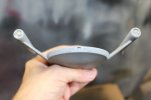
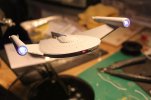
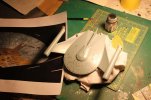
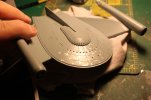
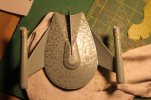
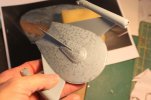
I've been working on this build of the Round 2 1/1000 scale Romulan TOS Bird-of-Prey for a few months now. I'm going to give you guys sort of an abridged version if you don't mind...
Box art:
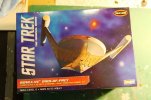 Romulan TOS BOP 1/1000 Scale by trekriffic, on Flickr
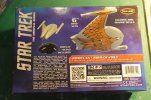 Romulan TOS BOP 1/1000 Scale by trekriffic, on Flickr
There are also some nice dorsal , ventral, and profile view on the sides and ends of the box.
The parts:
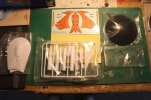 Romulan TOS BOP 1/1000 Scale by trekriffic, on Flickr
Instructions are pretty basic:
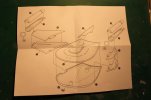 Romulan TOS BOP 1/1000 Scale by trekriffic, on Flickr
Paint and decal guide:
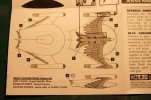 Romulan TOS BOP 1/1000 Scale by trekriffic, on Flickr
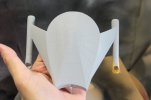
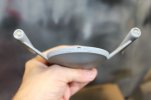
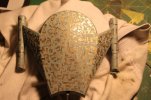
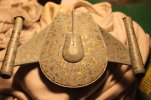
First thing I did was cut off the plastic nacelle "exhaust nozzles" and replace them with aluminum tubing:
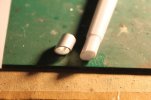 Aluminum Tube Replacement Nozzle by trekriffic, on Flickr
I had to grind the thickness of the metal tubing down some to get things to fit:
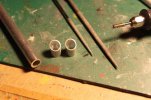 Grinding Down the Wall Thickness by trekriffic, on Flickr
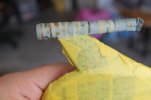
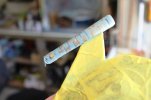
Some thin rings were cut from the same tubing and slid over a section of some smaller diameter tubing:
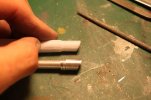 Plastic versus Aluminum Nozzle by trekriffic, on Flickr
Test fitting in the nacelle:
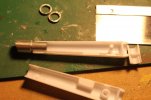 New Nozzle Test Fit by trekriffic, on Flickr
Not bad!
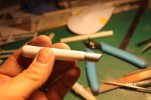 New Metal Nozzle by trekriffic, on Flickr
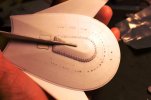
One thing missing from the kit were the frames around the rectangular windows and round sensor ports on the bow of the ship. These were included for the windows and ports on the upper hull and command cupola but not on the front rim for some reason (probably because they would not be easily removed from the injection mold) so I decided to add them myself. I used a copy of the kit decals as a template for drilling holes for the fiber optics as this model will be lit:
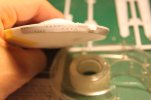 Templates for Window Drilling by trekriffic, on Flickr
After drilling with a pinvise:
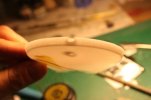 Window and Sensor Openings Drilled by trekriffic, on Flickr
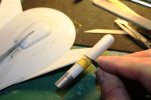
Window frames made from some rectangular Evergreen stock. I used round stock for the sensor ports (not shown):
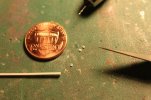 Window Frames for Bow by trekriffic, on Flickr
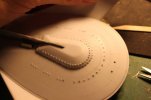
Frames in place:
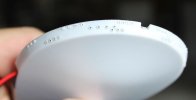 Bow Window and Sensor Port Framing by trekriffic, on Flickr
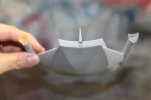
I decided to include a shuttle bay so scribed some hatches behind the cupola on either side of the tail fin to get started:
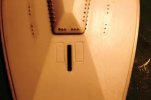 Shuttle Bay Hatches by trekriffic, on Flickr
This part deals with some metal balls I made for inserting into the ends of the nozzles. This reinforces the whole idea that this ship was a product of Romulan espionage and built from stolen Federation ship designs; a theme that was mentioned in one line of dialog in the original series "Balance of Terror" episode that was later cut from the final broadcast version. The enterprise had balls at the ends of its nacelles so why not?
First I made two grills from some leftover tin photo-etch fret:
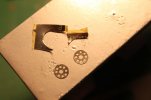 Nozzle Grills Made from PE by trekriffic, on Flickr
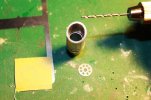 Nozzle Grill by trekriffic, on Flickr
Piano wire was inserted thru some plastic tubing to make a shaft for inserting thru a hole in the center of each grill. The piano wire then slid into holes in the center of the metal beads I used for the balls:
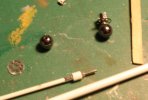 Metal Balls by trekriffic, on Flickr
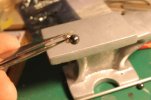 Nozzle Ball Assembly by trekriffic, on Flickr
The grills with balls were glued into each nozzle with 5-minute epoxy:
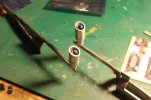 Nozzles with Balls by trekriffic, on Flickr
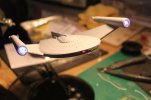
The nacelles were wired up with the finished nozzles which are lit with an amber/orange LED. A blue LED at the front of each nacelle will light the bussard domes:
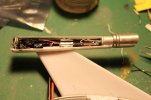 Nacelle Wiring by trekriffic, on Flickr
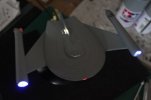
A light test of the nacelle nozzles and bussard domes:
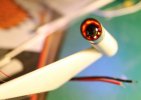 Nacelle Nozzle Light Test by trekriffic, on Flickr
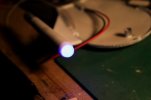 Nacelle Dome Ligth test by trekriffic, on Flickr
Power for the ship is provided by a 2-wire rectangular coupler in the stern of the ship:
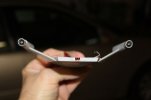 Wings wth Nacelles Attached by trekriffic, on Flickr
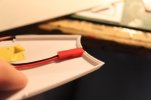 Female Power Coupler by trekriffic, on Flickr
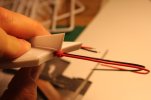 Male Power Coupler Inserted by trekriffic, on Flickr
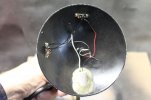
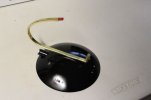
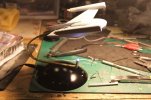
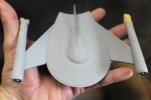
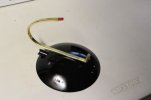
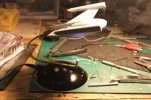
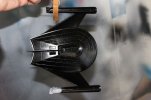
Here's the finished stand with two slide switches-one to operate the ship lights and the other to operate a spotlight at the bottom end of the brass display arm which I made from scratch. The spotlight will illuminate the Bird-of-Prey decal on the underside of the ship when I'm done:
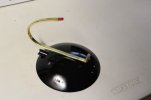 Display Stand by trekriffic, on Flickr
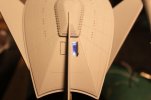
Along with the rim windows and ports I drilled out all the ones on the upper hull. Talk about tedious work! I must have broken about 6 drill bits along the way:
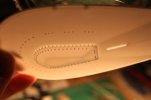 Cupola Holes Drilled by trekriffic, on Flickr
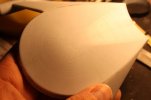
After drilling I sprayed the interior with Tamiya black lacquer for light blocking followed by a coat of primer then a coat of Tamiya white lacquer:
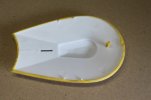 Edge Masking Prior to Priming/Light Blocking by trekriffic, on Flickr
For the plasma torpedo launcher in the bow I built a box with a red wide angle LED in it and glued it into the front of the lower hull:
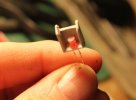 Box for Plasma Torpedo Launcher In Bow by trekriffic, on Flickr
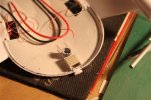 Test Fit of Plasma Torpedo Box by trekriffic, on Flickr
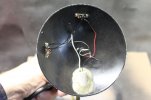
To light the windows and sensors I glued a 5000mcd ultrabright cool white LED into the center of a spool taken from a pack of Glide dental floss. The spool is translucent and helps to spread light evenly around the interior of the model, sort of like a lampshade would:
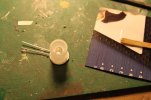 7000mcd ultrabright LED by trekriffic, on Flickr
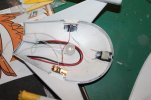 Main LED by trekriffic, on Flickr
On to the shuttle bay...
After cutting one of the shuttle bay doors out using a Tamiya photo-etch saw I installed a pushbutton switch I pirated from a Dollar Tree push-on light. The switch will control the bay lighting and the red LED at the front of the ship for the plasma torpedo launcher:
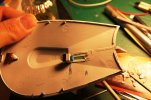 Pushbutton by trekriffic, on Flickr
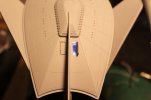
Jumping ahead a little, here's how the hangar bay door looked after I thinned it down with my dremel and needle files and glued on a piece of PE screen. The door hinge is made from two tiny pins made from piano wire inserted at the inside corners of the door:
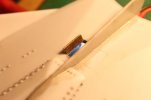 Shuttle Bay Door Revised by trekriffic, on Flickr
One wall for the bay has a rollup door for access to a shuttle maintenance shop:
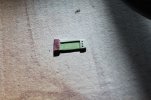 Starboard Bay Painted and a Screen Added by trekriffic, on Flickr
The opposite wall has some control consoles and doors for accessing other areas of the ship. The grill above the doors allows for air to be pumped into and out of the bay:
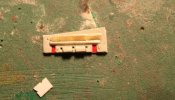 Port Wall with PE Screening by trekriffic, on Flickr
Here's a part I found in my greebly stash. I think it was a part from an F-16 Fighting Falcon kit I got some years ago for kit bashing. Anyway, I drilled out some exhaust ports to turn it into my shuttle/two-man scout ship:
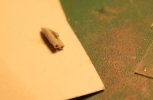 Shuttle by trekriffic, on Flickr
The walls were glued into the underside of the upper hull:
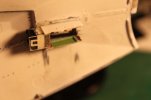 Shuttle Bay Walls Glued In by trekriffic, on Flickr
Pins were cut off and inserted into holes drilled into the underside of the scout to make landing struts:
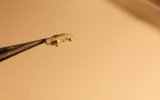 Landing Legs Installed in Shuttle by trekriffic, on Flickr
I gave the scout a fin to match the one on the mothership:
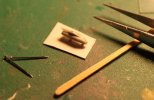 Fin Added to Shuttle by trekriffic, on Flickr
Some red stripes were added to the nose using some old decal material:
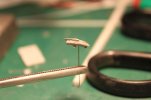 Decaling the Shuttle by trekriffic, on Flickr
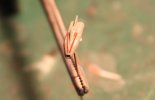 Shutttle with Red Stripes by trekriffic, on Flickr
The scout, referred to by the Romulans as a Talon, serves many purposes functioning as a transport, reconnaissance, and fighter craft. It measures 3/8" long which works out to 31" 3" at 1/1000 scale. Sleek and stealthy with the ability to cloak, the fighter is armed with disruptors and a single mini plasma torpedo with which it can destroy targets many times larger than itself; however, once fired it has to return to its launch bay for reloading. Its limitations are that it can only travel at sublight speeds with limited range shortened each time it is required to use fuel reserves to fire its weapons. Also, like the mothership, its cloak drains power from the engines and must be lowered to fire the plasma weapon.
Now back to the shuttle bay...
After soldering some wires a light test was performed. One end of the bay has the pushbutton switch as indicated previously; the other end has a bright white LED. Fibers will run from a purplish pink LED in the brass tube shown in the pic to holes drilled inthe walls to give the bay the same multi-hued glow seen with the bridge lighting in the Balance of Terror episode:
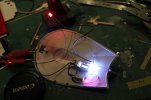 Light Test of Bay LEDs by trekriffic, on Flickr
Parts were cut for the floor of the bay. The white styrene frame is glued to the base of the walls first, followed by the clear frame piece (which will get some edge lighting), then the photo-etch screen. Finally a piece of translucent "milk jug" plastic (not shown here) will be glued to the PE screen which will allow some light to shine thru from below the bay:
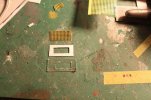 Shuttle Bay Floor Components by trekriffic, on Flickr
The completed floor installed in the bay. You can also see the fiber optic strands:
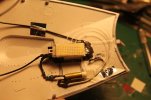 Fiber Optics and Floor Installed in Bay by trekriffic, on Flickr
Light test:
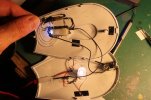 Wiring and Soldering all Done by trekriffic, on Flickr
The lit bay with the scout ship cemented in place using CA:
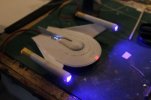
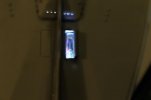 Shuttle in Lit Bay by trekriffic, on Flickr
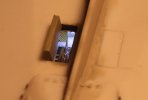 Rear of Lit Bay by trekriffic, on Flickr
Next up... I glue the hull together!
Box art:
 Romulan TOS BOP 1/1000 Scale by trekriffic, on Flickr
 Romulan TOS BOP 1/1000 Scale by trekriffic, on Flickr
There are also some nice dorsal , ventral, and profile view on the sides and ends of the box.
The parts:
 Romulan TOS BOP 1/1000 Scale by trekriffic, on Flickr
 Instructions are pretty basic:
 Romulan TOS BOP 1/1000 Scale by trekriffic, on Flickr
Paint and decal guide:
 Romulan TOS BOP 1/1000 Scale by trekriffic, on Flickr
First thing I did was cut off the plastic nacelle "exhaust nozzles" and replace them with aluminum tubing:
 Aluminum Tube Replacement Nozzle by trekriffic, on Flickr
I had to grind the thickness of the metal tubing down some to get things to fit:
 Grinding Down the Wall Thickness by trekriffic, on Flickr
Some thin rings were cut from the same tubing and slid over a section of some smaller diameter tubing:
 Plastic versus Aluminum Nozzle by trekriffic, on Flickr
Test fitting in the nacelle:
 New Nozzle Test Fit by trekriffic, on Flickr
Not bad!
 New Metal Nozzle by trekriffic, on Flickr
One thing missing from the kit were the frames around the rectangular windows and round sensor ports on the bow of the ship. These were included for the windows and ports on the upper hull and command cupola but not on the front rim for some reason (probably because they would not be easily removed from the injection mold) so I decided to add them myself. I used a copy of the kit decals as a template for drilling holes for the fiber optics as this model will be lit:
 Templates for Window Drilling by trekriffic, on Flickr
After drilling with a pinvise:
 Window and Sensor Openings Drilled by trekriffic, on Flickr
Window frames made from some rectangular Evergreen stock. I used round stock for the sensor ports (not shown):
 Window Frames for Bow by trekriffic, on Flickr
Frames in place:
 Bow Window and Sensor Port Framing by trekriffic, on Flickr
I decided to include a shuttle bay so scribed some hatches behind the cupola on either side of the tail fin to get started:
 Shuttle Bay Hatches by trekriffic, on Flickr
This part deals with some metal balls I made for inserting into the ends of the nozzles. This reinforces the whole idea that this ship was a product of Romulan espionage and built from stolen Federation ship designs; a theme that was mentioned in one line of dialog in the original series "Balance of Terror" episode that was later cut from the final broadcast version. The enterprise had balls at the ends of its nacelles so why not?
First I made two grills from some leftover tin photo-etch fret:
 Nozzle Grills Made from PE by trekriffic, on Flickr
 Nozzle Grill by trekriffic, on Flickr
Piano wire was inserted thru some plastic tubing to make a shaft for inserting thru a hole in the center of each grill. The piano wire then slid into holes in the center of the metal beads I used for the balls:
 Metal Balls by trekriffic, on Flickr
 Nozzle Ball Assembly by trekriffic, on Flickr
The grills with balls were glued into each nozzle with 5-minute epoxy:
 Nozzles with Balls by trekriffic, on Flickr
The nacelles were wired up with the finished nozzles which are lit with an amber/orange LED. A blue LED at the front of each nacelle will light the bussard domes:
 Nacelle Wiring by trekriffic, on Flickr
A light test of the nacelle nozzles and bussard domes:
 Nacelle Nozzle Light Test by trekriffic, on Flickr
 Nacelle Dome Ligth test by trekriffic, on Flickr
Power for the ship is provided by a 2-wire rectangular coupler in the stern of the ship:
 Wings wth Nacelles Attached by trekriffic, on Flickr
 Female Power Coupler by trekriffic, on Flickr
 Male Power Coupler Inserted by trekriffic, on Flickr
Here's the finished stand with two slide switches-one to operate the ship lights and the other to operate a spotlight at the bottom end of the brass display arm which I made from scratch. The spotlight will illuminate the Bird-of-Prey decal on the underside of the ship when I'm done:
 Display Stand by trekriffic, on Flickr
Along with the rim windows and ports I drilled out all the ones on the upper hull. Talk about tedious work! I must have broken about 6 drill bits along the way:
 Cupola Holes Drilled by trekriffic, on Flickr
After drilling I sprayed the interior with Tamiya black lacquer for light blocking followed by a coat of primer then a coat of Tamiya white lacquer:
 Edge Masking Prior to Priming/Light Blocking by trekriffic, on Flickr
For the plasma torpedo launcher in the bow I built a box with a red wide angle LED in it and glued it into the front of the lower hull:
 Box for Plasma Torpedo Launcher In Bow by trekriffic, on Flickr
 Test Fit of Plasma Torpedo Box by trekriffic, on Flickr
To light the windows and sensors I glued a 5000mcd ultrabright cool white LED into the center of a spool taken from a pack of Glide dental floss. The spool is translucent and helps to spread light evenly around the interior of the model, sort of like a lampshade would:
 7000mcd ultrabright LED by trekriffic, on Flickr
  Main LED by trekriffic, on Flickr
On to the shuttle bay...
After cutting one of the shuttle bay doors out using a Tamiya photo-etch saw I installed a pushbutton switch I pirated from a Dollar Tree push-on light. The switch will control the bay lighting and the red LED at the front of the ship for the plasma torpedo launcher:
 Pushbutton by trekriffic, on Flickr
Jumping ahead a little, here's how the hangar bay door looked after I thinned it down with my dremel and needle files and glued on a piece of PE screen. The door hinge is made from two tiny pins made from piano wire inserted at the inside corners of the door:
 Shuttle Bay Door Revised by trekriffic, on Flickr
One wall for the bay has a rollup door for access to a shuttle maintenance shop:
 Starboard Bay Painted and a Screen Added by trekriffic, on Flickr
The opposite wall has some control consoles and doors for accessing other areas of the ship. The grill above the doors allows for air to be pumped into and out of the bay:
 Port Wall with PE Screening by trekriffic, on Flickr
Here's a part I found in my greebly stash. I think it was a part from an F-16 Fighting Falcon kit I got some years ago for kit bashing. Anyway, I drilled out some exhaust ports to turn it into my shuttle/two-man scout ship:
 Shuttle by trekriffic, on Flickr
The walls were glued into the underside of the upper hull:
 Shuttle Bay Walls Glued In by trekriffic, on Flickr
Pins were cut off and inserted into holes drilled into the underside of the scout to make landing struts:
 Landing Legs Installed in Shuttle by trekriffic, on Flickr
I gave the scout a fin to match the one on the mothership:
 Fin Added to Shuttle by trekriffic, on Flickr
Some red stripes were added to the nose using some old decal material:
 Decaling the Shuttle by trekriffic, on Flickr
 Shutttle with Red Stripes by trekriffic, on Flickr
The scout, referred to by the Romulans as a Talon, serves many purposes functioning as a transport, reconnaissance, and fighter craft. It measures 3/8" long which works out to 31" 3" at 1/1000 scale. Sleek and stealthy with the ability to cloak, the fighter is armed with disruptors and a single mini plasma torpedo with which it can destroy targets many times larger than itself; however, once fired it has to return to its launch bay for reloading. Its limitations are that it can only travel at sublight speeds with limited range shortened each time it is required to use fuel reserves to fire its weapons. Also, like the mothership, its cloak drains power from the engines and must be lowered to fire the plasma weapon.
Now back to the shuttle bay...
After soldering some wires a light test was performed. One end of the bay has the pushbutton switch as indicated previously; the other end has a bright white LED. Fibers will run from a purplish pink LED in the brass tube shown in the pic to holes drilled inthe walls to give the bay the same multi-hued glow seen with the bridge lighting in the Balance of Terror episode:
 Light Test of Bay LEDs by trekriffic, on Flickr
Parts were cut for the floor of the bay. The white styrene frame is glued to the base of the walls first, followed by the clear frame piece (which will get some edge lighting), then the photo-etch screen. Finally a piece of translucent "milk jug" plastic (not shown here) will be glued to the PE screen which will allow some light to shine thru from below the bay:
 Shuttle Bay Floor Components by trekriffic, on Flickr
The completed floor installed in the bay. You can also see the fiber optic strands:
 Fiber Optics and Floor Installed in Bay by trekriffic, on Flickr
Light test:
 Wiring and Soldering all Done by trekriffic, on Flickr
The lit bay with the scout ship cemented in place using CA:
 Shuttle in Lit Bay by trekriffic, on Flickr
 Rear of Lit Bay by trekriffic, on Flickr
Next up... I glue the hull together!

