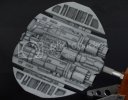
Revell/Monogram Cylon Raider

CheesyGrin

New Member
Joined
Sep 1, 2012
Messages
152
Good Evening All!

I've been lurking around the forum for some time and have enjoyed the site and your great forum posts. I thought I'd join in and share a WIP that's been on my bench for a while:

I've had the Revell/Monogram Cylon Raider kit in my stash since it was re-issued 15/16 years ago. For a kit that's 30+ years old, it's not a bad kit. However, it lacks in the fit and engineering department. So, I've been working off-and-on for some time resolving some of it's issues in hopes of building a reasonably representable final product. I was hoping to finish in time for the 2012 Nationals 3 weeks ago - but life got in the way. I did attend BTW and enjoyed every day of the event!

I'm 98% complete with the build and just about ready for paint. I added engine lights and scratch built a fair amount of new/replacement parts. You'll see lots of white styrene all over and even packed in seams. :)

I'm looking forward to being a part of the group and continuing to learn from you all. This is a great hobby!

http://s223.photobucket.com/albums/dd35/CheesyGrin_photos/Revell_Monogram%20Cylon%20Raider/
 
Looks great so far. Nice additional details, especially the thrusters.
 
blakeh1 said:
Looks great so far. Nice additional details, especially the thrusters.

Thanks so much! The kit was sorely lacking in thruster details.

I found a great tool for fleshing out ideas - Google Sketchup. I'm an engineer by trade so 'measure twice, cut once' is emblazoned in my brain. With Sketchup, I was able to re-create the kit thruster's housing and then "test" my insert designs. Once satisfied, I then was able to unfold and print them. These became my 1:1 templates for cutting and parts placement. Here's some screenshots to illustrate:

http://i223.photobucket.com/albums/dd35/CheesyGrin_photos/Revell_Monogram%20Cylon%20Raider/CylonThruster01.jpg
http://i223.photobucket.com/albums/dd35/CheesyGrin_photos/Revell_Monogram%20Cylon%20Raider/CylonThruster02.jpg
 
Thanks for the kind words guys.

I wet sanded the kit last night. And, today, I tackled the distasteful chore of cleaning my airbrush and mixing jars. I'm hoping to get primer and paint on it within the next couple of weeks. I'll post progress shots through paint and weathering. I'd like to try a color modulation and few other new techniques. I pray all goes well because I'm pleased with the build...

Thanks again!
 
Hi All,

Better late than never I suppose. I finally got some time this weekend to start painting. I chickened-out on a hardcore color modulation and opted for preshading. I was inspired by the awesome work of a master modeler:

http://www.naritafamily.com/howto/Su27/photo_frame.htm

I'll still try some level of modulation, mostly on the highlights - I think. Comments and suggestions are very welcomed:

DSCF5085.jpg


DSCF5091.jpg


More pics here:

http://s223.beta.photobucket.com/user/CheesyGrin_photos/library/Revell_Monogram%20Cylon%20Raider
 
Igard and Quaralane,

Thanks! Hopefully the rest of the paint job goes as well. I'll post progress pics this weekend.
 
So I did a paint trial this morning and am sorely disappointed. I had some Model Master acrylics sitting around and liked the shades. I thinned it considerably, sprayed highlights, then a few thin coats of top color. I got a grainy finish that I dare not spray on the full kit. Not sure what the issue is but glad I tried it on a small piece first. Also, the paint dried EXTREMELY fast and coated my needle tip within a few sprays. I suspect this contributed to the grainy texture.

I'll have to strip this part and go back to using my normal paint - Tamiya acrylics.

Any suggestions?

Paint_Test_zps52ba59c6.jpg


In the meantime, I'm off to see The Hobbit! :)
 
Might be a pressure issue in the brush, or it might be that you've thinned the paints down too far.
Not an a/b expert, so I really can't say for sure
 
Wow, that is some of the most precise pre-shading I've ever seen... leave it to an engineer ;)
Great work on this build. I like your thruster insert idea, I might have to steal that.
 
Splashcoat - thanks! Feel free to take the thruster concept and improve. Sketchup is free and the design file I have is 1:1 scale so I can send you the file if you'd like.

Whatever you do - I hope you share it with the group! ;)
 
I worked out the paint issue. I switched to Tamiya. ;D

Completed 1st airbrush pass (bottom only). Sprayed irregularly in the panel centers and misted a couple overcoats. I wanted to practice a bit on the bottom before moving to the top. I may get time this evening to do more. If so, I'll post more progress tonight.

Pass_1b_zps8b99b686.jpg
 

Latest posts

Back
Top