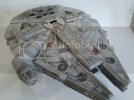
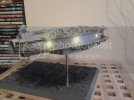
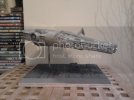
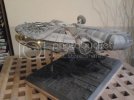
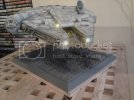
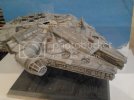
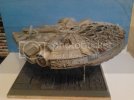
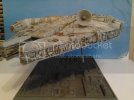
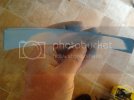
Revell Millenium Falcon "Easykit" .

Thundergod

New Member
Joined
Jul 26, 2013
Messages
202
I've had this Revell Falcon "Easykit" for quite a while , but had it stored away as it was missing a few parts ( I picked it up for a quid at a car boot sale ). As I've recently located the missing bits , I thought I'd give it a little attention . First though , I'd like to say that this isn't going to be a super-detailing/accurizing exercise , mainly because I've an original MPC/Airfix version waiting on the bench , but as a straight-forward "fun" build , more or less straight from the box , (that is , if I had the box, which I don't ) .
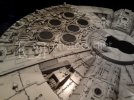
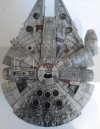
Here's how the top fuselage section looks , with it's factory paint job .
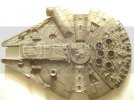
DSC05254_zps0468977f.jpg

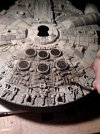
One thing I WILL be improving is the "turbo lasers". The moulded in ones of the kit are it's worst point . I removed these with my razor saw , to be replaced with scratchbuilt ones .
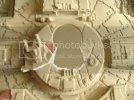
DSC05257_zps9b47c9fe.jpg

I'll not bore everyone with my opinion of these Revell "Easykits" , as I've stated this on more than one occasion , but I will say that this version of the Falcon is pretty damn good , in fact a LOT better than a lot of modellers would have you believe . I originally thought that the price of the kit was a bit high ( about £35 ) , due to it's relative few part count , but in fact the moulded detail is excellent and in my opinion , far better than the old ( admittedly larger ) MPC/Airfix version .
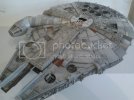
After spray coating a base coat with "Holts" light grey car spray ( my new "go-to" Star Wars base colour ), I picked out panels with a couple of shades of grey ( mid and dark ) and began shading with pastel chalk washes . I then used dry pastel chalks to add "exhaust staining" to the rear engine deck area .
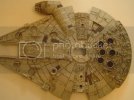
DSC05260_zps14595533.jpg
2013-10-05195449_zps4e307121.jpg

2013-10-05192341_zpsa9508d78.jpg
It's still early days , as I've only worked on the Falcon for a day , but I'm quite optimistic based on the results I've got so far . I may even add some lights , as I've got some LEDs that are looking for a home .
 
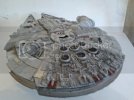
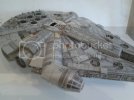
Work's continuing on the Falcon . I've used acrylic washes to bring out the detail on the side panels . I'm quite impressed with the level of "greeblie" detail in these areas , as well as those on the rear engine deck .
2013-10-06131015_zpsb3879aff.jpg
2013-10-06131033_zps14daf7dd.jpg

I've progressed with the painting , adding the various different coloured panels , as well as building up the shading/weathering with washes of acrylic paints .
2013-10-06155432_zpsb298d94c.jpg

2013-10-06155446_zps689ca3de.jpg

2013-10-06155458_zpsd2661ffc.jpg

2013-10-06155520_zps7ca28763.jpg

2013-10-06155704_zps75f7c05f.jpg

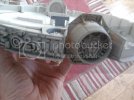
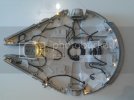
I've also been test fitting "headlights". I'm hoping to install about a dozen L.E.D's , to light the engines and cockpit , as well as running lights .
2013-10-06175955_zps484b1762.jpg

2013-10-06180026_zps10a9de35.jpg

The more I work on this kit , the more I like it . Though it's ( obviously)not up to Fine Molds standard , it's superior to the old MPC version and definitely worth investing in if you're not ready to shell out for the Fine Molds .
 
Your paint job really has drawn out the details on this kit, she looks a beauty

J
 
Thanks for showing this. It's giving me more incentive to work up a conversion I want to do with it
 
Thundergod said:
Quaralane said:
Thanks for showing this. It's giving me more incentive to work up a conversion I want to do with it

Intriguing ....Any clues ?
Not to hijack the thread, but a larger version of my 1/144 Jilted Harlot build
 
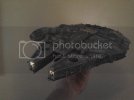
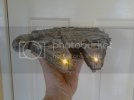
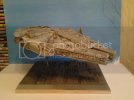
Little bit more work done on the Falcon . Thanks to Jaitea , I've replaced the missing parts and I've installed the headlights and engine lights . I've decided against the cockpit and running lights as the former isn't really practical with the set up I'm using and the latter just didn't look good ! I need to stock up on the parts I need to complete the guns and the engine detailing , so in the meantime I'm working on the display base . I'd originally intended to make an "asteroid field" diorama and had even begun work on it , but then I found the "Death Star " display base from the AMT/Ertl TIE Fighter kit set stashed away in my modelling cave and discovered that it was perfect for my purposes !

2013-10-14165424_zpsbcfa37b1.jpg


2013-10-14165747_zpsecdfe887.jpg

2013-10-14165738_zps470d0aa4.jpg

2013-10-14165725_zps5f29cab9.jpg

2013-10-14165711_zps06f838db.jpg

2013-10-14165605_zps02eb9057.jpg

2013-10-14165508_zps51782a96.jpg

2013-10-14165445_zpsd686213a.jpg
 
Beautiful job, best paintwork I've seen on this model (usually go too heavy on the weathering)

Love the base, is that where the power come from?

Just the turret guns to do?

J
 
Looking good.
Engine light looks a little spotty, but the rest is looking really good
 
Good <ork on this kit. I bought mine on a flee market for 5 euros, I don't regret it. The falcon is a little too fat (the edges) the turrets are awfuls but the rest of it is excellent.

Concerning the engines you can replace the transparent part with things more accurate.
I've done it on the Easy kit pocket and the big one too. Let's check the result...

http://www.scalemodeladdict.com/SMF/index.php/topic,5018.msg75126.html#msg75126

Or even the AMT ERTL kit. You may find some ideas for your project :)

http://www.scalemodeladdict.com/SMF/index.php/topic,8875.msg140574.html#msg140574
 
Thanks for the comments guys , in answer to the questions , I need to scratchbuild the guns but I need to re-stock on my materials . The same goes for the engine detail . I'm pretty much going to do as you did YOULI ,and use styrene strip to replicate the "framework" effect over the clear plastic part ( which I'll "frost" to diffuse the light from the LED's) . The power comes from a battery pack inside the ship . The lights are a complete unit , sold as Halloween lights and I'm leaving the top fuselage removeable to enable me to replace the batteries .
2013-10-07114210_zps3d63b74c.jpg
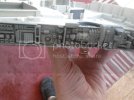
Here's the test fitting . I'm not using any lights down the side , but will be fitting them on the underside of the ship to illuminate the base as they are quite strong . I'm also "boxing in" the interior gun turret area so the lights will be visible through the ports .2013-10-07094759_zps5b8eead6.jpg
 
Excellent work! I love the fact it lights up, too. You sci-fi modelers are an ingenious bunch.
 

Latest posts

Back
Top