Revell F-18 Blue Angel 1/48

Glorfindel

Active Member
Joined
May 2, 2011
Messages
1,502
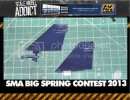
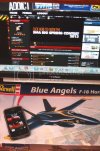
This is the Ilateri F-18 Hornet re-popped by Revell many years ago in the Blue Angels markings. This will be an ambitious little build where when finished will end up in my nephews hands who asked me to build him one. What he doesn't know is that I am lighting her up as best as I can. Engines are easy but Nav, collision, and marker lights will be added/attempted. The only AM here will be new CAM decals which I'm still waiting for to come in and a flasher circuit to simulate the red strobes at the rear stabs. I've purchased the Smooth On starter kit and will be using this to help create new stabilizers that will house fiber optics for all tail lights. Sounds like fun.
This bug will be assembled in flight and no landing gear will be used. Some modifications will be made to accommodate this.
Have fun guys. This should be a blast like last year watching all these kits come together! Happy building,
Anthony.
BSCpic_zpsf10b34c9.jpg
 
That's gonna look nice when it's done. Saw the italeri version at my LHS the other day.
 
Nice one G!! Love the F-18!! Grabbing a seat in the front row with Rookie!! :D
 
rook, T, Dweller thanks a bunch. I'm stoked by how many great kits and builders are in this competition. Only hope that I can keep up with you guys.
 
A nice kit! The Blue Angels were one of my favorite things to go see at air shows when I was a teen. :)
 
OK first post so lets boogie.
This is the plan. Get the Smooth On Starter Kit....check.
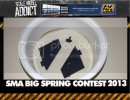
Make molds and cast both sides of rear stabilizers as single side block molds.....check
(Never ever used the stuff before so this can turn in to a one and done hack job)

Stabilizers_zpsa8628e9a.jpg
Readyformold_zps791d3dfc.jpg

Just poured some Oomoo over the parts and I'll see how those look in the morning.

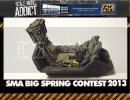
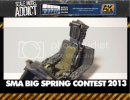
On to the cockpit. They need a touch of clean up and I think I'm going to repaint that yellow and black release handle at the bottom of the ejection seat too. There is a yellow and black loop that sits between the pilots legs that looked horribly thick as the kit part just will not do. I'll be scratching a new one out of 30 gauge wire....better look and probably a better diameter too.
Some of the pics are out of sequence and I stopped taking pics to do more paint work. They tell the story though.

Cockpitdetails_zps6d07d191.jpg
SideviewCockpit_zps3b7f55af.jpg
Cockpit_zpse6e240f7.jpg
Controlpanel_zps006a4fd6.jpg

I still have to fashion a harness out of Tamiya tape and paint the pilot. If any one is wondering the view screens on the front of the console is a mix of Tamiya Yellow Clear and X-4 Blue (not clear) This combo left a surprisingly glossy finish over the screens and looks neat. Last pic shows the clean up on the left screen I need to attend to. Got a bit sloppy and painted over the lines.


[attachment deleted by admin]
 
SOme nice work there in the office G!!Coming together really well!!!
 
Cool build Anthony :) ....Great looking office too ! very nice .

Chris.
 
Roy, John, Bisk, Chris thanks a whole bunch. It's great checking out everybody elses progress too.
 

Latest posts

Back
Top