Deadman Disciple
Member
- Joined
- Apr 28, 2015
- Messages
- 69
[youtube]https://www.youtube.com/watch?v=SLFPRxQkZR8[/youtube]
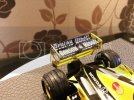
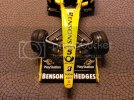
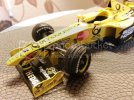
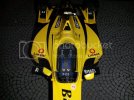
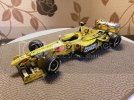
Back again with the next project, this time the Revell 1/24 Jordan EJ10 from the 2000 Formula 1 season.
As there is only 2 & a bit sprues to this kit, I decided to primer & with my Halford glass black & Humbrol No.69 Yellow spray the parts whilst they were still on the sprues.
Firstly I started on the rear wing assembly, by glueing in all the wings onto the one side of the end plate & let it dry & then lining up the wings into their holes on the other end plate was very difficult indeed, but I got there in the end.
Touching up a little where the glue had ran the paint a little with my yellow & black by hand, I then started on the rear wing decals.
Using the Bensons & Hedges sheet I got off ebay, as all the places I tried for the aftermarket sheet which was the same sheet as the kit Buzzin & Hornets sheet but with the B&H logos instead was either Discontinued or out of stock with a long re-order time wait, so these had to do.
Going down onto the wing really well, I noticed that no 2 Bensons letter decals were the same size (as these are for 1/18,1/24 & 1/48 scales), I had to use the Buzzin decals for the rear of the main wing, as I had only one Benson decal to fit the main wing.
Once those were dry & sealed, I started on the suspension rods that attach to the front of the rear wing assembly & unlike the Newman-Haas they were really easy to put together.
Then came the chassis & sidebody, glueing those panels into place was really easy & I also painted the sidepods vents in steel metallic, after that I then glued in the rear wing & suspension assembly onto the completed chassis & started on the front assembly.
Glueing the front suspension rods into the front bottom part of the nose was easy, but glueing the front brakes assemble was quite difficult, as I had 3 separate rods to glue onto one brake & the ballpeins were making it very difficult to snap into the mounting holes.
Once the front section was done I then glued that onto the chassis & then came the monocoque.
A lot easier than the Newman-Haas to mount, but I had to manoeuvre some panels into place, but once they slotted in, the clamps did a really good job in holding all that together whilst the glue dried.
Once all that dried, I started on the decalling.
The hornets on the side of the nose had been pre-cut where they sit underneath & around the steering/suspension rods, but I had to cut the decal in half as I couldn't manoeuvre the whole decal around those rods, but managed to match the 2 halves really nice & the microsol got to work.
I then started on the main nose sponsor decals & then the Bensons decal, but the aftermarket Bensons decal was too small, so I had to use the large italic font benson decal with the "S" borrowed from the hedges part & those blended together really well, the "B" from the Bensons I had to cut in half to place on the top & bottom of the raised rear facing camera & I painted some black paint on to complete the "B".
The rest of the sponsor decals went down great too, but the Bensons & Hedges decals for the sidepods were also too small & again I didn't have two the same size, so I went with the kit Buzzin & Hornets sidepod decal & left that to dry.
Around the rear engine pods & cover, I placed the exhausts cover curved pointed stripes & Honda stripes & on the plans, its stated there should be no yellow gap in between them, but looking at photos of the EJ10 on the internet there is a yellow gap, so that's what I did when placing that.
Underneath the Buzzin & Hornets sidepod decal, I placed a sponsor stripe decal & to the rear of that I placed a 3 striped pointed decal.
To finish off the rear wing, I placed a 3 sponsor decal, along with a number 5 decal on the endplate & those covered up the wing mounting pins up really nice.
The tyres were next, the OZ yellow circle decals had to be cut up into quarters, as the whole decal just wouldn't sit around the rim whole & I patched those up the best I could & then place the Bridgestone & Potenza decals on to the tyre sidewalls with a coat of Revell Glosscote to get them to sit & sealed them after.
Into the final stages of construction with the front wing, I placed my aftermarket B&H hornets above the Playstation logos & the Benson & Hedges decals along with the German post decals on either side on the endplates, I sealed those & using the glue n glaze I mounted the clear parts onto top on the already sealed German post decals.
Once dry, I glued the front wing into place, glued the complete tyres onto the brakes, but weirdly one of the front tyres wouldn't mount properly & is slightly wonky.
Last but not least, the top intake along with the camera mount was glued into place & then the side pod mirrors were glued into place & it's all complete.
Even though its a slight variant to the original with Buzzin & Hornets mixed with the Benson & Hedges, I'm really happy on how the Jordan F1 car had turned out.
Cheers,
Wayne.
