aboynamedred
The only good system is a soundsystem
- Joined
- Apr 13, 2013
- Messages
- 24
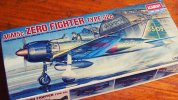
Good day, everyone!  I'm back again for my third project. And this time, I got myself a 1/72 Academy Mitsubishi Zero Fighter Type 52c. The truth is, I just went on a blind shopping with my friend in a hobby store. The rule is, I will close my eyes for 5 seconds and turn around 20 times inside the hobby shop and I'll buy the first scale model that I will see after opening my eyes. And the verdict? I saw this Zero Fighter.
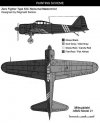
Of course, as expected of me, I also designed a custom painting scheme and a backstory for it (because I take it so seriously.) If you managed to stumble upon my Project Red Ghostriders, you might notice that I always design my own painting scheme + a custom backstory for it.
Of course, as expected of me, I also designed a custom painting scheme and a backstory for it (because I take it so seriously.) If you managed to stumble upon my Project Red Ghostriders, you might notice that I always design my own painting scheme + a custom backstory for it.
About the Nocturnal Mastermind:
â–º On the morning of December 7, 1941, the Imperial Japanese Navy conducted a surprise military strike at the United States naval base at Pearl Harbor. The Japanese Air Force sent out 353 planes at the wake of the entire attack. That was, excluding the 3 special squadrons of 67 Zero Fighter fighter planes of the Yako-sei No Shubo [夜行性ã®é¦–謀] (Nocturnal Ringleaders) Division which were declassified only after the war. The Nocturnal Ringleaders or most commonly known as the Masterminds is a classified tri-squadron air force division assigned by the Japanese government during the World War II to lead other fighters and provide assistance if needed. The division commonly attacks during midnight to dawn. Hence, earning the name of Nocturnal Ringleaders. They actively participated during the Pearl Harbor attacks and they attributed mostly to the destruction of various U.S. ships and providing reconnaissance of the whole place. And up until now, they are considered as the strongest and most intelligent fighter squadron the Imperial Japan has ever produced.
Okay, enough fiction. Let's get to the process. First of all, this project pushed my modeling skills to new heights. I learned some new approach as well as better techniques. I'm gonna explain those techniques that I learned. Yes, I know most of you guys use those techniques a lot, so pardon me for my mistakes, I'm still learning.
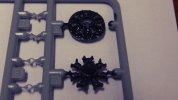
â–º This is propeller engine parts, I painted it with Tamiya Gun Metal Acrylic.
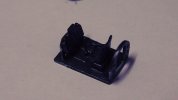
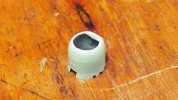
â–º The cockpit. I assembled it first and painted it with flat black. The Zero Fighter is a tad small so it is not that detailed.
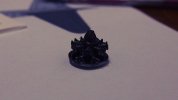
â–º The engine assembled.
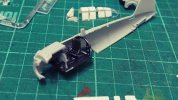
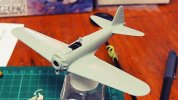
â–º Fuselage dry-fitting and assembly. From this point on are my favorite steps. Unlike my previous projects, wherein I paint the fuselage pieces separately and assemble them, this time, it's the other way around. I assembled the fuselage first then paint them. I really don't know which is which whether assembly first before paint or paint before assembly, but I think, from now on, I'm gonna use this technique.
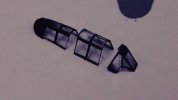
â–º Canopy painted. Too small, too messy.
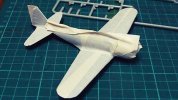
â–º Fuselage masked, ready for undercarriage painting. I painted the entire body Flat Black just like in the painting scheme. The gray undercarriage is now on its way.
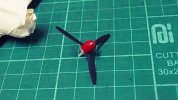
â–º The propeller set. I brush painted every part of it. I just need to put a yellow paint at the ends of each blade.
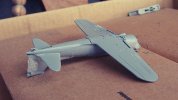
â–º Undercarriage painted in Gray.
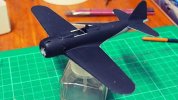
â–º Entire fuselage painted.
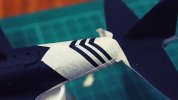
â–º Masking the "Red Stripes of Death." My previous build, the Red Ghostriders also have a Red Cross of Death. I don't know why but I just love adding those "-- of Death" symbols. Maybe just so you know, I could add my personal flavor to it so that no one can deny that it's my damn work.
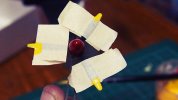
â–º Masking and painting the propeller tip. It was painted using Tamiya Yellow Acrylic.
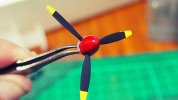
â–º Finished propeller. Ta-da!
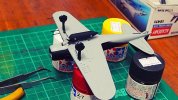
â–º Landing gears and attachments preliminary fitting. Originally, there were four small bombs included but I didn't want to put them on.
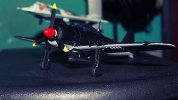
â–º Preliminary model. Here is the unpolished preliminary model. I learned this technique from a professional ship modeler that I met in the hobby store. He told me to "dry-fit" everything before putting the decals and/or assembling everything. He actually taught me new techniques that pushed my envelope to the borders. Thanks to that guy. Note that at this point, not all parts are glued.
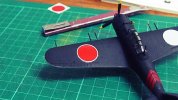
â–º Decal placement.
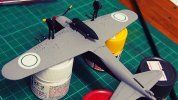
â–º Decal placement. Originally, tis should be a red circle over a white circle, but I wanted to make it "different" from the others since it is really is different based on the story that I made.
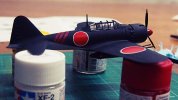
â–º Decal placement completed.
â–º I just realized, I forgot to take a photo of me stretching a sprue to make a wire-like thing to be attached at the top of that thing. That guy in the hobby store also taught me about that. He said that he always do that in building ships.
â–º COMPLETED PHOTOS â—„
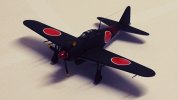
â–º Notice that wire above it? That's the stretched sprue that I'm talking about.
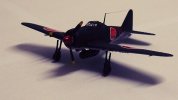
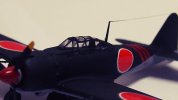
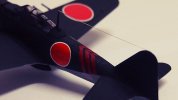
â–º This is a close-up to that stretched sprue. (why the hell am I so proud of it?!)
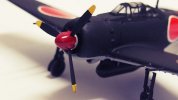
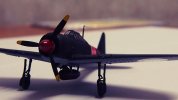
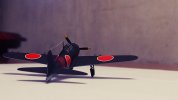
â–º For me, this is the BEST completed photo shot.
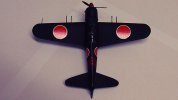
â–º I just noticed it right now, the circles at the fuselage aren't aligned. Silly me.
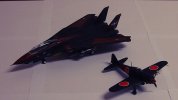
â–º Project Red Ghostriders and Project Nocturnal Mastermind. Just for you to see his big brother and their scale. Both are 1/72, by the way.
♥ ♦ ♣ ♠♥ ♦ ♣ ♠♥ ♦ ♣ â™
Builder's note:
â–º This kit is very good. Not that good as in more detailed than the Tamiya's, but at least, it can compete with them. What I can say from my view is that it pushed my modeling skills to the edge. I know, I have still a lot of things to know since this is just my third project. But I am proud to say that I learned new things with this at hand.
Comments and suggestions are highly appreciated.
Thank you for viewing. Cheers!
- Red
Okay, enough fiction. Let's get to the process. First of all, this project pushed my modeling skills to new heights. I learned some new approach as well as better techniques. I'm gonna explain those techniques that I learned. Yes, I know most of you guys use those techniques a lot, so pardon me for my mistakes, I'm still learning.


â–º This is propeller engine parts, I painted it with Tamiya Gun Metal Acrylic.

â–º The cockpit. I assembled it first and painted it with flat black. The Zero Fighter is a tad small so it is not that detailed.

â–º The engine assembled.


â–º Fuselage dry-fitting and assembly. From this point on are my favorite steps. Unlike my previous projects, wherein I paint the fuselage pieces separately and assemble them, this time, it's the other way around. I assembled the fuselage first then paint them. I really don't know which is which whether assembly first before paint or paint before assembly, but I think, from now on, I'm gonna use this technique.

â–º Canopy painted. Too small, too messy.

â–º Fuselage masked, ready for undercarriage painting. I painted the entire body Flat Black just like in the painting scheme. The gray undercarriage is now on its way.

â–º The propeller set. I brush painted every part of it. I just need to put a yellow paint at the ends of each blade.

â–º Undercarriage painted in Gray.

â–º Entire fuselage painted.

â–º Masking the "Red Stripes of Death." My previous build, the Red Ghostriders also have a Red Cross of Death. I don't know why but I just love adding those "-- of Death" symbols. Maybe just so you know, I could add my personal flavor to it so that no one can deny that it's my damn work.

â–º Masking and painting the propeller tip. It was painted using Tamiya Yellow Acrylic.

â–º Finished propeller. Ta-da!

â–º Landing gears and attachments preliminary fitting. Originally, there were four small bombs included but I didn't want to put them on.

â–º Preliminary model. Here is the unpolished preliminary model. I learned this technique from a professional ship modeler that I met in the hobby store. He told me to "dry-fit" everything before putting the decals and/or assembling everything. He actually taught me new techniques that pushed my envelope to the borders. Thanks to that guy. Note that at this point, not all parts are glued.

â–º Decal placement.

â–º Decal placement. Originally, tis should be a red circle over a white circle, but I wanted to make it "different" from the others since it is really is different based on the story that I made.

â–º Decal placement completed.
â–º I just realized, I forgot to take a photo of me stretching a sprue to make a wire-like thing to be attached at the top of that thing. That guy in the hobby store also taught me about that. He said that he always do that in building ships.
â–º COMPLETED PHOTOS â—„

â–º Notice that wire above it? That's the stretched sprue that I'm talking about.


â–º This is a close-up to that stretched sprue. (why the hell am I so proud of it?!)


â–º For me, this is the BEST completed photo shot.

â–º I just noticed it right now, the circles at the fuselage aren't aligned. Silly me.

â–º Project Red Ghostriders and Project Nocturnal Mastermind. Just for you to see his big brother and their scale. Both are 1/72, by the way.
♥ ♦ ♣ ♠♥ ♦ ♣ ♠♥ ♦ ♣ â™
Builder's note:
â–º This kit is very good. Not that good as in more detailed than the Tamiya's, but at least, it can compete with them. What I can say from my view is that it pushed my modeling skills to the edge. I know, I have still a lot of things to know since this is just my third project. But I am proud to say that I learned new things with this at hand.
Comments and suggestions are highly appreciated.
Thank you for viewing. Cheers!
- Red

