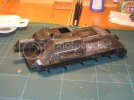
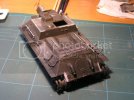
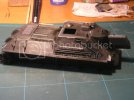
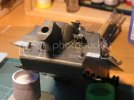
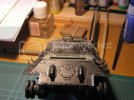
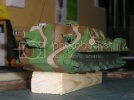
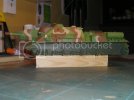
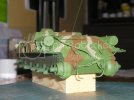
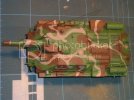
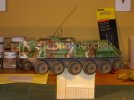
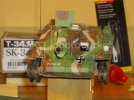
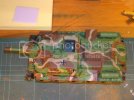
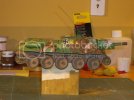
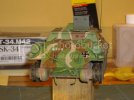
Not exactly a “What If” but a “Maybe”: 1944 finnish uparmored SU-122.

Jelly

Rob. G.
Joined
Apr 12, 2011
Messages
641
Good afternoon to you all,

Well, this is an almost ludic project that I decided to carry on a year ago or so… after my return to modelling. I also thought that it would be a good training, a kind of calisthenics with new (for me) techniques and materials: PE parts, aftermarket parts, use of evergreen, cutting pieces of the model, employing working tracks (Modelkasten), filters, etc, etc… well, you know, all that kind of stuff that was inexistent back in the 80´s or at least unbeknown to me.

I can remember watching the Tamiya catalog back in 1983 … an also watching with amazement a Verlinden´s diorama book in 1985… I always had some kind of Freudian fixation with the SU-122 (I don´t know why), so I decided to take one of this relics (the model was made back in the late 60´s or early 70´s, I don´t know well this detail), and optimistically to try to “improve” visually this design and get a less monotone and anodine model.

Reading a bit about Finnish T-34s (captured ones or the ones bought to Germany) and about Stug III (also in Finnish service), I decided that it could have been feasible that some SU-122 could have seen service in the Finnish assault guns batts.

So I decided to make some little “improvements” in the model (“Finnish” improvements), that could be summarized in:

• up-armoring the front of the vehicle, with welded Ekranamy-style 30 mm armor plates, and.
• Adding side spare-supplies boxes.

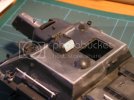
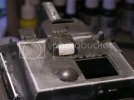
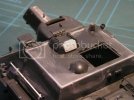
I have found a lot of deficiencies in the kit, some of them outrageous (like the absence of the rear-facing little hatch in the left positioned observation hull top cupola), but I think I´ve advanced a lot. The work is not finished by now, and I´ve advanced a bit more in weathering (slightly mudding and dusting) the bogies and lower part of the hull…

Let me show you some photos of this intensive self-learning project /sparring model. I repeat: this model is still very far from being finished, guys.

I have used:

• The old, very old Tamiya SU-122 1:35. A relic.
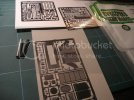
• Eduard PE kit : I´ve used only a part of it, I cannot say it has a great quality.
• Eduard SU-122 barrel: really BAD. I´ve had to enlarge manually the diameter of the bore, because the original one would have worked well… for a 76 mm gun…
• Eureka towing cables (very nice)
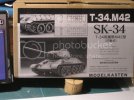
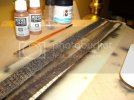
• Modelkasten tracks (very, very nice, beautiful… and very, very fragile!)
• Lots of evergreen, lots I say.
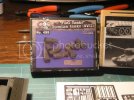
• Royal Model T-34/SU-122 fuel drums (fantastic ones)
• And I have a set of Sturmi decals Reddy to use with this model (Echelon, if I´m not wrong now!)

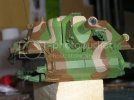
And I must recognize that maybe I´ve been a little “artistic” in the painting… but that doesn´t takes my sleep out!

(hush: I can see a piece of Kleenex paper inside the bore of the gun: by the time of this message, it has been cruelly deported to the waste bin)

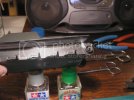
Eduard PE kit:
P1010192.jpg

The Modelkasten tracks:
P1010191.jpg

The Royal Model fuel drums:
P1010190.jpg


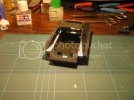
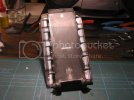
“Botox” stage:

P1010187.jpg

P1010189.jpg

P1010188.jpg

P1010280.jpg

P1010282.jpg

P1010283.jpg

P1010285.jpg

P1010295.jpg

P1010299.jpg

P1010301.jpg

P1010303.jpg

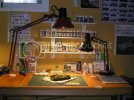
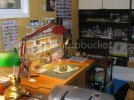
After the “basic” painting: in my (what you call) “man –modelling- cave”…

P1010649.jpg

P1010650.jpg


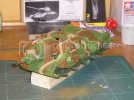
Some close ups: I can see deficiencies. Those photos are useful… mmm…
P1010651.jpg

P1010652.jpg

P1010653.jpg

P1010654.jpg

P1010655.jpg

P1010657.jpg

And these are the photos that I’ve by now, although I’ve advanced with the lower hull, bogies, etc, a lot…

I know that the model is not a winner, but I´m enjoying it a lot.

Cheers/saludos, guys.
 
Wow, Great work on this SU. I like your camo painting. You hit the pot! Have you checked that finnish StuG III, released by Tamiya ?
 
That is good work you have going on so far. The weathering should be fun eh?
 
@ Chiefpettyofficer: Thanks, mate, and yeah... in the end I saw in an finnish webpage the tri-color camo scheme of the "Sturmi"... and I said "why not???... I´m bored of watching mono-green SU122s or the always-white-with the big red circle ones... and this is a training model..." I tried to "make" the color the more equal possible to the colors that are shown in the Echelon positioning decal instruction sheet... and about the distribution of the camo shapes... well... I´ve had to do it by hand after a failure-due-to-cowardice using liquid mask... I´ve found that it is hard to do a tri-color scheme with hard edges just by hand... :p

@ noname: Yes, noname, it is imminent! but I think I will not (I will try not to) over-wheaterize it!

@ Quaralane: Thanks a lot mate! ;)

Cheers/saludos ;)
 
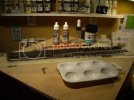
That's a lot of Vallejo white caps, did you do a lot of hand painting?

the camo looks great!!!
 
Hi guys,
here Sunday is coming to an end!!! :'( :'( :'(

But... :)

@ panzerace007: thanks a lot mate! :D Believe me I wasn´t sure how would be received that kind / attemp of camo by you, modelling veterans... Today I´ve painted in black the tracks, to begin their weathering... Modelkasten are great, but very, very fragile...

@ Eastrock: thanks my friend! :D It´s a surprise to me how well received has been that camo... it´s the first time I attemp it... and about the Vallejo paints... well I´ve been picking a few here and there, buying today twon, next weeks another two, etc... well, actually I use them either for painting figures or to finish the painting of a model... I must tell you that my wife also makes sometimes another kind of miniatures, and uses some very basic colors... I think they are great to build figures, or small details...

;)

Cheers/saludos
RG
 
Jelly said:
@ Chiefpettyofficer: Thanks, mate, and yeah... in the end I saw in an finnish webpage the tri-color camo scheme of the "Sturmi"... and I said "why not???... I´m bored of watching mono-green SU122s or the always-white-with the big red circle ones... and this is a training model..." I tried to "make" the color the more equal possible to the colors that are shown in the Echelon positioning decal instruction sheet... and about the distribution of the camo shapes... well... I´ve had to do it by hand after a failure-due-to-cowardice using liquid mask... I´ve found that it is hard to do a tri-color scheme with hard edges just by hand... :p

You DID it :) Great Idea!
Saludos Amigo!
 
Jelly said:
@ panzerace007: thanks a lot mate! :D Believe me I wasn´t sure how would be received that kind / attemp of camo by you, modelling veterans... Today I´ve painted in black the tracks, to begin their weathering... Modelkasten are great, but very, very fragile.

Jelly - Indeed those M.K. trax are Fragile. I'm making repairs to My set for th Elephant. I've noticed that They are susceptible to enamel washes . I've has a few pins eaten through ..... Same for you ?

Thanx for th kind words on being a Model Vet , there are Guys here that are far better , Thanx for th Nod ! :-[ - To kind of you !! I like th camo. It looks very Clean - meaning , If you hand painted it - Awesome Job - No brush strokes !!! If you Air brushed it - Great Job on the hard Edge feel !!!
 
panzerace007 said:
Jelly - Indeed those M.K. trax are Fragile. I'm making repairs to My set for th Elephant. I've noticed that They are susceptible to enamel washes . I've has a few pins eaten through ..... Same for you ?

Thanx for th kind words on being a Model Vet , there are Guys here that are far better , Thanx for th Nod ! :-[ - To kind of you !! I like th camo. It looks very Clean - meaning , If you hand painted it - Awesome Job - No brush strokes !!! If you Air brushed it - Great Job on the hard Edge feel !!!

Hola, Panzerace007 :)

Well, I TRIED initially to paint the camo using airbrush+liquid mask to get a "hard edge", but I felt unsecure (cowardice) after a small attemp... so I proceeded to do the camo by hand, old style (like shaving 80 years ago with razor blade, you know ;D).

I´ll tell you a small trick to make washes & so to Modelkasten tracks: use only acrylics, water, and you can use medic alcohol (ethanol) with the pigments, that´s what I´ve been told by a russian friend modeller: never use turpentine with Modelkasten.

I´ve had a few pins broken, but this is what I do to repair these elements:

1.- I cut the damaged pins.
2.- I drill completely the parts where the pins are supposed to fit, and part of the other track piece also.
3.- After having drilled these pieces, I take a very thin (diameter) piece of wire, and use it instead of the original pins.
4.- To secure the wire pieces, I apply a very, very small quantity of liquid mask (it contains latex) to the orifice of the track, so after applying this, it is impossible for the thin wire to fall out of the track.

It works very, very well, mate.

Cheers/salud.
 
JELLY,

It's all Good Bro !! Do what feels right for you !!

Notes taken on the M.K. trax !! I know now to always hit them with an Acrylic Wash & Pigments !

I'm lookin forward to seein' that Russian Beast finished !!
 
;D Nice job painting some of that with a Brush that is !!! I don't see paintbrush marks...

Impressive !

The Camo is Interesting !!! and I can see with all the Greebies you are Adding that you are
Going To Town with this Kit !!!

Awesome project you have there.... Keep pushing the Envelope ! we'll be watching !!!

Norm.

Out !
 
:D Good Evening, guys, :D

Hey mates: Panzerace007, SLW45, Schweinhund227, Kallie… I appreciate a lot your comments, feedback, and the time you´ve been watching my “calisthenic model”. Sincerely. :) :) :) :)

;D I would appreciate too if you also send me a case of bottles of “A” class Rum, and then I would love you more, a lot, guaranteed. :D

Panzerace, Schweinhund, here´s a pic of the two brushes I´ve used to paint the Buff and the Brown camo over the model (the green base color was a mixture of green and yellow, but that one was airbrushed, ok??). The paint was slightly diluted with water, so it flew easily. First I employed the small brush, and draw the contour of the shapes; then I took the “big” brush and filled with color the shapes. :p

IMGP1827.jpg


Now some advances with photos…

A.- Bogies and wheels have been glued to the hull. They´ve got a light weathering with pigments a higly diluted coat of Flat Earth airbrushed over them. Weathering stage of this part of the model NOT finished.

B.- Tracks have been / are being processed this way:
1.- Flat Black base (very flat, and very black it was… just a dark black, you now).
2.- Matt varnish coating, for protective purposes of the black base. Airbrushed.
3.- First wash: Vallejo red leather and Vallejo Brown (see photo for the references): they were diluted with water, and applied like a normal wash. First time I´ve tried an acrylic wash; easy, it has worked well.
4.- Second wash: Today have tried diluting pigments in water. Very little quantity of two pigments: MIG Old Rust and Andrea Natural Earth. It has worked well.

IMGP1829.jpg

IMGP1832.jpg

These track photos were taken before the pigment wash was applied. Today the weathering effect is more evident, but I don´t have the photo.

I suppose that the tracks will require two or three more washes of this kind to get the tracks ready for the next weathering stage. Process NOT finished.

C.- Decals applied to the model, following those steps:

1.- Upper hull airbrushed with diluted acrylic varnish: so this will allow the decals to fix to the model easily, and – in a later stage, nothing to do with decals- the appliying of “filter” more easy (I do not understand a hell of what I´m talking about, but I´ve done it).
2.- Then, Echelon “Sturmi” decals were applied. Easy, piece of cake.
3.- Next day, I airbrushed again satin varnish, but just over the decals and painted numbers, to protect them from the weathering agents.

D.- I took an adhesive mask that I had in stock, and painted a NICE “12” and a “Star” in the sides of the hull. Also small stars in the front and rear of the model.

Historical Note about the markings:
I can guarantee and certify to all of you that this is correctly historically inaccurate. I don´t know what the “12” means, but I like it. Maybe it means “12th platoon or so”. And the excuse for the star is… “hey, that was the Regimental Symbol of the H*rny Bl**mers Regiment back in 1.944, it was deployed near Absolut Vodka, my GrandPa told me !!! ”. :-X This kinda stuff works for my at 100%. Sometimes, of course. Not always, OK? ::)

E.- In 24 hrs I´ve applied two coatings of “filter”. I´ve readen that “it must be done”, but, again, sincerely: I do not understand a hell what I am doing ! ??? Of course, process NOT finished.

Personal quote: I´ve become in my life an expert in doing things that I do not understand a hell. End of personal quote. :-X ... ;D

There goes another salvo of photos:

IMGP1833.jpg

IMGP1835.jpg

IMGP1834.jpg

IMGP1836.jpg

IMGP1837.jpg


Positive Waves comments and jokes are welcome. :)

Cheers/salud. :D
RG
 
JELLY,

This thing is Awesome ! The Camo is Very Cool !! Great Job !! Bonus for Hand Painting th Camo !! Masterful Job !!

Where did you find th Finnish Swastika's ??
 
Great detailing techniques you got here Jelly!!! hand painted? totally awesome!!!
 

Latest posts

Back
Top