Necro's Deagostini Millennium Falcon Build

Quick update again:

763EE362-45C6-4E56-A51A-AC586672D800_zpselni2kh1.jpg
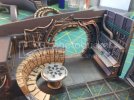
I'm pretty much finished painting the corridor wall seen here, and have started detailing the supports that stand in front of the giant horizontal pipes from the set. Just bits of plastic, and a little guitar wire. I hope to have these finished, painted, and permanently installed by tomorrow.

7A650D47-466F-43ED-A152-871873036F95_zpsryeghvm7.jpg
Now that the corridor PE rings are installed, I could finally finish off the pipework around this corridor ring. As well, I installed a little lighting into the computer station seen here. I am calling both the walls seen here DONE! ;D

BCC9BEDB-AF6A-4672-AF3D-23A5AD572CF7_zpsl5liuqnc.jpg
Cheers!
 
It's been a while since an update, and I have been busy on this build.
3d929ec25d_md.jpg
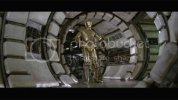
The corridor rings on the set have the beige pads in most spots. The odd one is missing, exposing wiring and pipework. I wanted to replicate this effect in my corridors.
558BB792-5DF9-48A1-B4F3-198C708CD8A6_zps6rmprajk.jpg
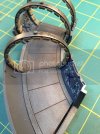
I chose to rip out these panels. Although there are a couple middle pad panels missing, they are right on the corridor seam and I didn't want to weaken the bond between the halves. The panels were drilled out, then snipped out.
30B2D3CE-4DB2-4ABC-8096-F5298BEEF829_zps0hklpri0.jpg
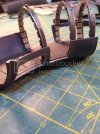
I used files and sanding sticks to clean up, flatten, and square off all the panel edges.
10B6348D-AAAA-4032-9E0C-4B2C0BFDD749_zpsdqjb4wha.jpg
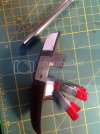
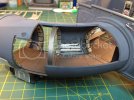
To give the panels depth, I want to recess the pipework in a box. These bits of plastic card glued to the outsides of the corridors will close up the panels I opened. The thickness of the corridor wall is pretty much exactly what looks like the correct panel depth, according to ref pics.
6BA47FB8-6F80-485E-88CE-A1D11DE842F7_zps30qrric4.jpg
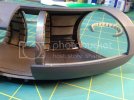
Greeblies! Lots of plastic rod, and bits from the spares bin.
65549B60-7437-4E24-B9B4-089A2DCB1C36_zpseb4f6bn5.jpg
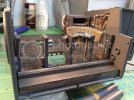
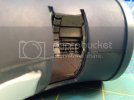
I sprayed the panels with the regular wall color, assembled the corridor, and painted some bits of the pipe with various acrylic washes. This was sealed in with some Future. At this point, I had another close look at the references and noticed the 90 degree thin brass or copper pipes on the set. I had to have them in mine too! This was all finished with some AK washes and grimes.
A9AFA56E-D3E1-4A15-BB64-9C6B9BB9B1B0_zpslcrvekrl.jpg
Man, I hope you'll be able to see it all when it's finished and installed in the body...
 
507328BB-97A8-4A21-8DB1-411C7811C037_zpsorzxgleo.jpg
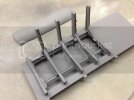
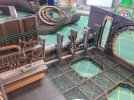
I painted up the wall supports on the aft cargo hold wall. They are clear-coated, awaiting a grime wash and general dirtying up.

3FA880D8-ADCB-4430-84ED-219F43856CE1_zpslrpvpphr.jpg
The forward wall in the kit is one giant blank. It's actually supposed to look more like this. The supports were cut out of some 1.5 mm card, glued to styrene sign card, then cut out to create that sandwich-look of each support. Of course, they had to be gerbil and detailed up.

351F92AE-CE8F-4B4C-B89C-EB1549B04CA2_zps957gqjku.jpg
A coat of Tamiya Dark Gray, the base color for all the wall parts of my cargo hold. Next is assembly of the big pipe on the back wall, then I'll close up the sides.
Cheers!
 
Wow! Incredible detailing you are doing here. Love the cockpit and the floor and all the little upgrades you are adding.
 

Latest posts

Back
Top