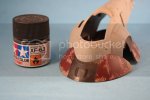
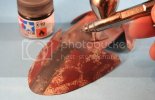
merseajohn's Fine Molds 1/144 Slave 1

Cheers clumsymodeler and nicholassagan. Started joining the fusalage together tonight. I used Revell's contacta glue with the idea that it would 'weld' the two halves together. It did work but I thought I was going to get away with no or hardly any filling and sanding ::) No such luck!
IMG_1616.jpg
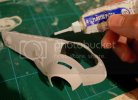
I used Vallejo's filler, it has a nice smooth finish when sanded.
IMG_1621.jpg
As you can see more work is needed :(
IMG_1620.jpg
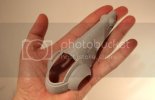
And this shows the size, its going to look good following the falcon ;)
 
You are kickin' butt on this one beautiful work so far!
 
I'm liking it. 8)

Great so far. Interesting that the putty you use almost looks like a glue with that nozzle. I take it it's quite thin.
 
Thanks Rentar 1, and Igard it's an 'acrylic resin plastic putty' so yeah comes out nice and thin and has a handy nozzle, although I think Vallejo have changed the tube design to the same as there paint pots, which arnt as nice to use.
 
i like the way this kit is taking shape, and i look forward to seeing more pictures and progress reports.

i have never seen that plastic putty you were using, who makes it and where do you get it from?
 
Nice post, I have quite a few of the fine molds kits but have yet to build one. Good to see detailed photos of the build up so I can see how well they go together.
 
Thanks for the kind words Jimi! as for you question...look up ;D if not our very own ECH stock it: http://www.elmcityhobbies.com/shop/index.php?main_page=product_info&cPath=55_56_58&products_id=155
Cheers Scott! I'm putting in the hard 'werk' lol, Cheers Glorfindel, and Grendels GET STARTING ON A FINE MOLDS KIT!! You dont know what your missing lol.
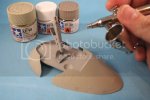
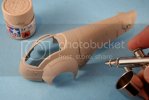
Anyways today's update, first off (after a bit of sanding that seem, still not perfect :mad: but you cant see right?.....) a coat of xf 55 deck tan sprayed with my trusty old badger 200-3 ;D.
IMG_1623.jpg
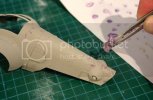
If you look at the refrence pics there's actually 3 types of paint on the body. So that was the reason for the deck tan, only a small amount can be seen though so I went ahead and got the maskol out. And back with the tweasers and sponge, make some practice 'splats' first though (and to take the majority of the liquid mask off) on a piece of scrap paper as you can see in the background.
IMG_1629.jpg
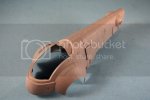
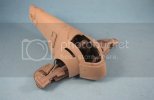
Heres a quick shot of it loosely dry fitted to get you an idea of how she will look :)
IMG_1634.jpg
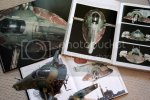
And here's some of the refrence I'm using! No excuses for not getting right lol, and there's the bigger brother hiding in all that aswell 8)
IMG_1637.jpg
As always comments welcome ;)
 
Forgive the noob question, but which book are you using for reference? Those are some fantastic photos in there. Also, good work on the fuselage! I'll have to give that sponge technique a try on a few builds in the future.

Can't wait to see how she'll look when complete, but until then I'm enjoying the journey probably as much as you are. Living vicariously! LOL!
 
Nice idea with the maskol, should make some good chipping.


When my current builds are done I can think of a fine molds kit. I have plenty in my stash!
 
Clumsymodeler, thats not a noob question at all! If you speak to most of the modelers here they will say that they spend half there time looking at/searching for refrence so allways ask, the books are: sculpting a galaxy/ star wars chronicles (original trilogy) and star wars archives (which also contains the indiana jones movies ;D) and glad your enjoying the journey lol. Grendels thanks for the comments!
Well another update. Got the base coat down on the 'skirt?' I used xf 2 xf 20 & xf 14 all equal parts. The paint chart calls out for Xf 14 (grey green) on its own but I thought that was a little to.....green.
IMG_1641.jpg
Next up was a nice thick layer of the awesome AK Interactive heavy chipping fluid. As you can see from the pic I sprayed it through my badger 200 airbrush and it went on like 'globuels' (I dont think I've ever had to write that word..globuel..I like it) but dont panick because it dries smooth.
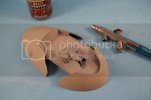
IMG_1642.jpg
Dont hang about though, once its dry get your next coat on (xf 9 hull red with some xf 57 Buff to lighten it up a bit). Then get a some water and a stiff brush, I used a citadel stippling brush but any stiff brush will do:
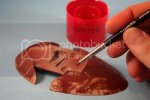
IMG_1648.jpg
Then the pink paint, I couldnt work out how I would achieve this easily with chipping paint fluids? So I went back to the trusty sponge! A mix of Vallejo Carmine red and white gave me the pink I needed. Using Vallejo paints to do this technique is great because they are thick and dont get absorbed by the sponge.
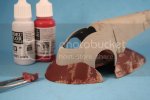
IMG_1655.jpg
I'm pretty happy with the way it turned out...its hard to get chipped paint looking right at that small scale. Anyway hope you like it and as allways comments welcome ;)
 
Once again, you're doing a tremendous job not only with the build (it'll look AMAZING when it come times to weather!) but the way you are documenting and sharing your process in invaluable. AND your build speed is nothing short of astounding! Keep it up!
 
Thanks Nicholasagan means alot. But I wont be going at this speed all the time I've got a busy weekend and week ahead at work :p Anyway last update of today.
Got the german grey down on the front and back walkway. I used the old maskol and sponge technique for the chipping (with medium grey as a base coat):
IMG_1658.jpg
And the chipping was too.....in your face so I toned it down with several layers of tmaiya smoke shot through the badger veloicity:
IMG_1659.jpg
Let us know what you think!
 
This build just gets better and better John.
Your attention to detail on the painting is fantastic, even more so knowing how small the kit is!
You're really making me fancy having a go at a sci fi kit!
 
:eek: I did not realize how tiny the 1/144 scale version is! I have the 1/72 and am terrified to do the weathering. Your wip has been very helpful in showing some great techniques for it! ;D
 
Nice, John! Some great technique on show once again, buddy. Learning alot from your posts. And wow! you're moving fast. 8)
 
I have a FM Jango Slave 1 (1/72) to make.....I think I'll modify it and make it as Boba's...Your painting techniques are really inspirational, thanks for your progress pics, they are very helpful

J
 

Latest posts

Back
Top