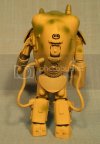
MaschinenKrieger Raptor build

the Baron

Ich bin ja, Herr, in Deiner Macht
Joined
May 12, 2009
Messages
1,961
Hi, all!
This is my entry in the Sci-Fi Fellowship Build at Agape, and I'd like to share it with y'all, too. For those of you who have seen it over there, I apologize for any repetitiveness, repetitiveness, I apologize for any repetitiveness...(here's where Ralph would hit Norton over the head and shout, "Will you get on with it?!")

Greetings, Earthlings! I come in peace! (there's a great sci-fi story right there ;) )

I got started on my entry this afternoon, a Raptor powered armor suit from the MaschinenKrieger series, created by Japanese artist/designer Kow Yokoyama.

Here is a shot of the box art:
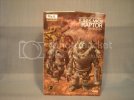
1-1MaKRaptorboxart.jpg

A little backstory, for those who might not be familiar with "MaschinenKrieger ZbV 3000" (hat tip, as Mark Levin says, to Wikipedia):

The franchise originally began as the science fiction series SF3D which ran as monthly installments in the Japanese hobby magazine Hobby Japan from 1982 to 1985. To develop the storyline, Kow Yokoyama collaborated with Hiroshi Ichimura as story editor and Kunitaka Imai as graphic designer. The three creators drew visual inspiration from their combined interest in World War I and World War II armor and aircraft, the American space program and films such as Star Wars, Blade Runner and the Australian film Mad Max 2: The Road Warrior. Inspired by the ILM model builders who worked on Star Wars, Yokoyama built the original models from numerous kits including armor, aircraft, and automobiles. He mostly concentrated on powered armor suits, but later included bipedal walking tanks and aircraft with anti-gravity systems.

There is a lot of confusion as to the details of the franchise's background story, partly due to the fact that it has never been officially or skillfully translated from its original Japanese language.

A nuclear World War IV in 2807 kills most of Earth's population and renders the planet uninhabitable. Fifty-two years after the war, a research team from an interstellar union called the Galactic Federation is sent to Earth and discovered that the planet's natural environment has restored itself. The Federation decides to repopulate the planet and sends over colonists to the surface. Cities and towns are eventually reformed over the next 20 years, but this growth attracts the attention of criminals, military deserters, and other lawless elements who wanted to hide on Earth away from the authorities. A few militias are active in protecting the colonists, but even they are not a match against the new interlopers.

Fearing civil unrest and the colonists forming their own government, the Federation gives the Strahl Democratic Republic (SDR) the right to govern the planet in the late 2870s. The SDR sends three police battalions and three Foreign Legion corps to Earth and uses heavy-handed tactics to restore order such as travel restrictions and hard labor camps - which creates resentment amongst the colonists. The colonists create the Earth Independent Provisional Government and declare independence from the SDR. The SDR immediately establishes a puppet government and attempts to quell the uprising. The wealthy Colonists hire mercenaries who are descendants of WWIV veterans to form the Independent Mercenary Army (IMA), which is bolstered by the presence of SDR Foreign Legion defectors. They attack the SDR forces and the battle to control Earth begins in 2882.

Over the next four years, the SDR and IMA fight each other at several locations worldwide while developing new technology along the way. The war turns up a notch in June 2883 when the IMA deploys a new weapon - the Armored Fighting Suit powered armor - to devastating effect. The SDR eventually builds their own AFS units.

In the last SF3D installment published in the December 1986 issue of Hobby Japan, the IMA successfully defeats the new SDR König Krote unmanned command-and-control mecha using a computer virus that also creates a new artificial intelligence system on the moon.

So, there you have it. A sci-fi story with so many of the elements the Japanese love--aftermath of a nuclear war, one world government, plucky rebels fighting that government, lots of mechanized combat vehicles and gear. In fact, the only thing missing is giant robots and huge creatures trampling Honshu to smithereens. The story and the concept share themes and details that crop up in a lot of animes, too.

I like this kind of science fiction, though. I like stories, and further, movies or series, that look real, that look lived-in and gritty, because that's how life is. Much as I liked the original Star Trek, its 'verse was too sterile. Give me Han Solo and the Millenium Falcon, Spike, Jet and the Be-Bop, or Malcolm Reynolds and Serenity, over one-piece polyester unitards and ships that look like the lounge at some 70s-era Hilton. But I digress...

OK, I got started, which is to say, I have given the sprues a bath in warm water and a teaspoon of Super Clean, to remove any mold release compounds and other oils or grease. They are literally squeaky-clean, and drying. Here are some shots of the kit:
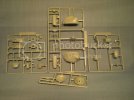
1-2_Raptor_sprue1.jpg

The kit parts are nicely detailed, which is a hallmark of kits from the series, regardless of the manufacturer, or so I have read.
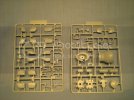
1-3_Raptor_sprue2.jpg

It scales to 1/20, more or less. It also combines ordnance and a figure, even if it's just the pilot's head sticking out of the suit.

There is also a sprue of soft plastic--think Airfix figures--comprising the hydraulic and air hoses, and joint seals, of the suit:
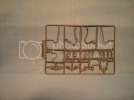
1-4_Raptor_sprue3.jpg

There is also a small clear fret, with a single part. Not sure yet if it's a sight for a weapons system, or part of a control panel.

Here is the cover of the instruction pamphlet:
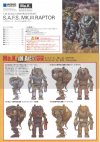
1-5_Raptor_instr_1.jpg

It's all in Japanese, and all I know is what I learned from "Shogun" ("Iyei! Wakarimasen, Toranaga-sama!"), and from Blue Oyster Cult, so I can only follow the exploded drawings, and try to match colors as closely as I can. The front helps with placing the markings, while the back:
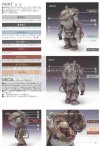
1-6_Raptor_instr_2.jpg

gives more of an idea of the paint schemes. If need be, there's a Japanese restaurant around the corner from me (Tokyo-Do), and I'll take the sheet there and ask for a translation.

Finally, here are the markings:
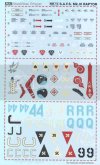
1-7_Raptor_decals.jpg

From what I can tell, the top part of the sheet, in this picture, contains technical stencils, while the bottom two-thirds are unit markings. The decals are printed very nicely and look to be in register--my scan may be off, though, my scanner is acting up.

So, first step is done. While the sprues are drying, I'm going to review the instructions and look for sub-assemblies. I suspect that I'll need to do a lot of detailing in sub-assemblies, and then put them together for the final assembly.

Also, I'm thinking of using more of a dark yellow Panzer scheme, rather than either of the color schemes shown in the samples. Don't tell anyone at maschinenkrueger.com--they don't like deviation from Yokoyama's original schemes, you can't call it a MaK build at that point, only "MaK-like". And you think our rivet-counters are bad!

Anyway, comments/questions are welcome, as always, and thanks for looking!

YbiC
Brad
 
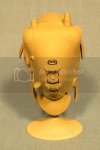
Hi, all, here's an update on my Raptor build. As a sometime-builder of aircraft, I started with the office, and as a sometime-figure painter, that meant--the pilot.

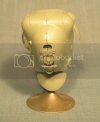
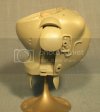
The pilot's face is nicely sculpted, and in 1/20 scale, his head is large enough to show a lot of detail. Here is a shot of the head:

2-1_Pilots_head.jpg

along with a piece that fits on the peg on his forehead. I think this other piece is supposed to be a virtual reality targeting visor of some kind (or an OptiVisor).

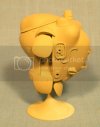
Wave did a great job engineering the molds, because the seams are along the top of his helment and the chin piece, but not on his face:

2-2_Pilots_head.jpg

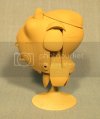
Here are the pieces, after cleanup on the seams:

2-3_Pilots_head.jpg

and

2-4_Pilots_head.jpg

The plastic is a little soft. I used a piece of maybe 200-grit sandpaper in the first pass, followed by a piece of what was originally 400-grit but has since been worn down to nothing. I ended up with a nice, clean surface.

Now, since the pilot's face is so nicely detailed, I don't want to attach the visor. It would obscure most of his face. I plan on installing it as if he just lifted it. So, I removed the post on his forehead:

2-5_Pilots_head.jpg

I used a fine razor saw to remove most of the post, and then followed with some careful sanding and filing, and I'm happy with the result. I'm thinking now on how to proceed to paint the face, with a mix of acrylics and oils, and do it justice.

As always, comments/criticisms/questions are welcome, and thanks for looking!

YbiC
Brad
 
Hi, all, here's a little update on my Raptor...

I got the torso assembled. Assembly went rather quickly, maybe an hour, hour and a half, all told. There are subassemblies to the main assembly, that made me think at first that the kit is a little over-engineered. For example, between the front and back halves of the carapace (I thought of a turtle in his shell! :D ), there are side panels with some smaller pieces that have to be added. These side panels attach to hinges at the bottom of the torso, and then they are swung to an upright position. These side panels include attachment points for the arms, but they also form part of the interior structure that holds the two halves of the back together. Wave could have used really long locating pins, but the mold would have been unnecessarily complicated. Wave did design the kit with locating pins on the inside, but they're made of several parts to span the 2 1/2 " or so from one side to the other.

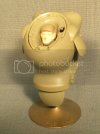
OK, so here are some shots. First, head-on:

3-1_Torso.jpg

I stuck the pilot's head in, just to get an idea of what this will look like when finished. The pilot only has a coat of basic flesh laid on, by the way. I have much more work to do on him.

The front of the fighting suit is relatively plain, and smooth, offering a curved surface as defense against projectiles. You'd have to hit this guy head-on, to get a round to penetrate. Better to hit him from the side:

3-2_Torso.jpg

The recessed area under the shoulder plate is the side panel I described above. The arm attaches to a pin beneath that shoulder plate. The plate itself is not glued in place.

Here is a shot of the left side:

3-4_Torso.jpg

A little more external detail on this side. Please note, too, the seams above the shoulder, at the "collar" of the head opening. The "swallow's nests" above the shoulder were inserts, and they leave seams that have to be cleaned up. Not too bad, a little putty and some careful sanding will take care of it. They almost fit without any "step".

Now, here's a shot of the back, and this is the only real disappointment so far:

3-3_Torso.jpg

The two halves didn't quite meet, leaving a little bit of a gap. I say I'm disappointed, because so far, everything else has fit nearly flawlessly. I don't think the problem was with the bits that have to be captured between the halves, because it didn't come out in test-fitting, but then again, when lining everything up, something may have slipped. In any case, a little putty and some careful sanding will fill this, too. I might use some of the kit sprue, too. I have to be careful, because there is a scribed panel at the top of the hunchback that is right in the path of the sanding.

Here's one more shot from the front:

3-5_Torso.jpg

The seam work is minor, and not enough to make me enjoy the build less. My buddy Scott Hershbell, who gave me the kit, said that it literally falls together quickly, and he's right. I could have knocked this together in an afternoon, I think.

I started on the arms and the cap hatch after I took these photos, so I'll post those in the next installment.

As always, criticisms/comments/questions are welcome, and thanks for looking!

YbiC
Brad
 
Hi, all, here's the next update on my Raptor!

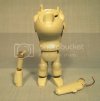
I've got the suit assembled, up to what I'm calling 80%. Here is a shot from the front:

4-1_nearly_complete.jpg

We see the front of the suit, flanked by the right and left arms. On the right arm (at the left of the pic), you can see the peg that fits into a piece at the shoulder joint. It's tight enough to stay put, that I'm not going to use glue to attach it. This is an example of some of the good engineering that went into the kit. It will make painting easier.

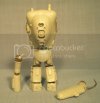
Here is a shot from the rear,

4-2_nearly_complete.jpg

and here you can see the one real downside to the kit--albeit a minor one--and that's the seams. In this shot, you can see that I've filled the rather large gap between the two halves of the back. There are more seams--on the legs, on the arms, on the feet--and it will take a little time to correct them. I spent some time this morning with putty (on the feet and legs) and Mr Surfacer 1000 (on the smaller seams on the arms and the weapon), tonight, I'll resume, with more putty on all seams. I'm finding Mr Surfacer to be more of a pain to use than putty. It takes multiple passes to fill seams, whereas using my homemade Mr Surface--Squadron putty thinned with acetone--I can do it in one pass. Still, it's not so bad. I've built other kits where the fit was really poor. All told, I'll probably spend an hour to 90 minutes on the seams. It's worth it, to get a good finish.

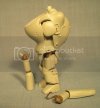
Here's a final photo in this installment, from the left side:

4-4_nearly_complete.jpg

Again, despite how much I've gretzed so far about the seams, this is a nice kit, and I recommend it to anyone. All of the joints consist of pins with a ball that fits into a socket made of softer plastic--kind of like the plastic Airfix uses for its sets of figures. So it's easy to assemble the limbs after painting.

So, as always, comments/criticism/questions are welcome, and thanks for looking!

YbiC
Brad
 
There! Now we're in synch between the two forums. Apologies for any weird carriage returns in the text; I use Notepad to write up each post now, and I have Word Wrap on be default. Some webpages ignore it, others don't.
 
Great start Baron! The little clear piece is for the hatch lens if you did not already figure it out ;)
Ma.K on!
 
Thanks, Maknifiso! Yes, that piece is installed in the hatch (which I've neglected to photograph, have to take a pic of that). I have to mask it so I can get started painting it. I've also thought about painting it gloss black, but I think leaving it clear will preserve an effect of depth that black on the surface won't have.

It is a fun kit, and I'm looking forward to getting more in the series, as well as the figure sets.
 
Thanks, guys! I primed the kit last night and am hoping to get time this weekend to apply my color scheme. I'll report on that, in my next post.

I am enjoying this kit thoroughly, and I can see getting several for a diorama.
 
Hi, all, here's a quick update from this weekend.

I didn't get as much time as I had hoped, but enough to get a first pass done towards the color scheme I have planned for my Raptor.

The box art and instructions show a couple of examples, one in a sort of blue-gray with green patches, and the others in darker to medium green camo schemes. My thought is to do a dark yellow scheme, with dark green patches. So, I stopped at HobbyTown and stocked up:

5-1_color_scheme.jpg

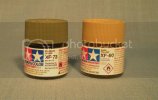
Tamiya's acrylic XF-60 Dark Yellow and XF-73 Dark Green. I think I was thinking of a sort of Panzer scheme, when I came up with this. After priming with my usual--WalMart's automotive primer--and allowing the primer to cure overnight (and in my kitchen, which is warmer and drier than the cellar), I hit the interior with flat white:

5-2_Cockpit_in_white.jpg

Here's where I realized a failure to plan. You can see the armature that holds the lid/hatch in place. Well, Ol' Knucklehead here glued that armature into its place in the "collar". That means that I can't place the hatch in the closed position over the opening for painting purposes. I'll have to mask the opening as I finish the exterior. I have also thought of another workaround, but I'll keep that a secret till the next installment.

Something else that I learned in the meantime, since spending some time browsing finished Raptor builds on the Web, is that the usual color for the interior seems to be gray. That's probably based on Kow Yokoyama's original drawings, I don't know. I thought white would be good to set off the colors of the padding on the inside of the hatch and around the interior, and I'm sticking with it. It's sci-fi, after all. The padding, I'll do in browns and red browns, to look like leather.

OK, so on to the next pass, and that's the dark yellow. I fired up the airbrush last night and did a first pass with
the XF-60. I thinned it about 50-50 with Tamiya's acrylic thinner--my first time using their thinner, instead of water or isopropyl. I wanted to see what kind of results I'd get, using Tamiya's products consistently. I use a Paasche VL, and sprayed at about 40 psi. It went on well. Any blotching you see is from my own inexperience in using the brush. The area around the "collar", as I like to call it, I'll hit in another pass, once I've masked the opening. I'm getting more comfortable with the airbrush, and I really like the control that I have. It's still a pain to field-strip, clean and reassemble, and I damaged the needle, in the meantime. Fortunately, I have two spares, so I'm able to continue.

Here's a shot of the back of the suit:

5-4_Dark_yellow.jpg

The putty work paid off. The major seams disappeared, and those that remain look natural, like you'd imagine where sems should be on a 1:1 example.

I'll do another session tonight, so I hope to report another installment tomorrow.

As always, comments/criticisms/questions are welcome, and thanks for looking!

YbiC
Brad
 
Hi, all, here's my latest installment of my Mak Raptor build. Today's word is "camoflage"!

First, a little update on some unresolved issues from the last installment.

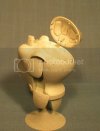
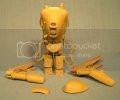
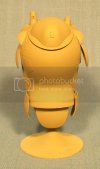
I noted previously that I shouldn't have glued in the armature that opens the hatch, because then I couldn't put the hatch in place for painting. Masking was going to be a pain, so I came up with a much simpler solution. I cut the armature off at the base of the post, and drilled holes for a pin, to re-attach it at the end of the build. So, I was able to close the hatch while I laid down the main colors. Then I did a second pass with the dark yellow, evening out the color. Here are views from all sides:

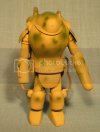
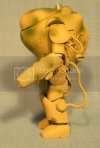
5-5_Dark_yellow.jpg


5-6_Dark_yellow.jpg


5-7_Dark_yellow.jpg


5-8_Dark_yellow.jpg

Seeing the suit on a stand reminds me of displays of samurai armor, by the way.

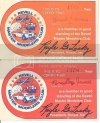
So, now I was ready to apply the camo pattern I pictured. And my idea was to reach back to a technique for templates, that I remember from the old Revell Master Modeler's Club--very proud to have been a member, with a card signed by Royale Lasky herself:

MasterModelerClubcards74-75.jpg

My T-shirt with the club iron-on is long gone, though, as are the newsletters, which I really wish I still had!

Anyway, there was a build in one issue, of the old Revell Me-109 Gustav, I think, and to paint the Luftwaffe's blotchy camoflage, the modeler painted the ground color, then used a 3-by-5 card with holes punched in it as a template (anyone remember 3x5 cards? Anyone remember writing a term paper using them?). So I took 2 cards, and made 2 templates:

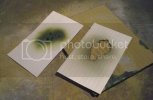
5-14_templates.jpg

The one on the right was for the top of the suit, which I pictured as a more-or-less continuous blotch, and the one on the left was for small blotches, which I pictured to myself as emanating or radiating from the top, gradually dissipating as we get further down on the suit. I thought it might be the kind of camo scheme we'd see in a wooded environment, maybe hastily applied as the soldier's unit was redeployed from another area.

So the process from the MMC newsletter was to hold the template above the surface, and airbrush paint through it. And here are the results. First, from the top:

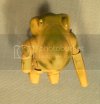
5-13_Green_blotches.jpg

I had to change the green paint, after the first pass. The dark green is actually a Japanese Self-Defense Force color, and it didn't paint as dark as I expected. I had only mixed a cupfull, so once that was done, I reached into my bag of tricks and pulled out my jar of Tamiya green, XF-7, I think? Anyway, it's darker and showed up better against the dark yellow. I applied it is quick strokes over the template, checking every so often and building up the color. I was pleased with the result. Next, it was on to the blotches on the body:

5-9_Green_blotches.jpg

I found that this template wasn't working so well. I had to hold it close to the surface, and give a good burst with the brush. Sometimes it worked, other times, I held the template too high. So it occurred to me to step off the edge, take the template away, and try just blowing bursts from the brush. Foolhardy, I know, because if the nozzle setting wasn't right--and I'm a novice with the airbrush, remember--it would mean messing up the yellow layer and having to redo that. But I closed my eyes, got off a quick prayer, and eh voila! It worked!

5-10_Green_blotches.jpg

Once I saw that I could do it, it was easy to apply the rest. Then the hard part was not to overdo it.

5-11_Green_blotches.jpg

I am very happy with the results. It looks pretty much as I pictured it, except perhaps that I did picture a slightly darker shade of green even than this one. But that's no matter. I am happy with the way this looks, and so now, it's time for weathering. I stuck the limbs in place for the photos, but since they just plug in, I can remove them and re-attach them at will. I will need to take them off to paint the coverings over the joints, and it'll be easier to paint them when they're detached, anyway.

Next time, I hope to have progress on the weathering, and on the soldier's face.

As always, criticism/comments/questions are welcome, and thanks for looking!

YbiC
Brad
 
Great job with that camo effect, Baron. It looks fantastic. Nice to see you trusted your instincts with the airbrush and they were correct. :)
 
Cave_Dweller said:
This looks like a really fun kit. I think I still see a few mold lines on the backs of his feet though :p

Heh, heh, as Pee-Wee Herman said, "I meant to do that!" I left some seams, figuring that they'd be there on the "real" thing. Some, I probably should have left, looking at builds elsewhere. The muzzle piece of the weapon, for example, seems to be something that most MaK modelers leave with a distinct seam.

Started some pin washes yesterday morning, in the finer seams and relief detail, but no pictures yet.
 
Grendels said:
Nice work on the Camo, and great idea to use those cards.

Thanks, Grendels! I've often thought of trying that technique, so I was glad of the opportunity.

Now, if I could only find all my old copies of the Revell newsletter....
 

Latest posts

Back
Top