Teddz
New Member
- Joined
- Sep 11, 2015
- Messages
- 6
Hi everyone,
While looking for some info on my build of the Bus, I stumbled upon a thread in this forum and figured I'd join since I have a serious issue with scale models.
I started this build in April of 2014 and I'm still at it. Life has gotten in the way a bunch of times and other obligations have kept me from working on her like I want to, plus a lot of the build process is a first for me in that I've never done any kitbashing, worked with fiber optics or made my own circuit boards. So there was a bit of a learning curve involved in making the things I wanted.
Started with the 2 1/144 C-17 Globemaster III's from Revel Germany, a bunch of styrene and a LOT of screen shots. My plan is to get her as close to the screen shown aircraft as possible.
I started with the engines because I thought they would be the easiest...
If there's one thing that I can't stand is those ejector pin artifacts. They bug me to no end. So even though these won't be seen ever again, they had to go.
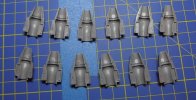
Never to be seen, but needs attention.
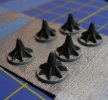
and while I have the airbrush out, might as well paint the main fan blades... Aluminum base with a diluted flat black overlay.
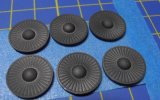
Onto the main body of the engines, in all each engine has an additional 18 pieces of styrene. That's an additional 108 pieces added to all 6.
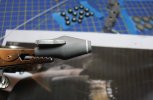
Difference between the kit engine and the modifications needed for accuracy... that bottom fin needed to be removed and 2 fins needed to be added to the sides. Hand shaped itty bitty styrene pieces.
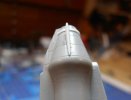
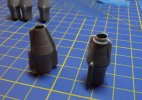
Now the exhaust part of the engine needed some detailing.. I had to stop drinking coffee for a few days prior to this because of the shakes I get with the strong coffee out here.
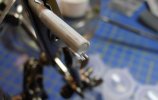
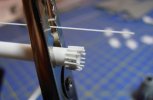
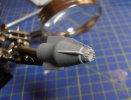
Base coat on the engines and although not 100%, they're closer than before.
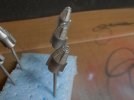
Since plans called for stretching the fuselage, I had to stretch the cargo area too - floor and walls.
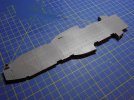
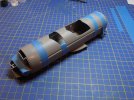
Sponson also needed modification because the screen aircraft has equal length sponsons.
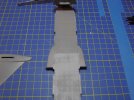
A quick dry fit to see how it's coming along... looks really long, but it's actually right on the money.
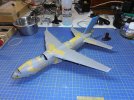
Since this bird was to have lights, time to design and fabricate the circuit board with the LED's. There are the 2 nav lights (red/green), 2 bright whites for wheel wells, landing lights & Coulson's office, 1 Green LED on a dimmer for the cockpit and front section and 1 bright white strobe for the underside. The cockpit and strobe lights are controlled by 555 timer chips. The rest of the LED's are powered normally via 12v. In all, 23 points of light.
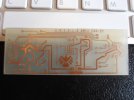
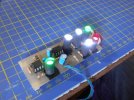
I used the fuselage from both kits to complete the stretch.
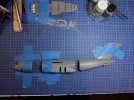
Initial cutting of the aft wings (in the main wings you can see the fiber optic strands coiled.
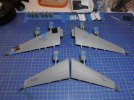
A fine tuning of the cut of the aft wing to follow the contour of the fuselage.
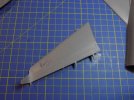
Quick test
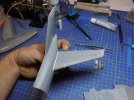
Secondary dry fit to ensure the engines were equidistant from the fuselage and lined up.
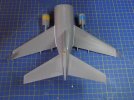
Here you can also see more fiber optics coiled up that were for the Nav lights... red on top and green on the bottom of the horizontal stabilizers.
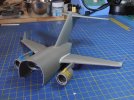
Once the circuit board was installed on the cargo deck, I needed to modify the cockpit. I removed the 2 seats behind the pilot and built up the closets.
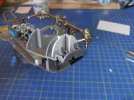
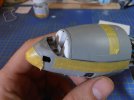
Added some details...
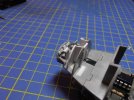
You can't see the details too well after painting, but I know they're there and that's enough to quiet the voices in my head.
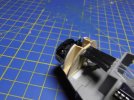
Prior to attaching the other 1/2
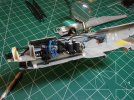
Since this plane is going to sit on the ground (instead of in-flight) I needed a way to get the 12V to the board inside. Cue the main landing gear.
Assembled and some minor detailing to the nose gear (those black stripes)
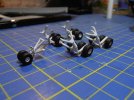
Used leftover parts from the 2nd kit to mock up how the power will be fed. Once installed on the main aircraft and set on the ground, the wires will be completely hidden.
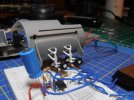
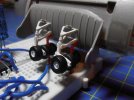
installed on main model
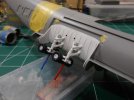
each wheel well gets 2 fiber optic strands
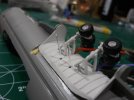
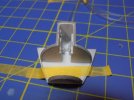
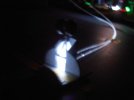
Cargo area closed up and time to start putting it together.
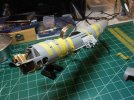
Aft section glued on and connecting the fiber optics
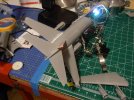
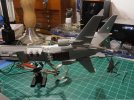
Modifying the sponson on the outside. I used the recessed panel lines as a cutting guide.
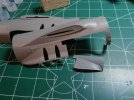
looks sloppy, but it cleans up.
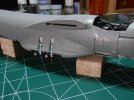
The bottom part... before
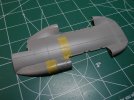
After... that little overhang into the wheel well was removed
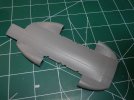
Starting to look like something now.
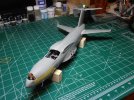
Time to get the forward section correct... starting with the hump for Coulson's office. Chopped off the top part just behind the canopy arch.
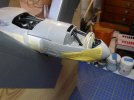
put in some styrene spacers on either side, made a decent sized cut in the top and heat formed it. Looks ugly but won't for long.
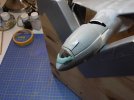
Once I was happy with the height and shape, I needed to cut out Coulson's skylight. This took me all day because I didn't have another forward section to cut if this got FUBAR'd.
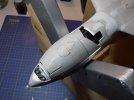
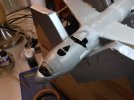
and needed a lip for the frosted "glass" to sit
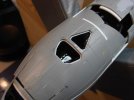
I can see the chip inside and that's no bueno.
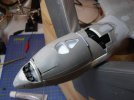
And since Coulson doesn't work in the dark... 3 fiber optic strands added.. 2 on either side and one in the front
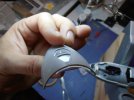
With that done, time to close up the gaps.
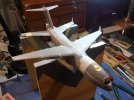
The styrene was too flat aft of Coulson's office so some milliput helped bring the shape to a more acceptable level.
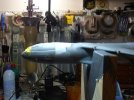
Better.
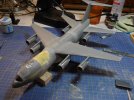
with the lights on
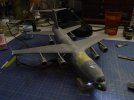
The engines still needed a bit of work... more styrene.
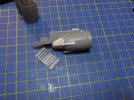
Turning on the lights is accomplished by a billet aluminum touch sensitive (with automatic shut-off) SHIELD emblem I designed and built that will be embedded in the base.
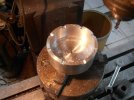
T4 Billet on my lathe. Lots of it went to waste, but this chunk was sitting around for 10 years. Time to use it or have it sit around another decade.
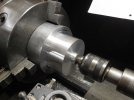
Cutting out the notches on the mill
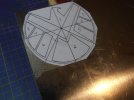
Emblem printed out and placed on 4mm aluminum plate. These were all had cut and beveled.
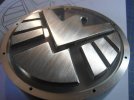
all assembled with the M2 stainless steel allen heads
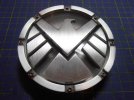
lights on
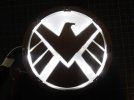
That's pretty much where she's at now. I'm in the process of putting back all the details and panel lines that were either sanded off or filled in.
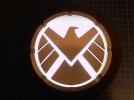
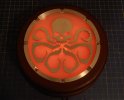
There was enough demand for the emblem I made, that I made another stand-alone version in it's own wooden base that's a bit larger (4.5" instead of 3.5") and made a HYDRA version.
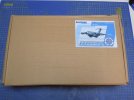
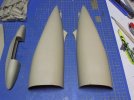
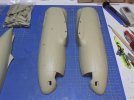
and because I don't know when to stop... here's the next version of the BUS that's going to start soon... in 1/72 scale. This one may become a limited run kit with a lot of detail.
Thanks for looking
While looking for some info on my build of the Bus, I stumbled upon a thread in this forum and figured I'd join since I have a serious issue with scale models.
I started this build in April of 2014 and I'm still at it. Life has gotten in the way a bunch of times and other obligations have kept me from working on her like I want to, plus a lot of the build process is a first for me in that I've never done any kitbashing, worked with fiber optics or made my own circuit boards. So there was a bit of a learning curve involved in making the things I wanted.
Started with the 2 1/144 C-17 Globemaster III's from Revel Germany, a bunch of styrene and a LOT of screen shots. My plan is to get her as close to the screen shown aircraft as possible.
I started with the engines because I thought they would be the easiest...
If there's one thing that I can't stand is those ejector pin artifacts. They bug me to no end. So even though these won't be seen ever again, they had to go.

Never to be seen, but needs attention.

and while I have the airbrush out, might as well paint the main fan blades... Aluminum base with a diluted flat black overlay.

Onto the main body of the engines, in all each engine has an additional 18 pieces of styrene. That's an additional 108 pieces added to all 6.

Difference between the kit engine and the modifications needed for accuracy... that bottom fin needed to be removed and 2 fins needed to be added to the sides. Hand shaped itty bitty styrene pieces.


Now the exhaust part of the engine needed some detailing.. I had to stop drinking coffee for a few days prior to this because of the shakes I get with the strong coffee out here.


Base coat on the engines and although not 100%, they're closer than before.

Since plans called for stretching the fuselage, I had to stretch the cargo area too - floor and walls.


Sponson also needed modification because the screen aircraft has equal length sponsons.

A quick dry fit to see how it's coming along... looks really long, but it's actually right on the money.

Since this bird was to have lights, time to design and fabricate the circuit board with the LED's. There are the 2 nav lights (red/green), 2 bright whites for wheel wells, landing lights & Coulson's office, 1 Green LED on a dimmer for the cockpit and front section and 1 bright white strobe for the underside. The cockpit and strobe lights are controlled by 555 timer chips. The rest of the LED's are powered normally via 12v. In all, 23 points of light.


I used the fuselage from both kits to complete the stretch.

Initial cutting of the aft wings (in the main wings you can see the fiber optic strands coiled.

A fine tuning of the cut of the aft wing to follow the contour of the fuselage.

Quick test

Secondary dry fit to ensure the engines were equidistant from the fuselage and lined up.

Here you can also see more fiber optics coiled up that were for the Nav lights... red on top and green on the bottom of the horizontal stabilizers.

Once the circuit board was installed on the cargo deck, I needed to modify the cockpit. I removed the 2 seats behind the pilot and built up the closets.


Added some details...

You can't see the details too well after painting, but I know they're there and that's enough to quiet the voices in my head.

Prior to attaching the other 1/2

Since this plane is going to sit on the ground (instead of in-flight) I needed a way to get the 12V to the board inside. Cue the main landing gear.
Assembled and some minor detailing to the nose gear (those black stripes)

Used leftover parts from the 2nd kit to mock up how the power will be fed. Once installed on the main aircraft and set on the ground, the wires will be completely hidden.


installed on main model

each wheel well gets 2 fiber optic strands


Cargo area closed up and time to start putting it together.

Aft section glued on and connecting the fiber optics


Modifying the sponson on the outside. I used the recessed panel lines as a cutting guide.

looks sloppy, but it cleans up.

The bottom part... before

After... that little overhang into the wheel well was removed

Starting to look like something now.

Time to get the forward section correct... starting with the hump for Coulson's office. Chopped off the top part just behind the canopy arch.

put in some styrene spacers on either side, made a decent sized cut in the top and heat formed it. Looks ugly but won't for long.

Once I was happy with the height and shape, I needed to cut out Coulson's skylight. This took me all day because I didn't have another forward section to cut if this got FUBAR'd.


and needed a lip for the frosted "glass" to sit

I can see the chip inside and that's no bueno.

And since Coulson doesn't work in the dark... 3 fiber optic strands added.. 2 on either side and one in the front

With that done, time to close up the gaps.

The styrene was too flat aft of Coulson's office so some milliput helped bring the shape to a more acceptable level.

Better.

with the lights on

The engines still needed a bit of work... more styrene.

Turning on the lights is accomplished by a billet aluminum touch sensitive (with automatic shut-off) SHIELD emblem I designed and built that will be embedded in the base.
T4 Billet on my lathe. Lots of it went to waste, but this chunk was sitting around for 10 years. Time to use it or have it sit around another decade.

Cutting out the notches on the mill

Emblem printed out and placed on 4mm aluminum plate. These were all had cut and beveled.


all assembled with the M2 stainless steel allen heads

lights on

That's pretty much where she's at now. I'm in the process of putting back all the details and panel lines that were either sanded off or filled in.
There was enough demand for the emblem I made, that I made another stand-alone version in it's own wooden base that's a bit larger (4.5" instead of 3.5") and made a HYDRA version.


and because I don't know when to stop... here's the next version of the BUS that's going to start soon... in 1/72 scale. This one may become a limited run kit with a lot of detail.


Thanks for looking

