You are using an out of date browser. It may not display this or other websites correctly.
You should upgrade or use an alternative browser.
You should upgrade or use an alternative browser.
Ma. K 1/35 Lunadiver Stingray
- Thread starter Cave_Dweller
- Start date
java
No disintegrations
- Joined
- May 15, 2010
- Messages
- 909
I haven't see one of these for a while,looking forward to seeing it's progress.
Cave_Dweller
New Member
- Joined
- Mar 18, 2011
- Messages
- 812
The progress is going fairly fast on this. It's not like a groberhund or powered armor with tons of steps to complete for each sub assembly. This is actually a fairly straightforward kit that is relatively easy to assemble!
Only a few sub assemblies, and most of those merge into a few major pieces that can be airbrushed at once.
But I still have a ton of seam filling to do on this one. Also the pilot its quite a serious model in and of itself. And sadly most of this exquisite detail will never be seen by anyone, as a result of the way the cockpit is built.
You'd basically have to position the cockpit completely open to cover the detail built into the pilot and cockpit. And then you would need to do a serious amount of scratch building to fill in the blanks.
I think, however, this model would look best with the canopy closed. Just glue it down and forget about the details hidden within.
I dunno, what do you guys think? Is there any reason to paint up a very detailed pilot and pilot seat, that no one will ever see? This isn't like a jet or airplane with a transparent canopy that begs a detailed interior. There is almost no reason to paint the pilot unless you plan on a diorama, with this model IMO.
There are two pilot models provided to accommodate this, with one being completely enclosed in a space suit, positioned as he would be flying the ship, and one peeking out over the hatch to the ship, helmet off, saying something to some hidden groundcrew, in a pre-flight kind of dioramic scenario.
The model looks awesome any way you bake it, but you could do a lot of things with this pilot and dioramas. But within the parameters of this competition, I'm going for a stock build.
Edit: Should also note, that while the sub-assemblies are few, there are many small crevices and bits that the airbrush or primer won't easily reach, and will in all likelihood require some precision brush painting to cover completely.
the Baron
Ich bin ja, Herr, in Deiner Macht
- Joined
- May 12, 2009
- Messages
- 1,961
Build it closed, and save the figures for your next MaK 1/35 build. Do another Stingray, for example, maybe on a landing dock, or get some of the 1/35 powered suit kits, or hover tanks.
MrT
New Member
- Joined
- Apr 25, 2011
- Messages
- 1,490
Stay at it! It's looking good.
Terry
Terry
Cave_Dweller
New Member
- Joined
- Mar 18, 2011
- Messages
- 812
the Baron said:Build it closed, and save the figures for your next MaK 1/35 build. Do another Stingray, for example, maybe on a landing dock, or get some of the 1/35 powered suit kits, or hover tanks.
Yeah I think that's the way to go, really. It will actually speed things up quite a bit and I'm rather eager to start painting this bad boy. Still need to solidify a paint scheme and I wanted to do a little research on how spacecraft actually 'weather.'
Little paint chips and dings here and there, maybe some impact marks, but I don't envision oxidation, as this would most likely be made out of aluminum, titanium or some kind of composite material, and only exposed to oxygen while in the docking back of a space station or something. Doesn't strike me as a craft ever intented for atmospheric flight.
Maybe some very subtle fluid leakages, and streaking in the front (from flying through dust clouds in space?), some exhaust streaking on the back and chipped paint to reveal medium gray primer.
I wonder what the Voyager probes look like now. V'ger!
CheesyGrin
New Member
- Joined
- Sep 1, 2012
- Messages
- 152
Looking good! The GroberHund Altair is my first MaK kit. I'm hooked! Looking forward to seeing this one completed. Great work.
the Baron
Ich bin ja, Herr, in Deiner Macht
- Joined
- May 12, 2009
- Messages
- 1,961
Cave_Dweller said:the Baron said:Build it closed, and save the figures for your next MaK 1/35 build. Do another Stingray, for example, maybe on a landing dock, or get some of the 1/35 powered suit kits, or hover tanks.
Yeah I think that's the way to go, really. It will actually speed things up quite a bit and I'm rather eager to start painting this bad boy. Still need to solidify a paint scheme and I wanted to do a little research on how spacecraft actually 'weather.'
Little paint chips and dings here and there, maybe some impact marks, but I don't envision oxidation, as this would most likely be made out of aluminum, titanium or some kind of composite material, and only exposed to oxygen while in the docking back of a space station or something. Doesn't strike me as a craft ever intented for atmospheric flight.
Maybe some very subtle fluid leakages, and streaking in the front (from flying through dust clouds in space?), some exhaust streaking on the back and chipped paint to reveal medium gray primer.
I wonder what the Voyager probes look like now. V'ger!
Don't forget discoloration due to excessive heat. In the presence of oxygen, you get oxidation, of course, but in the absence of oxygen, heat can still cause other visible effects. I like to shoot for rainbow or iris effects on bare metal.
Cave_Dweller
New Member
- Joined
- Mar 18, 2011
- Messages
- 812
Did a lot of sanding work and seam filling on this today. Thought I'd try out "Mr. Surfacer," but so far not liking this material at all! Difficult to apply (I really need some precision Q-tips for this), doesn't fill in seams very well. Been using Mr. Surfacer 500 and 1200.
I think I've made things a lot harder on myself trying this as opposed to filling in the seams with extra thick CA, which IMO dries into a plastic-like substance that can be easily grinded down. As it stands now I've spent hours sanding down the Mr. Surfacer with not a great deal of success. It's been a lot of work, and you definitely don't want to breath the dust from this stuff (inhaled some of it, coated my mouth in a gross film that was extremely unpleasant!), so it requires a respirator and constant cleaning of my files with a wirebrush and new pieces of sandpaper.
Blech to Mr. Surfacer, extra thick CA all the way!
ModelMakerMike
"It's Slobberin' time""
- Joined
- May 28, 2011
- Messages
- 1,838
Great choice for a build. I don't think I have seen one of these yet!
And, I have used the gel type of zap a gap for seam filling and stuff, and I thought it worked well!
And, I have used the gel type of zap a gap for seam filling and stuff, and I thought it worked well!
Cave_Dweller
New Member
- Joined
- Mar 18, 2011
- Messages
- 812
I'm gonna have to give that a try, Mike. I guess the name Mr. Surfacer should have clued me in its more for texturing FX. Ahh well, always learning in this hobby, which makes it interesting.
So I've got this baby all primed up and ready to paint! I'm working out the palette I want to use and this model definitely has a cool organic look to it, so I want a color scheme that is going to be mottled and blotchy, with lots of different light to mid tone colors, mainly greys, white and some tan-brown stuff. I'm also thinking some orange-red racing stripes would add some good visual appeal.
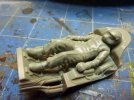
First, here's the cool pilot, who looks very relaxed! Took The Baron's advice and saved him for something else, as he's way too nice to seal into the cockpit.
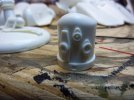
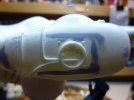
Cool sensor cluster, love the look of this
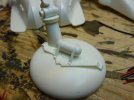
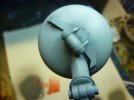
Some nice, subtle detail on the radar dish
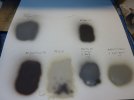
Some experiments and thoughts on color palette here. I think I like the med gray base, but with some built up white and tan highlights all over, and browns on the top of the model in a mottled, organic texture.
Seam filling, and oh man was this challenging, lots of seams to fill in, took a while and although I'm not 100% satisfied, I'm done with sanding and filing, man!!
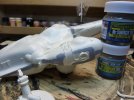
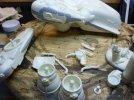
Most of the bits and sub-assemblies, not too bad of a model really, not nearly as complex as the groberhund was on complex sub-assemblies
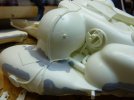
Close up of the seam filling, it was a lot of work, but such an awesome looking ship!
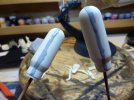
Fuel tanks? Fairly straightforward to seal
Finally getting stuff sanded down, the dust from this Mr. Surfacer stuff was awful, and not something you want to breath in!
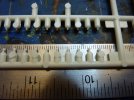
Here's the tiny little rivets included with the kit. They're amazing little details, but at 1mm in diameter, they are hard to cut off and glue on. I lost many of them, lodged in the carpet somewhere, so tiny. I didn't glue them at all the places as the hull as nice recessed pits where they go, and I think bare it looks quite good. I was going for a more asymetric rivet distribution.
Primer!!! ;D
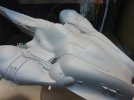
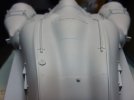
Some minor imperfections, but I can live with that, and it'll add texture when I apply some washes later
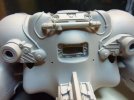
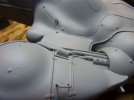
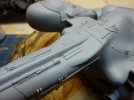
That's it for now but she's progressing steadily. The primer is still slightly tacky, so I'm gonna give it another day. I can't wait to lay down some paint on this baby! ;D ;D ;D
Edit: Found this cool video on youtube, some hardcore Ma.K nut made a whole series of computer animations featuring Ma.K models and stuff, very interesting and cool:
LunaDiver / ルナダイãƒãƒ¼ã€€Ma.k 3DCG movie
Anyone know how to embed this video properly? :-\
So I've got this baby all primed up and ready to paint! I'm working out the palette I want to use and this model definitely has a cool organic look to it, so I want a color scheme that is going to be mottled and blotchy, with lots of different light to mid tone colors, mainly greys, white and some tan-brown stuff. I'm also thinking some orange-red racing stripes would add some good visual appeal.
First, here's the cool pilot, who looks very relaxed! Took The Baron's advice and saved him for something else, as he's way too nice to seal into the cockpit.

Cool sensor cluster, love the look of this

Some nice, subtle detail on the radar dish

Some experiments and thoughts on color palette here. I think I like the med gray base, but with some built up white and tan highlights all over, and browns on the top of the model in a mottled, organic texture.

Seam filling, and oh man was this challenging, lots of seams to fill in, took a while and although I'm not 100% satisfied, I'm done with sanding and filing, man!!

Most of the bits and sub-assemblies, not too bad of a model really, not nearly as complex as the groberhund was on complex sub-assemblies

Close up of the seam filling, it was a lot of work, but such an awesome looking ship!

Fuel tanks? Fairly straightforward to seal

Finally getting stuff sanded down, the dust from this Mr. Surfacer stuff was awful, and not something you want to breath in!

Here's the tiny little rivets included with the kit. They're amazing little details, but at 1mm in diameter, they are hard to cut off and glue on. I lost many of them, lodged in the carpet somewhere, so tiny. I didn't glue them at all the places as the hull as nice recessed pits where they go, and I think bare it looks quite good. I was going for a more asymetric rivet distribution.

Primer!!! ;D


Some minor imperfections, but I can live with that, and it'll add texture when I apply some washes later


That's it for now but she's progressing steadily. The primer is still slightly tacky, so I'm gonna give it another day. I can't wait to lay down some paint on this baby! ;D ;D ;D
Edit: Found this cool video on youtube, some hardcore Ma.K nut made a whole series of computer animations featuring Ma.K models and stuff, very interesting and cool:
LunaDiver / ルナダイãƒãƒ¼ã€€Ma.k 3DCG movie
Anyone know how to embed this video properly? :-\
S
ScaleModelMadman
Guest
Cave_Dweller said:Anyone know how to embed this video properly? :-\
I fixed it for you but in the future, just copy the link from the browser and post as it embeds itself.
http://www.youtube.com/-*-watch?feature=player_embedded&v=ryqSb_1hofw
(without -*- )
LunaDiver / ルナダイãƒãƒ¼ã€€Ma.k 3DCG movie
Cave_Dweller
New Member
- Joined
- Mar 18, 2011
- Messages
- 812
Thanks Ken, I was copying it from the youtube embed links and not having any luck.
CheesyGrin
New Member
- Joined
- Sep 1, 2012
- Messages
- 152
Looking good! Can't wait to see the paint!!
Grendels
Active Member
- Joined
- Nov 24, 2009
- Messages
- 9,092
Agreed!!
Ravhin
New Member
- Joined
- Aug 21, 2012
- Messages
- 332
She's looking awesome ! Keep at it.
Cave_Dweller
New Member
- Joined
- Mar 18, 2011
- Messages
- 812
Ravhin said:She's looking awesome ! Keep at it.
Thanks, doing some airbrushing the last few days, slowly building up highlights with a mix of vallejo air and these new AK airbrush paints, both of which I really love. Finally getting somewhere with this ship!
Cave_Dweller
New Member
- Joined
- Mar 18, 2011
- Messages
- 812
She's done!!! ;D ;D
Been a crazy busy month for me, worked 20 days straight, and now I'm on 10 days vacation. Needless to say, very little was done during those 20 days.
So I really had to buckle down the last few days and get a lot done. I'm pretty happy with how it turned out, although there were a few snags and my clumsy hands have dropped the model about 3 times now, breaking off the fuel canisters each time!
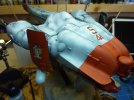
First, a few of the progress shots. I started by doing the base grey and then some shading in the recessed areas and panel lines. Used mainly vallejo model air paints.
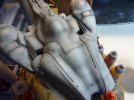
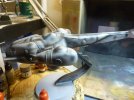
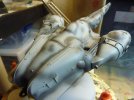
Then I kept adding lighter and lighter grey in patches, and finally highlighting everything with pure white.
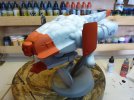
Next, I decided I liked the hot orange racing stripe motif, so I masked it off and painted it with vallejo game color.
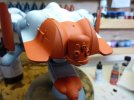
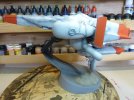
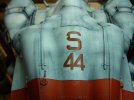
Next came the decals:
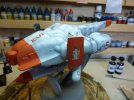
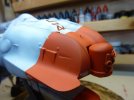
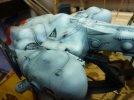
And then the washes. I tried out AK Interactive blue filter on this and I'm extremely pleased with it. Just gave everything that extra bit of depth, and made the hull look a little corroded or nasty in some parts.
And finally I applied a thin highlight of white artists oils to just kinda mix things up a bit.
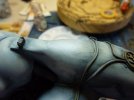
And here's the final pictures!! ;D
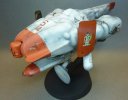
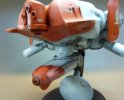
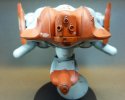
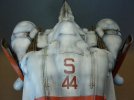
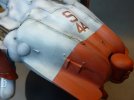
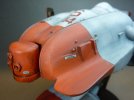
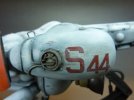
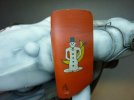
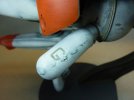
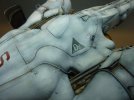
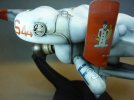
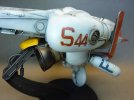
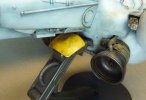
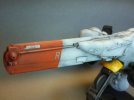
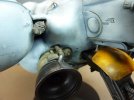
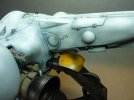
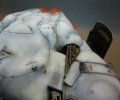
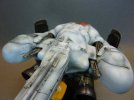
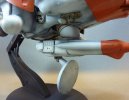
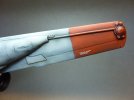
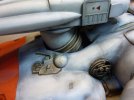
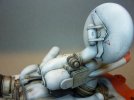
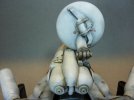
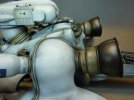
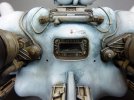
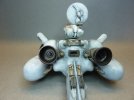
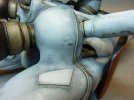
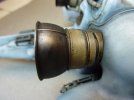
Been a crazy busy month for me, worked 20 days straight, and now I'm on 10 days vacation. Needless to say, very little was done during those 20 days.
So I really had to buckle down the last few days and get a lot done. I'm pretty happy with how it turned out, although there were a few snags and my clumsy hands have dropped the model about 3 times now, breaking off the fuel canisters each time!
First, a few of the progress shots. I started by doing the base grey and then some shading in the recessed areas and panel lines. Used mainly vallejo model air paints.


Then I kept adding lighter and lighter grey in patches, and finally highlighting everything with pure white.

Next, I decided I liked the hot orange racing stripe motif, so I masked it off and painted it with vallejo game color.


Next came the decals:


And then the washes. I tried out AK Interactive blue filter on this and I'm extremely pleased with it. Just gave everything that extra bit of depth, and made the hull look a little corroded or nasty in some parts.


And finally I applied a thin highlight of white artists oils to just kinda mix things up a bit.

And here's the final pictures!! ;D


JohnSimmons
For Spud: I was once Merseajohn
- Joined
- Jan 4, 2011
- Messages
- 5,645
Looks great! 
LrdSatyr8
Member
- Joined
- Dec 21, 2012
- Messages
- 765
I don't know what it is about the Ma. K kits but they really need to make some movies using them. They are the perfect blend of WWII and Futuristic that just makes me love building them and the kits are so detailed its amazing. I think you did an awesome job on this bro! Really love it! I gotta find me some of these awesome kits and build me a few more of them for my collection!
Similar threads
- Replies
- 38
- Views
- 6K
