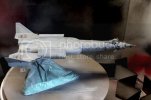
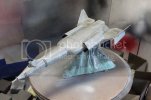
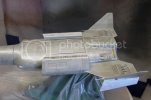
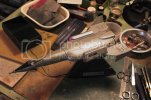
Leif Ericson Galactic Cruiser

Well wonder of wonders my new Windows 7 laptop did not reject the picture download from my camera so... here are some new pics...

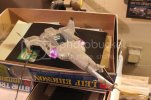
After spraying the hull with a mix of Testors Ghost Grey, Camouflage Grey, and Gloss Clear enamel thinned about 70/30 with thinner I set it aside to dry and worked on the Preiser figuresn Frank2056 had so kindly provided.

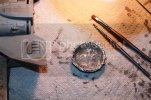
I decided that I'd show them in spacesuits so I cut tiny rectangular bits of Evergreen strip and glued them to their backs to approximate oxygen tanks. Then I painted them silver and made helmets from white glue applied withn a toothpick. I stood them up on foam tape while they dried:

IMG_2461.jpg

IMG_2469.jpg

Next day I went back to the Leif. The overspray I'd airbrushed on allowed the darker paneling to show thru (very subtly) but the silver panels were basically gone. Interestingly, the layers of paint I'd applied for the panels left behind raised edges even though I'd given the hull an overall light sanding once the masking tape was removed. It actually gave the smooth hull surface a nice texture like armor plating. It also served as a guide for me to go back with brushes and touch up the silver panels keeping the paint confined within the raised borders.

Here's the paint mix I used- 1 part Ghost Grey, 1 part Camouflage Grey, 2 parts Steel, and thinner. This was dry-brushed on to good subtle effect:

IMG_2468.jpg

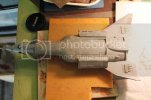
The upper hull and lower hulls after brushing the steel grey panels:

IMG_2465.jpg

IMG_2467.jpg

Stern of the Leif with Crew figures in the foreground for size comparison. These little guys are only about 5/32" tall:

IMG_2470.jpg

Once the panel retoiuch is finished I'll give her an overspray with this:

IMG_2466.jpg

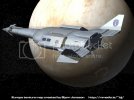
I think it's going to be pretty close to the look of the Leif in this image when I'm done:

Loyd_macarthur.jpg

Thanks for reading everyone!
 
Nice paintwork on her. Love the idea for the crew in the hanger. Inclusion of figures in any model build gives
the project scale and most important...The Human factor. Congrats. Bill
 
It is Looking awesome!
and those figures are tiny! Sheesh.....do you know a certain, Mr. Scratchy?
lol
;D ;D ;D ;D
 
Today's update...

After another few days of drying time it was time for spraying the Gloss Pearl Clearcoat.

Here she is in my paintbooth ready for spraying:

IMG_2471.jpg

And after a couple of passes with the pearl:

IMG_2472.jpg
IMG_2474.jpg
IMG_2473.jpg

I still need to spray the underside.
Then I'll give her one more shot of pearl on top, or not; actually she looks about right in the photos as far as muting the plating goes.
Once that pearl dries I'll apply the decals before sealing with Glosscote followed by 2-3 coats of Dullcote to tone down the gloss.

Then I need to address what's going on in the launch bay.

See ya!

;D
 
Pics from this past weekend...

Here are the nampelates included in the ParaGrafix PE set:
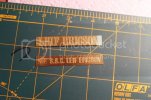
IMG_2475.jpg

Paul gives you two of each. I only ended up using one of the SSC Leif Ericson plates.

Here's the stand and nameplates primed. I primed both plates since I hadn't made up my mind on which one to use yet:
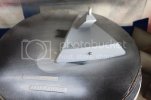
IMG_2476.jpg

The stand after spraying with Testors flat black enamel and sealing with Krylon Clear Satin acrylic spray. The nameplate was sprayed with Tamiya silver; the recessed lettering was painted with thinned Testors black enamel; the emblem is a decal cut from the kit decal sheet:
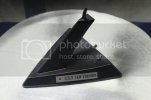
IMG_2487.jpg

The ship as she looks right now:

IMG_2482.jpg

The ion engines aglow. I really like the look of the corrugated aluminum foil inside the shrouds:
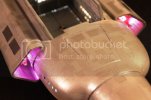
IMG_2485.jpg

I know, I know, I still need to attach the PE engine grills front and back.

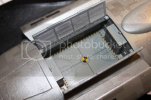
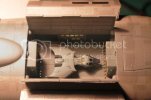
The launch bay with lights on and the floor decal in place:
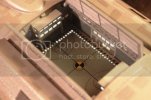
IMG_2484.jpg

Running the fiber to each landing light around the edges was a pain but well worth the trouble I think.
I need to touch up the circle in the center with my mechanical pencil once I've sealed with Glosscote and sprayed with Dullcote.
Then I'll seal the pencil with Dullcote. There is a hole in the floor in the center of the circle with a short tube udnerneath the floor into which a brass wire inserted in the underside of the scout ship will slide. This will keep the scout ship from sliding around inside the bay.
There will also be two other mounting holes atop each tower at either end of the bay for inserting a longer wire when I want to display the scout shp in flight over the bay.

More to come...
as if I need to tell you guys that!

;D
 
eh up buddy,your work on this kit is amazing mym8,can`t wait to see ya next project.cheers for sharing this with us.it`s work like this that pushes me forward to learn more and wish to be better!cheers peza
 
Thanks peza. Thanks Grendels. Thanks MrT.

Some pics from yesterday evening...

After spraying the launch bay with Glosscote to seal the decals a shot of Dullcote was applied.
Then I took an HB pencil and some Evergreen tubing-the same diameter as that penciled on center circle-and used the tubing as a guide to redraw the mssing section of the center circle.
That did the trick.
Afterward I sealed the pencil with another shot of Dullcote:

IMG_2489.jpg

This morning I went back and gave the yellow/black decal in the center a good coat of Future.
I want to protect the decal as much as possible from getting scratched when inserting the brass wire from the scout ship.
The next things will be installing the basketball goals and the crewmen in their spacesuits.
Here's one crewman after I painted his helmet:

IMG_2477.jpg

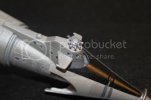
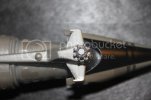
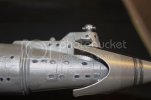
The sensor array I'd finished weeks ago was inserted over the bridge with the fiber strand facing back to the center forward facing LED:

IMG_2492.jpg
IMG_2494.jpg
IMG_2493.jpg

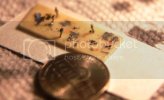
I used a rhinestone on top with tiny metal pins cropped and inserted around the edges.
The round ports you see in the center of the angled facets actually do light up when the ship is powered up.

The impulse engines were umasked.
Here they are lit up:

IMG_2503.jpg

Overall, I'm pretty satisfied with how they turned out.

Thanks for reading! Comments welcome as always!
 
Today's Update... :)

At lunch today, I finally got around to installling the engine shroud grills.

Forwards grills:
IMG_2520.jpg
IMG_2524.jpg
IMG_2505.jpg

Stern grills:
IMG_2514.jpg

Stern grills and impulse engines:
IMG_2515.jpg

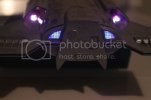
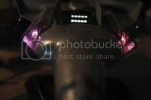
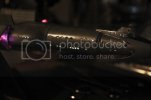
Here are a couple of pics of the wing mounted laser cannons. I got lucky and caught the red and green flashers when they were lit up too:
IMG_2519.jpg
IMG_2516.jpg

Next post will show the launch bay with basketball goals installed! 8)
 
She looks great!
Now I don't want to attempt building mine.....because it just couldn't compete. ;)
 
ModelMakerMike said:
She looks great!
Now I don't want to attempt building mine.....because it just couldn't compete. ;)

Thank you. That's high praise indeed from one with skills like yourself sir.
 
Thank you. That's high praise indeed from one with skills like yourself sir.
[/quote]

Holy cow! Do you really think that? I am, after all, my own worst critic.
 
The Strategic Space Command mandates that officers and crew engage in regular recreational activity to maintain physical and mental fitness so...

Basketball goals!
IMG_2525.jpg
IMG_2528.jpg

If you look closely at the sidewall windows in the pic above you can see the silhouette of a crewman behind one of the windows.
I should have the crewmen playing two-on-two basketball (with one spectator) in their spacesuits for the next post.

Launch bay with scout ship:
IMG_2529.jpg
IMG_2530.jpg

The scout was sprayed with pearl like the Leif.
I didn't want the windows, nose panel, and hatch to be pearl so I brushed on some liquid masking fluid beforehand.
Once the pearl coat dried I sprayed with some Dullcote for a flat finish.

Neck windows port and starboard:
IMG_2532.jpg
IMG_2535.jpg

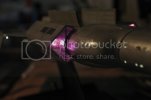
The bow phaser projector lit up:
IMG_2506.jpg

After looking at this pic I did a little cleanup inside the phaser barrel with a rasp so it's nice and round in there now.

The Leif on her stand and ready for decals:
IMG_2539.jpg

You can't see it in this pic but I glued a piece of black felt to the top of the stand to prevent scratching the underside of the ship.

Thanks for hanging in! We're almost there!
 

Latest posts

Back
Top