f2k
New Member
- Joined
- Apr 2, 2011
- Messages
- 301
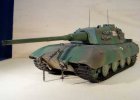
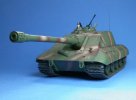
I just realized that I still haven’t posted anything from my contest entry, so here it is: The Jagdpanzer E 100.
The inspiration from this was a small section in Panzer Tracts 6-3 regarding Krupp’s suggestion to create a Sturmgeschütz based on the chassis of both the Maus and E 100 chassis. Equiped with either a 15 cm. or 17 cm. anti-tank gun, this would have been a beast of a tank destroyer, quite capable of taking out any tank at ranges well over 3000 m.
But while the armament was certainly impressive, the usefulness of the tank destroyer itself must be questioned. Equiped with a 15 cm. KwK L/63 gun, the vehicle would likely have had a length of 15+ m. and a combat weight of somewhere between 100 t. and 120 t - much too large to be practical as a weapon of war.
Not that that’s going to stop me from building it anyway…
I’m aware that there already exists a conversion-kit for the 1/35 scale Super Heavy E 100 Tank. However, the company doesn’t seem to exist anymore and, in any case, I’m not a fan of the conversion. Besides, kit-bashing is so much funnier than simply slapping a conversion-kit together…
This then, is my take on the design of the Jagdpanzer E 100.
My main priority was to retain the characteristic 60 degree slope on the front. Behind this I wanted to create a large casemate stretching all the way back to the engine deck like on the Jagdtiger. For a while I toyed with the possibility of sloping the sides of the casemate to match the slope on the track guards. But that would have reduced the available space within the tank to a point where I had some difficulties to imagine how that would have worked in reality. So I settled on using a far more conservative slope, again taking inspiration from the Jagdtiger.
For the first attempt at a design, I created a polystyrene mockup of the casemate to help me get a feel for the angles involved. However, I wasn’t entirely happy with the outcome. The E 100 was a fairly heavily sloped tank and the box-like casemate just didn’t fit the rest of the tank.

While I was wrestling with this problem I keep turning the model over and over in my hands. And then inspiration struck! The turret had nearly the same width as the tank (minus a few mm. on each side) and it was fairly sloped. If I cut it down a bit and used that to created the rear part of the casemate it would not only provide the slope I was looking for, it would also create a foundation that I could use to fix my kit-bashed parts and a near perfect mount for the gun.


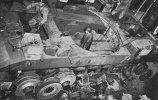
As can be seen from the last picture, I have created the majority of the plates for the front of the tank. I cut off parts of the front-slope and the glued-in-place turret and connected them with plastic card. This, unfortunately, left the part of the gun mount sticking out of the glacis plate, but that couldn’t be helped. I could have placed the gun even lower in the chassis, but that would have required even more cutting and gluing. So I decided to go with the original mount as that was simply far more convenient…
The inspiration from this was a small section in Panzer Tracts 6-3 regarding Krupp’s suggestion to create a Sturmgeschütz based on the chassis of both the Maus and E 100 chassis. Equiped with either a 15 cm. or 17 cm. anti-tank gun, this would have been a beast of a tank destroyer, quite capable of taking out any tank at ranges well over 3000 m.
But while the armament was certainly impressive, the usefulness of the tank destroyer itself must be questioned. Equiped with a 15 cm. KwK L/63 gun, the vehicle would likely have had a length of 15+ m. and a combat weight of somewhere between 100 t. and 120 t - much too large to be practical as a weapon of war.
Not that that’s going to stop me from building it anyway…
I’m aware that there already exists a conversion-kit for the 1/35 scale Super Heavy E 100 Tank. However, the company doesn’t seem to exist anymore and, in any case, I’m not a fan of the conversion. Besides, kit-bashing is so much funnier than simply slapping a conversion-kit together…
This then, is my take on the design of the Jagdpanzer E 100.
My main priority was to retain the characteristic 60 degree slope on the front. Behind this I wanted to create a large casemate stretching all the way back to the engine deck like on the Jagdtiger. For a while I toyed with the possibility of sloping the sides of the casemate to match the slope on the track guards. But that would have reduced the available space within the tank to a point where I had some difficulties to imagine how that would have worked in reality. So I settled on using a far more conservative slope, again taking inspiration from the Jagdtiger.
For the first attempt at a design, I created a polystyrene mockup of the casemate to help me get a feel for the angles involved. However, I wasn’t entirely happy with the outcome. The E 100 was a fairly heavily sloped tank and the box-like casemate just didn’t fit the rest of the tank.

While I was wrestling with this problem I keep turning the model over and over in my hands. And then inspiration struck! The turret had nearly the same width as the tank (minus a few mm. on each side) and it was fairly sloped. If I cut it down a bit and used that to created the rear part of the casemate it would not only provide the slope I was looking for, it would also create a foundation that I could use to fix my kit-bashed parts and a near perfect mount for the gun.


As can be seen from the last picture, I have created the majority of the plates for the front of the tank. I cut off parts of the front-slope and the glued-in-place turret and connected them with plastic card. This, unfortunately, left the part of the gun mount sticking out of the glacis plate, but that couldn’t be helped. I could have placed the gun even lower in the chassis, but that would have required even more cutting and gluing. So I decided to go with the original mount as that was simply far more convenient…


