Biskup
New Member
- Joined
- Aug 27, 2010
- Messages
- 1,876
I’ve already posted it in contest area but it was in to parts and with my entry topic but I think it won’t be too bad if I post is as a separate topic here.
I am a big fan of the Andrea Miniatures company and their Warlord Saga series, which is sculpted in a significant part by Joaquin Palacios. As soon as I saw the bust Ithandir, I placed an order for it.
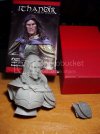
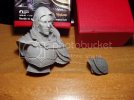
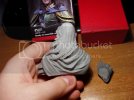
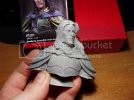
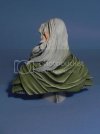
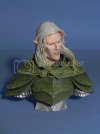
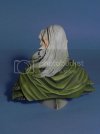
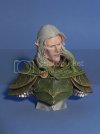
Photos of the set after I received it.
I started the work on this bust by assembling it together and filling small gaps. I surfaced it with Mr. Resin Surfacer, then brightened and darkened it with white and dark gray automotive primer.
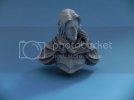
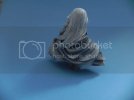
I’ve painted the face first. Beginning with mid tone for which I used paint Elf Skintone # 4 (Vallejo (V)).
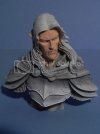
Then I’ve prepared first highlight tone by mixing paint Elf Skintone # 4 and Virgin Flesh Paint # 1104 (Life Tone (LT)) in a ratio of 3:1. I’ve painted the places which would be naturally lit.
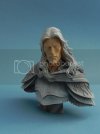
Further brightening was made using the same colors but in different ratios: first 1:1, second one 1:3 ratio. The final paint used for highlights was Virgin Flesh # 1104. Each time I’ve covered smaller areas with it.
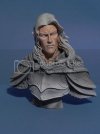
Now came the time for shadows. I prepared the first color mix using Elf Skintone #4 and Dwarf Skin # 41 (V) in a ratio of 3:1. I painted these places where shadow would occur.
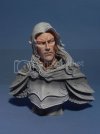
Further shadows were made using the same paints, but in a ratio of 1:1, 1:3, and the final shadows were made with Dwarf Skin #41. Just like making highlights I covered smaller areas each time.
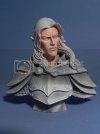
I’ve sealed the whole thing with Matt varnish to which I addend small amount of little base color # 4 Elf Skintone. This softens the transitions between colors.
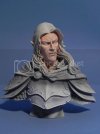
In the next stage I was painting eyes and armor of our elf at the same time.
For armor base color I mixed Lime Green # 827 (V) and Reflective Green # 890 (V) in a 1:1 ratio.
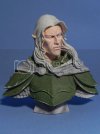
I used base mixture and gradually add Lime Green # 827 to make the highlights, first in the ratio 3:1, then 1:1 and 1:3. Then I used pure Lime Green # 827.
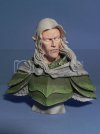
For the last highlights I used mix of Lime Green # 827 and Light Yellow # 949 (V). As always when making highlights I was covering smaller areas each time I used brighter color.
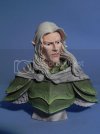
Shadows on armor I created by painting smaller areas as the color is darker. For that I used a mixture of base color with Reflective Green # 890 in the ratio 3:1, and then 1:1, 1:3, and then I used pure Reflective Green # 890. Last shadows I painted using mixture of Reflective Green # 890 and U.S. Dark Green # 893 (V) in a 1:1 ratio.
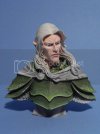
to even up the color transitions and protect the painted armor I sprayed it with an airbrush using mixture of matt lacquer and base color.
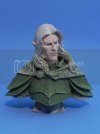
I started painting eyes from sclera and normally I don’t use for this pure white color, but as this is the Elf I decided that pure white sclera will look good so I used Flat White # 951 (V).
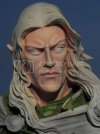
In next step I painted the base for the iris using Flat Black paint # 950 (V).
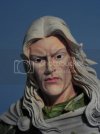
Next color that I used for iris was Magic Blue # 21 (V) leaving a thin black border around it.
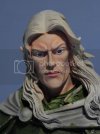
Then using Pastel Blue # 901 (V) I painted rays from the inside of the iris to the outside.
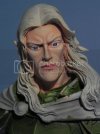
Now was the time to paint pupils with Flat Black # 950.
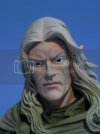
At the end I painted “spark†in the eyes just to bring them to life. I used for that Flat White # 951.
Then lips were painted. First by using a mixture Bright Flesh # 107 (LT) and KB Flesh # 1105 (LT) and then a thin layer of Virgin Flesh # 1104.
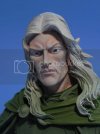
Time came to paint the cape I started with base color in this case I used Light Green # 401 (LT).
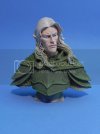
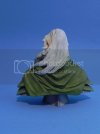
Then I prepared a mixture to lighten the cape and for that I used Light Green Paint # 401, Pale Flesh # 1102 (LT) and Flat White # 951 in 1:1:1 ratio. I added the mixture on to the base color Light Green # 401 in ratio 1:3, then 1:1 and 3:1 covering smaller areas each time. Final highlights were made using a blend of three colors Light Green # 401, # 1102 Pale Flesh and Flat White # 951.
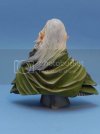
I made diming by preparing another mixture this time of Germ. Cam. Dark Green # 979 and Flat Black # 950 in a 2:1 ratio. That I added to base color Light Green # 401 creating three different mixes in ratios of 1:3, 1:1, 3:1. For final shadows I used the same mixture of two colors Germ. Cam. Dark Green # 979 and Flat Black # 950. As always each time I used darker shade I covered smaller areas were shadows would occur.
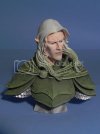
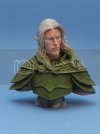
Markings in the main armor were painted with a wash of Flat Black # 950. Armor scales covering lower parts of the arms I painted with base color Oily Steel # 865 (V). Which then I brighten with Silver # 52 (V) at first and then Silver # 997 (V). I did the shadows with Flat Black paint # 950 and sealed the whole thing with Sidolux (similar to Future).
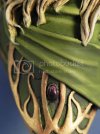
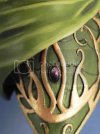
Decorations on the armor and a buckle on cape I painted with Glorious Gold # 56 (V) which I lighten with Polished Gold # 55 (V).
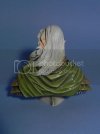
Stones located on shoulder armors and cape buckle I painted Flat Black # 950 which will result in greater depth later in the process of painting them.
Also now came the time to start painting the base color of this warriors hair. For base color I used Buff # 976 (V), and Light Yellow # 949 in a 2:1 ratio.
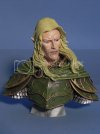
His hair was highlighted by gradually adding to the base mixture a compound obtained by combining Buff Ivory # 976 and # 918 (V). Recent lightening was done using only the lighter mixture of Buff Ivory # 976 and # 918 (V). Shadows of the hair I made by adding to the base mix Yellow Ochre # 70913 (V) first in 1:3 ratio, then 1:1, and the last 3:1. Final shadows I made using only the color Yellow Ochre # 70913. Once it was dry, I did a wash with Nuance Raw Umber # 1221 (LT).
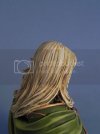
Next I painted eyebrows using Germ. Cam. Orang. Ochre # 824 (V) and I highlighted them with a mix of base color and Flat White # in a ratio 1:1.
The stone on the buckle of the cape I painted with highly diluted Purple # 959 (V) painting smaller areas each time until I achieved the effect that satisfied me. Then I used a very diluted paint Flat Black # 950 to ease the transition of colors. Flat White # 951 I used to do flares on the stone.
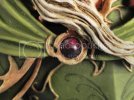
I painted side stones the same way as buckle stone but I used Dark Red # 946 (V) instead of Purple color.
The final element was to paint the stand. I used airbrush and Stainless Steel # 1402 (Model Master). When it was dry I rubbed it with a toothbrush to give it a nice shine. Then I made a wash of Flat Black # 950.
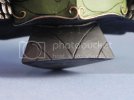
I cover the whole bust with Semi-Gloss Clear # 2016 (Model Master). After masking the stand, armor and face painted rest with Flat Clear # 2015 (Model Master). At the end I used the Sidolux on eyes and gemstones.
No the bust was finished.
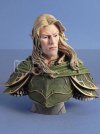
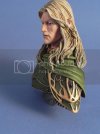
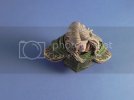
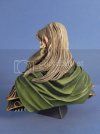
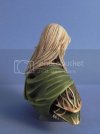
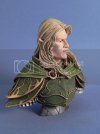
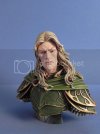
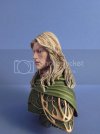
All comments are more than welcome.
If you have any questions feel free to ask on PM or e-mail ([email protected])
Cheers
Lukasz Ziolkowski
I am a big fan of the Andrea Miniatures company and their Warlord Saga series, which is sculpted in a significant part by Joaquin Palacios. As soon as I saw the bust Ithandir, I placed an order for it.
Photos of the set after I received it.


I started the work on this bust by assembling it together and filling small gaps. I surfaced it with Mr. Resin Surfacer, then brightened and darkened it with white and dark gray automotive primer.


I’ve painted the face first. Beginning with mid tone for which I used paint Elf Skintone # 4 (Vallejo (V)).

Then I’ve prepared first highlight tone by mixing paint Elf Skintone # 4 and Virgin Flesh Paint # 1104 (Life Tone (LT)) in a ratio of 3:1. I’ve painted the places which would be naturally lit.

Further brightening was made using the same colors but in different ratios: first 1:1, second one 1:3 ratio. The final paint used for highlights was Virgin Flesh # 1104. Each time I’ve covered smaller areas with it.

Now came the time for shadows. I prepared the first color mix using Elf Skintone #4 and Dwarf Skin # 41 (V) in a ratio of 3:1. I painted these places where shadow would occur.

Further shadows were made using the same paints, but in a ratio of 1:1, 1:3, and the final shadows were made with Dwarf Skin #41. Just like making highlights I covered smaller areas each time.

I’ve sealed the whole thing with Matt varnish to which I addend small amount of little base color # 4 Elf Skintone. This softens the transitions between colors.

In the next stage I was painting eyes and armor of our elf at the same time.
For armor base color I mixed Lime Green # 827 (V) and Reflective Green # 890 (V) in a 1:1 ratio.

I used base mixture and gradually add Lime Green # 827 to make the highlights, first in the ratio 3:1, then 1:1 and 1:3. Then I used pure Lime Green # 827.

For the last highlights I used mix of Lime Green # 827 and Light Yellow # 949 (V). As always when making highlights I was covering smaller areas each time I used brighter color.

Shadows on armor I created by painting smaller areas as the color is darker. For that I used a mixture of base color with Reflective Green # 890 in the ratio 3:1, and then 1:1, 1:3, and then I used pure Reflective Green # 890. Last shadows I painted using mixture of Reflective Green # 890 and U.S. Dark Green # 893 (V) in a 1:1 ratio.

to even up the color transitions and protect the painted armor I sprayed it with an airbrush using mixture of matt lacquer and base color.

I started painting eyes from sclera and normally I don’t use for this pure white color, but as this is the Elf I decided that pure white sclera will look good so I used Flat White # 951 (V).

In next step I painted the base for the iris using Flat Black paint # 950 (V).

Next color that I used for iris was Magic Blue # 21 (V) leaving a thin black border around it.

Then using Pastel Blue # 901 (V) I painted rays from the inside of the iris to the outside.

Now was the time to paint pupils with Flat Black # 950.

At the end I painted “spark†in the eyes just to bring them to life. I used for that Flat White # 951.
Then lips were painted. First by using a mixture Bright Flesh # 107 (LT) and KB Flesh # 1105 (LT) and then a thin layer of Virgin Flesh # 1104.

Time came to paint the cape I started with base color in this case I used Light Green # 401 (LT).


Then I prepared a mixture to lighten the cape and for that I used Light Green Paint # 401, Pale Flesh # 1102 (LT) and Flat White # 951 in 1:1:1 ratio. I added the mixture on to the base color Light Green # 401 in ratio 1:3, then 1:1 and 3:1 covering smaller areas each time. Final highlights were made using a blend of three colors Light Green # 401, # 1102 Pale Flesh and Flat White # 951.


I made diming by preparing another mixture this time of Germ. Cam. Dark Green # 979 and Flat Black # 950 in a 2:1 ratio. That I added to base color Light Green # 401 creating three different mixes in ratios of 1:3, 1:1, 3:1. For final shadows I used the same mixture of two colors Germ. Cam. Dark Green # 979 and Flat Black # 950. As always each time I used darker shade I covered smaller areas were shadows would occur.


Markings in the main armor were painted with a wash of Flat Black # 950. Armor scales covering lower parts of the arms I painted with base color Oily Steel # 865 (V). Which then I brighten with Silver # 52 (V) at first and then Silver # 997 (V). I did the shadows with Flat Black paint # 950 and sealed the whole thing with Sidolux (similar to Future).


Decorations on the armor and a buckle on cape I painted with Glorious Gold # 56 (V) which I lighten with Polished Gold # 55 (V).


Stones located on shoulder armors and cape buckle I painted Flat Black # 950 which will result in greater depth later in the process of painting them.
Also now came the time to start painting the base color of this warriors hair. For base color I used Buff # 976 (V), and Light Yellow # 949 in a 2:1 ratio.

His hair was highlighted by gradually adding to the base mixture a compound obtained by combining Buff Ivory # 976 and # 918 (V). Recent lightening was done using only the lighter mixture of Buff Ivory # 976 and # 918 (V). Shadows of the hair I made by adding to the base mix Yellow Ochre # 70913 (V) first in 1:3 ratio, then 1:1, and the last 3:1. Final shadows I made using only the color Yellow Ochre # 70913. Once it was dry, I did a wash with Nuance Raw Umber # 1221 (LT).

Next I painted eyebrows using Germ. Cam. Orang. Ochre # 824 (V) and I highlighted them with a mix of base color and Flat White # in a ratio 1:1.
The stone on the buckle of the cape I painted with highly diluted Purple # 959 (V) painting smaller areas each time until I achieved the effect that satisfied me. Then I used a very diluted paint Flat Black # 950 to ease the transition of colors. Flat White # 951 I used to do flares on the stone.

I painted side stones the same way as buckle stone but I used Dark Red # 946 (V) instead of Purple color.


The final element was to paint the stand. I used airbrush and Stainless Steel # 1402 (Model Master). When it was dry I rubbed it with a toothbrush to give it a nice shine. Then I made a wash of Flat Black # 950.

I cover the whole bust with Semi-Gloss Clear # 2016 (Model Master). After masking the stand, armor and face painted rest with Flat Clear # 2015 (Model Master). At the end I used the Sidolux on eyes and gemstones.
No the bust was finished.


All comments are more than welcome.
If you have any questions feel free to ask on PM or e-mail ([email protected])
Cheers
Lukasz Ziolkowski
