Deadman Disciple
Member
- Joined
- Apr 28, 2015
- Messages
- 69
[youtube]https://www.youtube.com/watch?v=qr98j2NrJc8[/youtube]
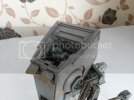
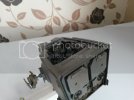
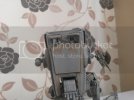
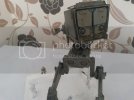
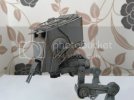
My wife bought me the Bandai Star Wars AT-ST kit for christmas from an Amazon.co.uk seller based in Japan costing £16 with free shipping.
This was supposed to be one of the Bandai SW kits I would have bought with the £70 left over from last November's model kit fair.
Looking at the sprues, the parts look smaller than id imagined & the various build pictures ive seen make it look bigger than it actually is.
Anyways, construction is fairly straight forward, starting with the belly.
It was fairly easy to snap-fit all the belly parts, but the braided tubing was very flimsy, so care was taken when cutting them off the sprues & slight sanding.
Also the tubing will need gluing into the relevant holes as they feel really loose & did pop out a few times.
Continuing with the legs & it was all easy to snap-fit together, a few peices were a bit flimsy, namely the rear moveable strip caliper.
Slowly but surely adding the parts to the legs came the feet, which were a tight fit & took a bit of persuation to snap together but I got there in the end.
Once done, id noticed I had built the lower leg back-to-front & the mounting ring was supposed to be on the top instead of underneath, but taking everything apart again to correct such a small mistake to me was pointless.
Moving onto the interior cockpit/command area.
I primered all the interior wall parts, seating, dashboard & driver figures & started painting.
Pretty much all Tamiya XF-80 (Royal Light Grey) & picked out the various light panels & switches in various colors & the same on the dashboard & then gave it a black wash to bring out the rest of the detail.
Seating area was nato olive for the seats & a little white for the detail & greyish blue for the joysticks.
The rear wall was washed in white wash & black washed around the outer parts.
The drivers were then painted:-
US Compass Grey for the uniform
Folkart Greenscape for the helmets
Flesh Pink for the faces
Nato Olive for the seatbelts
Black for the goggles, gloves & boots.
Then I mounted them into the seats with a smidgen of glue for a little extra security.
I had to widen the mounting holes slightly when putting the cockpit/command area together, as primer had gotten into them & the back wall took my pressure clamp to get in mounted properly, but all the other walls went together fairly easy.
Cheers,
Wayne.

