Hasbro Hero Millennium Falcon Modification

Jaitea

Active Member
Joined
Nov 15, 2011
Messages
1,139
Well guys I bought another Falcon

A toy Millennium Falcon......The Hero Series Falcon

It's basic, hollow, but is the correct dimensions of the studio models (it borrows details from the 5ft & 32")...and has nice crisp moulded on greeblies......

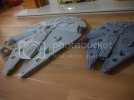
Heres some comparisons with the FineMolds kits:
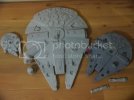
HHMFampFMFMs.jpg
HHMFampFMMF2.jpg
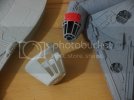
cockpits.jpg
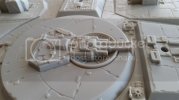
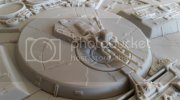
Gears.jpg

Honestly cant get over the size & the possibility of this thing

The usual measurement that should be the same is the outermost diameter of the docking rings, the front of the jaw, the diameter of the cockpit tube & the dish.....

.....the dish is slightly larger than the others.....slightly,....I dont think I will reduce the size of the dish:
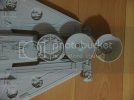
Sizes.jpg

This is very exciting.....I ordered a Revell TIE large scale today to use the detail of the solar panels for the engine vents...(I'll hopefully just mould & cast the details)

Thanks very much for looking

John
 
Eh up buddy,wow this looks mint....i've got if only they made
it earlier i could of have some of my life back!!!cant wait see
what you do with her mym8....envy overload!!!😁peza
 
Woe, thanks for all the comments guys (BlackGoldLable, welcome to the forum mate)

This one should be pretty straightforward,...no structural modifications needed......everything is scaled right....just need greeblies

John
 
Looks very promising John! This should be a nice break to just relax a bit and add some detail, then have fun with the paint job. Cant wait to see this one! Enjoy. :D
 
Thanks Jake, yep less work with this one

A guy called khitomer informed me that Argos in UK is selling 3 toys for the price of 2 up until early next week so I took a trip today and bought a couple of dolls for my daughter for Xmas & another Hero Falcon.....gonna use the other top turret, window & quad gun for the underside

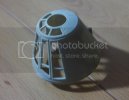
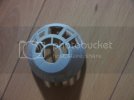
Cockpit2.jpg
cockpit.jpg

...gave the cockpit cone a blast of primer,....just for a laugh.....tested the dried area with masking tape which easily removed the paint.....guess I'm gonna have to get the right paint to prime this type of plastic

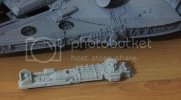
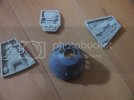
partsapart.jpg
partsapart2.jpg

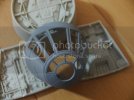
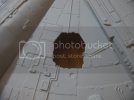
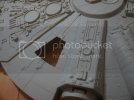
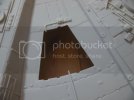
Notches:
cutout2.jpg
cutout3.jpg
Cutout1.jpg

Thanks for looking
John
 
Yeah Scott it's the big guy. So John now your making me think I should get two?? And as well as the paint not sticking I've heard the glue doesn't either? Nice job on the notches ;)
 
Thanks John, yep the offer at Argos is on until Tuesday,....so I'm sure theres something you'll need to get for your own kids or relatives....buy 2 get 3rd free

I would have had to cast the bottom turret & gun

The paint & glue issue has been sorted on The Replica Prop Forum,....I'll link to the product details in the next post

J
 
I was in the shop and cannot open up to see the inside so I didn't get it. I was hoping someone will put a post of this up and the detailing looks good. I shall get this 1 ... or 2!
 
At the minute Argos are selling this 'toy' at half price, so they say plus they have this buy 2 get 3rd free deal on,....it really is an ideal chance to get a spare one.

The lower turret is like this:
Bottom.jpg
& the top turret is like this:
Top.jpg

...so thats the main reason I bought another one....& there are spares incase I make any mistakes

J
 
Good call on the parts kit. This looks freakin wicked, toy or not.

Of you get a chance throw up that 'paint and glue that works' cheat sheet. ;)
 
Thanks Scott,....get one (or two).....it would be a brilliant addition to your collection ;D

The first recomendation was Krylon paint, its supposed to be designed for polypropylene/ polyethylene:

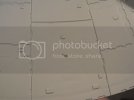
Ok, a quick update: It hasn't quite been 24 hours yet, but here's where she stands. I sprayed this spot with two coats of Satin White Krylon Fusion with no prep....no cleaning, just sprayed it on as it came out of the box. At 3 hours I was able to produce the chip seen in the picture with my fingernail with some effort. Ten minutes ago, I tried to do it again, but the paint would just scuff, not chip. I then did the tape test using both 3M Scotch-Blue painter's tape and Tamiya masking tape, including applying it directly over the chip and it passed with flying colors.

Now, I know that others haven't had success with this paint....I'm just reporting the results that I have had: Use at your own risk. The next step will be to spray a coat of Tamiya Gray Surface Primer over the fusion, let it dry, and repeat the above tests. Results to follow.....

IMG_0649_zps4c53ae21.jpg


For best paint results, clean the entire surface and then apply a coat of adhesion promoter, followed by primer. Let it cure for a day, then try scratching it or peeling up tape. The paint should stay on without a problem. Polypropylene and polyethylene plastics don't have good surfaces for adhering paint to. By applying adhesion promoter, it give the surface more "bite" and allows the primer and paint a tough surface to stick to.

In regards to paint tests, aren't car bumpers made of a very similar plastic?? Couldn't automotive bumper primers work on polyethylene? As soon as I get back from holiday I'm going to give it a shot, I'll do the isopropyl rubbing and sanding as mslz22 suggested and then try dusting automotive primer on in fine layers. Hopefully it stands up to the masking tape test, if not I guess it'll be back to the drawing board

And here's the stuff at Halfords in UK:
http://www.halfords.com/motoring/pai...er-spray-300ml

My results with the Krylon Fusion, after 1 or 2 days i could not scratch it off (or the fine primer i applied over the Fusion). The only difference from Roberts above is that i did a wipe down with 91% ISO to clean any possible mold release, as a light scuffing with fine steel wool. The other thing to keep in mind is that i only did a dusting, i mean a dusting of the fusion, from like 12-14 inches away with the Fusion nice and warm so the particles were fine.

I think the dusting works well because a heavy coat of Fusion or any other paint seems to want to "float" on the plastic more than adhere. The fine dusting seems to grab better, there may be some scientific reason but my experience comes only from building resin kits that sometimes have the same adhesion issues.

Again, your results may vary but i have had a successful test IMO.

Fusion sounds promising...

If an adhesion acellerator is used first, then the Fusion on top of that, would you be negating the effect of the Fusion since it is now being applied to the acellerator coat instead of directly to the plastic?

I've had a lot of success with the Montana Gold line of spray paints....I think they're acrylic based? But I haven't yet found a material they won't stick to. I've been looking through the colour chart and I think the following colours might be a suitable base colour:

- G7000 Pebble
-G8000 Elm
-S 9110 Shock White Cream

They all dry with a satin finish and are easy to wetsand. Tamiya paints through an airbrush onto Montana Gold paints work beautifully, could be a winning combo....


The Glue:

Anyone ever try or use this glue from locktite - http://www.loctiteproducts.com/p/sg_...ing-System.htm

It is a stocked item at Home Depot stores, so it is readily available, but have read that it does not have a long shelf life. Another possible option in any case
This is THE stuff!

I've been using it for gluing polypropylene to itself and other materials for years. It's a two-part system - a surface prep and a glue. Makes stuff stick to "unstickable" plastic.

Oh, by the way, I used Loctite liquid super glue to attach the styrene panels where the landing gear were. Seems to work fine

I'm gonna get some adhesion accellerator & car bumper primer tomorrow & I'll let you guys knw the result of that

John
 
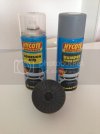
I went to my local car accessory shop & bought some Adhesion Aid and Bumper spray

IMG_1323.jpg

The Adhesion Aid took a bit longer to dry than the usual car spray,.....you can tell as it looks like youve sprayed the part with water,.....eventually patches appear of matte drying out across the part.....

After it was completely dry I sprayed it with the Bumper paint, which dries just like regular car paint......I made myself a cup of tea and tested the part with masking tape.....nope....the paint stayed undamaged,....I tried stronger tape electrical tape,....still no damage

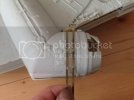
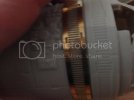
I have one of those nice PE sets for the MPC Falcon designed by Haystack Hair,....the grille that wraps around the cockpit might do for the Hasbro Falcon

IMG_1324.jpg
IMG_1326.jpg

Thanks for looking

John
 
I just picked one of the big boys up from Wal-mart yesterday for $59.95... Its gonna take a lot of work to get I up to par. Some of the things that I noticed were the cockpit windows needed to be cut out, the landing gear look terrible and are vacuformed into a big blob on the bottom, it's missing a lot of the side detail (the detail you showed is about the only detail you get on this kit, most of the side detail is suppose to be stickers), the bottom gun was like the landing gear and was one big blob of plastic. It's gonna be interesting to see how you're gonna fix the issues with this one. It's huge I will say that!
 

Latest posts

Back
Top