Goliath vignette *FINISHED*

Re: Goliath vignette

Here is a better picture the other was kinda small. ;)


prr7.jpg
 
Re: Goliath vignette

Thank you! I am hopping to get this done by the beginning of March so I can enter it in a show in Madison.
 
Re: Goliath vignette

Here is a couple more pieces I finished today. The canteen is really small so I apologize for the blur but you get the idea. The German hand pump took a longer than I expected but I am happy with the result.

[attachment deleted by admin]
 
Re: Goliath vignette

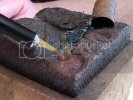
Hi Everybody, thought I would give an update.....sorry it has been so long. I have now started to assemble the vignette, which I started by placing a barrel, fuel pump and tree stump. These pieces are in a puddle that I decided should be a combination of mud water and rust water. This puddle is pretty small and I need to precisely place the rust water in the mud water. So to resolve this problem I used my large version 1 Glue Looper which worked great!! Here is the latest image of the base.


Annlooper_zps51e32ad0.jpg
 
Re: Goliath vignette

Oh SHIT! Here is the first finished figure.....the driver of the tank. I am working on the control box right now.....I am very excited to get this done! I am planning to participate in a show in 6 weeks.

annDriver_zps001e4151.jpg
 
Re: Goliath vignette

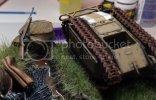
I added the grass today! I am getting really excited to finish this piece. Tomorrow I will be adding the barrels and putting some finishing touches on the tank. I will post images of the two other figures also.


annbase1_zps45c7ade3.jpg
 
Re: Goliath vignette

Here is an updated image after a long day of positioning and waiting for glue to dry. I was hoping to get further but you know how that is. I am very happy with the way this is turning out! :D

Have a great week everyone!

IMG_1396_zps7c9a17d6.jpg
 
Re: Goliath vignette

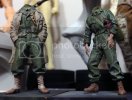
I just spent another day positioning stuff including the two helmets and waiting for epoxy to dry. I added a riffle leaning up against a barrel and as promised I am posting images of my two headless figures. Tomorrow I am hoping to get one of the figures in place. The final assembly is so tedious and nerve racking. But it is amazing watching all the pieces coming together!

IMG_1476A_zpsd62ce566.jpg

IMG_1443A_zps8752468e.jpg
 
Re: Goliath vignette

I want to thank every one who has been watching this build so far......and your comments are very inspiring and is what keeps me moving forward. I don't have anything new to show you because I actually got the wiring completed on the box..it took most of the day and I am to afraid to move it, take a picture, or breath on it until I am sure the epoxy is dry. I hopefully will have new pictures next weekend. But for now it's back to reality for another week.

Thank you again,

PG
 
Re: Goliath vignette

Panzergirl, did you put in the grass with one of those static thingamajigs ?
It looks really good!

Zappa
 
Re: Goliath vignette

Hi Zappa,

Thank you for your support through out this project,

Yes, I did use a static grass applicator but that is not the whole story. I spent a long time experimenting and looking at different grass products and this is the combination I found that worked. The glue that I used was Matte Medium transparent scenery cement. I used this product because as you can tell it did not change the color or any glossiness to the ground work. One other tip.....the directions on the bottle tell you to dilute 4:1 with water DON'T DO THAT use it strait this causes the grass to stick up and stay in the place that it is applied (kinda feels like razor stubble when dry).
Next I found that Silflor grass was the best and most realistic color.....I used a mixture of a summer and autumn (grass is not florescent green or any other weird color). Also I used a mixture of 4 mm and 6 mm length because this scene is not a golf course but out in the open field. Finally, I uses the GrassTech static grass applicator. The BIGGEST TRICK: get the ground wire grounded to the art work and the grass in the reservoir and let it charge for about a minute before application. Don't forget to let this dry over night.
Also, don't be afraid to practice before application. I made some fake ground out of the same material as my real ground and got the color and density perfected before applying the real thing. They give you a lot of grass in a bag so you should have more than enough.

Now you have all of my secrets on grass application....

PG
 

Latest posts

Back
Top