You are using an out of date browser. It may not display this or other websites correctly.
You should upgrade or use an alternative browser.
You should upgrade or use an alternative browser.
GMC Plow truck
- Thread starter Timbaux
- Start date
Grendels
Active Member
- Joined
- Nov 24, 2009
- Messages
- 9,092
will be watching!
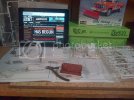
Cut off the mufflers
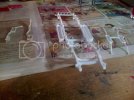
And then the tanks... Seeing that that these half tank pieces fit fairly well together it should not be to hard to make one single tank
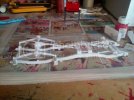
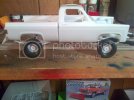
I cut some pieces of sprue to mock up what it would look like with a little lift. Not sure if this is will cause any problems aside from drive shafts? Maybe engine angle. Still trying to figure out body colour but I'm leaning towards of in the style of military.

And then the tanks... Seeing that that these half tank pieces fit fairly well together it should not be to hard to make one single tank

I cut some pieces of sprue to mock up what it would look like with a little lift. Not sure if this is will cause any problems aside from drive shafts? Maybe engine angle. Still trying to figure out body colour but I'm leaning towards of in the style of military.
Junkie
Active Member
- Joined
- Apr 24, 2009
- Messages
- 8,830
Watching. 
THE NEW ONE
follow me on twitter @SpaceSavy
- Joined
- Oct 4, 2011
- Messages
- 346
very interesting
Cave_Dweller
New Member
- Joined
- Mar 18, 2011
- Messages
- 812
My favorite truck!
THE NEW ONE
follow me on twitter @SpaceSavy
- Joined
- Oct 4, 2011
- Messages
- 346
I think it looks better now
Big-John
New Member
- Joined
- Sep 17, 2011
- Messages
- 1,052
We'll it's been lifted... Maybe to high.
It will fit right in in my neighborhood. ;D
Junkie
Active Member
- Joined
- Apr 24, 2009
- Messages
- 8,830
Here too. Looks cool. Givr'.
Hello everyone,
Done a little progress last night.
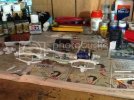
Painted some things, and test fitted the engine. Started lengthening the shocks and I have to say that the Tamiya glue works very well compared to what I was using before. Also was my first time trying putty and was impressed on how well this stuff works. Will try my hand at weathering the engine soon.
Thanks for watching!
Steve
Done a little progress last night.

Painted some things, and test fitted the engine. Started lengthening the shocks and I have to say that the Tamiya glue works very well compared to what I was using before. Also was my first time trying putty and was impressed on how well this stuff works. Will try my hand at weathering the engine soon.
Thanks for watching!
Steve
Junkie
Active Member
- Joined
- Apr 24, 2009
- Messages
- 8,830
Nice. Yes, Tamiya works very well.
Hello everyone. Some more progress tonight.
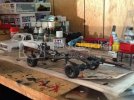
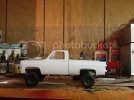
Weathered the engine and glued some headers I had laying around instead of using the manifolds that came with the kit. Spayed some colour on the frame and wheels, now I just got to modify the exhaust to make it fit and the chassis should be pretty much done.
Next will the choosing the body colour


Weathered the engine and glued some headers I had laying around instead of using the manifolds that came with the kit. Spayed some colour on the frame and wheels, now I just got to modify the exhaust to make it fit and the chassis should be pretty much done.
Next will the choosing the body colour
Junkie
Active Member
- Joined
- Apr 24, 2009
- Messages
- 8,830
Moving along great.
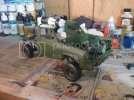
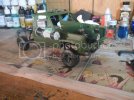
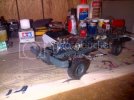
A little more progress the last few days. We are getting pummelled with snow at the moment and it's keeping me quite busy... Our girls love it though so enjoying the last weeks of winter. Anyway enough rambling, I got the engine to fit after modifying the exhaust and finished up lengthening and painting the shocks and front drive shaft.
Decided to paint the body today...
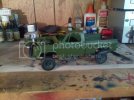
Had to stop and clean off the hood because of a paint run but besides that it went ok. Good ol testers airbrush and compressor is awful loud and shaky but it got the job done
Thanks for your comments
Steve

Decided to paint the body today...

Had to stop and clean off the hood because of a paint run but besides that it went ok. Good ol testers airbrush and compressor is awful loud and shaky but it got the job done
Thanks for your comments
Steve
Worked on the interior tonight. Kit came with A CB, so I made a mic to try to add some detail.
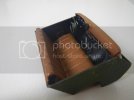
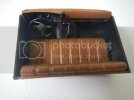
Also modified the shifter with the piece I cut of the steering column. Not sure what else I can do to make this interior more detailed? The only glass that comes with the kit are the front, back and sunroof. No side windows... This is where I believe the contest theme will come into play
Cheers,
Steve
warped_one
New Member
- Joined
- Apr 19, 2013
- Messages
- 236
looking nice
Timbaux said:Not much progress tonight, still debating where to mount the gatling gun.
mount on a 360 mount on the roof
Similar threads
- Replies
- 13
- Views
- 3K
Latest posts
-
-
-
-
-
-
-
-
Do I need to thin my Tamiya X-22 clear coat?
- Latest: BlackSheepTwoOneFour

