Finnish (WWII) AFV crew...

Jelly

Rob. G.
Joined
Apr 12, 2011
Messages
641

Well, finally I could put my hands over some figures that will perfectly do as a Finnish AFV crew during WWII. They wear basically exactly the same as their Russian counterparts: overall & “sausage” helmet…

As you will (probably) remember, I needed to give a crew to this beetle:
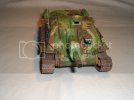
P1010724.jpg
So I decided to buy some Tristar figures that would fit very well (and at a very reasonably price) with what I was intending to do, so I picked this set:

P1010710.jpg


P1010713.jpg


This is what you get: they also give you two extra heads:

P1010716.jpg


The quality of the figures is 100% OK, no dramas, no surprises, no disappointments… I like their quality FAR more than, for example, another of my current works (I think I will show them here soon) “VERLINDEN German WWII Radio Team” :p (resin).

As you can see the Front Cover Art in the box, it shows us 07 figures, one of them a woman in Red Army uniform. I will use the three figures that are shown at the top.

I need a driver for the (obviously) driver position, but I know that it will hardly seen (just take a look a the front hatch of the SU… it´s roughly HALF size of a T-34 one… definitely not a escape hatch for the driver… I could appreciate that almost only the face of the driver would be seen… ), so I have decided to spare its lower body and its arms (its arms will be given to another figure displayed in the commanders hatch) and send them to my “Dr. Frankenstein 1:35 Body Parts Box”…

So I cut the pieces for the driver, a little of soft sanding…

P1010718.jpg


Then I had to fix the figure in the proper position ( X , Y ) and height ( Z ) from the bottom of the model: I previously (at the beginning of the building) cut a section of the SU´s front floor plate. It is really HARD to get info over the SU-122, so I had to get a drawing and some photos of the driver station in a regular T-34 design and take some measures to “land” properly the driver: it was easier that I thought, just two or three attemps and then finally I called Fire For Effect and got the driver correctly positioned:

P1010723.jpg


As I told before, I decided to give the original arms to another figure that will be displayed in the commanders hatch, so I decided to give two partial, limited arms to the driver:

P1010724.jpg


I took some Tamiya bi-component putty to model its partial-arms (I found this putty some sticky, next time I will try Kneadatite, I don´t know hot the green stuff behaves and I want to give it a go):
P1010726.jpg


This is what I was able to get without too much effort… as almost only the face of the guy will be seen…

P1010727.jpg


Then primed…

P1010738.jpg


Then painted with some Vallejo…

P1010740.jpg

P1010741.jpg

P1010742.jpg


And to get an idea… the figure on its “mast”… before getting into its plastic prison…

P1010748.jpg


And… finally… this is the only you will see… if you get low and use a torch… this photo was taken with the light from an desk lamp and the camera flash… TOO MUCH LIGHT, the figure looks ugly with this amount of light… but I repeat, it is very difficult to see it! ( but anyway I was not disposed to display a functioning / running AFV without I driver ! ::) ).

P1010750.jpg


Now I´m over those two figures that simultaneously will be displayed in the commanders hatch:

P1010743.jpg


And this is the one that has got the driver´s arms and hands… a little filler & sanding… a little drilling between its right hand fingers, a small cigar made scraping a tiny styrene rod… and that´s all by now… in the photo it can be seen some fuzz in the figure… don´t worry, it has been cleaned…

P1010746.jpg


P1010744.jpg


And that´s all by now, not too much but more than zero… ;)
Do not be cruel, please! ;)
RG
 
Finally you posted your figures. The driver looks good only to things that you could change in my opinion. Eyes are too big and if I'm not mistaken he hasn't got eyebrows. They should be easy to correct.
Looking forward to next installment.
Cheers
Lukasz
 
Biskup said:
Finally you posted your figures. The driver looks good only to things that you could change in my opinion. Eyes are too big and if I'm not mistaken he hasn't got eyebrows. They should be easy to correct.
Looking forward to next installment.
Cheers
Lukasz
Glad to read you, Lukasz :D

OK, Lukasz, I must confess that I find REALLY difficult to paint the eyes.


Lukasz, are you talking about the size of the iris? or about the size of "all" the eye ??

:( Size of the iris, it hard to get, maybe I´m finishing with japanese-anime iris sized figures... I tell you how I proceed: first I paint the color of the iris, all along the eyeball... then comes the white of the eye...

I find also that the paint dries very quickly in a very small brush... but in the other side, if I dilute the paint very much to gain time before the paint loses fluidity... I risk having some undesired capilarity behavior of the paint in that very small area :(

Eyebrows: believe me, Lukasz: I painted them with very diluted paint, a mix of brown and basic skintone I didn´t want to get a guy that looked a Neanderthal ;D but it is evident that I have been too much subtle... so much that it is almost impossible to see them!

I´m finding that painting details in a face is a REAL challenge ! I almost SWEAT... literally... ;)
 
Hi Jelly ,nice set of figures fella ...and some great work on them too .

I believe Lukasz is referring to the white of the eye ,which is a little to big mate . I usually place the eyes in using a toothpick ,it gives you more control than a brush . and in 1/35 the eye is just about visible ;)

Chris.
 
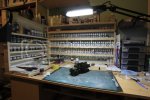
By the way ,I forgot to ask you ....Do you and Spud share the same bench ?? they look very similar ???

Chris.
 
Chris S said:
Hi Jelly ,nice set of figures fella ...and some great work on them too .

I believe Lukasz is referring to the white of the eye ,which is a little to big mate . I usually place the eyes in using a toothpick ,it gives you more control than a brush . and in 1/35 the eye is just about visible ;)

Chris.

Hi, Chris, :)
I have some doubts, man, "about the white of the eye":
I need to clarify that, or I won´t be able to do it correctly:

1.- The "white" is too big either horizontally (white in each of the sides of the iris) or vertically (over and under the iris) ? or both? IMO believe me it is really small... if you are watching the photo of the guy whe he is inside the tank... theres an "insane" amount of light... I was surprised when I saw the photo... the guy seemed terrified, it seems to me that it appears to be more white around the iris than it is really...

2.- Do you use the toothpick to paint either the iris? the white? both?

Face painting... this is really hard for me. Nobody said it to be easy, and I didn´t hoped it to be ;D but... ufff... figures should come with prepainted eyes ! ;D

:) No, Chris, my friend, Spud & me don´t share the same bench, paints, etc ! ! ! It is pure coincidence ! I´ve seen his paint stack, he has a lot more of Vallejo than me (and more space, and more models :p ;D ) , and if I remember well his paint stack is a fixed one to a wall... I made mine with a medium size wooden drawer and some small and tiny board in order to keep it mobile... but my stacking volume must be more or less half of Spud.

And we are separated at least by 2000 km... :p ;D

Cheers, Chris :D
RG
 
Hi Jelly ,

Dont take me the wrong way buddy ,Im not knocking your work ,Im just trying to help you out a bit .
In the pic of the driver in the tank ,the whites do appear quite big ,but as you say it may just be the light .

But to answer your question ,I use a toothpick for placing both the white and the iris ,if you use a brush the tip can bend making a much larger contact area ,were as the toothpick wont and you can just touch the tip down where you want it ,you can sharpen the toothpick to give a smaller dot if required too ;)

Chris.
 
nice work on them there Jelly. they looks like a decent set of figures, and i like the arms, he may not be a good driver tough :p.

as for my paint rack, yes fixed to the wall. and Very Full.
IMG_0016.jpg
 
Jelly, nice work on the figures, they really look good.

Thanks for the painting tip on the eyes chris!
 
Chris S said:
Hi Jelly ,

Dont take me the wrong way buddy ,Im not knocking your work ,Im just trying to help you out a bit .

Chris.


Gooood morning to you all ! here @0850 hrs more or less the coffee is hot and the day is bright ! :D

Chris, mate :) OF COURSE I fully understand you (and Lukasz too !) ... you´re trying to help me to improve / correct my deficiencies... that´s highly appreciated! Again: absolutely do-not-worry, I fully understand the purpose of what you´re pointing to me... :)

Spud, thanks man, as you can see even the figure shoulders can´t be see through that hellish "hatch"... so I decided to spare some valious parts of the body. Hey, does it seems to me or do you have the full AK range or products? I can see also some Humbrol... for enamel washes? I really love Humbrol´s silver color...
:D Big John, Quaralane, my friends thanks a lot for watching! as you can see this is a struggle against "the eyes", mainly... ;)

I have to take the car and go to the city :p &:p, see you later, mates...
RG
 
haha no jelly not all but i do have a good few of the AK range, 2 i havent used yet but thats soon to change. i dont use the humbrolls for washes but i do plan on getting some white and trying chris's white wash.
 
:) OK, some more progress… this afternoon work: just one figurine, it seems a triffle, but it has taken its time! … and the eyes got really tired… :p Painting the face is really a struggle to me! :p ... but, of course, I am not going to abandon painting faces... no-no-no-no--- :-* ;D

I´ve tried to follow Lukasz and Chris technical advices… :D

P1010722.jpg


P1010728.jpg


P1010723.jpg


P1010726.jpg


Mates, I await your evaluation & criticism, :)
Cheers
RG
 
i think he looks pretty good, face painting is a pain for us Chris wanabes..
 
That does look a lot better Jelly ....what do you think yourself ? , I do think your figs are very good ,the eyes are a bit of a paint for everyone believe me ;)

.....Chris wannabe's .....lol , take my word for it ..ya dont wannabe ;)

Chris.
 
lol mabe i shoulda siad we needs chris's face painting Slillz. :'(
 
Hi!
Your crew really looks awsome. I mostly work in the 28-32mm range so eyes are mostly black dots in a little white but that is hard enough ;D I always found it easier not to go for the smaller brush because they can't store any paint. I rarely use something smaller than size zero. The quality brushes eg Windsor & Newton, DaVinci, Raphael, make that up with a very fine and durable tip. I don't know, what brushes you use, but you'd be amazed what small detail you can paint with a w&N size 1. The paint doesn't dry so fast in the larger reservoirs. You could also use some retarder to extend your worktime.

You mentioned wanting to try Kneadite for sculpting. If you want to buy new putty, especially for sculpting, I would recommend ProCreate. Not that Kneadite doesn't work quite well, but the ProCreate is even better.

Regards, Sarah.
 
Thanks a lot for watching & the kind comments, mates! :) Today here´s raining as if the world is coming to an end :p

Elastirion said:
Hi!
Your crew really looks awsome. I mostly work in the 28-32mm range so eyes are mostly black dots in a little white but that is hard enough ;D I always found it easier not to go for the smaller brush because they can't store any paint. I rarely use something smaller than size zero. The quality brushes eg Windsor & Newton, DaVinci, Raphael, make that up with a very fine and durable tip. I don't know, what brushes you use, but you'd be amazed what small detail you can paint with a w&N size 1. The paint doesn't dry so fast in the larger reservoirs. You could also use some retarder to extend your worktime.

You mentioned wanting to try Kneadite for sculpting. If you want to buy new putty, especially for sculpting, I would recommend ProCreate. Not that Kneadite doesn't work quite well, but the ProCreate is even better.

Regards, Sarah.
:D Hey Sarah, thanks ! but I believe that you´re lightyears in advance from me... for example, I fully understand the concept of "retarder", but I dind´t knew that it existed !! I just use water to dilute a little the paint (´cause I use acrylics...)... and yes, you are 110% right ! I´ve noticed that when I´m usuin the smallest of the brushes... :p I hardly can paint anything with them... I´m more time cursing than painting ´cause the "$%& paint dries in the tip of the brush... in the other side, when I tried to dilute more the paint, that dilution "stabbed me in the back" :mad: due to undesired capilarity behavior :p

Since last saturday, after reading here the advices, I´m painting the eyes just with two toothpicks, and supporting that with a very small brush that has scribed on it´s side: 5/0 Sarah, I just don´t know what´s the meaning of that, but the tip is Lilliputian size.

Oh, OK Sarah! I just have a tube of Tamiya bi-component putty (maybe it´s my fault but I find it sticky), and some Kneadatite... I´ve never used that before... Allright I´ll take advice about that ProCreate... never heard before the name but surely will be great... ;)

Cheers, and thanks again ;)
RG
 
Hi!

Jelly said:
:D Hey Sarah, thanks ! but I believe that you´re lightyears in advance from me...

Not really, I only read or watched every single tutorial on miniature painting available. My knowledge is mostly theoretical , because I spend way much more time surfing the net and buying stuff than actually painting ;D Don't undersell yourself (is that the right phrase?), I took a peek at your german radio crew and they look mighty fine, could maybe use some contrast.

The topic on brushes and brushsizes is a wide one. I hope you don't mind a little OT in your thread if I rambel on about it ;) I think that the concept that the higher the number of a brush the bigger it is, is an easy one. To point out the smaller brushsizes from zero downward multiples of zero are used (yes, I know, all the great mathematicians in world history conjointly rotate in their graves :p) 5/0 means 00000. I have a 10/0 lying around somewhere. Only such small brushes have no reservoir to hold any paint, so what little paint is on there dryes on the way from the palette to the mini. Quality brushes like kolinsky sables have a very fine point so that you can paint small detail but still have a reservoir to hold some paint. For good results choose natural fibre over synthetic and fine artists brushes over those made by modelling or miniature companies like GW or Tamiya etc.
Not to make it too easy for the customer, all manufacturers have their own standarts for brushsizes, so a Raphael 0 might be about the same as a daVinci 1 and so on. I took a little picture of some of my brushes to show you:

pinsel1.jpg

1 Pegasus size 1 (avarage cheap kolinski sable)
2 daVinci Maestro 1 (top notch Tobolinski Kolinski)
3 W&N Series 7 Miniature 0 (dito)
4 Raphael 8403 0 (dito)
5 Vallejo 5/0 (no idea but probably cheap kolinski)

Take a look how the hairlenght varies from brush to brush.
pinsel2.jpg


I can paint eyes with that Raphael, well sort of ;) if I could paint eyes...

regards, Sarah.
 

Latest posts

Back
Top