Quaralane
Well-Known Member
- Joined
- May 22, 2009
- Messages
- 11,262
Next up on the bench is going to be the Fine Molds 1/72 X-wing fighter

I'll be building the kit as "Red Two" from Star Wars, or "Red Leader" from Return of the Jedi, using English versions of the instructions provided several years ago by Hobbylink Japan.
A look at the contents


A VERY thorough decal sheet

Started with work on the cockpit and instrument slab
Assembled according to the kit instructions, followed by a black wash for detail
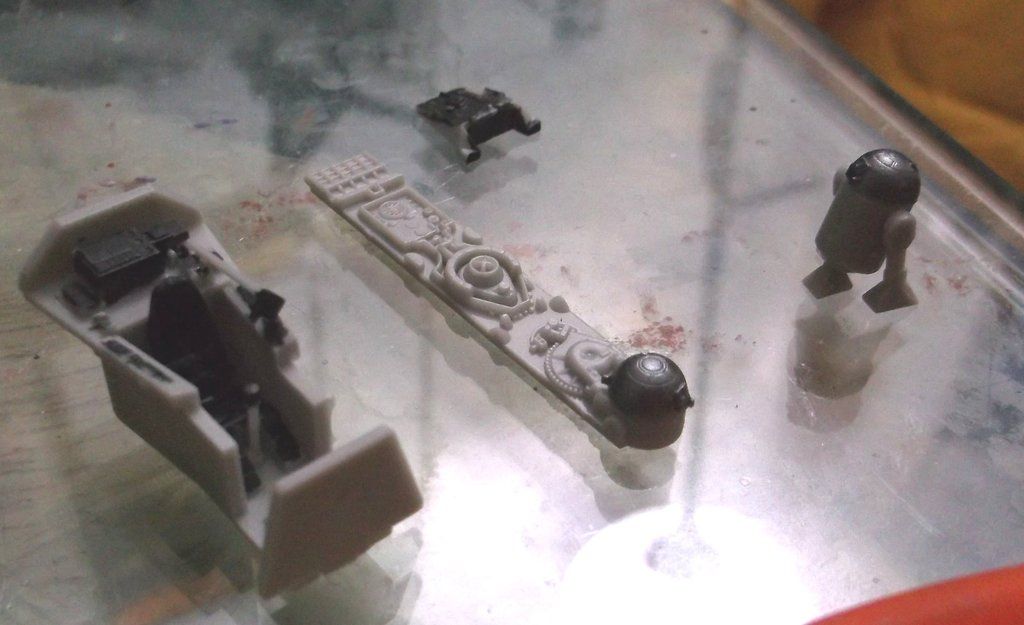

Pilot figure was painted up in a standard orange flight suit with the green patches on the helmet to make him Wedge

Wingtip guns

Main fuselage is assembled

Engine assemblies

Wings were assembled.
The inserts were painted in with Gunmetal, as were the engine endcaps

Basic assembly is finished. Opted for closed landing gear

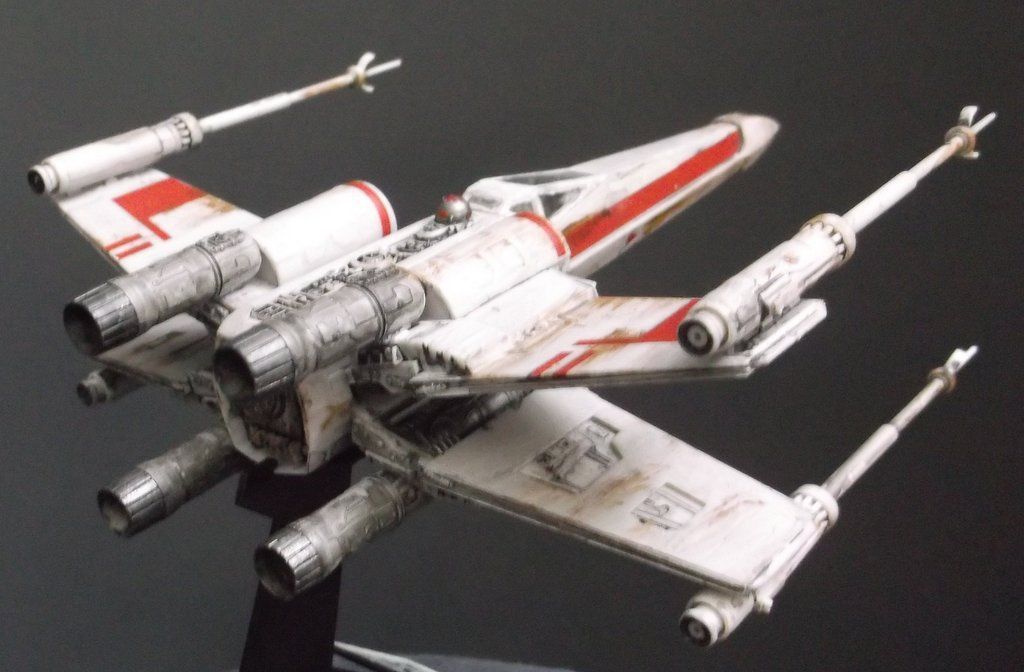
After applying the decals, the whole model was given a coat of flat sealer.
I gave the model a black wash, wiping off the excess. Then I gave the engines and back panel a second black wash
The model was further weathered with some dry-brushing using Vallejo's smoke color.
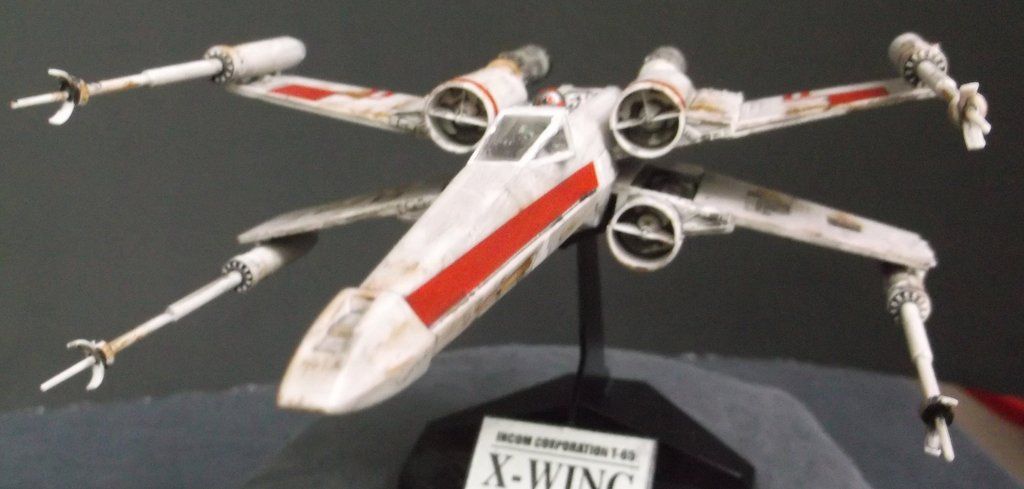
The canopy frame was hand-painted with Vallejo's grey primer, followed by hand-painting the frame with Alclad flat
The base was painted with black, then had the "Incom" placque applied
Finished build pics:


Youtube link:
[youtube]http://www.youtube.com/watch?v=xeckVPuKvmI[/youtube]
I'll be building the kit as "Red Two" from Star Wars, or "Red Leader" from Return of the Jedi, using English versions of the instructions provided several years ago by Hobbylink Japan.
A look at the contents
A VERY thorough decal sheet
Started with work on the cockpit and instrument slab
Assembled according to the kit instructions, followed by a black wash for detail
Pilot figure was painted up in a standard orange flight suit with the green patches on the helmet to make him Wedge
Wingtip guns
Main fuselage is assembled
Engine assemblies
Wings were assembled.
The inserts were painted in with Gunmetal, as were the engine endcaps
Basic assembly is finished. Opted for closed landing gear
After applying the decals, the whole model was given a coat of flat sealer.
I gave the model a black wash, wiping off the excess. Then I gave the engines and back panel a second black wash
The model was further weathered with some dry-brushing using Vallejo's smoke color.
The canopy frame was hand-painted with Vallejo's grey primer, followed by hand-painting the frame with Alclad flat
The base was painted with black, then had the "Incom" placque applied
Finished build pics:
Youtube link:
[youtube]http://www.youtube.com/watch?v=xeckVPuKvmI[/youtube]
")