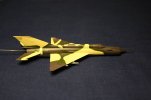
Eduard 1/144 Mig-21MF

Well, like Grendals said, once the glass is on, probably won't notice it much, so on we go.

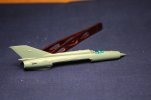
Spine and tail fin on
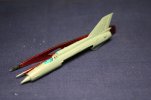
IMG_2411-vi.jpg

IMG_2412-vi.jpg

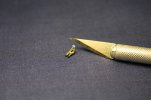
Pilot painted up. Have him glued into the cockpit now...might just hit him and the rest of the cock pit with a quick wash to tone it all down and draw out any details left, at least what you can see.

Tiny bugger!
IMG_2413-vi.jpg

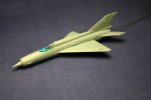
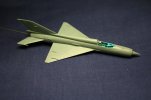
Wings and tail pieces on, also added in the piece of steel wire into the rear of the engine. Drilled out one hole, wasn't big enough, and then went too big, but luckily I could place the wire right up and under the cockpit to hold it, while I put a couple of drips of thin CA down the wire to the backside of the burner can, before the wings went on.

Skipped the main gear bay assembly since it is going to be wheels up config., just hope the bay doors fit like they should now! LOL
IMG_2414-vi.jpg

IMG_2415-vi.jpg

The detail even at this scale that Eduard has done, puts some 1/72 aircraft kits to shame, nevermind other 1/144.
 
Beauty part of it is, you get 2 kits in the box for the price.

Downside....the kit really isn't engineered for wheels up. Got the gear door covers on...many spots to clean up.
 
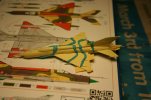
Couple of photos from painting.

Kit was primed in Vallejo Grey Primer, and the color was close enough to the color on the bottom of the aircraft that it is what I went with.

Beige color is Vallejo Air Radome Tan, with blue tack to mark off the areas of the tan I want to keep.

IMG_2461-vi.jpg

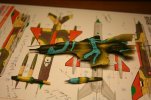
Next came the green which is Vallejo Air Med. Green. Color swatch looked good when compared to the color on the box, but I find it came out a little dark. Hoping it will lighten up some once the masking is taken off and all the colors can be seen.

IMG_2462-vi.jpg

More blue tac masking to line up the green I want to keep, last color is a mixture of Vallejo Air German Grey and Tank Brown, about a 4 to 1 ratio.

Pics to follow once I get the masking off.
 
OK, masking pulled off, need to do some minor repair work for some over spray, and where some paint pulled up (which is what I get for doing it quick).

The beige and brown/grey look good, but the green is too dark. Looked good on a color swatch compared to the color on the box, but way too dark. Oh well, too late now!

IMG_2467-vi.jpg

IMG_2468-vi.jpg

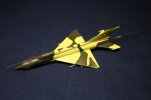
On to the orange panels, which are currently giving me fits as the orange paint even neat from the bottle has poor coverage.

Vallejo #956 in the model color range. In Spanish, it is just orange, in English, it says clear orange, which to me means a transparent, however they already have a transparent orange in the line up, so I figure it is just a translation problem. Well 3 coats later and the colors underneath are still show through....so a clear orange it is, however more opaque than their transparent orange. Switching to Bright Orange to see if that makes any difference. And there will be some clean up, as I can see the orange paint seeping under the tape I laid down to give me a straight line. Fun, fun!
 
Alright....a quick update. The painting the orange by hand, even with the panels taped off was pretty much a disaster. Besides the orange paint being very translucent (despite it not being a transparent paint), it needed multiple coats (think I am on 3 coats of Orange and a coat of bright orange and I can still see some of the darker paint under the orange), and the paint running under the tape, coupled with the fact that the green I used in the camo pattern is too dark (much darker than it looks in the photos above), I have decided that this kit is going to need to be stripped and re-painted, which means there is no way I will have it done for the contest ending.

Learned my lesson, should have sprayed the orange wing tips, tail and spine first over the grey primer, and then masked it off and sprayed the rest of the plane.

So, in the purple pond this will go to start over. We shall see if Castrol Super Clean will take off the Vallejo Primer!
 

Latest posts

Back
Top