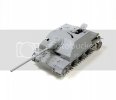
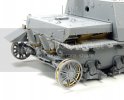
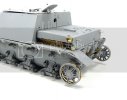
Dueling PZ IV L70 (A)

scratchmod

New Member
Joined
Feb 13, 2011
Messages
856
Sorry for my absence here, been busy with a fun project that is coming to an end soon. T and I have been having fun doing a duel build/blog of the Dragon Jagdpanzer IV L70 kits...old and new.

Here is what I was up to.

007-3.jpg


008-1.jpg


Should be done in the next day or two.

Rob
 
Looking really great Rob!!! Love the weathering and the ground works...top notch building!! ;)
 
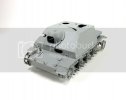
Hey guys!! Not as far along as Rob at the moment....a little bit farther than this, but not much:

KChorusChristmas2012048.jpg

KChorusChristmas2012043.jpg

Some may see where I am heading on this one!!! ;D While Rob's may be land-locked, mine will still be "operational" so to speak!!! Hope to have another update soon! ;)
 
Here is where mine stands at the moment....

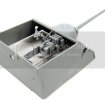
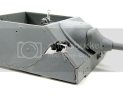
I attacked the pea shooter last night. I must say I like the detail on the gun itself, however little to none of this will be seen when done.

011.jpg

From thins angle, maybe. I seen a shot from the museum that the gun shows, so the interior will get some paint all around.

014.jpg

015.jpg

The butt.....

022.jpg

023.jpg

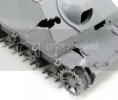
Tonight I should finish the plastic damage all around. I stumbled across one picture I had not seen before of this tank being brought back...that make 4 after she got owned by the good guys...anyway it was taken by a trailing vehicle from behind....this opened a couple doors for a 'little' damage on the rear right fender that was obscured in other pics.

Thanks again for hanging around!!!
 
Todd, very cool work I esp like the damage on the upper hull. I've been wanting to get this kit myself...so maybe after Christmas. I have also been working on a Jagdpanzer IV/70(V) w/Zimmerit by Dragon just started it a week ago, and it will be the first kit built from my new place. Good to see your work on here !

Cheers !

Rob B
 
Rob, some really amazing work here on your Jagdpanzer IV/70(A). Will have to visit your Scratchmod site real soon I just got online at my new place. It wont be long before i get my workshop up and running. So i can run with the pack so to say. Awesome stuff as usual and its always good to see what kind of Panzer wrecks you come up with !

Prosit !

Rob B
 
Hey Rob!! Congrats for getting back up online and going at the new place!!! Must be nice!! Starting a celebratory kit as well!!! You must show at some point!! Found tons of nice piccies of the 'V'. Was thinking the other day what a dope I was for not grabbing the 38T w/interior off you at AMPS.....next time brotha'!!! Maybe at one of the build meetings sooner or later!!

Hey Gee!! She had an interesting pattern to the damage. Of course the frontal hits but the right side got messed up pretty good but can clearly see these vents were just slighly bent here and there!!! Wait till I get to some of the mesh armor! ;D ;D ;D ;D
 
Nice project T, can't wait to see this come together. Loving the extreme damage!
 
Thanks guys!!! Appreciate the comments!!! I suspect we will be seeing an update from Rob soon...should help answer some questions about damage!!!! ;D
 
I'm back again. Just got to the bench 45 min ago and thought I would show a quick sbs to explain the reason for the dust streaks on the sides. Since the tank was in this position before whatever house or building came down it would have been covered in debris. This also explains why I sand the tank into the base.
A pic of the front of the tank I did first and is some what dry now.

005-4.jpg


Instead of using just earth I ground up some brick cement and plaster to an almost powder being sure to leave some bits. A small amount was also mixed with light earth.

007-4.jpg


I first applied some of the earth, brick mix.

008-2.jpg


Then came some of the AK sand and gravel fixer applied with sparingly, don't want to soak the model.

009.jpg


While still wet I applied more of the powder and bits, adding some brick color here and there.

010-1.jpg


After that some light earth/dust pigments from AK.

011-1.jpg


Now the model is set aside to dry, then some final dust pigments where needed.

012-2.jpg


013-2.jpg


Will give the base the same treatment and maybe add some detail bits. Need to get this one done before the Zombies get here.. ;D ;D
Should have this wrapped up tonight....and not bad for 2 1/2 weeks work.
 
Rob very cool on the dirt and debris it looks awesome and very convincing. Well done !

Rob B
 
Beautiful stuff there Rob!!! Rubble is kickin'!!! Almost there my friend!!! ;D
 
looks the part alright just goes to show you don't need expensive products to get the quality finish as you have shown....rock on with the DIRT
 

Latest posts

Back
Top