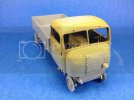
Dragon RSO/01 Type 470 Tractor Kit #6691
Big-John

New Member
Joined
Sep 17, 2011
Messages
1,052
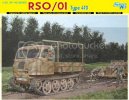
Dragon RSO/01 Type 470 Tractor Kit #6691

rso-01.jpg

Ever since I heard Dragon was going to release a new RSO in August, I knew right away that I just had to have one! I have been watching the on line vendors periodically and finally found them available from Sprue Brothers. So I wasted no time in placing my order.

I have read articles on the other RSO variants that the suspension was a real PIA, so I will be doing my homework before committing any parts to glue to make sure I get it all lined up the best I can.

For anyone wanting to build a Dragon RSO, I highly recommend the following sites before starting.

http://www.perthmilitarymodelling.com/reviews/vehicles/dragon/dr6691.html

http://www.perthmilitarymodelling.com/reviews/vehicles/dragon/dr6684.html

http://www.perthmilitarymodelling.com/reviews/vehicles/dragon/dr6640.html

http://ricklawler.plastic-garden.com/?p=1885

The inspiration
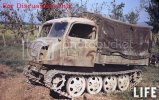
RSODiscussion.jpg
 
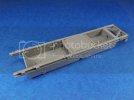
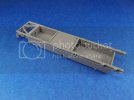
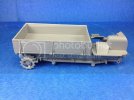
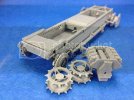
I finally got started on the RSO this week end after studying the instructions and figuring out a plan of attack. Dragon has you assemble the fragile suspension and running gear that’s so hard to line up and keep straight. I thought I would Start with the lower tub and assemble the suspension onto it to help hold it in place better.

I started with step 4 which deals with the lower tub. Most of this step is pretty straight forward, however, there are a few things I found that I thought I’d share with anyone wishing to build this kit.

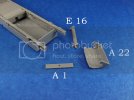
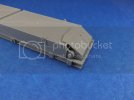
As Terry Ashley states in his review. Dragon calls for parts from the A sprue for the front idler axle. In fact, you will need to use the axle parts from the E sprue. This allows the front tub cover to be fitted correctly. Dragon has you install part A1 in step 4, but you need to leave this off until you install the idler axle and front tube cover in step 5.

Dragon provides an etched front cover (pats MB5, MB1, and MB2). This is the cover you need to use to make life easy. I don’t have the proper PE bending equipment, so it didn’t take me long to trash this part. Dragon also includes a plastic front cover (A 22), but will need modified to fit correctly. It is to long to fit up in behind part A 1.

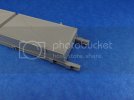
Most of the morning has been spent filling and test fitting the front cover. It is not glued in place yet as I have a gap to fill that resulted from the modification.

Overall, the lower tub is a very fiddly assembly and lots of test fitting should be done to ensure proper fit.

100_0793.jpg

100_0792.jpg

100_0790.jpg

100_0791.jpg

100_0794.jpg
 
hmmm, not exactly my cup of tea, but im looking forward to see how it progresses! nice work with the chassis! 8)
 
Nice kit big john
i wanted this but ended up settling for the rso/03 instead.
ill look forward to watching this come together!
Take care with the running gear if its anything like the 03 its a bit of a mare, but it should turn out a nice kit
 
Hi

Very nice work, I love all kinds of RSO. Good luck with that. I must get that kit too.

Przemo
 
Now, by no means am I bashing this kit, but, it is very fidily and needs a little care and a lot of test fitting.

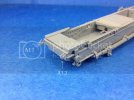
The first pic I show where I have shortened the hooks by about 1mm per Terry Ashley’s recommendations. (Parts A11 and A12)

IMG_0622.jpg

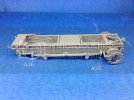
Here in the second pic. I have identified parts (A25 and A26). They have a little pin that goes through the leaf spring eye, (parts B6 and B7). I had to drill the holes out on parts B6 and B7 to get the pins to go through.

IMG_0623.jpg

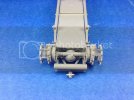
Next is the rear end, or differential. This is composed of a lot of separate parts and is hard to keep straight while fitting it all together. Again, just take your time and test fit. I glued the drive sprockets in place and set the unit in between 2 glass glue bottles to hold it all straight while it set up. DO NOT glue the front sprockets on until you have fitted the tracks. This way you can assure to get the proper tension and slack in the tracks.

IMG_0625.jpg

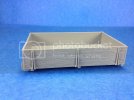
I got board with the lower half, so I spent a little time with the cargo box so I could see how it was going to fit. I was originally going to toss the engine in my spares box, but I see that part of the engine will be visible between the frame and cab. I’m going to have to find a way to shoehorn it in now.

IMG_0626.jpg

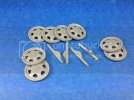
And lastly, here are the wheels and such all cleaned up waiting their turn.

IMG_0628.jpg
 
I’m finally getting to a point to where it feels like I’m making progress.

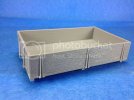
I gave the out side surfaces of the cargo bed some wood grain texture with a scribing tool.

IMG_0647.jpg

IMG_0648.jpg

Got the front sprockets done, and just enough of the engine that will be seen under the cab. The rest of the engine parts will go to my spare parts box.

IMG_0646.jpg

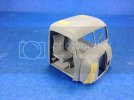
Made a start on the cab, so far, the fit is good. The seats are some what of a pain. The only thing that holds them in is the single center support on the front. I had to tape the cab together to insure that the seat backs fit against the back wall.

IMG_0650.jpg

I’m also in the process of cleaning up the magic tracks.
 
Cool Vehicle...detail looks nice. What type of paint scheme are you looking at? Bill
 
PANZERMAN said:
Cool Vehicle...detail looks nice. What type of paint scheme are you looking at? Bill

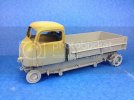
Thanks, I'm going with something close to the prototype picture at the begining of this thread.

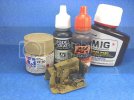
Got some paint started today. I need the paint the cab interior so I can get it closed up.

Going to try Acrylics on this one and I'm loving what I'm seeing!

Also tried chipping for the first time ever, I'm happy with some of it, still need practice with that one. Good thing hardly ANY of it wont be seen once it's closed up.

IMG_0657.jpg
 
i taught you had forgotten about it :)

looking good tough John
 

Latest posts

Back
Top