You are using an out of date browser. It may not display this or other websites correctly.
You should upgrade or use an alternative browser.
You should upgrade or use an alternative browser.
Dragon 1/32 "early" P-51D Mustang
- Thread starter Carsenault
- Start date
Carsenault
New Member
- Joined
- May 7, 2009
- Messages
- 845
Thanks for the thumbs up guys, much appreciated! Things are going so well with this one, the big Tamiya kit may not be very far away afterall.
Got some color on it now. I started off with the invasion stripes, using Tamiya white and semi gloss black, followed by MM chrome yellow over white primer. Hoping to get the green field applied camo on tomorrow night. Cheers for now.
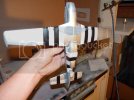
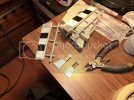
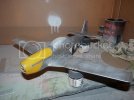
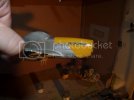
Got some color on it now. I started off with the invasion stripes, using Tamiya white and semi gloss black, followed by MM chrome yellow over white primer. Hoping to get the green field applied camo on tomorrow night. Cheers for now.


liquorboxracing
New Member
- Joined
- Oct 12, 2012
- Messages
- 62
Man that's looking good! The yellow really pops!
Is that foam you used inside landing gear bay's to keep over spray out?
Is that foam you used inside landing gear bay's to keep over spray out?
S
ScaleModelMadman
Guest
Nice!
Carsenault
New Member
- Joined
- May 7, 2009
- Messages
- 845
liquorboxracing said:Man that's looking good! The yellow really pops!
Is that foam you used inside landing gear bay's to keep over spray out?
Yup, I had a section of foam from a computer part package that I had saved. I made a pattern using the gear bay doors to draw the outline. I then put the pattern on the foam sheet and cut out the pattern a little bigger than the actual door outlines. Then just placed them in the openings to keep the paint out. Im gonna have to find some more of that foam stuff, I am almost out now.
liquorboxracing
New Member
- Joined
- Oct 12, 2012
- Messages
- 62
Carsenault said:Yup, I had a section of foam from a computer part package that I had saved. I made a pattern using the gear bay doors to draw the outline. I then put the pattern on the foam sheet and cut out the pattern a little bigger than the actual door outlines. Then just placed them in the openings to keep the paint out. Im gonna have to find some more of that foam stuff, I am almost out now.
Awesome idea! I think I have some foam in a few boxes in my attic. I'll be trying that one! Looks like it worked perfect.
JMac
cut. glue. paint. repeat.
- Joined
- May 24, 2009
- Messages
- 2,812
Great tip for masking the landing gear bays. The paint is looking fantastic Charlie.
Quaralane
Well-Known Member
- Joined
- May 22, 2009
- Messages
- 11,262
Beautiful looking bird.
Nice masking technique, too
Nice masking technique, too
Ferris928
New Member
- Joined
- May 7, 2009
- Messages
- 623
Great update and idea!
Gonna have to remember that one.
Cheers!
Gonna have to remember that one.
Cheers!
Carsenault
New Member
- Joined
- May 7, 2009
- Messages
- 845
Ok, Im really getting worried now, this build is going too well. first time I havent struggled with a paint job in ages.  Knock on wood!
I love controversial paint schemes, and this one is the grand daddy of em all I think. It has to be the most debated finish of any WW2 Allied aircraft. Depending on who you talk to or what book you read, the top-side camo color is either dark sea blue, medium blue, olive drab or RAF dark green. To complicate things further, it would appear to have had at one time full D-Day stripes top and bottom, then had the upper stripes painted over in a contrasting color to the base topside camo. some say the different color is simply due to color blotches on the photo negatives. I went with the RAF dark green topside and US OD green for the touch ups. The color pictures I have seen support that. And the multiple angles showing the discolored areas would disprove the bad negative theory. from the few pics as well, it appears to have a mix of hard and soft edge demarkations.
To get the different demarkations, I used both raised paper masks and masking tape applied directly to the model. I found a few very good profiles online and was able to draw out the patterns fairly accurately, I then transfered the patter to some masking tape to mask off for the hard edges, and I cut out paper masks for the soft edges. I used Tamiya RAF dark green as a base color, then I mixed a faded version of that by mixing in some Tamiya buff which i used to fade out the panels a bit. I then did a mist coat of the dark green again to blend it all in. The OD green is Vallejo Model Air, which I also faded out in a few areas with a slightly lightened od/sand mix. I didnt want to OD to be as faded as the dark green as I'd like it to look freshly painted. Once this cures a bit, I will chip the dark green and yellow paint some.
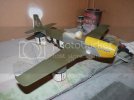
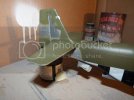
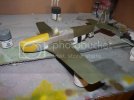
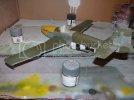
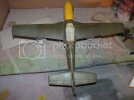
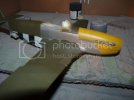
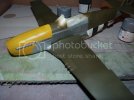
And thats all for tonight, Have a happy and safe Hallowe'en and Samhain
I love controversial paint schemes, and this one is the grand daddy of em all I think. It has to be the most debated finish of any WW2 Allied aircraft. Depending on who you talk to or what book you read, the top-side camo color is either dark sea blue, medium blue, olive drab or RAF dark green. To complicate things further, it would appear to have had at one time full D-Day stripes top and bottom, then had the upper stripes painted over in a contrasting color to the base topside camo. some say the different color is simply due to color blotches on the photo negatives. I went with the RAF dark green topside and US OD green for the touch ups. The color pictures I have seen support that. And the multiple angles showing the discolored areas would disprove the bad negative theory. from the few pics as well, it appears to have a mix of hard and soft edge demarkations.
To get the different demarkations, I used both raised paper masks and masking tape applied directly to the model. I found a few very good profiles online and was able to draw out the patterns fairly accurately, I then transfered the patter to some masking tape to mask off for the hard edges, and I cut out paper masks for the soft edges. I used Tamiya RAF dark green as a base color, then I mixed a faded version of that by mixing in some Tamiya buff which i used to fade out the panels a bit. I then did a mist coat of the dark green again to blend it all in. The OD green is Vallejo Model Air, which I also faded out in a few areas with a slightly lightened od/sand mix. I didnt want to OD to be as faded as the dark green as I'd like it to look freshly painted. Once this cures a bit, I will chip the dark green and yellow paint some.


And thats all for tonight, Have a happy and safe Hallowe'en and Samhain


letsgobrowns82
Active Member
- Joined
- Feb 27, 2011
- Messages
- 1,368
The paint is looking great, it looks like the kit has some amazing detail in the panel lines and rivets. Looking forward to seeing it finished.
liquorboxracing
New Member
- Joined
- Oct 12, 2012
- Messages
- 62
It's looking Amazing Carsenault! Some cool paint tricks you've used there as well! I will be trying a few of those affects on some of my projects in the future. I really like the contrats the two (well I guess technicaly four ) green colors have with one another. Makes for a very realistic finish. You've worked your tail off on the paint and it shows. Again, very very nice!
MrT
New Member
- Joined
- Apr 25, 2011
- Messages
- 1,490
Great looking on both accounts.
;D
;D
Ferris928
New Member
- Joined
- May 7, 2009
- Messages
- 623
Looking sweet!
Carsenault
New Member
- Joined
- May 7, 2009
- Messages
- 845
Almost done but Im gonna have to shelve this project for a bit. Early on while I was assembling the main gear struts, I had snipped off what i though was some ejector pins off of the upper strut parts. They didnt show on the scanned instructions I had. Turns out these were actually attachment points for the gear struts. ???
Once I got to the final assembly stages, I look at the instructions again to see how they mount and if there were any parts I had forgotten, and there I see in this step that the pins were to be left on and are part of the mounting point. The kit does come with spare parts, But I tried first to add some sprue to act as a mount, after being on for several hours it still wasnt very solid. So Im opting instead to get the SAC white metal gear set for this kit. Not only does it have new struts, but also better wheels plus some linkages that DML omitted. Ill order these parts soon so I can finish this. Fr now, here is the latest pics... next pictures will be the finished item.
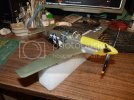
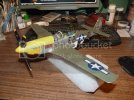
Once I got to the final assembly stages, I look at the instructions again to see how they mount and if there were any parts I had forgotten, and there I see in this step that the pins were to be left on and are part of the mounting point. The kit does come with spare parts, But I tried first to add some sprue to act as a mount, after being on for several hours it still wasnt very solid. So Im opting instead to get the SAC white metal gear set for this kit. Not only does it have new struts, but also better wheels plus some linkages that DML omitted. Ill order these parts soon so I can finish this. Fr now, here is the latest pics... next pictures will be the finished item.


Chris S
Its a bit like being handcuffed to a lunatic !
- Joined
- Feb 14, 2011
- Messages
- 4,573
Pitty about the undercarriage ,but she's looking great otherwise  ...hope to see it finished soon
Chris.
Chris.
JMac
cut. glue. paint. repeat.
- Joined
- May 24, 2009
- Messages
- 2,812
Nice work Charlie. The SAC landing gear will work out great - looking forward to the next update.
Elm City Hobbies
Active Member
- Joined
- May 7, 2009
- Messages
- 3,239
Hey there Charlie,
If you are in need of the SAC gear, I can get them for you, they run $24.25 for this kit.
If you are in need of the SAC gear, I can get them for you, they run $24.25 for this kit.
