Deep Space 9 - Lighting her up!

Kila2000

New Member
Joined
Aug 13, 2012
Messages
34
Hi all
Been lurking here a while and seems theres a great bunch of Sci-Fi modellers here so I thought I would share what I'm currently working on, my old AMT DS9.
I've been on this for some time now, started drilling holes and cleaning part a couple of years ago and even got some pieces together before shelving it. Pulled it out around this time last year and got stuck into the fibre optics getting pretty much everything in place and LEDs wired in and such before, once again shelving it, this time due to trying to figure if I could light the tiny little Runabouts it comes with. Can't by the way, they are WAY too small. Anyway, I won't post a bunch of old pics but you can see everything on my Photobucket page: http://s454.photobucket.com/albums/qq268/Kila2000/Deep%20Space%209/

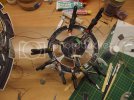
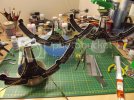
So, a few weeks ago I decided to get back on with the intention to get it finished this time. Had some wires and fibres to sort out and tidy up as well as a couple of LEDs still needing a home. At last, just last weekend, I was ready to assemble her. I've built this in a certain way that if it works out should make it a bit of a show stopper, so I won't say anymore on that in case it doesn't work out. Anyway, because of that I made my job of assembly a bit difficult, needed to thread fibre from a bottom half section into a top half and position LEDs as the assembly takes place. Took me a while to get it all sorted but I basically went from this:
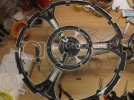
Lowerhalfwiringcomplete.jpg

Promenadewiringcomplete.jpg

Upperhalfwiringcomplete.jpg

To this:
Readyforassembly.jpg

You can see from here how much I had jammed inside and the space I had to work with threading fibres as I assembled it:
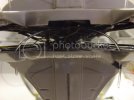
Insideonepylonsection.jpg
 
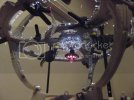
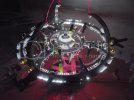
And so once I had all the final fibres sorted and the loose wires joined and stuffed inside everything was clamped down ready for glue. But first, I wanted to see her lit and so plugged everything into a breadboard, checking there were no wires touching others to cause short circuits, closed my eyes, flicked the switch, and for the very first time got to see the whole station lit up as one (I had previously been lighting sections to check circuits along the way.

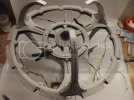
Heres how she looked:
Fullylit-aboveshot.jpg

Fullylit-belowshot.jpg

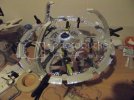
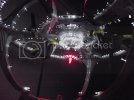
Same shots but with the room lights off:
Fullylit-aboveshotlightsoff.jpg

Fullylit-belowshotlightsoff.jpg

I was sooooo pleased it all worked out, especially as early on in the build I burnt out half a dozen LEDs due to using an un-regulated power supply (no idea what that was before then) and very nearly setting the model on fire!!

Not much more to show at this stage as I'm working on the ton of seams that need filling and sanding. I have the wires all tidied which will sit partly in the kit stand before running out into a wooden base I plan to build. Everything is glued in place and last night I was able to lift the whole model as one unit instead of separate pieces. Once the seams are all sorted I can get the paint sorted. Going to go for a studio model look rather than screen look as I like it better. Looks to me to be a sandy greyish color mostly so will have a play with some paints before I get to that stage.

I'll post more pics of decent progress as I get there but you want to see anything just ask and I'll be happy to post.
Any suggestions are welcomed and of course comments are always appreciated.
 
Stunning! It's amazing how you fit all those wires and fibres into that space! You've done a superb with all those tiny windows.

Looks incredible Kila! I'd also point out that I love the sensor dome (I think that's what that is) on the bottome. Great effect you got there. Super lighting work!
:eek: ;D :D :) 8)
 
Amazing work...

A silly question from me : do you glue your fiber with white glue ? And you cut with a pair of scisors ?
 
Thanks everyone for the great comments. I gonna spend alot of time of the seams so hopefully I won't screw things up.

YOULI said:
A silly question from me : do you glue your fiber with white glue ? And you cut with a pair of scisors ?
Yes to both questions, have you been hacking my webcam and watching me? ;D I did start out with plain white glue but then moved to Micro Kristal Klear instead.
 
Excellent work on those lights.
Been about 15 years since I tried to tackle one of those things myself.

Took a lot of patience.
Your work is proof that it can pay off big time.
 
:eek: that is totally mind blowing work you've done there mate, well done indeed.
 
Thanks everyone for the great comments.
I dont have much more to show on this yet. I have everything glued down and am working on the seams, although some are just too hard to get to due to the fibre optics so will have to be left. I did have an issue with breaking two of the thicker fibres running what will be the flashing red navigation lights on the tips of the Weapons Sails but that has been sorted. Most of this week has been devoted to tidying up the wiring and getting some switching circuits organised. I still have some stuff to figure out with the circuits so hopefully get that out of the way but this weekend I'll get some detailing work done and should be able to post more pics.

Thanks for your interest
 
Hey, Killa
Good to see you made it here to SMA..And good to see you're still chopping away at this kit...it's been a couple of years now, right?

perseverance.
 
Hey thanks man, good to see ya again. Yup, still sloggin away at this one. I keep changing my mind on things so its taking me ages to finish.

However...
although not much plastic work has been done lately I have been making progress with the electronics. I already have a strobe unit built for the navi lights so thats old news. Right from the start I wanted to be able to light this in sections but then at the same time turn everything on at once. What I have now is 11 switches for the 11 different sections I set up but, using diodes on each set of LEDs I've able to rig a master override switch that lets me turn the whole station on but still have the option of switching on sections. Heres a little vid clip of the test bed I did for them:
http://s454.photobucket.com/albums/qq268/Kila2000/Deep%20Space%209/?action=view&current=LightingswitchtestPC.mp4

What I also wanted to achieve was a way to make the Power Core appear to power up, so a fade in/out circuit was built too. This works thru a capacitor that when given power slowly charges up making the LEDs go from dim to bright. Turn the power off and the opposite happens. I want to play with the fade in time a bit more but another vid demonstrates it working:
http://s454.photobucket.com/albums/qq268/Kila2000/Deep%20Space%209/?action=view&current=Fadeintest.mp4

Got one more piece of the circuit puzzle to sort out and then electronics are done.
 

Latest posts

Back
Top