Converting Jango's Slave 1 to Boba's

Jaitea

Active Member
Joined
Nov 15, 2011
Messages
1,139
I bought a couple of Jango Fett Slave 1's at a ridiculously low price on ebay a few years ago, my plan was to paint one of them as Boba's.....I soon discovered that the 2 ships had slight differences besides the paintwork.....mainly the cockpit.

2boxes.jpg


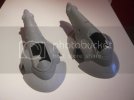
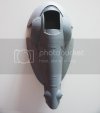
Here's my work so far:
2ships.jpg

L: Boba R: Jango
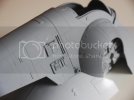
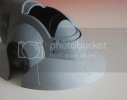
2ships2.jpg

2ships3.jpg

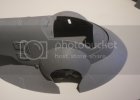
Near: Boba Far:Jango
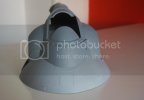
2ships4.jpg

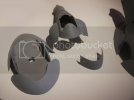
L: Jango R: Boba

Thanks for looking

John
 
So... I am guessing that you have already made those modifications?
It might have been cool to see how you did it. :)
 
Thanks John

ModelMakerMike: The two main modifications I made were to fill in the open slots on the shoulders & scratch new details on one side of the ship.

The filling in of the shoulder slots were done by pulling tight thin PVC electrical tape over the slots on the exterior side,....then filling in the gap by pasting model filler on the inside of the shoulders:
insidebz.jpg


The tape was carefully removed after a few days, naturally there was sinking of the filler but that was re-filled, being very careful not to destroy any panel lines.

The filled area was sanded smooth, again paying attention to the fine details by the manufacturer.

When I was happy that the filled area was polished to a surface similar to the rest of the model I used tape to plan out where to scribe new panel lines. I used tape that I bought for The Falcon, it's a flexible PVC tape but it's magnetic....so it's thicker than most & very flexible, so it will follow a curve.

I scribed the lines with a scalpel blade (I need to refine the lines I've done...still looks a bit rough)

The scratched details were made of card & bits of kits:
sidedetails.jpg


One part of the scratched part is made out of the material used on 3D posters (donated by my teenage son)
sidedetailscloser.jpg

3dposter.jpg


The grooves adds fine detail

John
 
Did not realize the subtle differences between the two I will be following this realize that it's a ways off but always enjoy seeing the painting techniques on this ship.. Great start!
 
Nice start, and I thought that they were basically the same ship. Nice to see the differences.
 
Thanks John, builder101 & Grendels

The main difference is the cockpit interior, but subtle differences are also on the exterior...

There now is a missing part on the Studio Filming model that is used for reference, the darker un-weathered square here:
missingpart.jpg


the other side shows a completely different shape (the Jango Fett Slave 1 has this same shape on either side as does the old AMT kit of Boba's from 1980 onwards)
slave1right01.jpg


......but this still from the film shows the model 'flipped' to reveal the missing part....:
stillr.jpg


Zoomed, brightened 7 flipped back:
stillcopy.jpg


The FineMolds kit fills in the missing part:
dscf002114.jpg


John
 
Ha!......no John, sure all my builds are 50 shades of GREY!! ;D

Maybe someday I might go into colour?

John
 
Definitely some work involved on the conversion.
Never realized all the differences
 
Thanks Quaralane, subtle differences outside, but the interior needs to be built from scratch.....when I get back to this I will try & photo each of the problems

Thanks HIGHWAYMAN9674 & welcome, I haven't got very far with this kit at all, I will get back to it though

John
 
Hi guys.....dug this one out

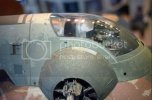
I spotted a wee diffrence in some reference photos of the studio model and the FineMolds kit(s) of Slave 1:
OriginalSlave1.jpg

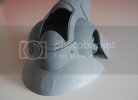
Around the cockpit there is a gap where the FM has moulded solid:
BesideJango.jpg

I cut away the piece and I'm in the middle of tidying it up:
dryfitBoba.jpg

newbitboba.jpg

Thanks fer looking
John
 
Coming along nicely . And that's a useful tip about the 3D ( lenticular ? ) posters . Keep up the good work . ;)
 
Thanks guys,

Heres where I'm at with the mod:

TopSlave.jpg

newbits.jpg

Some wee bits of detail added, plasticard & PE

newbits3.jpg

front.jpg

newbits2.jpg

Thanks for looking
John
 

Latest posts

Back
Top