Thundergod
New Member
- Joined
- Jul 26, 2013
- Messages
- 202
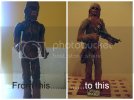
A few years ago , I picked up a Hasbro 12" Chewbacca action figure off eBay and although Hasbro have done some nice figures in this scale , THIS wasn't one of them ! It languished in a box until recently , when I re-discovered it . As I'm waiting to re-stock some materials for my current builds , I found myself wondering whether I could do something with it and as I have a bit of a history of building vinyl figures and have recently taken to customising 1/6 scale figures , I thought I'd have a bash at converting it into a "statue".
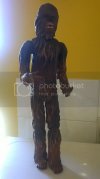
I started by using gel-type superglue to fix all the joints and then started to sculpt Chewie's "hair" with Milliput 2-part epoxy putty .
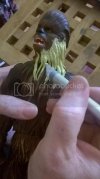
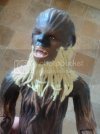
I was quite pleased with the results until it dawned on me that the new hair was more detailed than the existing sculpt , so I had to go back and simplify the detail until it more matched the original figure !
I then needed to remove the figures arms with a razor saw and add a "pin" made from aluminium tube . This was due to the figure's inability to hold the provided weapon . Seriously , in it's original state , this is probably the worst Star Wars "Action Figure" I've ever seen ! I then used the Milliput to fill in and build up the arms , after removing the detail around the joints with my power tool .
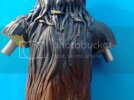
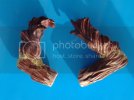
It was then simply a job of filling the joints of the waist , hips and knees with the putty and re-sculpting the hair in these areas . ( I also gave Chewie some "bangs" , to give him that "Empire/Jedi" look , but later changed my mind and removed them , after deciding to go with the more classic "New Hope" style ).
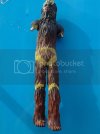
My focus then shifted to Chewie's "Bowcaster " . Again , Hasbro dropped the ball with this , as it bears only a passing resemblance to the Wookie's signature firearm . The fact that it's at least 50% too small and unable to fit into the figures hand was only the start of the problem .
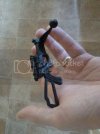
Using styrene sheet and rod , I put together my own version , using the "crossbow " part of the original gun to save me a little work .
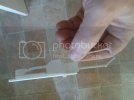
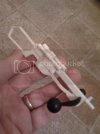
Although not 100% "screen accurate" , it's close enough for me and certainly an improvement !
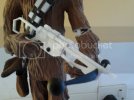
I had to further modify Chewie's left arm at this point , because when I re-positioned the arms I mis-calculated and yet again , Chewie was unable to hold his beloved Bowcaster ! ( Doh !)
Anyway , this was easily solved and after a little more work with the putty , I was back on track .
I then sanded and filed all the joints until I was more or less happy and then started on the paint . I used Humbrol acrylics and started with a brown/terracotta base coat before blending in various browns and a dark battleship grey . When dry , I drybrushed lighter browns over the entire figure .
I mounted the figure on a wood base and added a Star Wars nameplate from the spares box .
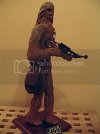
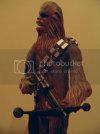
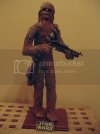
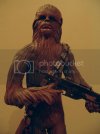
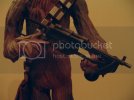
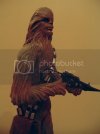
Now , it's far from perfect and some of the sculpting could use a little more work , but this was intended as just a "fun build" and took about 5 nights total work . All that remains to do is do a little shading with pastel chalks around the face and I'll most likely add a sling and "bowstring" to the weapon .

I started by using gel-type superglue to fix all the joints and then started to sculpt Chewie's "hair" with Milliput 2-part epoxy putty .


I was quite pleased with the results until it dawned on me that the new hair was more detailed than the existing sculpt , so I had to go back and simplify the detail until it more matched the original figure !
I then needed to remove the figures arms with a razor saw and add a "pin" made from aluminium tube . This was due to the figure's inability to hold the provided weapon . Seriously , in it's original state , this is probably the worst Star Wars "Action Figure" I've ever seen ! I then used the Milliput to fill in and build up the arms , after removing the detail around the joints with my power tool .


It was then simply a job of filling the joints of the waist , hips and knees with the putty and re-sculpting the hair in these areas . ( I also gave Chewie some "bangs" , to give him that "Empire/Jedi" look , but later changed my mind and removed them , after deciding to go with the more classic "New Hope" style ).

My focus then shifted to Chewie's "Bowcaster " . Again , Hasbro dropped the ball with this , as it bears only a passing resemblance to the Wookie's signature firearm . The fact that it's at least 50% too small and unable to fit into the figures hand was only the start of the problem .

Using styrene sheet and rod , I put together my own version , using the "crossbow " part of the original gun to save me a little work .


Although not 100% "screen accurate" , it's close enough for me and certainly an improvement !

I had to further modify Chewie's left arm at this point , because when I re-positioned the arms I mis-calculated and yet again , Chewie was unable to hold his beloved Bowcaster ! ( Doh !)
Anyway , this was easily solved and after a little more work with the putty , I was back on track .
I then sanded and filed all the joints until I was more or less happy and then started on the paint . I used Humbrol acrylics and started with a brown/terracotta base coat before blending in various browns and a dark battleship grey . When dry , I drybrushed lighter browns over the entire figure .
I mounted the figure on a wood base and added a Star Wars nameplate from the spares box .


Now , it's far from perfect and some of the sculpting could use a little more work , but this was intended as just a "fun build" and took about 5 nights total work . All that remains to do is do a little shading with pastel chalks around the face and I'll most likely add a sling and "bowstring" to the weapon .

