Big T-Rex a 3D Printed Model

Papermodder

Modeller in both Plastic and Paper Card
Joined
Jan 2, 2013
Messages
1,224
Good evening all.
Still playing with the 3D Printer.
In a subject somewhat suited for the coming season I've picked on another 3D printed subject.
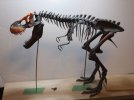
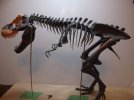
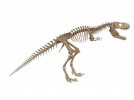
A 1/20 th scale T-Rex skeleton.
She is about 1m snout to tail, and consists of ~ 200 pieces. This is at 50% of the original model size.
1897e49d2190b9fff2e24_preview_featured_zpstmkehuxz.jpg

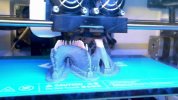
I have put a lot of hours in printing bones and more bones over the last couple of weeks. and I'm about half way through the printing process.
Print%201_zpsmq8ym04w.jpg

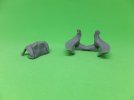
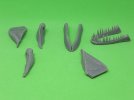
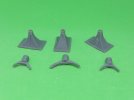
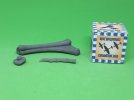
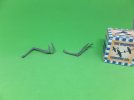
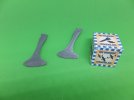
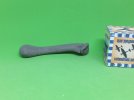
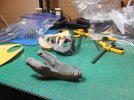
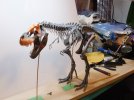
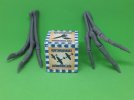
Here are some of the skeleton that has been printed and some assembly.
Bones%202_zpsnupmhctn.jpg

Bones%203_zps6kjmblkr.jpg

Bones%204_zps9vb4ycag.jpg

Bones%205_zpsebj0iswu.jpg

Bones%206_zps6qomjdav.jpg

Bones%207_zpsoa6h9qxu.jpg

Bones%208_zpsimbikn8t.jpg

Bones%209_zpsxwggbxp8.jpg

Bones%2010_zpsvbgyf2fg.jpg

Bones%2011_zpsi0e7jzpl.jpg

Bones%2012_zpsv2xsii3b.jpg

Bones%2013_zpsx4sg9t3i.jpg

Bones%2014_zps7b71ozwz.jpg

Bones%2015_zpspc8atfwo.jpg

Bones%2016_zpsx9l0xsmz.jpg

Will start on the seam work after all the printing and sub assemblies are done.
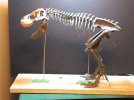
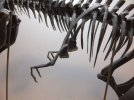
Spent Thursday at the ROM in Toronto taking reference pics of their T-Rex, as again no assembly drawing. Will have to depend on anatomy references to construct this.

Thank you for following.
Question and comments welcome.

Jim
 
Very Cool ! ;D

You have to reference the real-deal to build it - LOL

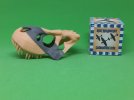
Why is the skull two different color material ?
 
Thanks Urumomo.

The head was the first thing I printed and ran out of grey filament, so used a partial spool of flesh that I had, to finish the print.
It will be painted anyway so it doesn't really matter.

Jim
 
Ah - OK .
That's logical 8)

I didn't know if maybe the size of the piece necessitated a different type of material .

Cheers
 
Good day.
Finally have finished printing all the pieces for this T-Rex.
The parts for the back of the skull and the lower jaw, I reprinted as wanted to try and print these pieces without a raft to get a flatter smoother joint surface to reduce prep time.
I am working on the skull at the moment. The back of the skull is now attached and am working on the lower jaw.

Head%201_zpsb9zpbtgp.jpg

Still have putty and seam work to do.

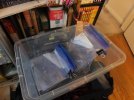
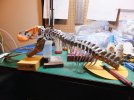
In this box are all the pieces of the lower spine and tail. They are all sorted by position for ease of assembly.

Tail%201_zps1l8upulb.jpg

I still have half the pieces to assemble into spinal sections.
Want to work on the head and upper body of the skeleton before working on the tail.

Thank you for following.
Questions and comments welcome.

Jim
 
Good day.
Had a bit of fun installing the lower jaw to the skull. This piece is so awkward that finding a good way to support it while the glue set was very difficult. Ended up just holding it in place.
Also glued together the parts of the upper spine and neck. These went together fairly straight forward.
Last night I mated the skull to the upper spine and left it to dry overnight.

Assembly%201_zpsxi83dvto.jpg

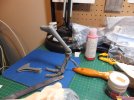
I've also been working on the legs.
One issue was that the placement of the rear toe was not correct and had to modify the part and place it in it's proper location.
The placement of the lesser toe was straight forward.

Assembly%202_zpsuddlbpuc.jpg

Cannot go any farther with the left leg till the pelvic bones are installed and the spine supported into position.
Started working on the right foot.

Thank you for following.
Questions and comments welcome.

Jim
 
I guess you could drill the centers and assemble the pieces around a heavy wire so it would be posable ?
... at least to some degree ,
Would that require much or any modification to the vertebrae ?
 
The Main spine and the neck are fixed sub assemblies. If you wanted to you could cut the individual vertebrae, to isolate them. The tail would be easy as except for the tip are all individual vertebrae.
 
Thanks Patrick.
It has been an interesting build so far and a bit of an education.

Jim
 
Thanks Kev.
I'm aiming for this one to resemble the one on display at the ROM.

Jim
 
Good evening all.
Since the last post, the legs are now complete.
The hip bones have been assembled and installed onto the skeleton.
That was tricky, as there was no way to physically clamp them to hold their place. Had to just hold them in my hand till the glue set.
When dry the ball socket for the legs was installed onto the hips and the ball joint was installed to the top on the legs.
While that was drying, I started on preparing the base. I'm using 1/8" dowel temporarily for the support rods as they are easier to size and will replace them with steel rods later.
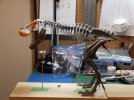
Attached the legs and positioned the skeleton to measure placement and rod length. With the rods cut and the supports placed on top, I was then able to place the T-Rex on to the base and standing on it's own pins.

Assembly%203_zpsxav48gju.jpg

Then fine tuned the rod length.

Assembly%204_zpsqarbjwtn.jpg

I wanted to finish the upper torso before starting on the tail, so went ahead and installed the shoulder blades and those tiny arms.

Assembly%205_zpsiqsjadjk.jpg

Assembly%206_zpsptrfgkel.jpg

Assembly%207_zpsoxryfqvx.jpg

Assembly%208_zpsikjmpmwp.jpg

I'm probably going to replace those flimsy dowels with the steel rods before I move on to the tail.
I have enough rod and another support brace for the tail if I need it. We"ll see.

Thank you for following.
Questions and comments welcome.

Jim
 
Funny Urumomo.

It does Patrick. And almost as much work.
Having access to a real one has been a great help.

Jim
 

Latest posts

Back
Top