Scootypuffjunior
Member
- Joined
- Dec 1, 2013
- Messages
- 74
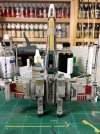
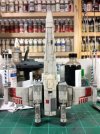
I was commissioned by a friend of mine to build four models to recreate the trench run from Star Wars; Vader, two TIEs, and Luke's Red 5. I was excited about this because I wanted a chance to do another Red 5 X-wing after I completed my own last year and was never really happy with the final result.
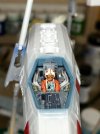
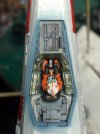
I started out with the cockpit and Luke. The interior was painted in Tamiya Neutral Grey (XF-53) and given a couple of coats of Future for the decals. I'm not too happy with the decals on the control panels, but since you can barely see inside the cockpit when it was complete I decided to leave them. I then went around and picked out some details before painting Luke.
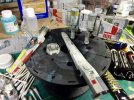
After giving everything a coat of grey Alcad II Primer/Microfiller, I went to work preshading all of the numerous panel lines over the model with heavily thinned Tamiya German Grey (XF-63), which turned out to be quite a tedious job!
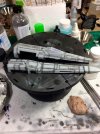
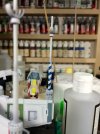
After the preshading was complete, I began laying down the base color. In the past, I have used a 1:1 mix of Tamiya Flat White (XF-2) and Medium Grey (XF-20), which I think makes a fine color for Rebellion ships. However, I wanted to try something different so I picked up a couple of Vallejo mixing bottles at my FLGS and set to work mixing up a custom color. I mixed one 10mL jar of Tamiya Flat White (XF-2), 2/3 of a jar of Tamiya White (X-2), twelve drops of Tamiya Flat Earth (XF-52), and four drops of Tamiya Neutral Grey (XF-53). Overall, I was pleased with this color.
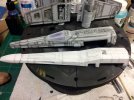
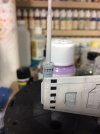
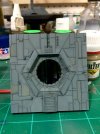
Although there is an extensive decal sheet provided with the kit, none of the decals have any of the typical weathering found on so many Star Wars vehicles. As nice as Bandai decals are, I prefer to use paint wherever possible for the most consistent finish. I used a combination of Tamiya masking tape and Humbrol Maskol applied with a torn piece of foam, trying to mimic the weathering on the filming miniature as best I can.
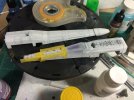
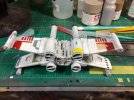
After a couple of hours, I had all of the panels on the fuselage complete. I tried to follow the studio model as best I could, but I took some liberties on various panels. I used twelve different colors on the different panels!The panels are rather stark right now, but I will go over everything with some fine grit sandpaper to give them a work look and then a combination of filters, washes, and pigments for weathering will tone them down.
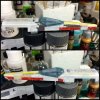
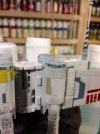
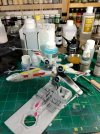
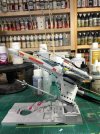
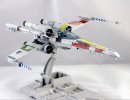
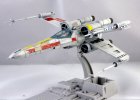
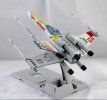
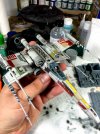
I moved on to painting the S-foils, which is the most complicated part of the painting due to the squadron markings. Again, the kit is supplied with high quality decals, but I much prefer the finish of paint an it's easier to weather compared to the decals. Luckily, this is not my first time trying to mask X-wing squadron markings so it went pretty well overall. The hardest part is getting the hash marks properly spaced, but after a little trial and error I think I got it. The decal sheet has a medium grey colored decal for the lower wing panel around the cutout. I decided to use Tamiya Cockpit Green (XF-71) instead because it appears to be greenish in the reference photos I have of the studio model. Above all, I just wanted a little splash of color on the wings. I also used this time to insert the engines that I had previously painted. They were done with a basecoat of Tamiya Gun Metal (X-10) over a black primer and then highlighted with a misting of Flat Aluminum (XF-16). They were then given a light drybrushing with some Tamiya metallic weathering powder.
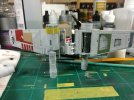
That's it for now! I am working on the second S-foil and then I have the candy cane stripes to do on the laser cannons before I put everything together and begin the fun part: weathering!
I started out with the cockpit and Luke. The interior was painted in Tamiya Neutral Grey (XF-53) and given a couple of coats of Future for the decals. I'm not too happy with the decals on the control panels, but since you can barely see inside the cockpit when it was complete I decided to leave them. I then went around and picked out some details before painting Luke.


After giving everything a coat of grey Alcad II Primer/Microfiller, I went to work preshading all of the numerous panel lines over the model with heavily thinned Tamiya German Grey (XF-63), which turned out to be quite a tedious job!

After the preshading was complete, I began laying down the base color. In the past, I have used a 1:1 mix of Tamiya Flat White (XF-2) and Medium Grey (XF-20), which I think makes a fine color for Rebellion ships. However, I wanted to try something different so I picked up a couple of Vallejo mixing bottles at my FLGS and set to work mixing up a custom color. I mixed one 10mL jar of Tamiya Flat White (XF-2), 2/3 of a jar of Tamiya White (X-2), twelve drops of Tamiya Flat Earth (XF-52), and four drops of Tamiya Neutral Grey (XF-53). Overall, I was pleased with this color.

Although there is an extensive decal sheet provided with the kit, none of the decals have any of the typical weathering found on so many Star Wars vehicles. As nice as Bandai decals are, I prefer to use paint wherever possible for the most consistent finish. I used a combination of Tamiya masking tape and Humbrol Maskol applied with a torn piece of foam, trying to mimic the weathering on the filming miniature as best I can.

After a couple of hours, I had all of the panels on the fuselage complete. I tried to follow the studio model as best I could, but I took some liberties on various panels. I used twelve different colors on the different panels!The panels are rather stark right now, but I will go over everything with some fine grit sandpaper to give them a work look and then a combination of filters, washes, and pigments for weathering will tone them down.

I moved on to painting the S-foils, which is the most complicated part of the painting due to the squadron markings. Again, the kit is supplied with high quality decals, but I much prefer the finish of paint an it's easier to weather compared to the decals. Luckily, this is not my first time trying to mask X-wing squadron markings so it went pretty well overall. The hardest part is getting the hash marks properly spaced, but after a little trial and error I think I got it. The decal sheet has a medium grey colored decal for the lower wing panel around the cutout. I decided to use Tamiya Cockpit Green (XF-71) instead because it appears to be greenish in the reference photos I have of the studio model. Above all, I just wanted a little splash of color on the wings. I also used this time to insert the engines that I had previously painted. They were done with a basecoat of Tamiya Gun Metal (X-10) over a black primer and then highlighted with a misting of Flat Aluminum (XF-16). They were then given a light drybrushing with some Tamiya metallic weathering powder.

That's it for now! I am working on the second S-foil and then I have the candy cane stripes to do on the laser cannons before I put everything together and begin the fun part: weathering!

