B-Wing

danimal518

New Member
Joined
Nov 9, 2012
Messages
80
Been a long time since I've posted on here. I just started the old AMT B-wing and figured I'd get involved in the forums again.

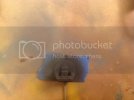
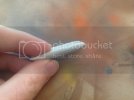
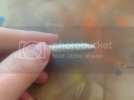
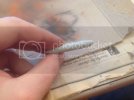
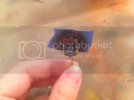
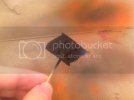
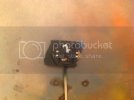
I taped a toothpick to the back of the cockpit for ease of handling then base coated the cockpit using a mix of Tamiya dark grey and a touch of flat black.
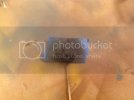
5c2fb453277269be6cf4e52e23d01381_zps6b9afema.jpg
f1bb6d8e172291ef5aed9cf25b76bf61_zpsewybknyt.jpg

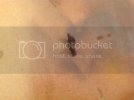
And the pilot
e3fbf466e89dad40634ad9fbd5e8aa4b_zpsydnlzomb.jpg

And part of the cockpit frame
92f8c8a3dcc400159a1889d88c87f87f_zpsgjloidex.jpg

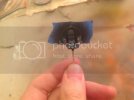
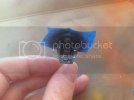
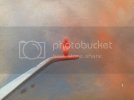
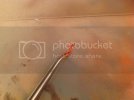
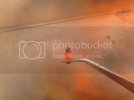
After letting the paint dry for about 3 days, I gave the pilot his first coat of Vallejo bright orange. It was my first time using Vallejo paint, so I'm still getting used to how it goes through my AB.
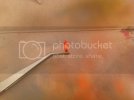
8dd0443de3be4eb777706ed6c869ccf3_zps0rdy9xvt.jpg

I also started brush painting some of the details in the cockpit. I didn't follow any references, I just wanted to add a little color.
c5b740e676ceb5a22ac8b278bae70374_zps8ibqz0e8.jpg
b6f943cd9c4b30319e7ebbace012022b_zpsz54eh34a.jpg

Still have a lot to do. I want to add a few more details in the cockpit. The sides of the seat are sparse, not sure if I should add details or if it'll just be lost when I glue everything together.

Hope to get some more work done next week as I'll be out of town this weekend.
 
I have one of those waiting to be built. :)

If it were up to me I would add cockpit details just because they are so cool. Even if they are partially hidden you still know they are there.
 
Looking forward to progress on this one.
Built one of these WAYYYY back when they were a new thing
 
JohnSimmons said:
Love the B Wing, watching this ;)
John this is the B-Wing I bought from you a while back ;D

OK, so my bad for not posting more frequently on here, but I have been documenting my work.

I'm not sure what this piece is, but I glued it together. You can see the seam very clearly in these pictures
image.jpg1_zpsiilclwio.jpg

image.jpg2_zps7oagvfn1.jpg
Then a little bit of sanding
0869aec4e578d7c4f8cbf9d663d52e84_zpsjdvzdkrl.jpg
Some of the engraved details are off. I'm going to rescribe that later.

In the meantime, I decided to put a little background in the cockpit. I'm not very artistic in terms of drawing, so I opted to just add some decals to the background.

With a coat of Future
image.jpg5_zps9kohu1qh.jpg

Having only a few models under my belt, my spares box is rather sparse. I used 2 small decals from my 1/72 Emhar Mark IV tank.
b6b791c19a670cc415e6b83a25170ff5_zpshl6likxd.jpg

Next up is the pilot. I gave him another coat of Vallego orange
image.jpg4_zps4p4npdtn.jpg

With a solid orange base on him; it was time to start picking out some details

I darkened his vest and lightened the helmet here.
a049c34e386380626a6c91cfe82df0f4_zpsw405h1nt.jpg

Added some color on the helmet for ear pieces
f3c8f3f2b225dfe9dcaab511923292ef_zps4qu2xp03.jpg

Here's more of the details picked out
2815d1a941132e5a104464cfad5431fb_zpsnfiqijmb.jpg
0f0085808db3a77bd2f206507cec4bd8_zpsqzvdnamy.jpg

I also started working on the engine plate
814e411cbcc918091e5af80d6e6b477c_zpstunyxadu.jpg

And added some details to that as well. Most of this probably won't be seen on the finished model, but it'll give the hint of detail
a51c0ec20ea0a47f76c216b2d3f97c68_zpsjxq6mk01.jpg


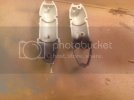
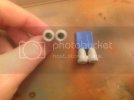
I also worked on the engines. The engines were off the sprue, so I had to manage to keep the attachment points clear of glue. I opted for the lazy man's fix by just masking them, which doubled as a handle
f04aab817b387095641738b8b12f51b4_zpsfnblhla8.jpg

I base coated them a dark grey with Tamiya acrylics
6baa6c4549d59ec54d7f5c6ed1867c49_zpsqsoiycqb.jpg

Here I added some scorch marks on the engines
ac97d752d6a72d9421e990a2e5cd9993_zpsar6bwkji.jpg

I hope to get some more work done on the cockpit and close it up in the next few days.
 
Looks great. The B Wing is also one of my Top 5 SW ships. ;) Looking fwd to seeing the results of your next session.

RE: the Vallejo paint. FWIW. I found this out by complete accident looking for different info. Buried in their online documentation Vallejo recommends you shoot their paint around 12psi. Many shoot at 20+. But that dries the paint. Once I lowered my compressor, my clogs have gone to near zero. HTH
 
I got some time late last night and tonight on the bench.

First I put the engines on the engine plate. I'm pretty happy with how this turned out.
8248843206a21fa354795458dfbb7783_zpsv7yym4kr.jpg
668aca159ce97e445ba8f18ba770af7f_zpsoqzxrtz2.jpg

I also glued the cockpit together. There was a nasty gap, so I used some homemade liquid sprue to fill it. This was my first time using liquid sprue, and it was messier than I thought it'd be.

f70a0bcc8f1f78be1bf0c5713b72003b_zps3mrpw6aj.jpg

The nice thing about liquid sprue is that it sands down very nicely. I did, however, destroy some raised detail in the process. I don't know how to fix the seam with all of the intricate detail.
23cb829c0a5b290aae3e6ccd62c47b6c_zpssgwwziun.jpg

My next step is to scribe a new line (what is that supposed to be anyway?) and then sand off the rest of the raised detail. I need to get this cockpit done, so I can put it inside the body.
 
Go Flight said:
Looks great. The B Wing is also one of my Top 5 SW ships. ;) Looking fwd to seeing the results of your next session.

RE: the Vallejo paint. FWIW. I found this out by complete accident looking for different info. Buried in their online documentation Vallejo recommends you shoot their paint around 12psi. Many shoot at 20+. But that dries the paint. Once I lowered my compressor, my clogs have gone to near zero. HTH

I checked the air pressure on my AB, and I shot the Vallejo at about 15psi. I'll try dialing it down to 12 next time and see how that works. Now to find an excuse to paint something with my limited Vallejo collection.
 
Nice little bit of progress. That cockpit looks nice with the clean details.

I just became aware of homemade liquid sprue. What method did you use to make yours?

Try magnet wire (or whatever gauge you need to match the detail size) in a thin scribed groove to restore raised details.
 
Hagoth said:
Nice little bit of progress. That cockpit looks nice with the clean details.

I just became aware of homemade liquid sprue. What method did you use to make yours?

Try magnet wire (or whatever gauge you need to match the detail size) in a thin scribed groove to restore raised details.

Making the liquid sprue was pretty easy. I took a jar that was half full of Plastruct Bondene and put bits of sprue in. I came back a day or two later and added more. I kept doing this until it was nice and thick. I originally made the mistake of making it in a bottle without a brush applicator. I tried using an old paintbrush to apply the liquid sprue and that was awful. I eventually cleaned it off by dipping it in another bottle of cement. I'd recommend making your liquid sprue in a bottle with a brush applicator. The neat thing about making liquid sprue is that you can make it as thin or as thick as you want. I plan on making a few more bottles of different viscosities for different needs. I'm sure with enough practice, I'll get good at applying it.

I should also note that masking off the gap helped a lot. I took the mask off too early and it left the edges a bit ragged, which was easily fixed by sanding. You don't want to let it get too dry, or it'll turn into a solid piece of plastic and you'll never get the mask off completely. You just have to figure out the right timing for removing your mask.
 
Thanks for the liquid sprue insights. I have since looked into this more and there seems to be quite a few methods for making it. I'm going to have to try yours out and play with it.
 
Very cool looking, I like the detail you put into the model. I am waiting to see how the cockpit looks closed up as I have the same model and want to detail it up more myself :)
 

Latest posts

Back
Top