AMT U.S.S. Enterprise Set

Uncle_Bang

a.k.a. Brandon Hodge
Joined
Oct 17, 2012
Messages
19
How's it going eh!

This is my first WIP forum post and my first build (since from forever ago). And since this is practically my first build I'm sure there will be something I'm doing that is cringe-worthy wrong, but I will have no idea what it is. I'm new at this, so all I really know for certain is: put glue on parts and put parts onto other parts. So yeah if you see something that is amiss please call me out on it, otherwise I will never learn.

I am building the AMT U.S.S. Enterprise kit. It is 1/2500 scale and is the first in the set of four kits I plan on building (I'll be doing all the Enterprises from A-E at this scale).

You can get more info about the kit and view it's instructions through the link I've provided above, but here's a quick look at the box art:
product.jpg

I've already started a fair bit of it before I've even heard of these forums, so I'll get you guys up to speed in this first post. I only have pictures of the assembled models, I didn't even think to document my progress up to this point.

1.) Enterprise NCC-1701

I'm practically done this one. I've put together the sub assemblies, applied some paint, and applied the decals. All that is left on this one is applying a matte clear coat and final assembly. Here are a few shots:

Engineering Hull (with warp nacelles dry fitted on)
amt660_enterprisencc1701_1_by_uncle_bang-d5i9gai.jpg
Side
amt660_enterprisencc1701_2_by_uncle_bang-d5i9gaf.jpg
Top
amt660_enterprisencc1701_3_by_uncle_bang-d5i9ga3.jpg
Threw this angle in because I thought it looked cool :p

Saucer
amt660_enterprisencc1701_4_by_uncle_bang-d5i9ga1.jpg
Top
I kinda borked up that registration decal on the top and at the time I had no idea how to fix it, oh well live and learn.
amt660_enterprisencc1701_5_by_uncle_bang-d5i9g9w.jpg
Bottom

For assembly I opted to glue it together with some Testors glue instead of using the snap feature of the kit (I wanted to feel all growed up, hur :D).

The paints I used were some basic acrylic craft paints that I picked up from the dollar store. I didn't put any primer on the plastic before I painted it (oops), after researching more on model building I realized I probably should have done that. I lucked out here I think though, because the acrylic stuck to the model pretty good (I did remember to wash all the parts before I started).

For decal application I applied a few coats of some FolkArt stuff I found at Wallie World to the parts. It was a Hi-Glaze clear coat. And made sure to follow the decal instructions printed on the sheet. I also picked up some Microscale Micro Sol and Liquid Decal Film. The instructions I found online somewhere said that the decal was supposed to wrinkle quite a bit after apply that Sol stuff, but that never happened... But anyway, the decals seemed to have turned out all right (with the exception of the registry decal on the top of the saucer, that makes me a sad panda :'(). I later realized that in order to nudge the decal properly I need to add more water to float the decal on the model so I could put it in place. After learning that all the other decals here were a cinch.

Next I'm planning on applying the matte coat (some generic acrylic spray brand I found at the dollar store). I want to keep those red bits on the nacelles shiny, but I'm not sure if I should try to mask it off or just apply some brush on glaze after the fact... What do you guys think would be best there?

Oh, and in case you are wondering, that black wire you see attached to the engineering hull is just some craft wire (from the dollar store). I twisted together to make it more ridged and used a bit of hot glue to fasten it to the model. It is so I can hold the model to apply the spray glaze and spray matte.

2.) Enterprise NCC-1701 Refit

I've assembled all the sub assemblies on this one (and the next) and it's been sanded and I'm going to remember to apply primer to these. I decided to apply the nacelles beforehand because I figured it would be easier to paint and apply the decals, the saucer is still separate it's only dry fitted on for dramatic effect. Here are a few shots of my current progress on this ship:

amt660_enterprisencc1701a_3_by_uncle_bang-d5i9g9p.jpg
Top. Tried to keep my fingers out of the shot, but I still needed to support it
amt660_enterprisencc1701a_2_by_uncle_bang-d5i9g9r.jpg
Side. Quickly scrapped the tweezers idea, couldn't hold it steady enough to take the shot.
amt660_enterprisencc1701a_1_by_uncle_bang-d5i9g9t.jpg
Bottom

Nothing much else to say about this one yet...

3.) Enterprise NCC-1701 B

The ships are getting bigger! :O This one is still in sub assemblies (all of the shots are just dry fits). I'm still working on filling gaps with that Testors putty shtuff. I think I will keep this in it's three separate sub assemblies while I apply paint and decals. Here are some images of my current progress on it:

amt660_enterprisencc1701b_1_by_uncle_bang-d5i9g9m.jpg
Top
amt660_enterprisencc1701b_2_by_uncle_bang-d5i9g9l.jpg
Side
amt660_enterprisencc1701b_3_by_uncle_bang-d5i9g9i.jpg
Bottom

I was thinking about filling that stand hole at the bottom of the B with some Testors putty, would that be the the right stuff to use for that job?

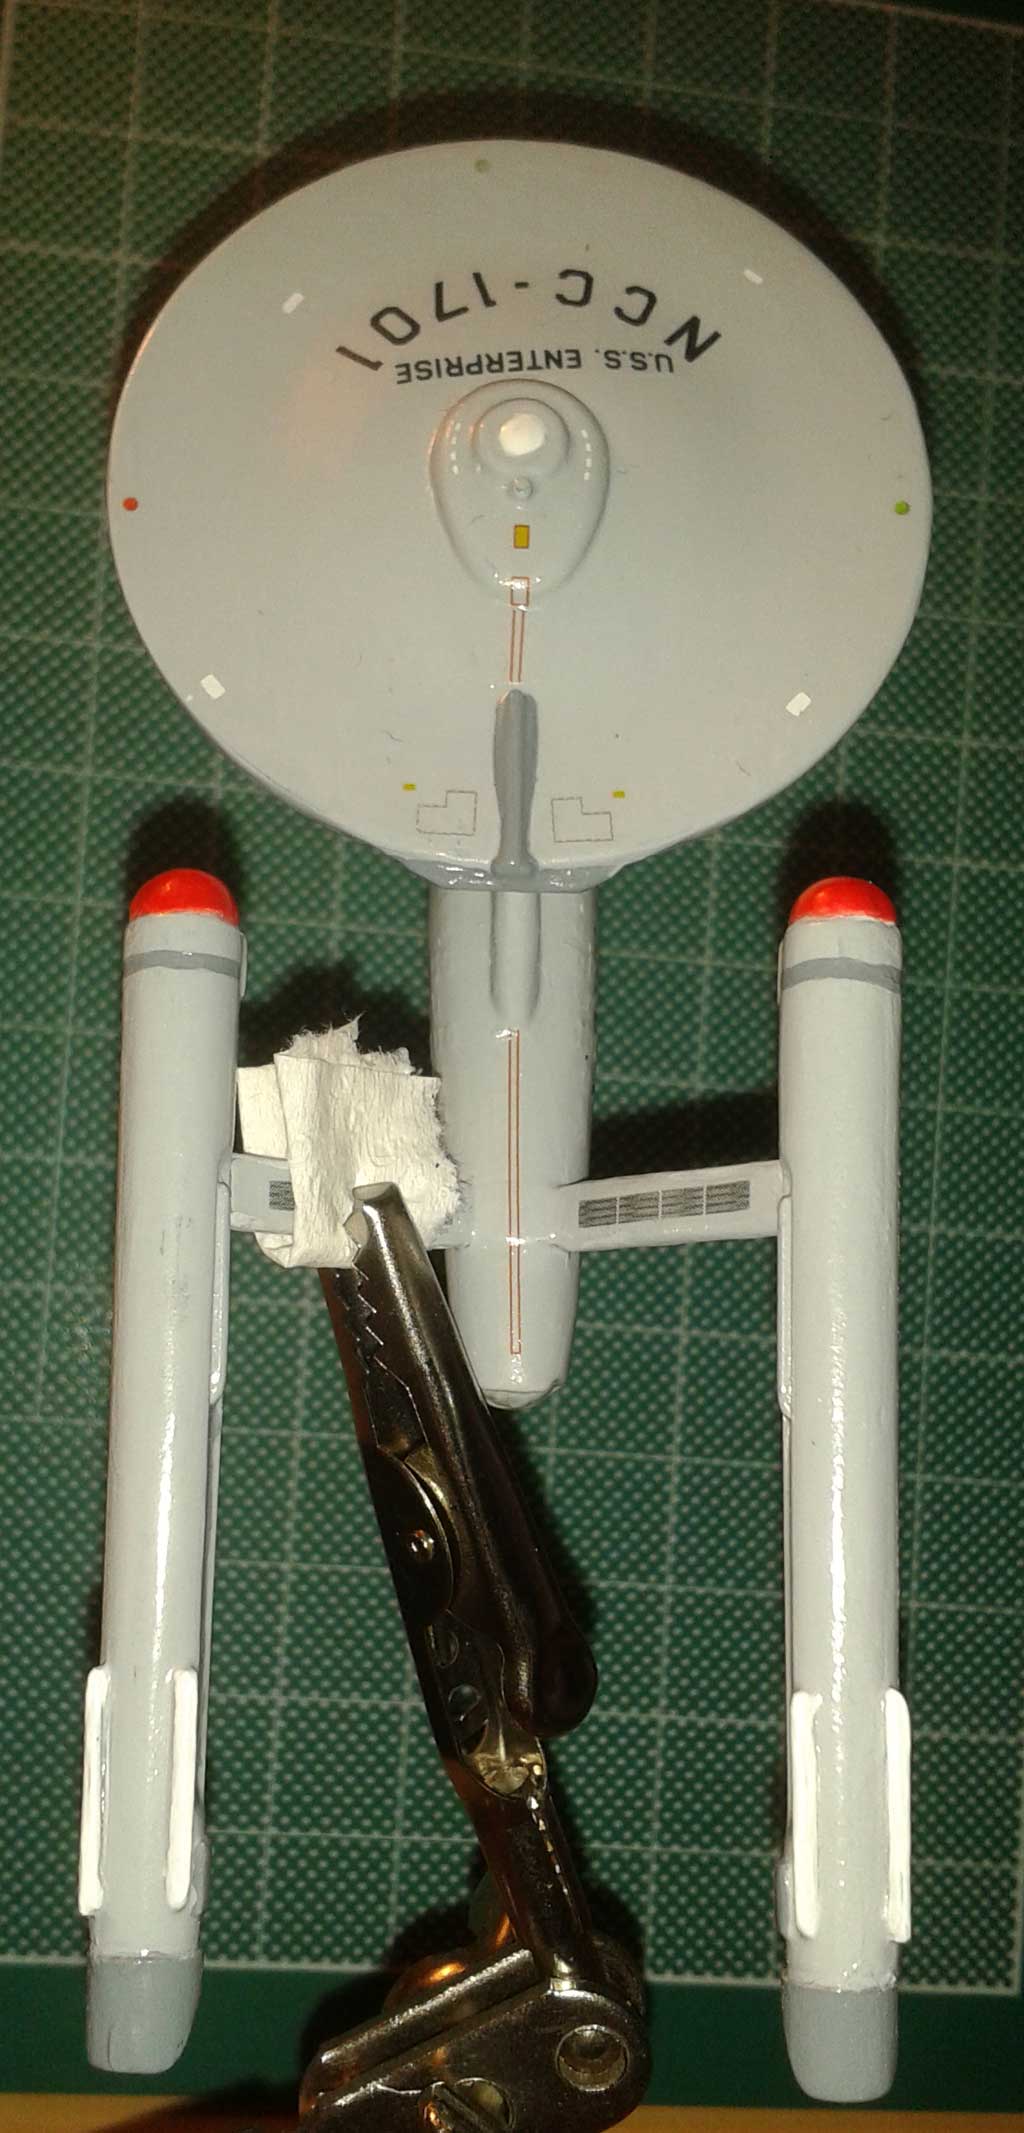
Just for fun here's a shot of how I keep the models while paint and stuff is drying on them:
amt660_workspace1_by_uncle_bang-d5i9g9h.jpg

That's all I have for now on this build. One thing I'm still humming and hawing over is how I'm going to display these. I was thinking of just drilling a hole in the bottom of each and sticking a brass rod in them, but I was kind of hoping for a less destructive approach. Any suggestions?

Thanks for reading!

Have a good one eh,
~Uncle Bang
 
looks like this set (1/2500) is gonna be the only way to get a complete set of enterprises. Ah well, looks good btw!
 
Quaralane said:
Looks like you're off to a good start.
Too bad about the upper saucer registry
Thanks, and yeah; I'm pretty sure that registry is going to haunt me well after it's built. I guess it gives me the excuse to rebuild a larger version of the ship now. :D

You have some really great builds. I've been trying to watch them all on YouTube, but due to lack of time I haven't gotten very far.

amateurmodeler said:
looks like this set (1/2500) is gonna be the only way to get a complete set of enterprises. Ah well, looks good btw!
It definitely seems that way, at least for all of the classic ships. It would have been cool if the NX-01 and the J.J. Abrams version were released at this scale. I know those aren't very popular with fans, but I'm a bit of a completionist and to me that would have been a more complete set.

Great work with the Klingon D7, it turned out great! I want to light up a model too. I even have the kit I want to light picked out, the Enterprise E 1/1400 by AMT. I'm no where near ready to take on that build, but that's what I'm trying to work up to.
_____

I wasn't able to get much work done on it last night. All I did was mask off the red bits of the ncc 1701 for the matte coat and attach a little craft wire to the A's engineering hull (so I can rotate it while I spray the primer on). No pictures for that because that's kind of boring and not much of an accomplishment.

~Uncle Bang
 
Nice work so far, and I agree they should make at least a 1/2500 NX-01. Since Round2 didn't someone else did:

http://www.federationmodels.com/

The JJ Abrams enterprise is under Misc models, And the NX-01 is under VA miniatures. Neither one is cheap. The NX is $17 and I think the Abrams is $25.

For seams, get yourself some Bondo spot putty. It can be found at any home improvement store or auto parts store. For a bit more than the cost of the testors stuff you get a much larger tube and it is much easier to work with.
 
Grendels said:
Nice work so far, and I agree they should make at least a 1/2500 NX-01. Since Round2 didn't someone else did:

http://www.federationmodels.com/

The JJ Abrams enterprise is under Misc models, And the NX-01 is under VA miniatures. Neither one is cheap. The NX is $17 and I think the Abrams is $25.

For seams, get yourself some Bondo spot putty. It can be found at any home improvement store or auto parts store. For a bit more than the cost of the testors stuff you get a much larger tube and it is much easier to work with.
Awesome thanks very much man! I'll head over to the hardware store today to pick up some Bondo.

And you weren't kidding that those ships weren't cheap, holy cow. To ship to where I live it's going to cost like 72 dollars! It only gives me two shipping options: Priority International ($25) or Express International ($31); I don't need priority or express. If they had a standard shipping cost (like $10 or so) I'd probably go ahead and buy both, but I might just settle with the NX-01... I'll come back to that when I finish the six ships that I already have, but thanks muchly for pointing those out to me.
 
Grendels said:
Nice work so far, and I agree they should make at least a 1/2500 NX-01. Since Round2 didn't someone else did:

http://www.federationmodels.com/

The JJ Abrams enterprise is under Misc models, And the NX-01 is under VA miniatures. Neither one is cheap. The NX is $17 and I think the Abrams is $25.

Well I am glad to hear that about the JJ abrams version. I was disappointed to find out about the Round2 deal with that particular ship. Who knows maybe in a few years there will be one, the mock photos I saw of a prototype didn't look bad.
 
Update Time!

1.)Enterprise NCC-1701

I've glued on the nacelles and applied one matte coat. The nacelles aligned quite nicely I think. I tried touching up a mold line I overlooked on the warp drive pylons, but it looks lighter than what it currently is (it's the same mix of paint). My guess is that the clear coat did something to the paint I dunno, it's still lighter than the rest even after I applied the matte coat. Should I have done another gloss coat before I applied a matte coat?

And speaking of the matte coat, it doesn't look very matte to me. It's still showing a lot of tight light reflection. Is that how matte is supposed to look? If it is, is there such a thing as a flat clear coat?

Also I can really notice the edges of the decals. Did I miss a step? Was I supposed to add another gloss coat before I put the final matte coat on?

Here are a few shots of this ship's progress:

amt_enterprisencc1701_8_by_uncle_bang-d5ifst9.jpg
Aligning the nacelles as the glue dried. You can see how the same paint colour looks lighter than the rest of the ship here...

amt_enterprisencc1701_7_by_uncle_bang-d5ifstc.jpg
The ship parts after the matte coat.

I'm using something called Americana Acrylic Sealer - Matte (DAS13-IC... dunno what this number is, thought it my be relevant) by Deco Art. Moving right along...

2.) Enterprise NCC-1701 Refit

I filled in a few more gaps, sanded, and added the first coat of grey primer. I picked up some Bondo Glazing & Spot Putty and that stuff works amazingly well, waaaaaaaay better than that Testors stuff. Thanks very much for the tip Grendels! After I sanded the putty smooth I applied a coat of Color Place Interior/Exterior Fast Dry Spray Paint (Primer Gray colour), it says it's a spray enamel. I picked that stuff at Wallie World.

Here's an Image of the ship's progress so far:

amt_enterprisencc1701a_4_by_uncle_bang-d5ifst3.jpg
I plan on touching up any other spots I find and then applying another coat of the primer before I apply a white base coat.

Next ship!

3.)Enterprise NCC-1701 B

I really took advantage of the Bondo stuff here and tidied up the ship quite a bit. In a lot of videos I've seen the modelers appear to be using left over sprues to mount their various parts for spray painting. So I did that here; took the sprues from the kit and glued them to the under side areas of the parts so that I had something a little more durable to hold onto than those craft wires from before. In retrospect gluing them with plastic cement may have been a little over kill, I probably should have just used a blob of hot glue instead. :-X

And I still have no idea how I want to mount these yet so I left the big hole on the B for now. Here's an image of this ship's progress:

amt_enterprisencc1701b_4_by_uncle_bang-d5ifstd.jpg
A few more spots here and there to putty and sand...

So yeah, I've been holding onto these pieces as I sprayed them and got a bunch of paint and glaze all over me. Just before I started on the matte coat for the NCC-1701 my brain kicked in and I put together a rudimentary spray booth:
amt_enterprisencc1701_9_by_uncle_bang-d5ifst5.jpg

What you see holding the model is my brand spankin new helping hands, woo! I stumbled across a pair as I was perusing my local hardware stores for model tools and supplies. I was super excited that I found some and couldn't wait to get home and start using that bad boy. It was decked out with a magnifying glass and a cradle for a soldering iron (which is great because I want to eventually light a model). I've removed those extra tidbits for now, they were just getting in the way and I didn't want to get gunk all over my new magnifying glass while I sprayed.

Anyway, that's all for now. Any tips or comments are greatly appreciated. I find that logging this really helps keep my motivation up in completing these.

Have a good one eh!
~Uncle Bang
 
Quick update, I've just finished putting together the NCC-1701 and it is now sitting proudly in my glass case. Even thought this first ship was a bit of a learning experience I still like how it turned out. For now I made a temporary stand out of some craft wire that I bent into a sort of cradle shape so the ship would at least sit upright.

Here are some photos of the finished NCC-1701:

amt_enterprisencc1701_final1_by_uncle_bang-d5ihuqr.jpg

amt_enterprisencc1701_final3_by_uncle_bang-d5ihumq.jpg
A fun dramatic angle of the ship.

amt_enterprisencc1701_final4_by_uncle_bang-d5ihujn.jpg

amt_enterprisencc1701_final2_by_uncle_bang-d5ihu2r.jpg


I have some free time today so I'm hoping to get more done on the other two ships.

Talk to you later!
~Uncle Bang
 
Quaralane said:
Paint's looking good on that little lady
Thanks very much, Quaralane.

No photos this time. Just worked a bit more on the sanding and priming for the next ship. I think after one more sand the 1701-A will be ready for it's base coat of white. I picked up some Folkart Pearl White since that's what the instructions suggest it's base colour to be. I'll lay a couple light coats of that down on the base white, then add the other color accents.

I've also started building the U.S.S Enterprise NCC 1701-C while I waited for the primer to dry; the kit was just sitting there taunting me I couldn't help it :p. I'd have to say that my favorite part of the modelling process is the initial build. I'll eventually post another topic about that build as I get closer to finishing this build.

~Uncle Bang
 
She came out nice and I am glad that you like the Bondo putty. I tried 5 or 6 methods out on one model and found that the bondo was the best of the lot. It won't work in every situation, but it was the most versatile.
 
Another tip for the Bondo (and a bunch of other fillers): you can thin it down with nail polish remover if you're finding it too thick. You can use a Q-tip soaked in nail polish remover to wipe away the excess filler and clean up around the seam a little as the Bondo dries.
For the really tiny and thin fill jobs, get yourself some Mr. Surfacer. It's a fine resin filler that you paint on and sand off. It thins with a little lacquer thinner (not too much or you might dissolve the plastic on the model), and cleans up off the model with a Q-tip and nail polish remover too.
 
NecronautDrummer said:
Another tip for the Bondo (and a bunch of other fillers): you can thin it down with nail polish remover if you're finding it too thick. You can use a Q-tip soaked in nail polish remover to wipe away the excess filler and clean up around the seam a little as the Bondo dries.
For the really tiny and thin fill jobs, get yourself some Mr. Surfacer. It's a fine resin filler that you paint on and sand off. It thins with a little lacquer thinner (not too much or you might dissolve the plastic on the model), and cleans up off the model with a Q-tip and nail polish remover too.
Awesome, thanks for the tip! I've just been using a scraper to remove the excess bondo, but that Q-tip suggestion sounds like a great alternative. If I can get my hands on some of that Mr. Surfacer I might give it a try. I'll keep my eyes peeled for it at my local hobby shops.

As for updates: I've applied the white base coat to the NCC-1701 Refit and I'm hoping to get a chance to give it another light sanding tonight before I put on the first coat of pearl white. I didn't bother including an image of the ship this time around since there really wasn't much change in appearance between the primer and white base coat (with the exception that it's now all white instead of all grey :p). I will post another image once I have the pearl white done on the ship.

Thanks for reading,
~Uncle Bang
 
Uncle Bang, it's great to see someone building all these Enterprise models! I have a soft spot for the C! Lovely looking ship that one, so looking forward to seeing it!

Great work on the old 1701, shame about the registry, but she's looks majestic all the same.

I noticed you asked about clear coats. I don't know if spraying the gloss coat over the re-painted section before spraying the matte would even out the colour. It's usually good practice though, to repeat the exact steps to recreate a finish.

I've tried a few different clear coats, and was never happy with any of them. In the end I seeked out what is considered one of the best (but also quite expensive). Testor's dullcote and Testor's glosscote. They're lacquers and quite noxious so always wear a mask in a very well ventilated area.
 
Igard said:
Uncle Bang, it's great to see someone building all these Enterprise models! I have a soft spot for the C! Lovely looking ship that one, so looking forward to seeing it!

Great work on the old 1701, shame about the registry, but she's looks majestic all the same.

I noticed you asked about clear coats. I don't know if spraying the gloss coat over the re-painted section before spraying the matte would even out the colour. It's usually good practice though, to repeat the exact steps to recreate a finish.

I've tried a few different clear coats, and was never happy with any of them. In the end I seeked out what is considered one of the best (but also quite expensive). Testor's dullcote and Testor's glosscote. They're lacquers and quite noxious so always wear a mask in a very well ventilated area.

Thanks muchly man. I like how the C looks too, I kinda prefer it over the D. But my most favorite ship is a tie between the U.S.S. Voyager and the Enterprise E; I really dig the sleek look of those ships. On future builds (including the A) I will definitely put another gloss coat over the model after the decals have been applied then apply the final matte coat. I may give other clear coats a try in the future, but for now the Folkart Hi-Gloss spray coat seems to be doing the trick.

Enterprise NCC-1701 Refit Update

So I've applied a couple coats of Folkart Pearl White. In retrospect I probably should have mixed it with some white so that it covered a bit better. I think I'll need to add another light coat of the pearl before I do any other detail work. I really like how shiny it looks with the pearl white, here are a couple images:


amt660_enterprisencc1701a_5_by_uncle_bang-d5j4cwg.jpg
The white base coat I sprayed on dried on really rough, I'm hoping that a gloss coat will cover that up...

amt660_enterprisencc1701a_6_by_uncle_bang-d5j4cwf.jpg
A little hard to see this one, probably should have turned of the flash to reduce the reflected light.

I'll post another update before I apply the decals after all of the additional colour accents have been applied to the A here. I've decided to finish A before I do anything more with the B. So once the A is done I will start posting updates on the final ship in this kit.

Thanks for reading!
~Uncle Bang
 
Quaralane said:
That Pearl White does look good
Grendels said:
Looks good.
Igard said:
Very nice! 8)

Thanks very much guys.

I finally got around to putting down the recommended paint colours. I decided leave out the recommended light blue around the pylons because I couldn't see where it was supposed to be added. The decals included seem to cover the area you are supposed to paint and the base of the pylon itself is left white (at least that's what I saw in a lot of reference photos).

I kinda borked it up a bit at the end though. I tried to apply a black wash to help bring out the molded edges, but I had no idea what I was doing so it turned into a blotchy mess. I'm in the process of recovering the area by going over it again with pearl white (you can see what I'm talking about by the deflector dish). I still really want to emphasize some of the edges before applying decals; so what I plan on doing is coating the ship in a hi-gloss clear coat. Then get a proper thinner for acrylic and going back at it; once dried hopefully I will be able to clean it up with the thinner without damaging the paint underneath the hi-gloss coat... fingers cross on that.
Here are a couple photos:


amt660_enterprisencc1701a_7_by_uncle_bang-d5jmpxv.jpg
I really like that blue bit.

amt660_enterprisencc1701a_8_by_uncle_bang-d5jmpxw.jpg
You can see my misguided attempt at washing around that deflector.

Thanks for reading!
~Uncle Bang
 

Latest posts

Back
Top