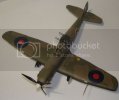
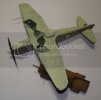
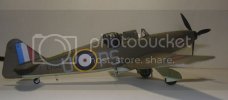
Airfix 1/72 Boulton Paul Defiant Mk.1

mademodeller

New Member
Joined
Apr 2, 2011
Messages
249
Airfix 1/72 Boulton Paul Defiant Mk.1
[youtube]http://youtu.be/G3KdvGBnnvA[/youtube]
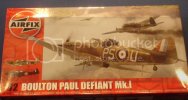
DSC00107_zpsea132a05.jpg
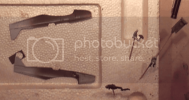
Well I said in my review I cannot keep my hands off this and I couldn't. So Wednesday morning whilst my video was being uploaded and I had nothing on my bench so I started building it. I have a lot of video of the build but not many photos is the model was just falling together it wouldn't surprise me if I'd put the glue in the box and could shake it on opening the box I would have a finished model.
How I came to this stage I started with the front bulkhead alone in position and using the right hand half of the fuselage to align the bulkhead. I then made up the seat rear bulkhead and floor.

I then gave the sides of coat of interior green whilst that was drying I cleaned up and painted some of the other parts.
674c94f4-ef0c-4194-8b0e-13a2fc8acc0d_zpswyye58ai.png
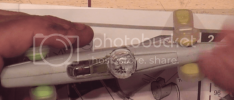
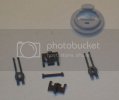
And then came to of the important parts to be placed on the sides of the Fuselage as these hold the instrument panel. I gave them some colored buttons lights and levers to get some Colour in their and then place the floor and rear bulkhead in at the same time and placed in the rear gunner's platform and once more use in the right hand side still align everything up.
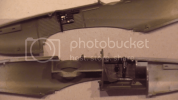
5c75c174-1386-435a-ad6f-fa36083b6c81_zpst7nf7dw0.png
Using tape to hold them together till they were dry. After little time I took them apart and gave them a ink wash
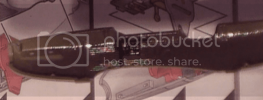
962af937-83ee-4c64-83fc-396fb3697cc7_zpslkvnbqgp.png
When that was dry it was time to glue the two halves together and using tape to hold them together
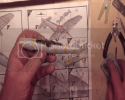
vs150123-008_zps6p1mojqw.png
That's about it for Wednesday work.
The build will slow down on Friday when I start the painting as I have to wait for it to dry before continuing.
Thanks for looking hope you'll buildings going good see you soon Alan
 
Part 2
sma
[youtube]http://youtu.be/Gp2fg86Q1ig[/youtube]
In part two we start the wing's first thing we have to do is the wheelwell painting in interior green then wiring is black and finally a ink wash when dry I glued them to the bottom wing panel.
2fa03733-5f80-41f9-801f-3a7a5022b4a8_zps2xcq3l76.jpg
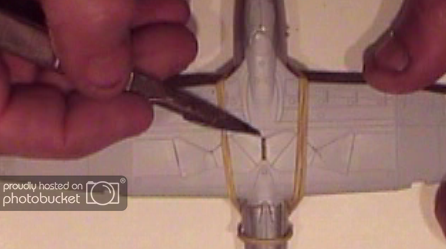
I had temporarily tapes up the wings then offering them up to fuselage I found mostly OK but I had a gap at the back of the wings were they meeting the fuselage.
58de60a6-c695-46c5-a41b-d432d6c5b8ca_zpsqnntuvhe.png
Having glued the wings together I took the tape off the fuselage covered up the cockpit. I gave it a light sanding then sprayed it with silver along the joints which will show up every little mark that's there.
b7e49d4d-0c14-481f-a785-32d202d65ff0_zpsji2ykjej.png
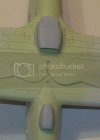
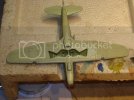
Now comes the biggest problem with this kit I found on the top wing panels the underside of the tips did not match up with the bottom wing panel which was higher than the tips but level with the top wing panel with the ailerons. So I had to put some filler on the tips.
vs150123-011_zpsnonn7nif.png
Leaving that to dry I'd checked the fuselage for the fit with the glazing and found it to be an excellent match with the cockpit and turret canopies.
vs150123-004_zpsyygit2wl.png
I then sanded down the tips only to find that it was only a depression in the tips.
vs150124-001_zpshgtpdks0.png
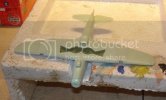
I glued the wings to the fuselage when dry I found the glue had filled the gap and there was no need for filler. Using the wheels up doors to fill up the wheelwell so that I could spray the bottom of the wings.

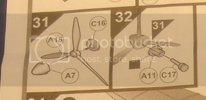
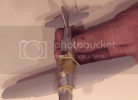
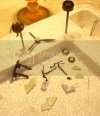
I turn my attention to the prop the unusual way of fitting in the prop to the fuselage for Airfix the pin axle in the plans is parallel but on the sprue I found it was tapered trying it I found two much slop at the prop end so I cut the head of the pin and then glued that end into the prop. Part A11 I glued into the fuselage nose this means I can leave the prop loose if I need to transport it anywhere.
DSC00104_zpsmamx3e5f.jpg
I finally got round to gluing the stabilizers and rudder on they were very good fit. I could have positioned the rudder 25° either side but I just left it centred.
vs150124-004_zpsbbpykntm.png
The last thing I did was to glue on the rear parts of the fuselage it was a very good fit.
vs150124-005_zpsftvtxftb.png
Sorry for the delay in getting this up by well behind with my editing as I have to use a lot snapshots from my video to show the build my stills camera takes good shots when it feels like it. I will have to get a new stills camera a good one but I haven't allocated any funds for this at this time I'm going to have to sort out some. Also with the other stuff I have to do is just taking an age to do these write ups are trying to get Friday's work up today and today's work maybe tomorrow.
Thanks for looking at this and hope you'll buildings going good see you all soon Alan.
 
Part 3
[youtube]http://youtu.be/WdBZGa6Zcuo[/youtube]
I got up really early today as you can see it is primer done simply shading but not with my airbrush I used the thing down black paint her brush I then went on to paint the underside when that was dry I use life colour sky
vs150124-002_zpsdy4h3h16.png
Also when I was painting the bottom returned to the radiators dry brush with silver and assembled them glueing them to the underside and Recoating with sky colour
DSC00115_zpsgjzkergc.jpg
DSC00117_zpsz1ptupf0.jpg
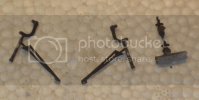
Whilst the paint was drying on the underside I started on the turret guns. I finished assembling there with the figure as well I also put the pilot in the cockpit.
DSC00116_zpscfyetugu.jpg
The next item was the undercarriage but the model was wobbling all over the place so I cut a notch in the from block to support it.
DSC00126_zpsdwvtxtpd.jpg
I found it easier to put the third leg on the undercarriage out of the wheelbay but before it dry I fitting into the wheelbay so it dry in the correct position.
DSC00131_zps19zkmk0g.jpg
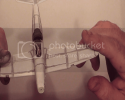
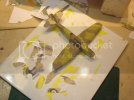
Now came time for the camo I started with an all over darker earth from a boxed set of life colours battle of Britain RAF. First a took my model put it on the instruction camo pattern I used the wing tip and a spinner as the starting points and mark the length of the fuselage and the wing Span on instruction camo pattern. I then scanned the instructions into my PC. Drawing a box touch in both wing tips rudder and spinner I copied that the of the image I then enlarged the box so attach the two no marks what I've made on the drawimg earlier from the model then I pasted in the image I just copied then I had printed in out so I could use them as a mask. I use glue stick and 40nn tape (see photo)
DSC00132_zpsl9zajac4.jpg
Next I mask up the canopies and turret.
vs150125-002_zpsz8jesgf9.png
That's was it for Friday.
 
:eek: Friday night before going to bed I painted the green camo this give it time to dry on Saturday morning I started to remove the masks the first one came away find but the second started lifting the dark earth off by the time I'd finished removing the masks the paint had lifted in six places one of them very badly which disheartened me for a time actually I been nothing on Saturday to the model. I did however get back to it on the Sunday where I handpainted five of them I gave it a coat of clear then sprayed the 6th one when that was dry and another coat of clear. That did the job I am now decal it. It would have been finished Saturday now looking at Monday to finish. :eek:
 
Part 4
[youtube]http://youtu.be/x4cFiLUlNhw[/youtube]
I now have completed the masking up she's now ready for the green coat
DSC00132_zpsl9zajac4.jpg
I decided to paint it before going to bed that gives it the night to dry
DSC00135_zpseesqvgcz.jpg
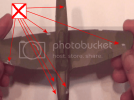
I started Saturday morning to remove the masks first one was fine then when downhill fast. Pulling off paint in 7 different places the next three photos will show you where they are.
vs150126-001_zpst8idqcvt.png
vs150126-003_zpsdavtvak2.png
vs150126-002_zpsxivn4lgg.png
This got me really downhearted I'd put it away for Saturday. A couple of hours seemed to do the trick I think I saved it.
DSC00136_zpsttvnsysp.jpg
After letting the gloss coat dry I started the decals. As you can see they were all on the wing and one on the air scoop. Just for safety's sake I gave this a gloss coat. Then letting the that dry for I turned her over and finished the top of the model.
DSC00138_zpsfohsuitv.jpg
Whilst I was waiting for some of the decals to dry I'd jumped back and forth on the small items that I needed to finish.
DSC00143_zps6sd21cuc.jpg
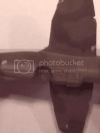
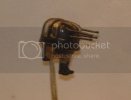
As you can see that I came out all right. The guns really need replacing the last turned ones I believe master kit to us at barrels for this aeroplane I've seen them used on an MPM kit with very slight modification they should fit this one.
DSC00147_zpsw7jauck9.jpg
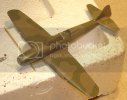
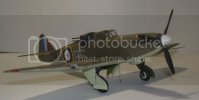
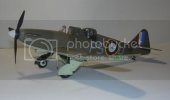
And finally after applying the all small parts and given it a coat of matte. Then came the unmasking of the canopy again this looks OK I then added the turret. Using a piece and stretch srew for the aerials which I think you can just see in the picture's. I could call her complete.

DSC00170_zpsph9sixnt.jpg
DSC00171_zpsrpdsznzy.jpg
DSC00172_zps7ubh8m98.jpg
DSC00173_zpseoymassv.jpg
DSC00175_zpsegyj7wwv.jpg
Well outfit for this one finally completed. She turned out very good in the end but I have to say I cannot give it 100 out of 100. 99 out of 100 pure and simply because of the guns and I am just nit picking at this as I said before there are turned grass barrels for this and next time I built this I will get the glass panels for it.
Well hope you'll enjoy this build I do hope yours is going very well so for now I'm gonna say goodbye see all very soon Alan.
 
Looks great! This is an aircraft one doesn't hear about much. I like the looks of it.
 
Very cool little build. I love these new Airfix releases, good value and really interesting subjects.
Nice finish on the Defiant.
 

Latest posts

Back
Top