Academy 1/48 scale TOW Defender 500D

Scale Model Addict - Model Tips, Guides, Tools & Tech, Tutorials, and Community

Help Support Scale Model Addict:

DavidsScaleModels

Well-Known Member
Joined
Sep 16, 2022
Messages
205
City & State/Province
Shelbyville, IL
For my next build I will be building the Academy 1/48 scale TOW Defender 500D and using the kit decals for the Israeli Ai Force. This kit does lack some details so there will be some scratch building of the missing details.

I started off with the pod for the nose. The kit does not provide any details under the lens so I used some styrene to make the inside panel. I used a reference photo to replicate the panel. I then assembled the TOW missile launchers that mount on the sides of the fuselage. The reference photos show cabling from the fuselage thru the wing and into the pod. The kit does not provide this detail but I will add them later once they are mounted to the fuselage.

Next I started working on the cockpit and interior. The bulkheads have no details on them. I used some photo etch pieces to add the details. It looks like the inside of the fuselage halves will also need a lot of work due to the large mold marks. Switching over to the cockpit side I added seatbelts to the seats. One big detail that is missing is the cyclic control stick. I used some styrene rod and photo etch to replicate them. The instrument panel has no raised details and a very basic decal is supplied for the panel as well as the center console. I found some nice reference photos and created my own decals of them. The kit foot pedals were huge so I trim them down. I am going to wait to install the instrument panel until after the interior id mounted inside the fuselage.

I am currently working on the indie of the fuselage halves. Once the mold marks are corrected I need to use some styrene to replicate the inside ribbing.

You can see all the photos and details from the start in the build log at: https://davidsscalemodels.com/build-log/1-48-tow-defender-500d-helicopter/

DSCN4348.jpg


DSCN4350.jpg


DSCN4353.jpg


DSCN4357.jpg


DSCN4365.jpg


DSCN4366.jpg


DSCN4367.jpg


DSCN4369.jpg
 
The second week of the 500D Helicopter I was able to finish and install the interior. I added the interior fuselage details and some interior details with first aid bags in the rear area. The interior assembly was mounted into the port half. The starboard half had some interior detail added and then I installed the door. This is where this kit starts to show its bad fit. The door has a huge gap across the top edge and a small gap on the bottom right corner. I filled the gap in with putty and will re-scribe the door seam later. The upper windows above the doors have a 1mm gap as well. I used acrylic gel to fill this gap.

I then put the two fuselage halves together. This is where the fit huge issues rear its ugly face again. The interior assembly has a huge 2mm gap between the fuselage and cockpit floor. The fuselage is what is too wide. To properly mount the canopy I had to make a curved clamp to align the fuselage frame to the center of the canopy so they meet correctly. The top area and bottom area fit pretty well. The landing skids were mounted.

Speaking of the canopy, the raised markings for the canopy frame and the forward light bezel are molded on the inside. This makes no sense. For the forward light I used a photo etch part to be the light bezel. After the fuselage issues were corrected I added some of the ducts to the fuselage and added the tail. I then base coat painted the sandy brown paint. I then went to mount the nose pod. This is another part that does not fit very well. I sanded the edge that mounts to the canopy to get the gaps smaller and then I used putty to fill the gaps. I then finally scratch built the mounts for the cable antenna that runs across the underside of the fuselage.

I am working on the main and tail rotors now. All that is left are the decals, some more details on the fuselage, and the final top coat on the helicopter. I should have this finished by the end of the coming week.

You can see all the photos and details from the start in the build log at: https://davidsscalemodels.com/build-log/1-48-tow-defender-500d-helicopter/

DSCN4372.jpg


DSCN4376.jpg


DSCN4378.jpg


DSCN4381.jpg


DSCN4384.jpg


DSCN4386.jpg


DSCN4387.jpg


DSCN4389.jpg
 
The third and final week of the Academy 1/48 TOW Defender 500D helicopter build is now completed. To start with I sanded the area around the nose pod and finished all the detail painting. I used EZ-line to replicate the underside antenna line. There are two red lights on the fuselage. One is under the start of the boom and one on the tail. I cut off the molded "lights" and replaced them with clear lenses. These were then painted with Tamiya X-27 clear red paint. The top canopy windows were then tinted green using Tamiya X-25 Clear green paint. There are two side navigation lights on the front of the skids. I drilled these out and filled them with clear acrylic gel and then painted then with the clear red and clear green paint. The TOW launchers were then installed and the additional wiring was hooked to the fuselage.

The next step was the decals. The kit does not supply decals for the typical sandy brown paint scheme so I used reference photos and made my own decals. These were applied and a matte topcoat was applied. Finally the main rotor was assembled, painted, and installed. This completed the build.

In review, this kit has many fit problems especially around the side door, interior assembly, and nose pod. The kit also lacks a lot of details. The instructions have a good assembly flow. The only kit decals I used were the Israeli Air Force insignia's on the sides. These went on very well. Overall I would consider this an average kit. I do not think I would recommend this kit mainly due to the fit issues. Granted not all kits are perfect but the fit on this kit was more bad than average. I hope you all have enjoyed following along and if you decide to tackle this kit at least you are aware if the main issues. Happy Modeling!

You can see all the photos and details from start to finish in the build log at: https://davidsscalemodels.com/build-log/1-48-tow-defender-500d-helicopter/

DSCN4390.jpg


DSCN4395.jpg


DSCN4396.jpg


DSCN4400.jpg


DSCN4404.jpg


DSCN4407.jpg


DSCN4410.jpg


DSCN4412.jpg


DSCN4413.jpg
 
As an Amazon Associate we earn from qualifying purchases. Product prices and availability are accurate as of the date/time indicated and are subject to change.
The third and final week of the Academy 1/48 TOW Defender 500D helicopter build is now completed. To start with I sanded the area around the nose pod and finished all the detail painting. I used EZ-line to replicate the underside antenna line. There are two red lights on the fuselage. One is under the start of the boom and one on the tail. I cut off the molded "lights" and replaced them with clear lenses. These were then painted with Tamiya X-27 clear red paint. The top canopy windows were then tinted green using Tamiya X-25 Clear green paint. There are two side navigation lights on the front of the skids. I drilled these out and filled them with clear acrylic gel and then painted then with the clear red and clear green paint. The TOW launchers were then installed and the additional wiring was hooked to the fuselage.

The next step was the decals. The kit does not supply decals for the typical sandy brown paint scheme so I used reference photos and made my own decals. These were applied and a matte topcoat was applied. Finally the main rotor was assembled, painted, and installed. This completed the build.

In review, this kit has many fit problems especially around the side door, interior assembly, and nose pod. The kit also lacks a lot of details. The instructions have a good assembly flow. The only kit decals I used were the Israeli Air Force insignia's on the sides. These went on very well. Overall I would consider this an average kit. I do not think I would recommend this kit mainly due to the fit issues. Granted not all kits are perfect but the fit on this kit was more bad than average. I hope you all have enjoyed following along and if you decide to tackle this kit at least you are aware if the main issues. Happy Modeling!

You can see all the photos and details from start to finish in the build log at: https://davidsscalemodels.com/build-log/1-48-tow-defender-500d-helicopter/

DSCN4390.jpg


DSCN4395.jpg


DSCN4396.jpg


DSCN4400.jpg


DSCN4404.jpg


DSCN4407.jpg


DSCN4410.jpg


DSCN4412.jpg


DSCN4413.jpg
I built this kit a few years ago. It was a fun little build.
I also have an almost finished 1/35 scale version of the MD500 that is waiting until I can figure out the green glass problem.
Your green cockpit glass tuned out really well. My efforts on the green glass haven't worked out very well. How did you achieve this effect?
Any suggestions would be appreciated.
 
the green glass problem.
Spray it with transparent green paint, available from a number of different paint brands. Trying to brush-paint it will not look good — no matter how hard you try you'll get uneven coverage and streaks visible everywhere. But spray it and it'll be fine almost automatically (still, practice first on some leftover canopy or some other clear plastic you happen to have around, like from some packaging).
 
For tinting canopies and other clear parts I have found thinning the paint and applying multiple light layers gets the best results. I let each layer dry very well before the next layer. Too thick of a layer will cause the paint to pool in areas and not have even coverage. I have even did this with a brush for smaller clear parts. The other advantage with thin layers is you can adjust how light or dark the tint is to match the reference photos.
 
For my next build I will be building the Academy 1/48 scale TOW Defender 500D and using the kit decals for the Israeli Ai Force. This kit does lack some details so there will be some scratch building of the missing details.

I started off with the pod for the nose. The kit does not provide any details under the lens so I used some styrene to make the inside panel. I used a reference photo to replicate the panel. I then assembled the TOW missile launchers that mount on the sides of the fuselage. The reference photos show cabling from the fuselage thru the wing and into the pod. The kit does not provide this detail but I will add them later once they are mounted to the fuselage.

Next I started working on the cockpit and interior. The bulkheads have no details on them. I used some photo etch pieces to add the details. It looks like the inside of the fuselage halves will also need a lot of work due to the large mold marks. Switching over to the cockpit side I added seatbelts to the seats. One big detail that is missing is the cyclic control stick. I used some styrene rod and photo etch to replicate them. The instrument panel has no raised details and a very basic decal is supplied for the panel as well as the center console. I found some nice reference photos and created my own decals of them. The kit foot pedals were huge so I trim them down. I am going to wait to install the instrument panel until after the interior id mounted inside the fuselage.

I am currently working on the indie of the fuselage halves. Once the mold marks are corrected I need to use some styrene to replicate the inside ribbing.

You can see all the photos and details from the start in the build log at: https://davidsscalemodels.com/build-log/1-48-tow-defender-500d-helicopter/

DSCN4348.jpg


DSCN4350.jpg


DSCN4353.jpg


DSCN4357.jpg


DSCN4365.jpg


DSCN4366.jpg


DSCN4367.jpg


DSCN4369.jpg
Nice. Pantherman
 
Spray it with transparent green paint, available from a number of different paint brands. Trying to brush-paint it will not look good — no matter how hard you try you'll get uneven coverage and streaks visible everywhere. But spray it and it'll be fine almost automatically (still, practice first on some leftover canopy or some other clear plastic you happen to have around, like from some packaging).
Thanks! I've tried what you mentioned a number of times, but I was never pleased with the results. What size airbrush needle are you using? What pressure are you using? And did you thin out the transparent paint? What distance did you spray from?
I tried fiddling around with all of the above variables but never seemed to find the sweet spot.
For some reason I always seemed to get an uneven finish. It almost looked a bit like dust had mixed in with the paint.
 
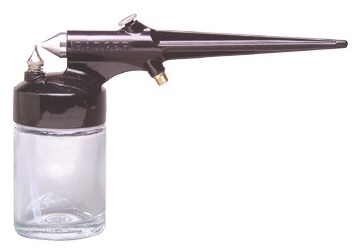
The only transparent parts I can remember painting were full-size vehicle light glasses — available in clear but my father needed them in red, for tail lights. So I put Tamiya clear red into a simple model spray gun of the general type pictured below, no thinner, and sprayed the insides with enough pressure to get the paint through. That worked quite well, though for a model I would thin the paint and use a better airbrush :) However, as I thin my paints by eye and adjust my compressor's air pressure mostly by feel I couldn't tell you how much of either to use.
badger-basic-spray-gun-set-model-250-2.jpg
 
The only transparent parts I can remember painting were full-size vehicle light glasses — available in clear but my father needed them in red, for tail lights. So I put Tamiya clear red into a simple model spray gun of the general type pictured below, no thinner, and sprayed the insides with enough pressure to get the paint through. That worked quite well, though for a model I would thin the paint and use a better airbrush :) However, as I thin my paints by eye and adjust my compressor's air pressure mostly by feel I couldn't tell you how much of either to use.

View attachment 181298
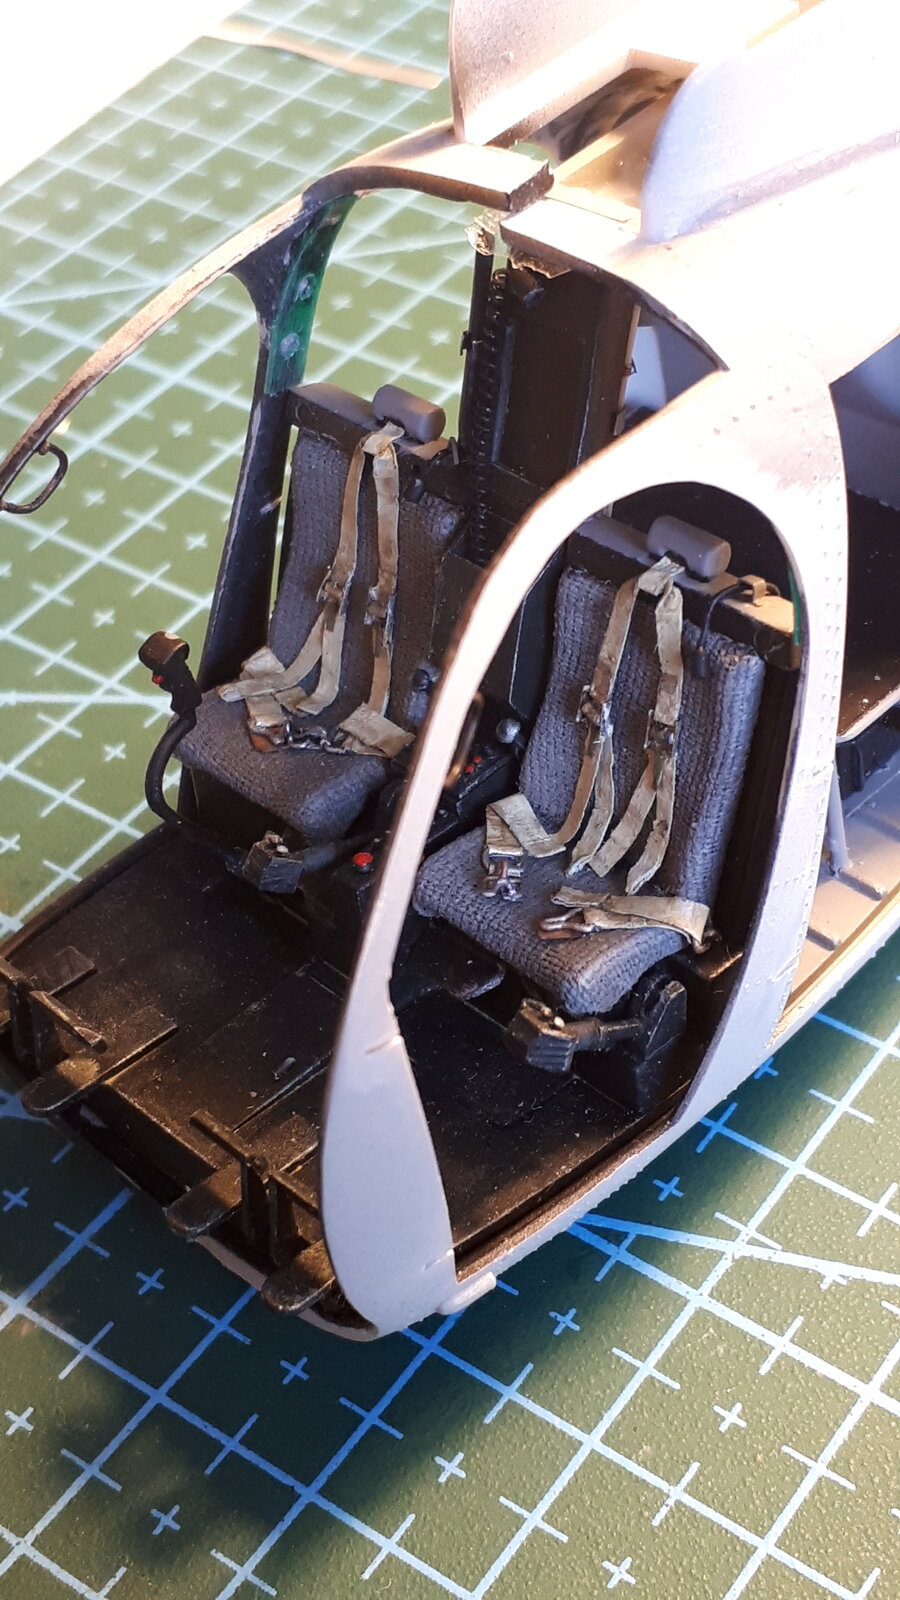
Okay. You have motivated me to give it another try. The below 1/35 scale MD-500 has been sitting in a box for the past 4 years after I shelved it out of frustration with the transparent green canopy glass. I spent too much time scratch building on this kit to settle for a lousy job on the canopy.
1771882585114.jpeg
 
Back
Top

