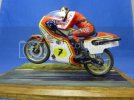
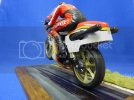
A tribute to Barry Sheene MBE (11th September 1950 - 10th March 2003).

Backbreaker

Member
Joined
May 6, 2009
Messages
314
In the late seventies, the Suzuki RG 500 with which Barry Sheene won the world championship twice in succession was considered to be the fastest and most powerful half-litre racing motorcycle in the world. The heart of the light 135 kg machine was in the water-cooled, four-cylinder, two-stroke, 494.7 cc engine that developed 125 bhp and accelerated the RG to a top speed of 280 kph. Acceleration from 0 to 100 kph was 2.8 seconds and from 0 to 200 was 8.9 seconds. Already, three races before the end of the 1976 season, in the half-litre class, Barry Sheene had secured the world championships title which he successfully defended in 1977. In addition Suzuki won the constructors' title four times running from 1976 onwards.

Model-details: - Detailed multi-part engine with four separate cylinder heads - True-to-original wheel rims - Double tube frame and telescopic forks - Detailed, finely worked brake discs - Multi-part tank - One-piece, finely worked chain - Separate pedals - Four multi-part exhaust pipes - Detailed fairing with fine surface structures - Authentic decals for the Paul Richard Grand Prix in May 1977 for motor bike.

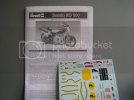
Box art.
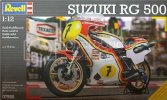
SuzukiRG500.jpg

The real thing.

Suzuki-RG500-Sheene-76-3.jpg

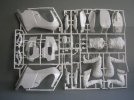
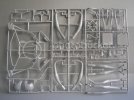
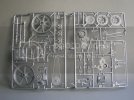
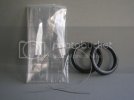
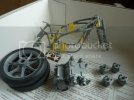
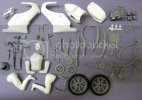
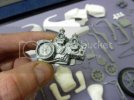
OK shots of the sprue.

dscn4936az0.jpg

dscn4938om0.jpg

dscn4943vt5.jpg

dscn4949mw9.jpg

dscn4953rv3.jpg

BB.
 
Made a start,
And I must say "Flash", loads and loads of flash, with a few fit issues, but nothing loads of filler and sanding can't sort out. Note to self buy wet and dry!!! ;D

SMAspringcompbuild.jpg

BB.
 
This kit is going to be more about trying to achieve a factory finish paint job than assembly, but saying that trying to put the kit together without damaging the paint job is going to be tricky. Oh and the decals look challenging to say the least. This is the first bike I've built and it may be my last. ;D
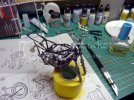
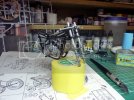
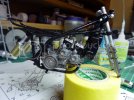
So, all of the sub assemblies are Errr assembled and ready for paint, there are a few tiny flaws that I'm hoping some Mr surfacer 1000 will take care of.

SMAspringcompbuild0122000x1418.jpg
SMAspringcompbuild0132000x1500.jpg

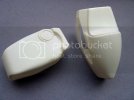
The fuel tank is made from four parts that needs lots of patients to put together, and still rewards you with ample opportunity to practice your filling skills.

SMAspringcompbuild0092000x1500.jpg

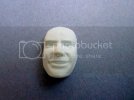
The detail of "Baza" is a little 'soft', as it usually is with figures made from this material. It's actually not that bad, although it needs cleaning up. There are also things that need to be done to it that although not making a huge difference to it's appearance, will make it easier to paint later. Firstly, gently scrape away all the seam detail, trying to ensure that you don't introduce a 'flat' onto the curved surfaces. Once you've removed all the seams and the part is 'clean', you can begin to re-scribe all the detail using the sharp tip of the blade. Use very gentle pressure to begin with, and gradually increase it. You will slip at some point...it's inevitable...but as long as you haven't pressed too hard, the mistakes can be scraped away. On this part there are also some of the very fine 'cooling' lines marring the surface, so gently scrape these away too.
Examine the head/face under a powerful lens and see if there is anything you can improve on the face , without going overboard and ruining it. The lips and teeth can be separated slightly, nostrils dug out and the philtrum made slightly more obvious. The last thing to do is to very gently scrape away any tiny irregularities on the plastic and try and make it as smooth as possible. This will really help later on when applying a wash to the face!

SMAspringcompbuild0102000x1500.jpg

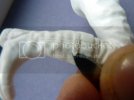
There's all the detail on the boots to be re-scribed, along with the seams on and around the knee pads. In addition, once the basic lines are sharpened up, you can very carefully 'lift-up' the corners of the boot straps to make it appear like a real flap.

SMAspringcompbuild0062000x1500.jpg

That's all for now folks ;)
BB
 
Scott Girvan said:
This is looking great! Keep at it. There is still time!

Don't worry buddy, I'm going to blitz this build and get it finished in time, I've been busy finishing the king T dio (More pics on that soon). I also had a fall at home last week and broke a couple of ribs, so trying not to cough or sneeze ;D.
BB
 
Awesome! Have you decided on a paint sceme yet or are you going with box colors? this is a really interesting kit. Ive never built a motor bike kit yet, but will one day ;). very nice detail have fun.
 
mariosmodelkits said:
Awesome! Have you decided on a paint sceme yet or are you going with box colors? this is a really interesting kit. Ive never built a motor bike kit yet, but will one day ;). very nice detail have fun.

Thanks MMK,
I'm going with the box colours and this is my first bike kit to.
cheers man.
BB.
 
Pressures on ;D
The bikes all painted and the fairing just needs the red edging sprayed on, white base coat is now dry.
The next couple of days the figure of Barry will be painted, then the whole thing mounted on a simple base.
suzybody.jpg

suzyframeandblock.jpg

suzyframeandblock3.jpg

suzyframeandblock2.jpg

Later ;) BB.
 
Weren't you the guy that got really seriously injured and didn't build a thing for like, a long time and then got back into to the hobby just a short time ago?

This is insane! That second photo - the angle, the energy. What an amazing build!
 
Scott Girvan said:
Weren't you the guy that got really seriously injured and didn't build a thing for like, a long time and then got back into to the hobby just a short time ago?

This is insane! That second photo - the angle, the energy. What an amazing build!

Hi Scott, thanks for the great feedback.
Yea I broke my back in 2 places, started modelling a year and a half ago after a 29 year gap and when I'm up to it its great therapy. My 1st Dio the King T "Payback" was a labour of love , SMA AKA Scott introduced me to scratch building, which I certainly got to practice on my dio.
Joolz.
 
great stuff man there's no way id be getting those decals on, never mind making it look like anything more than an ole clapped out 125 banger lol the ones that sound like a wasp trapped in a tin can .
 
Awesome! it really is a cool piece,you have definitely done this justice and i really like the way you achieved a look/feel of movement.
 

Latest posts

Back
Top