1/48 Studio Scale TIE Bomber

nicholassagan

sippin on gin + juice
Joined
Dec 28, 2011
Messages
2,013
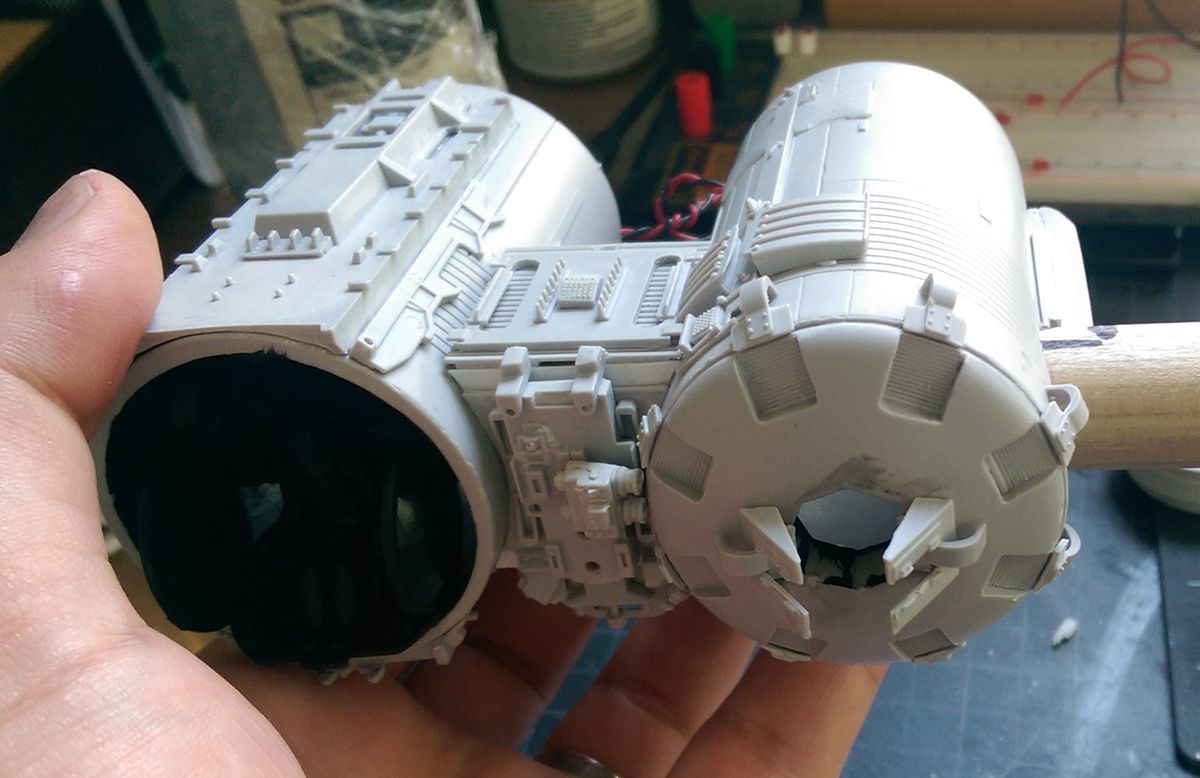
I wrapped up a few things for Wonderfest early and had some extra time and building energy. This project has been on my mind for a while now so it was time to dig in. Not only will I have it done for WF, I’ll be entering it in 2 other online contests as well!!

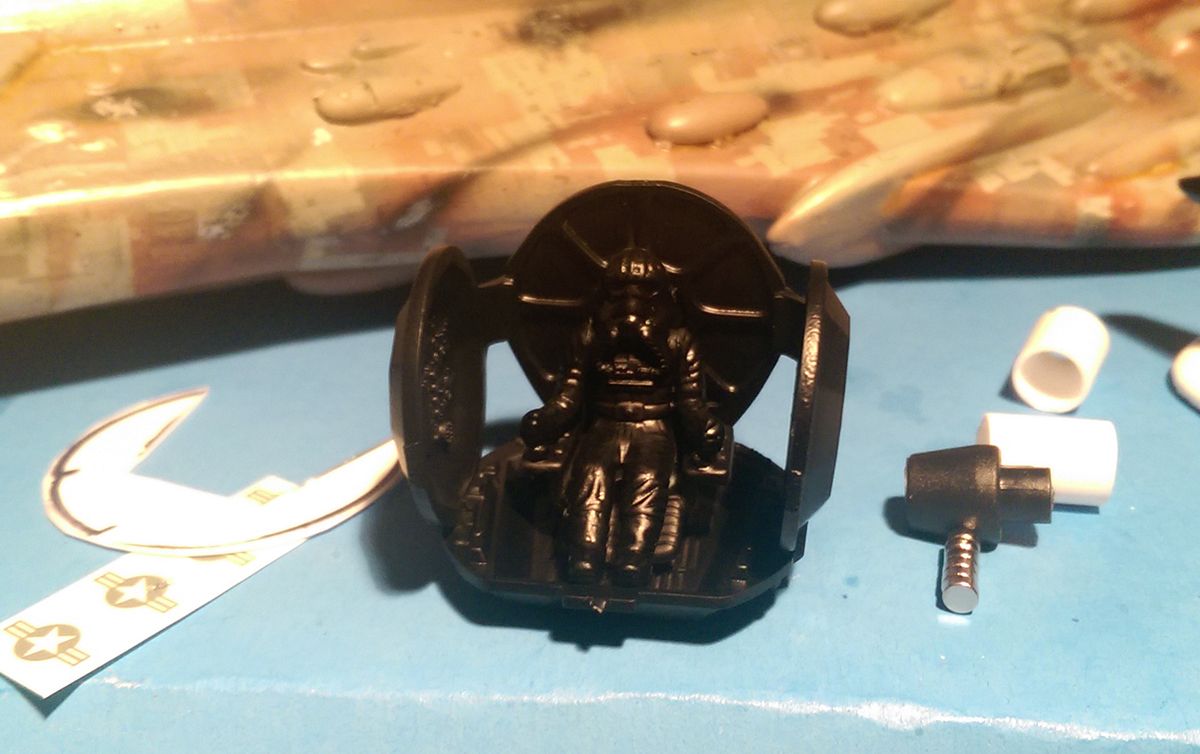
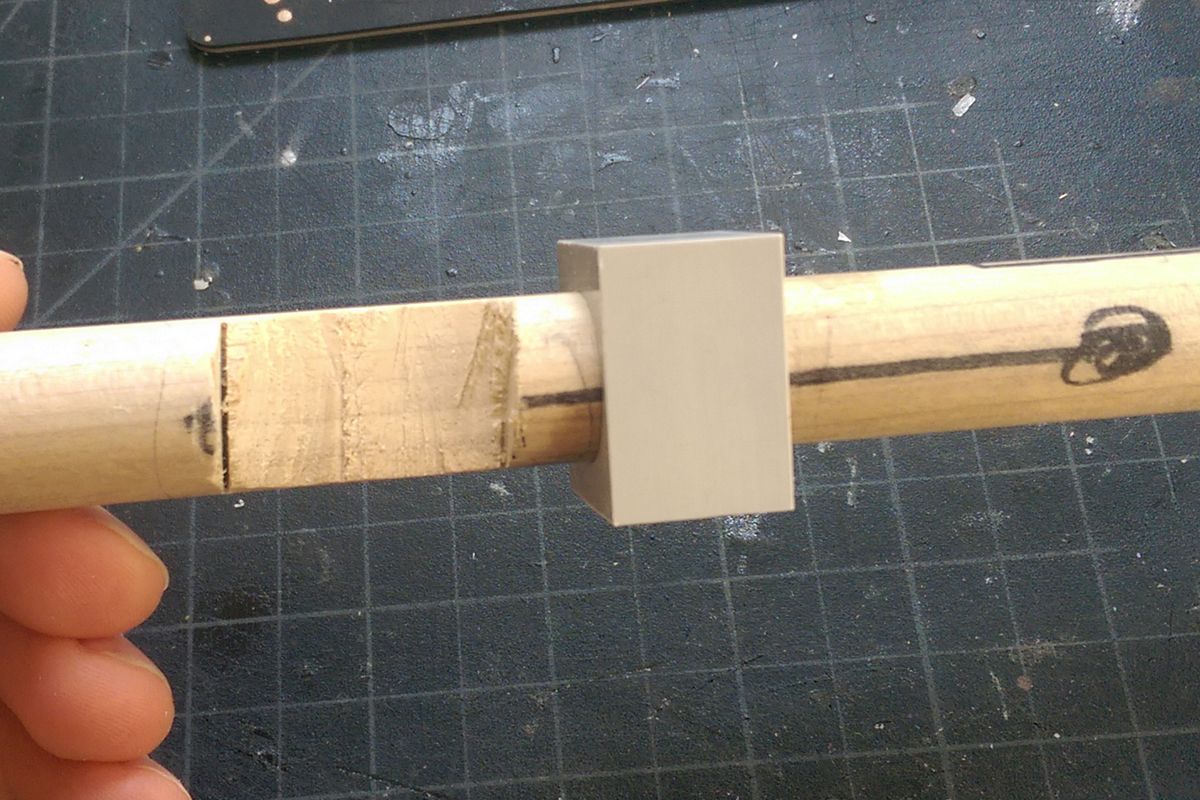
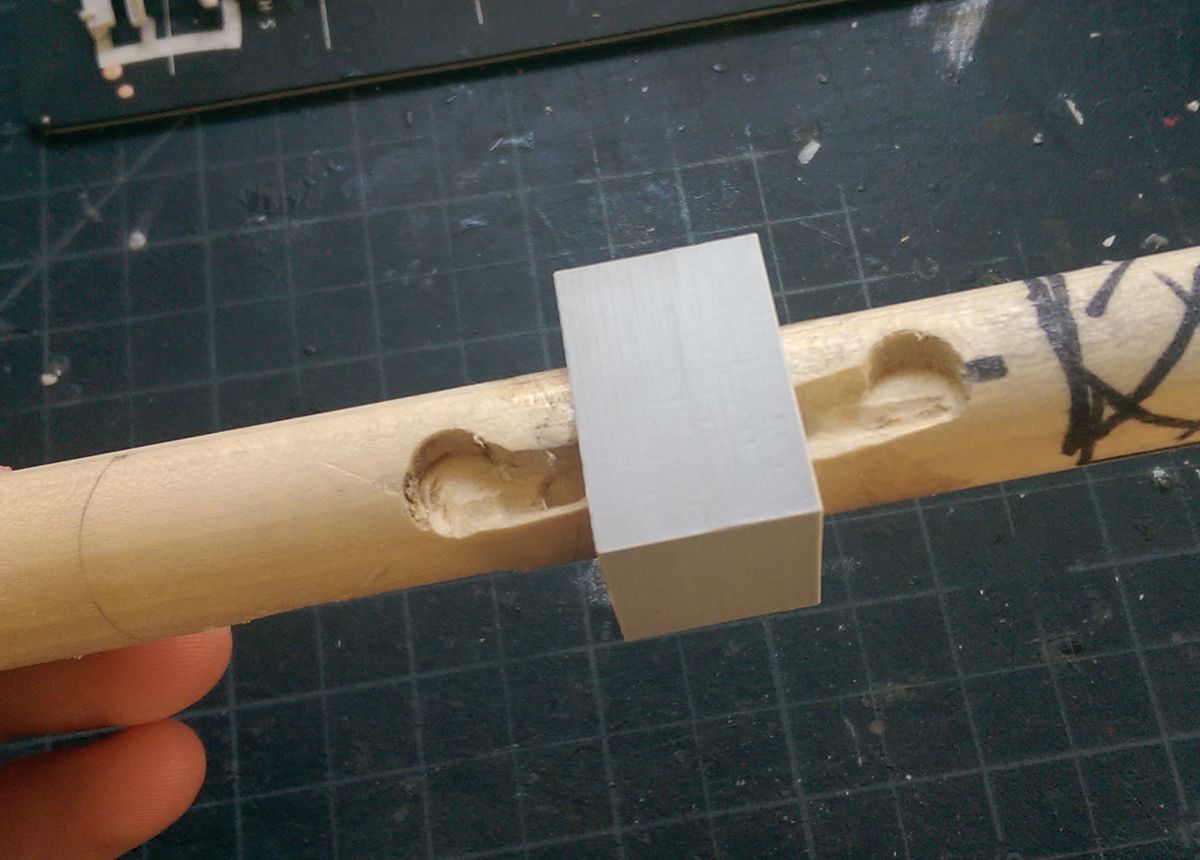
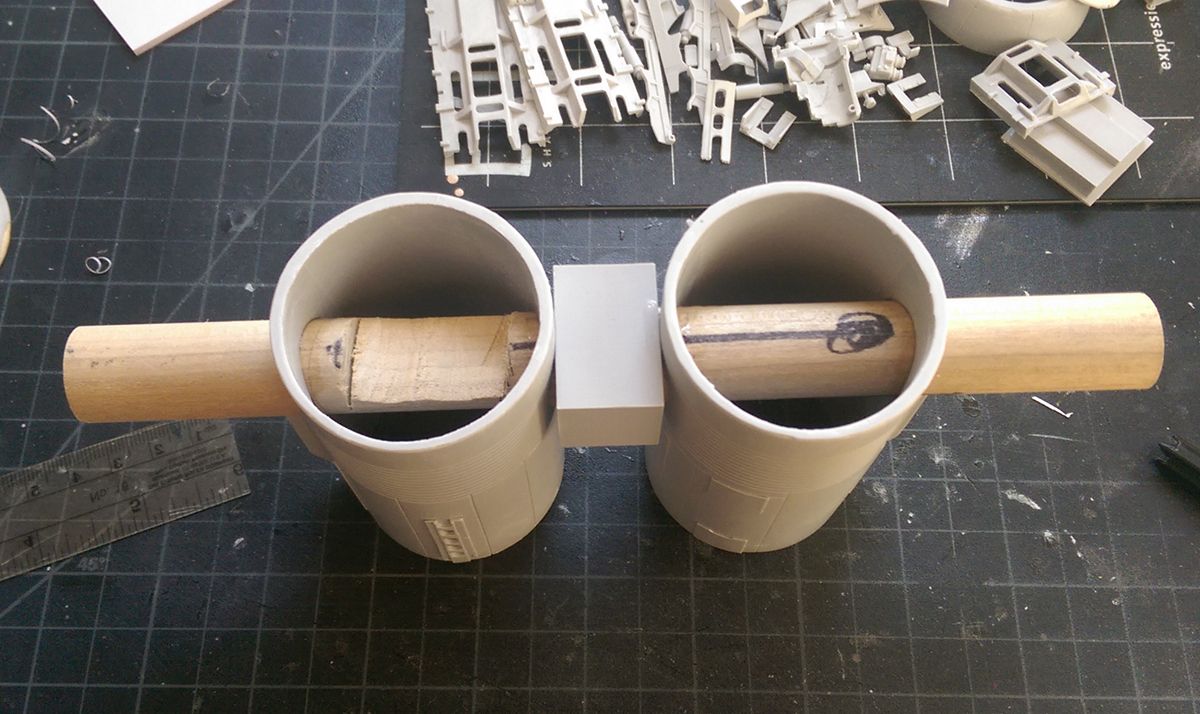
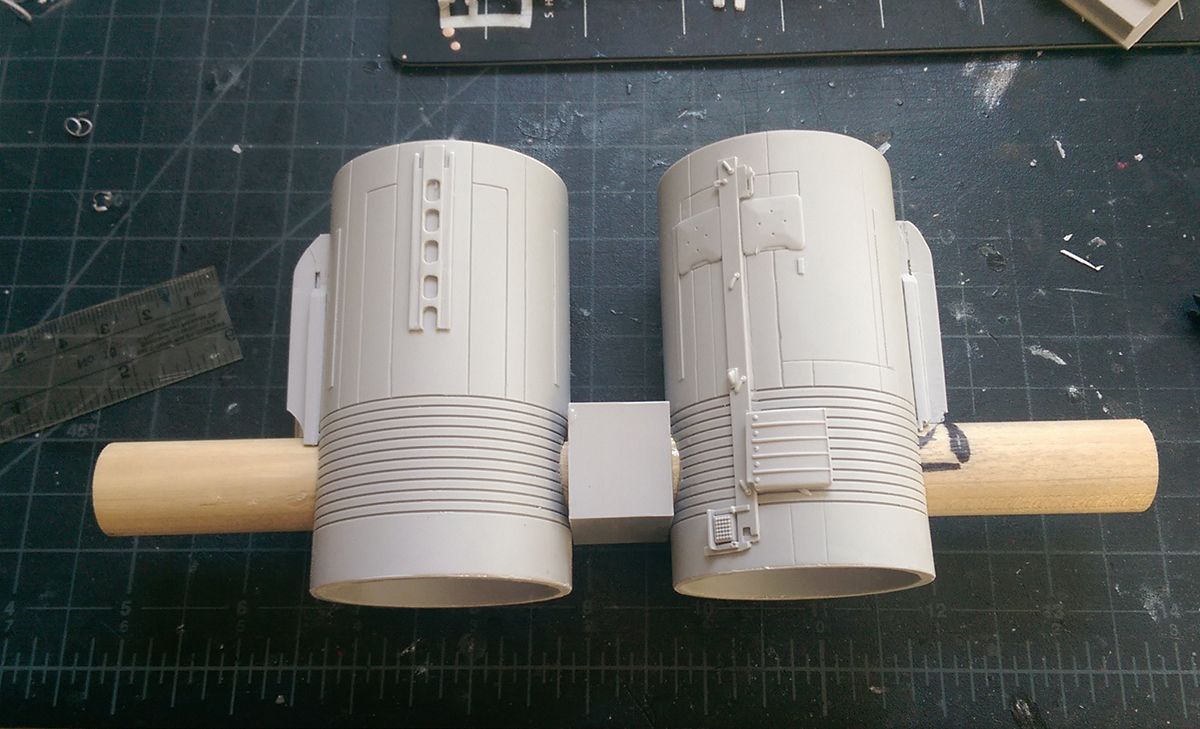
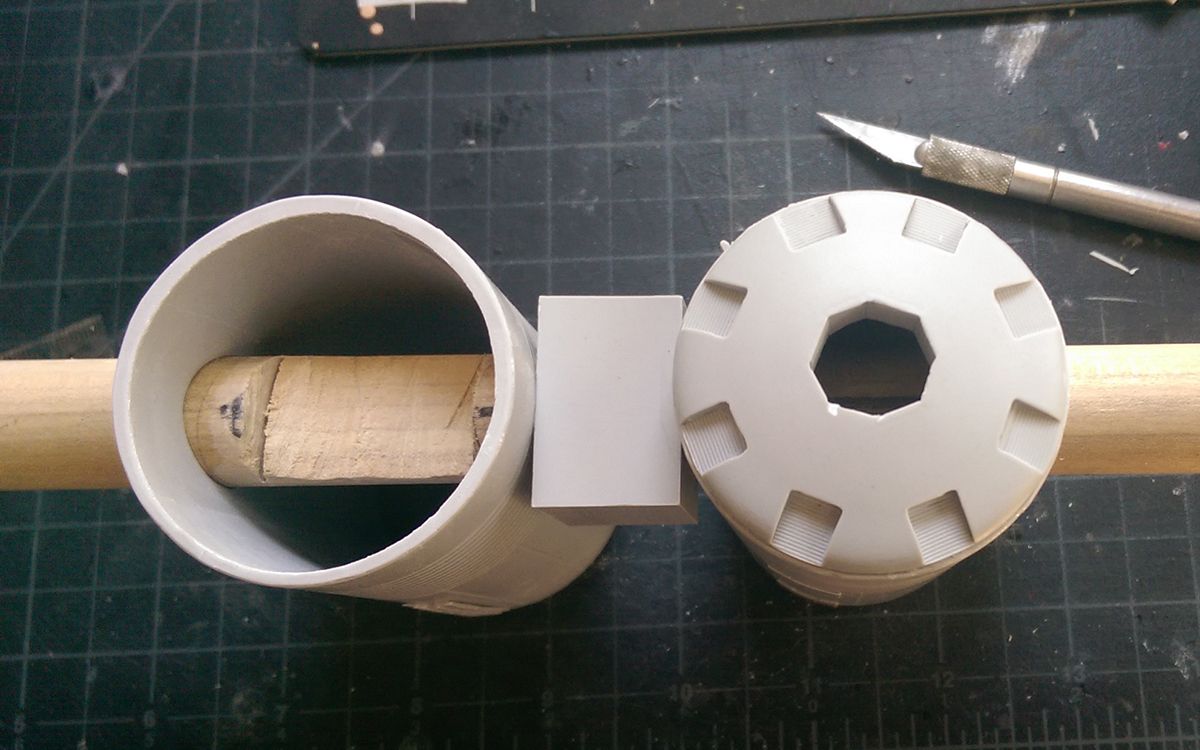
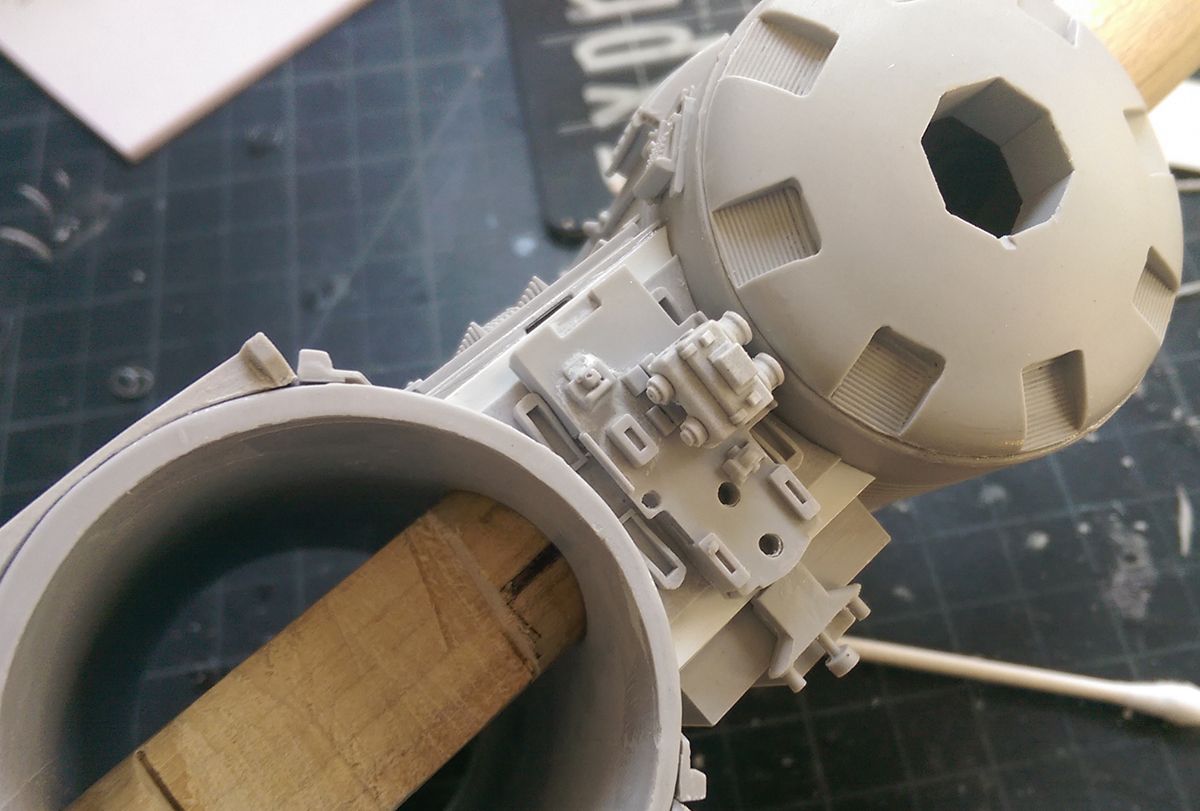
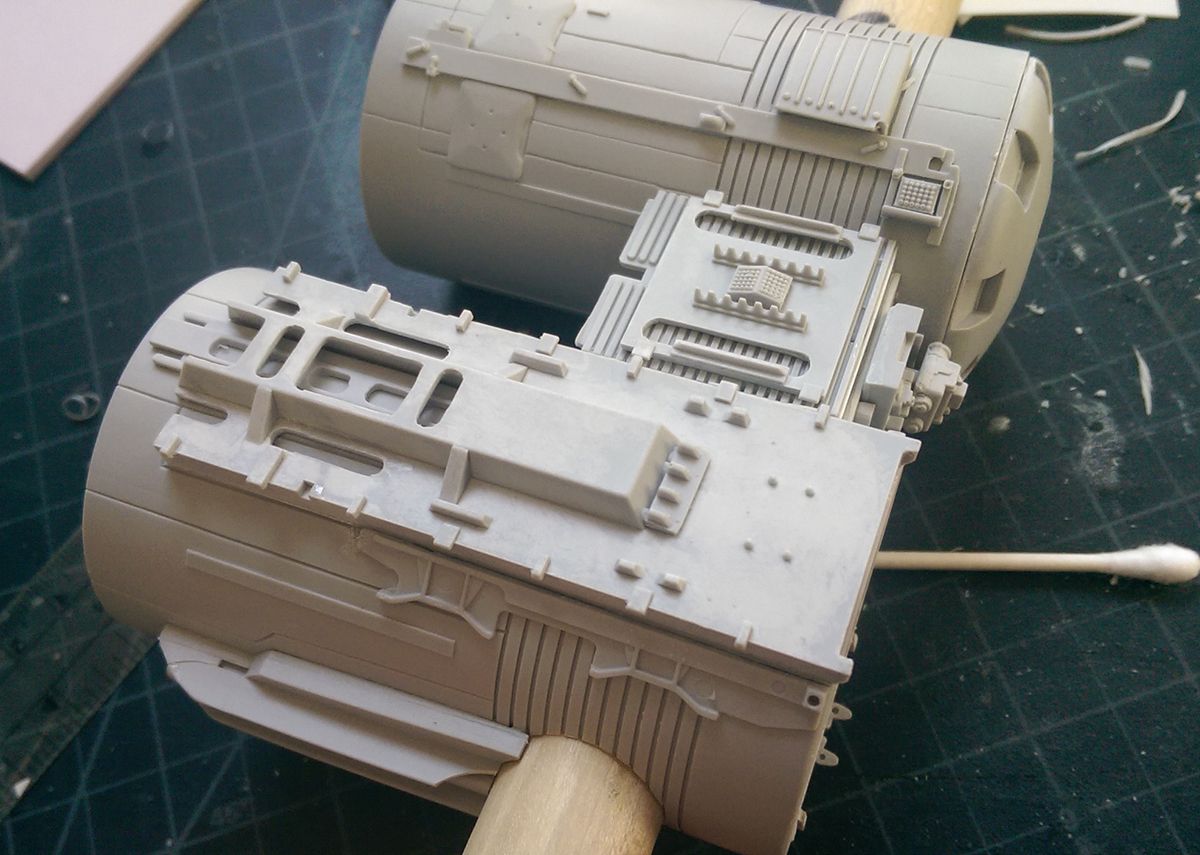
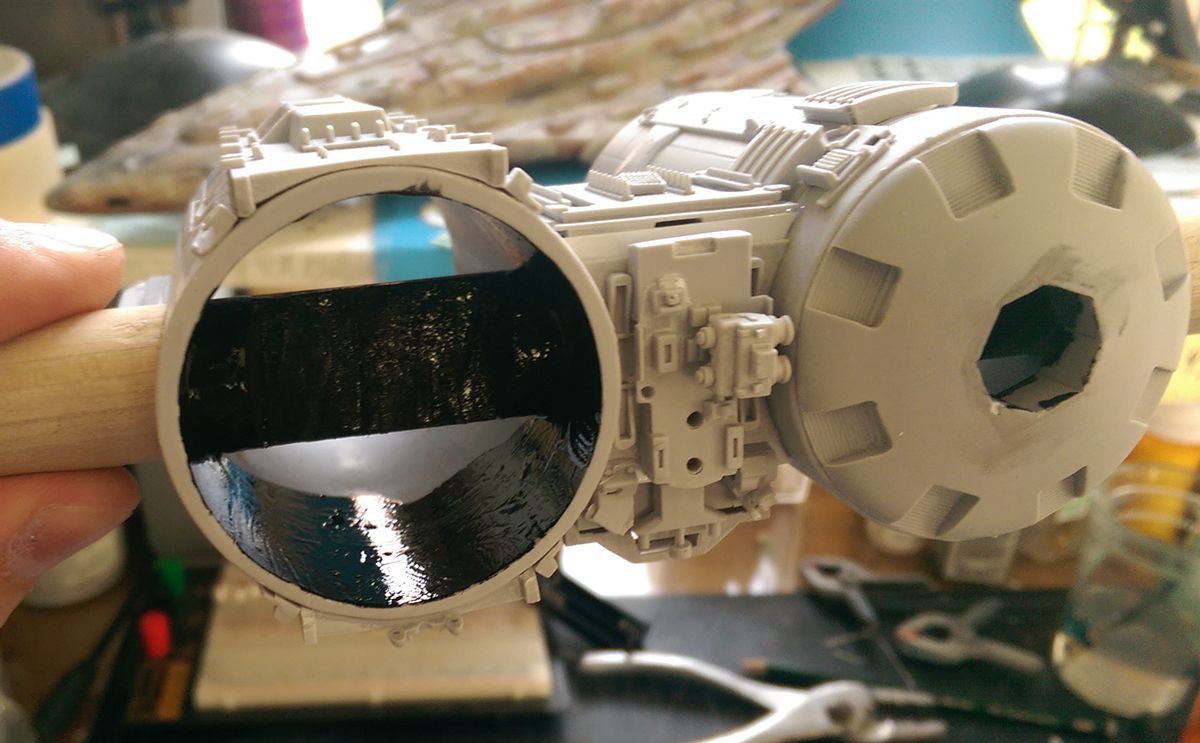
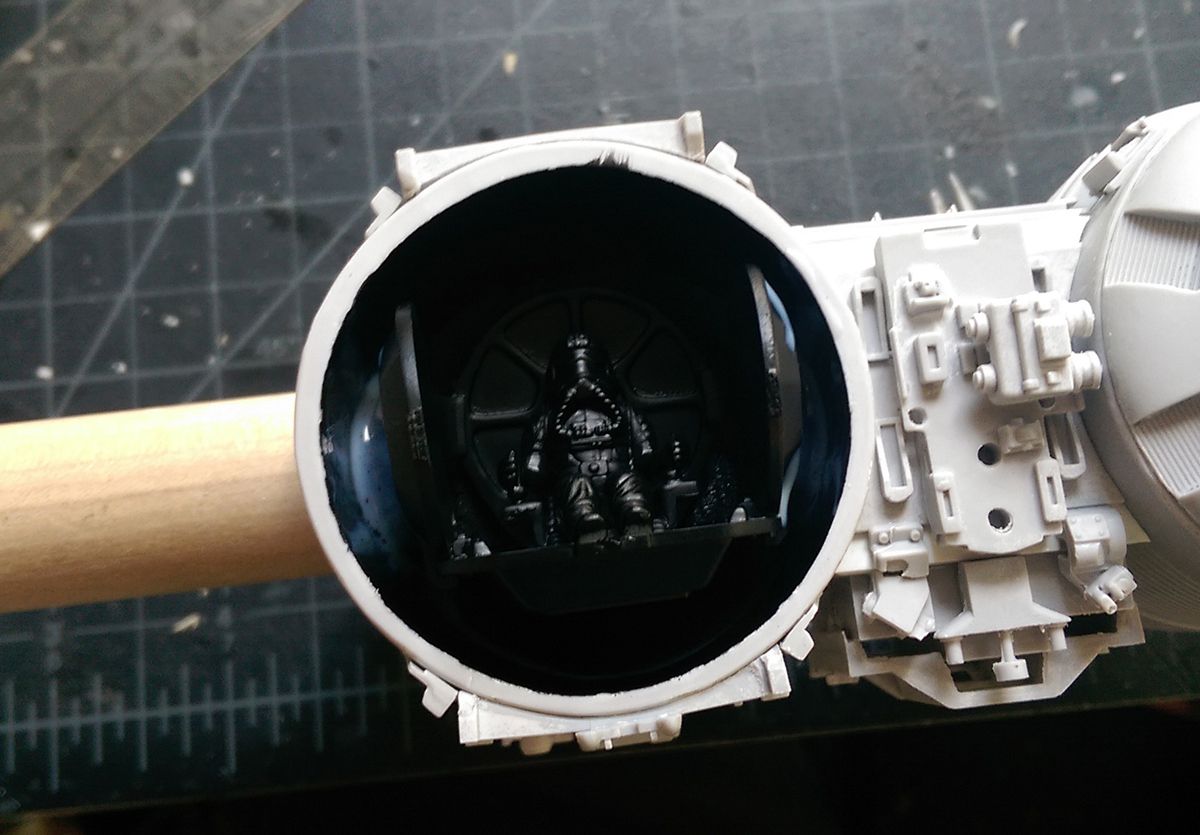
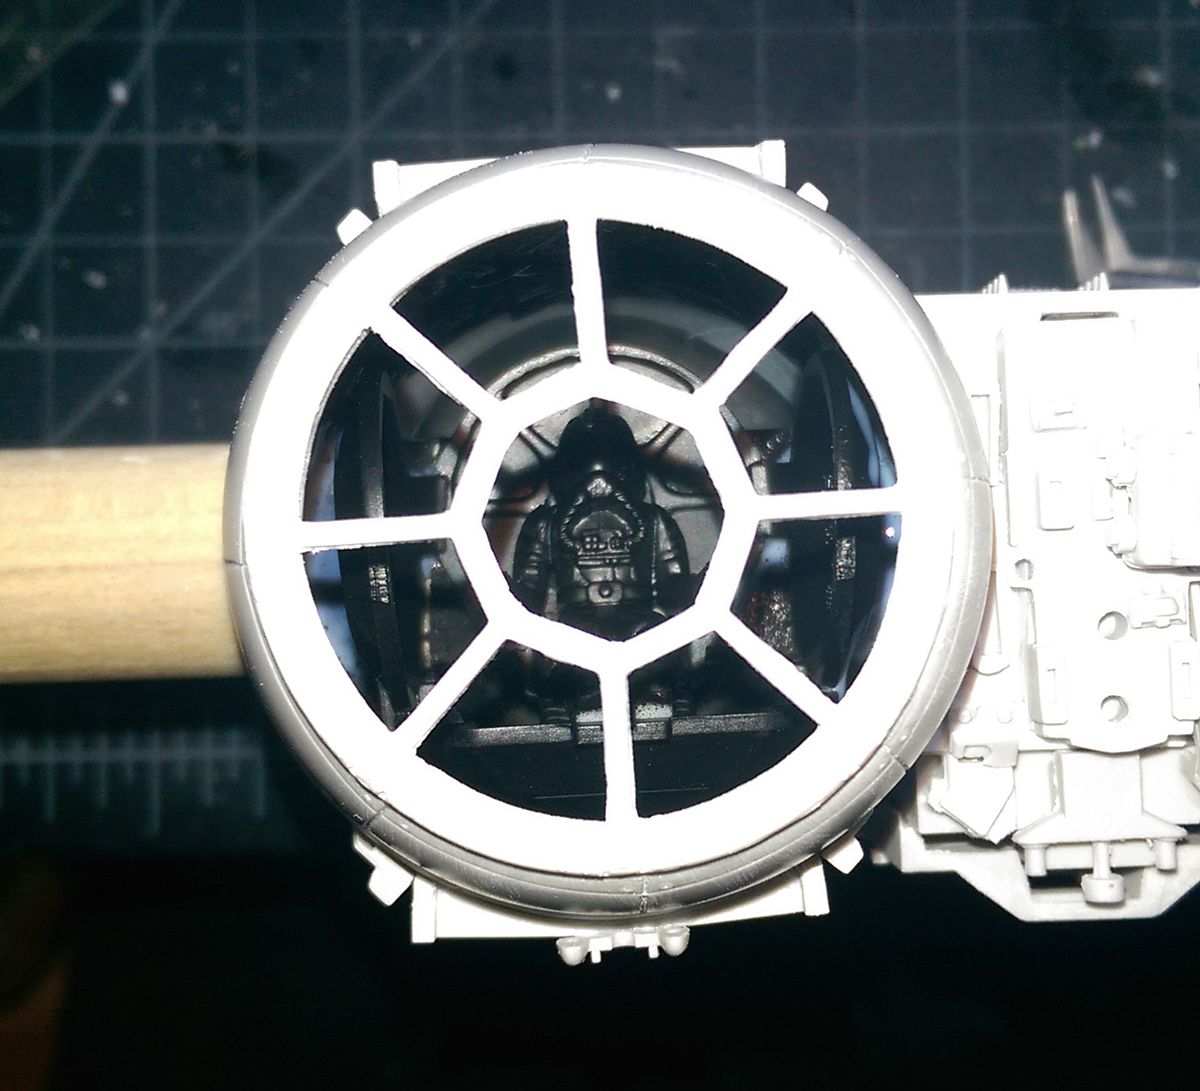
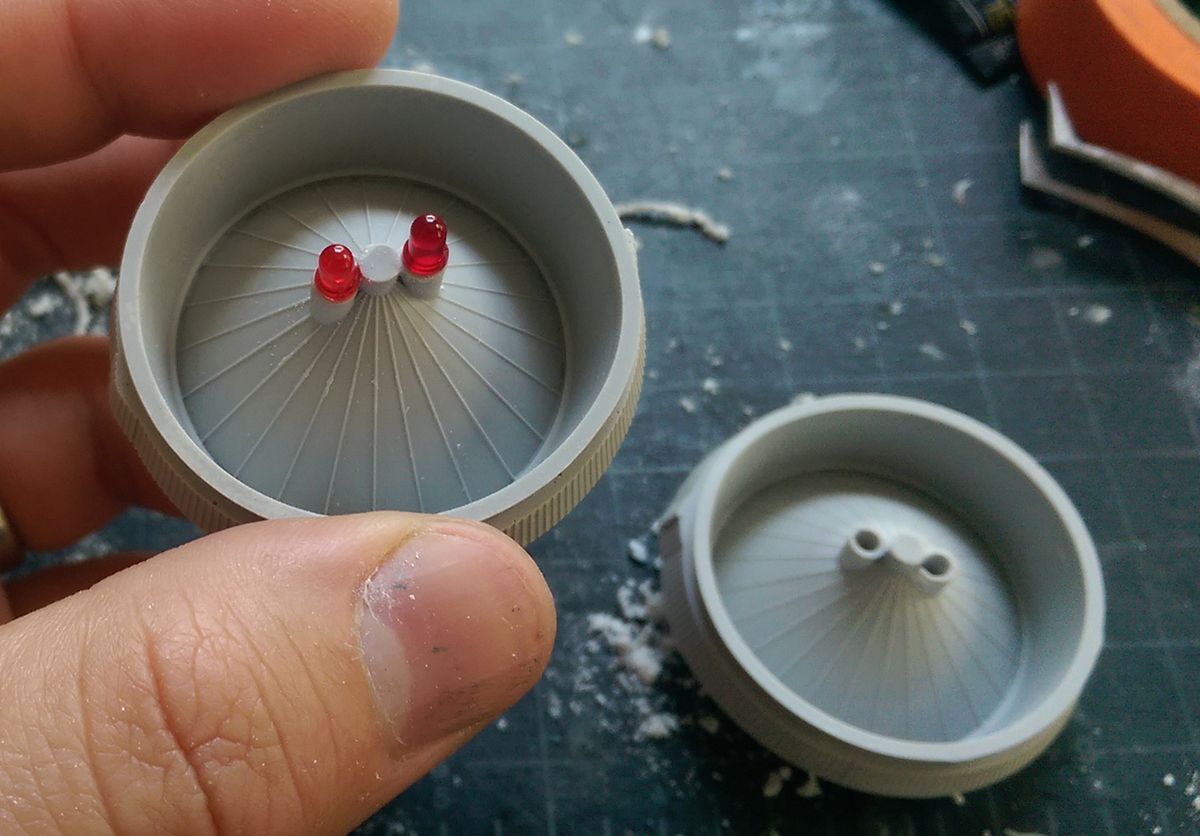
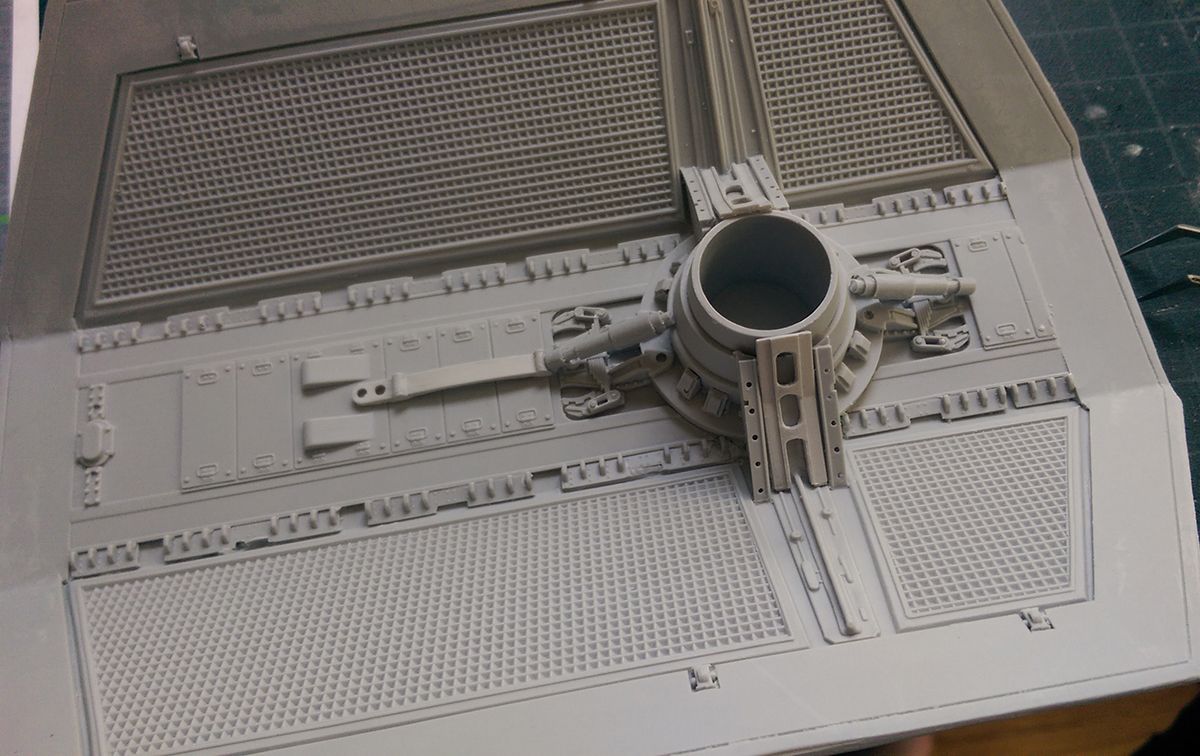
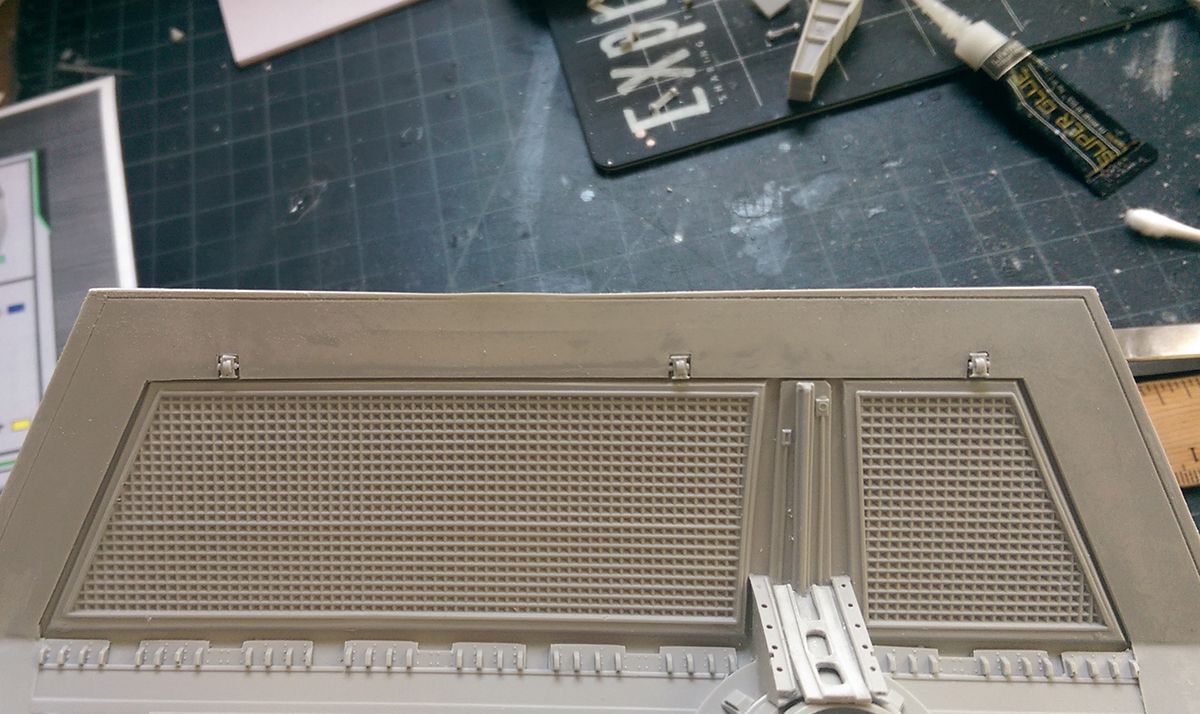
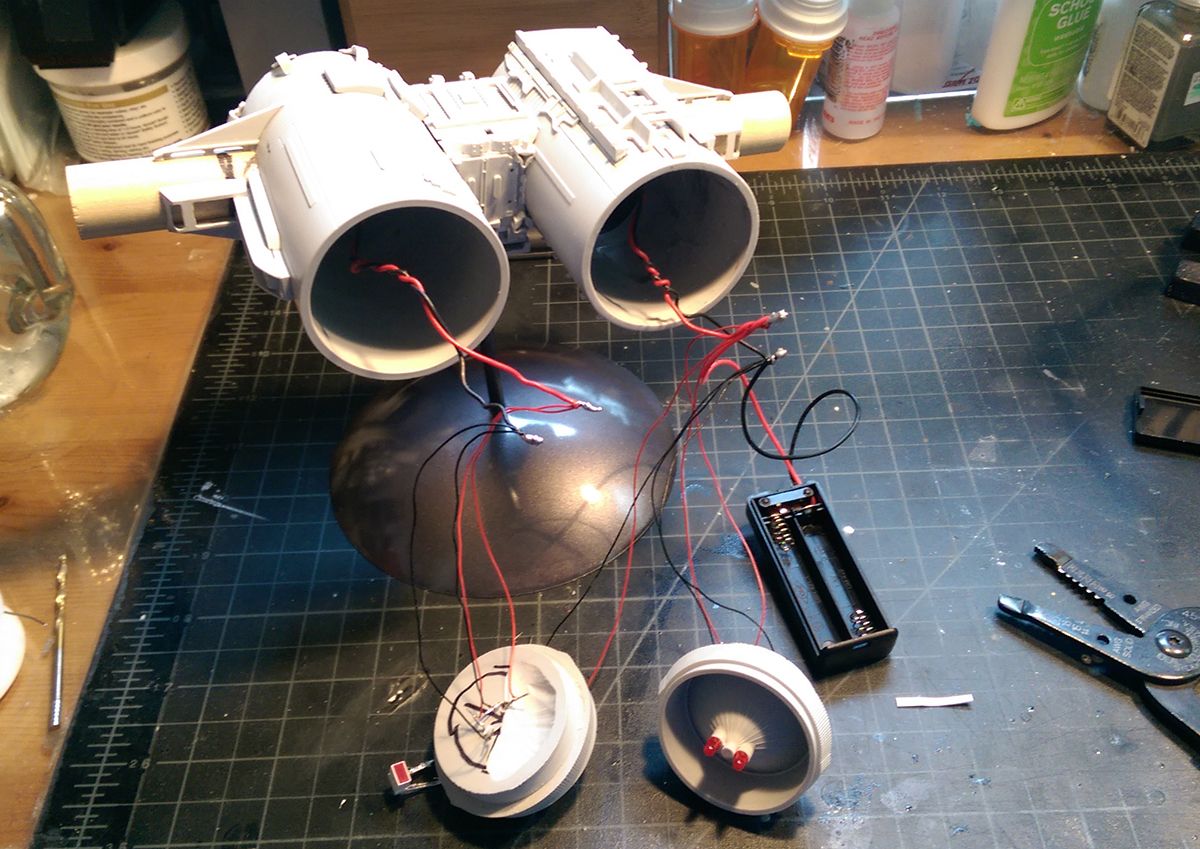
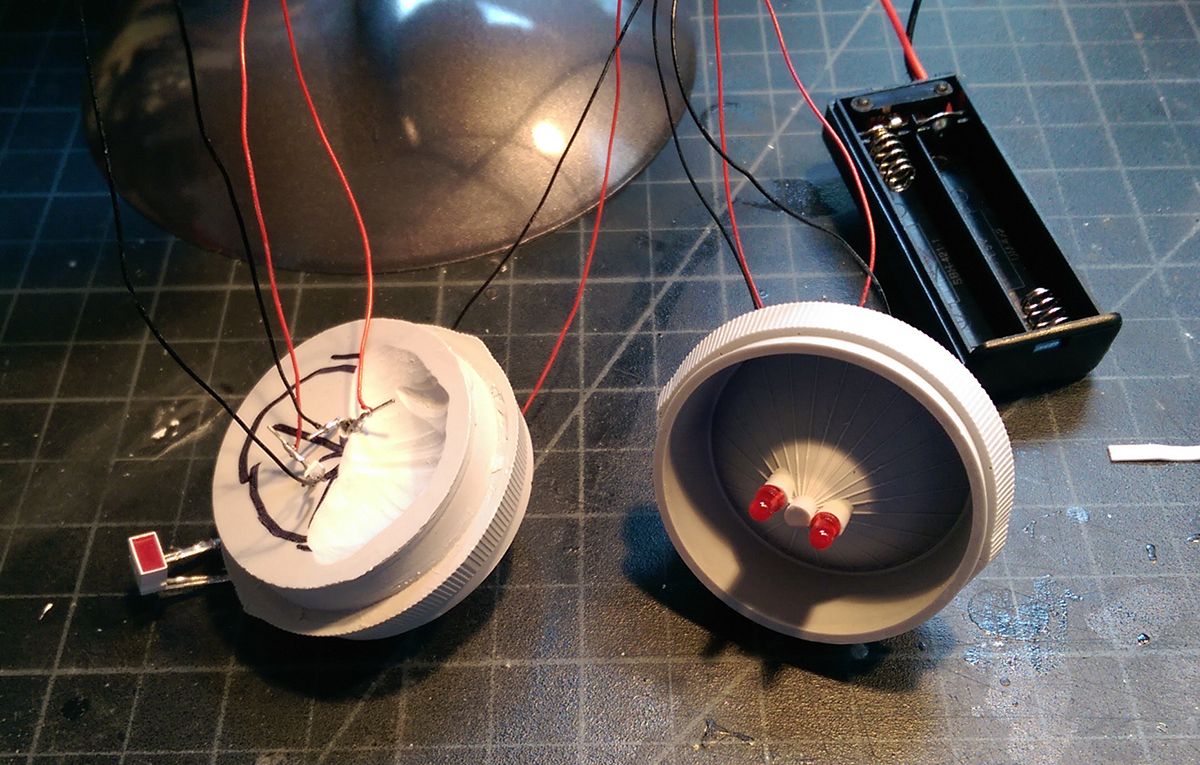
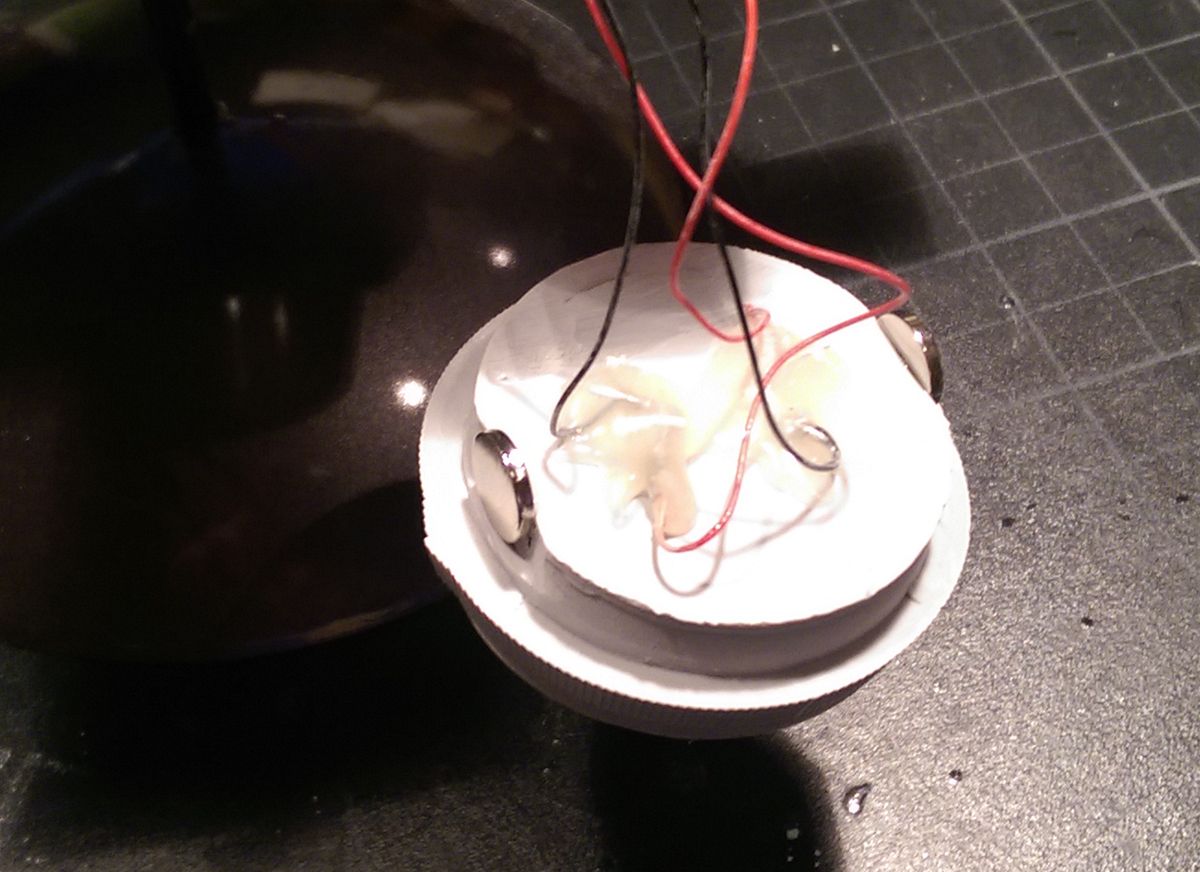
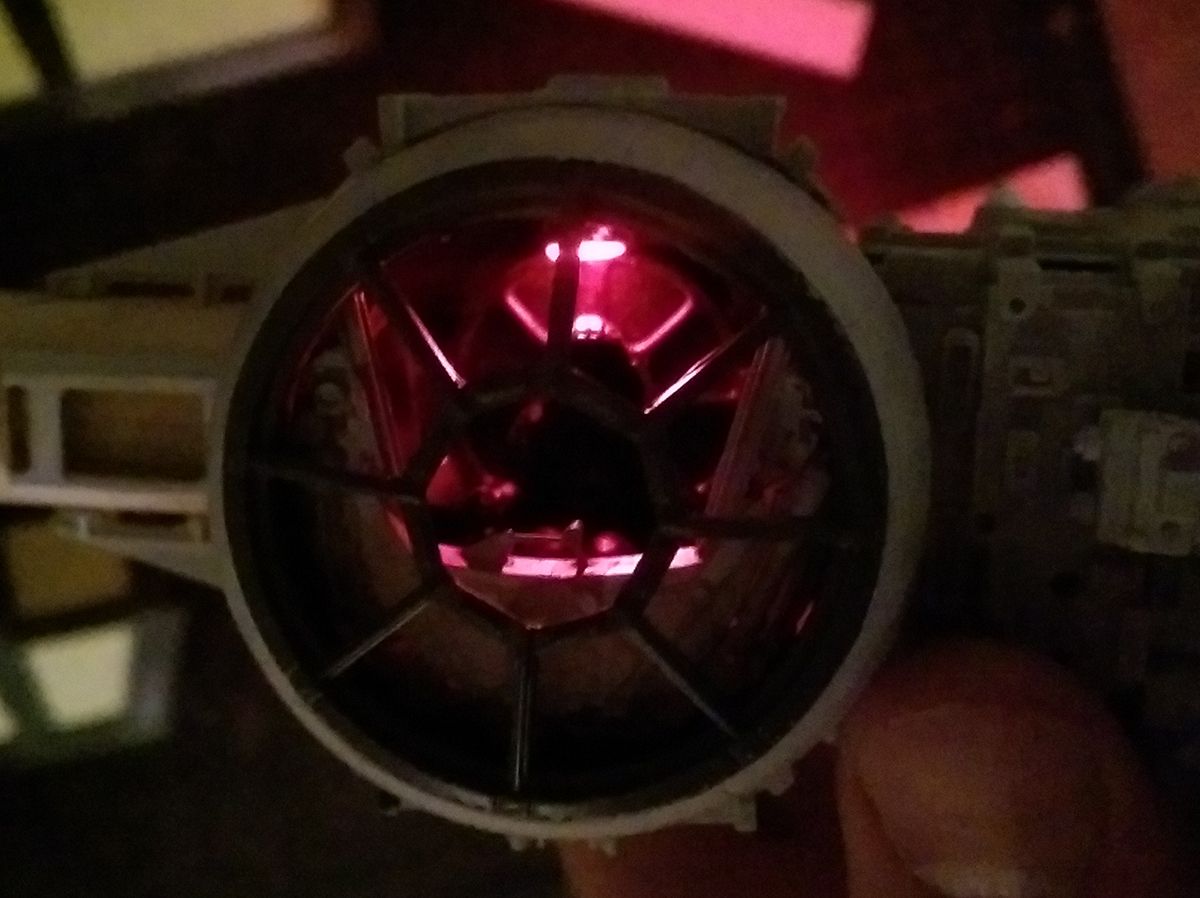
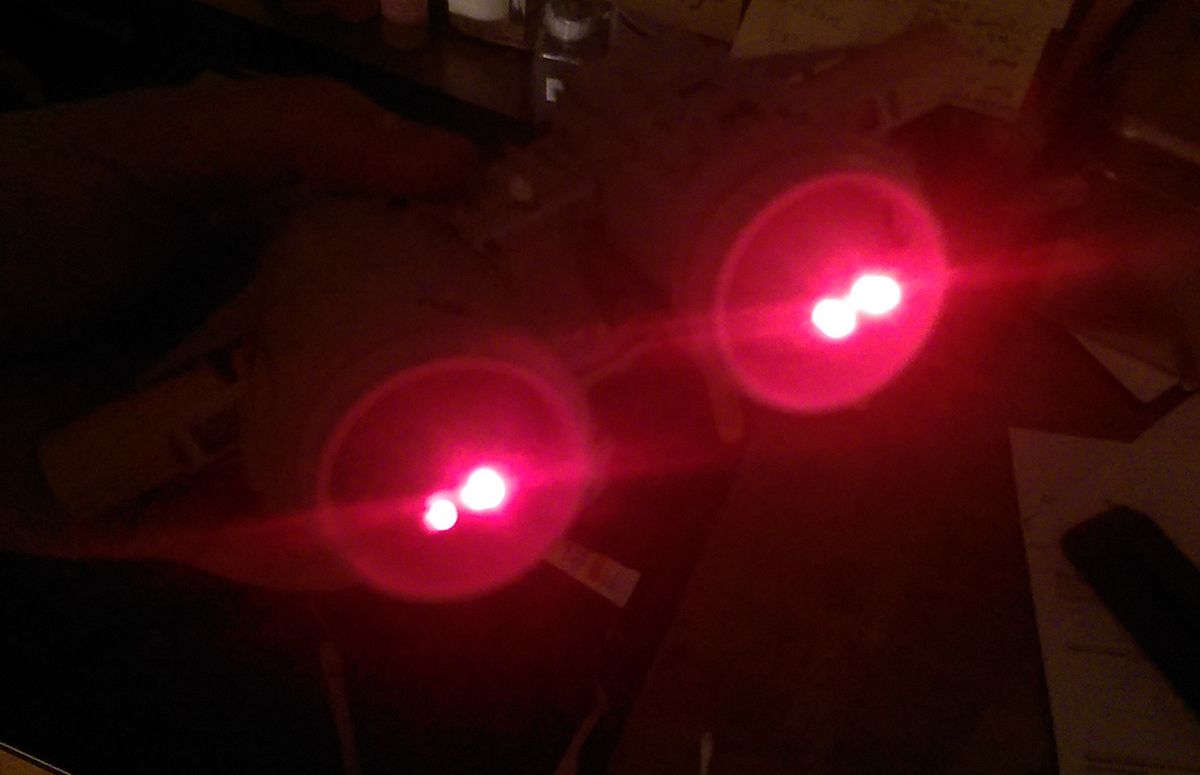
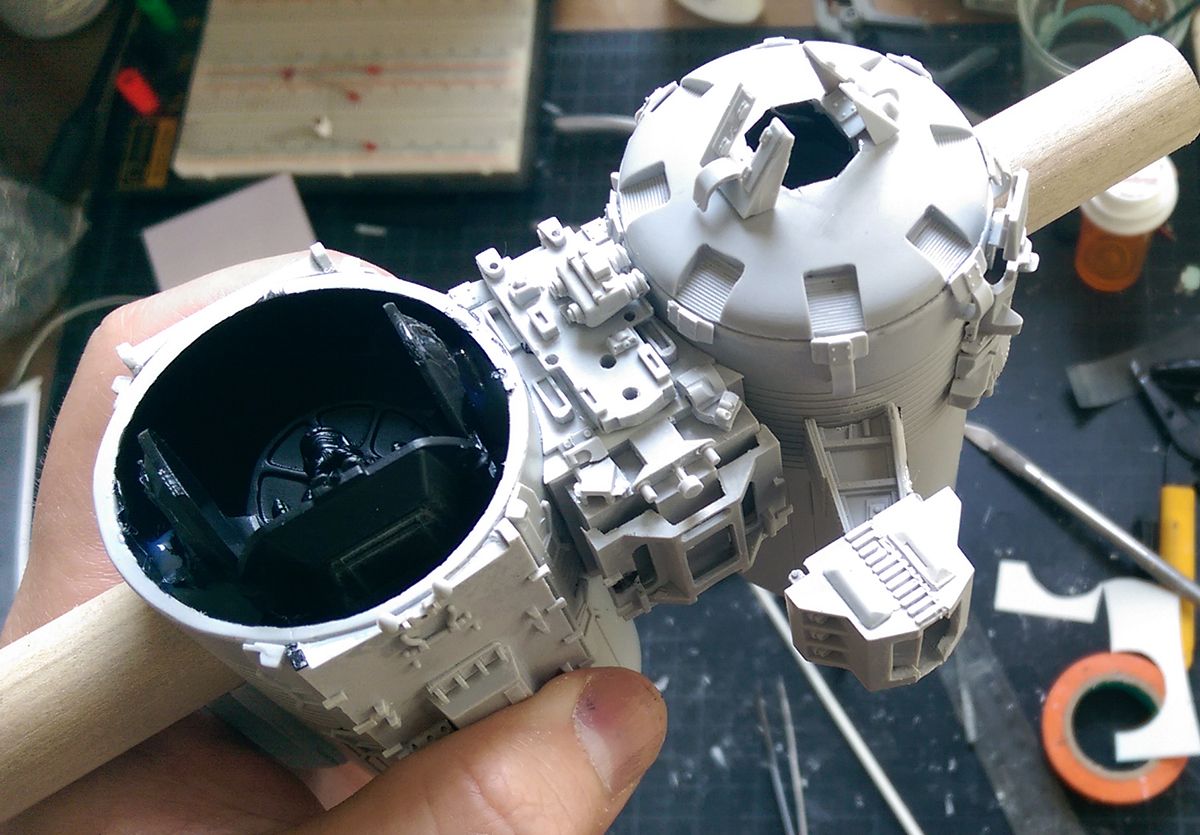
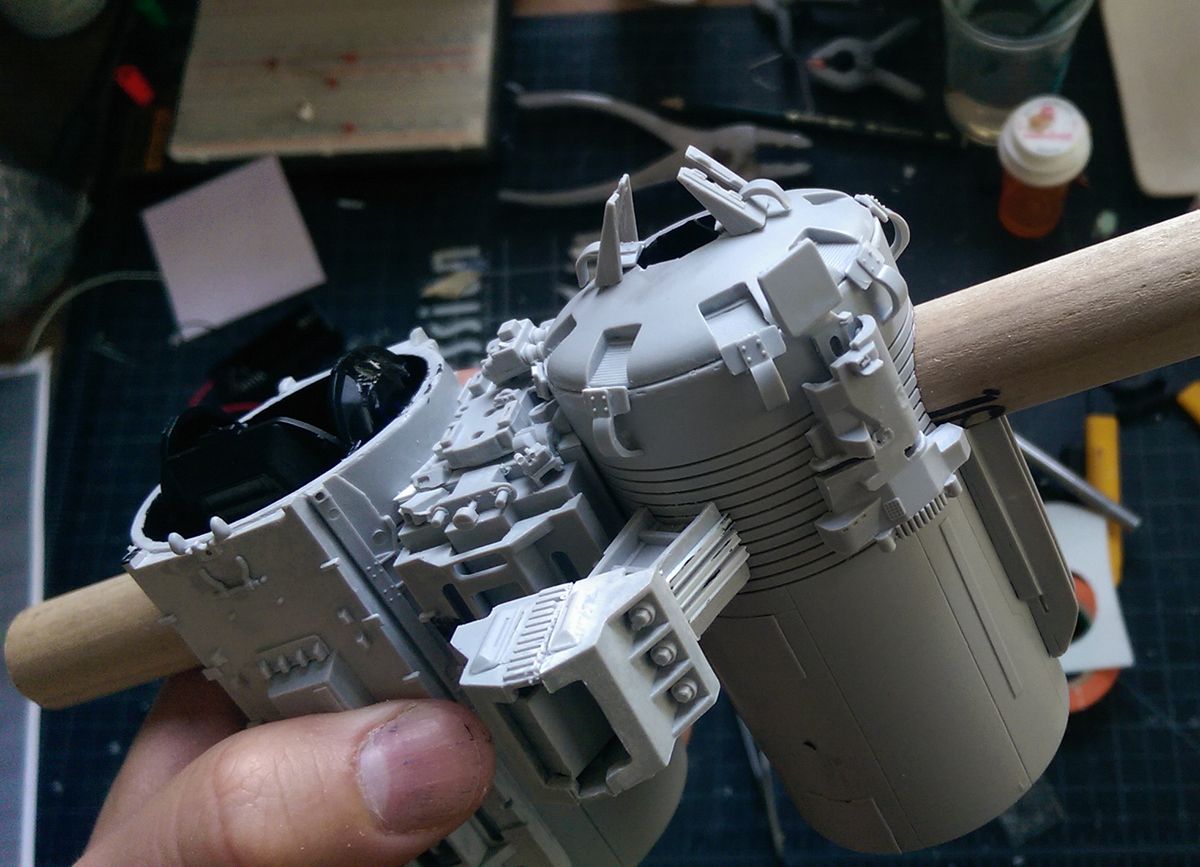
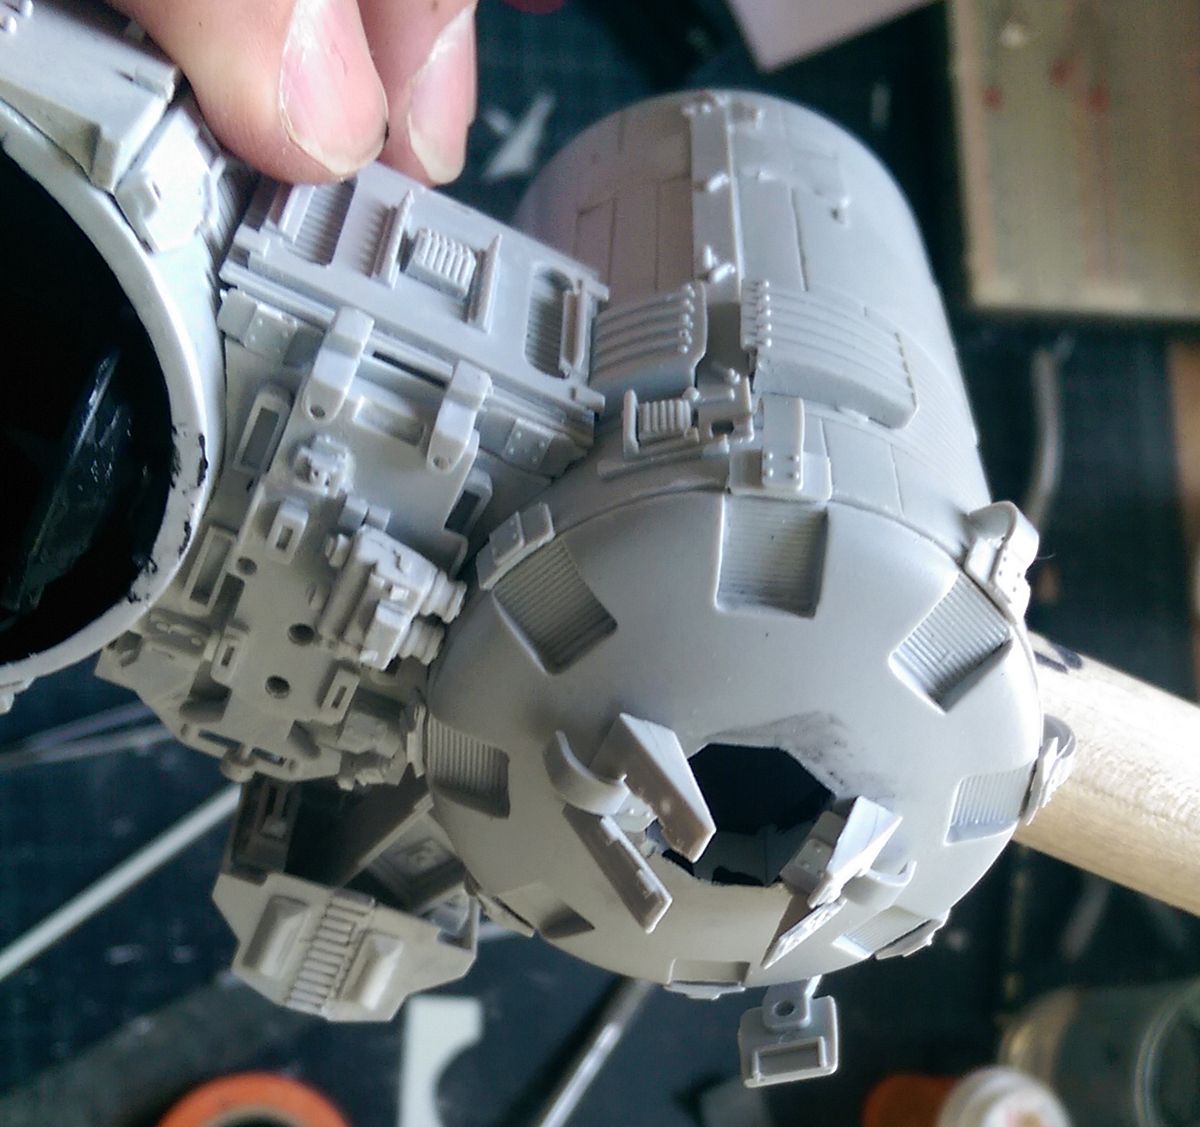
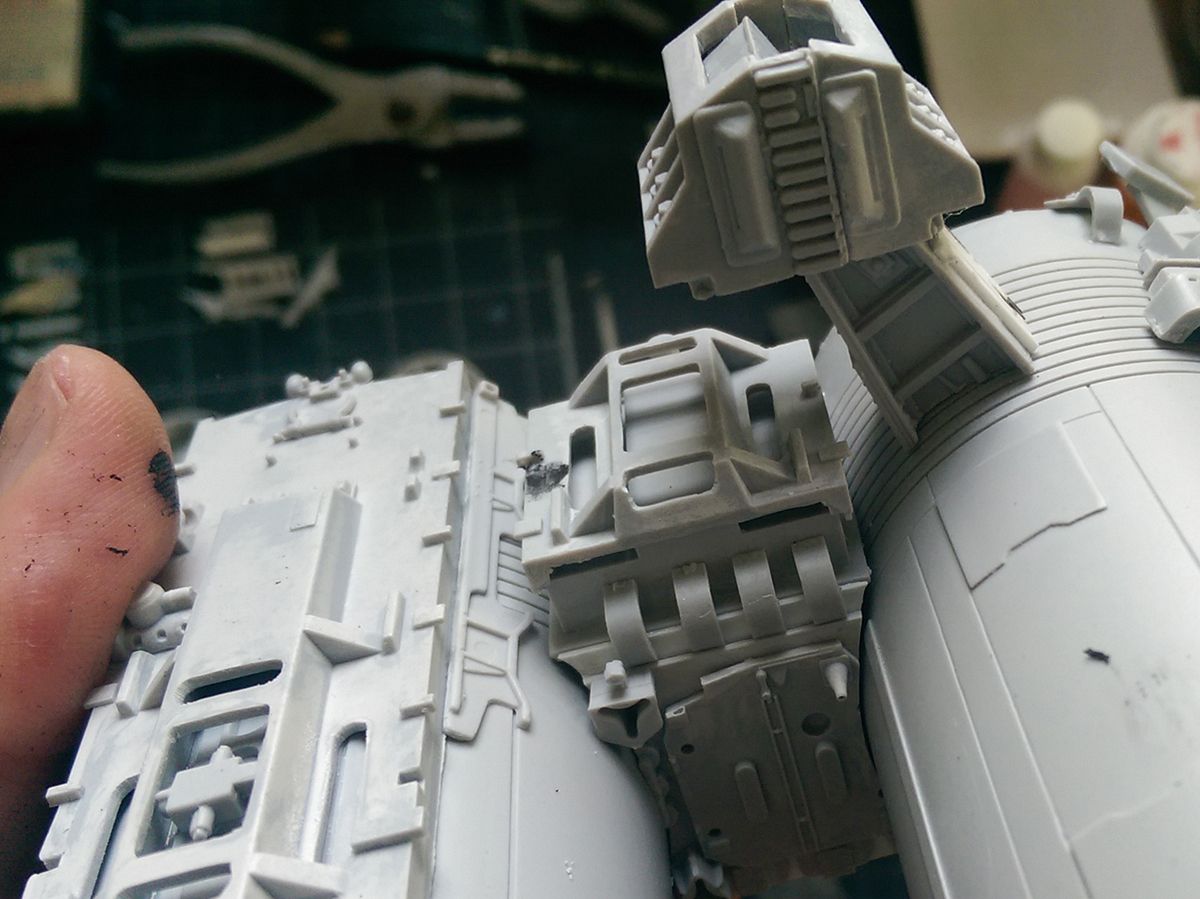
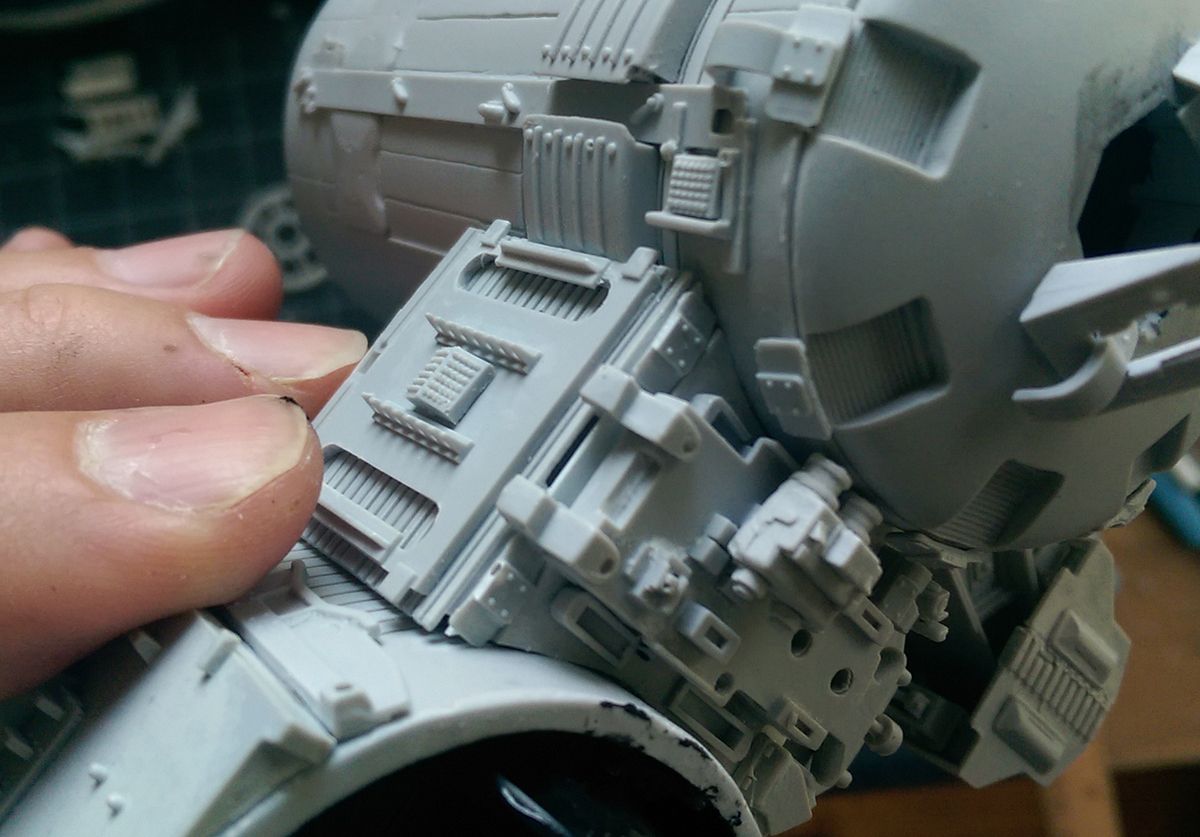
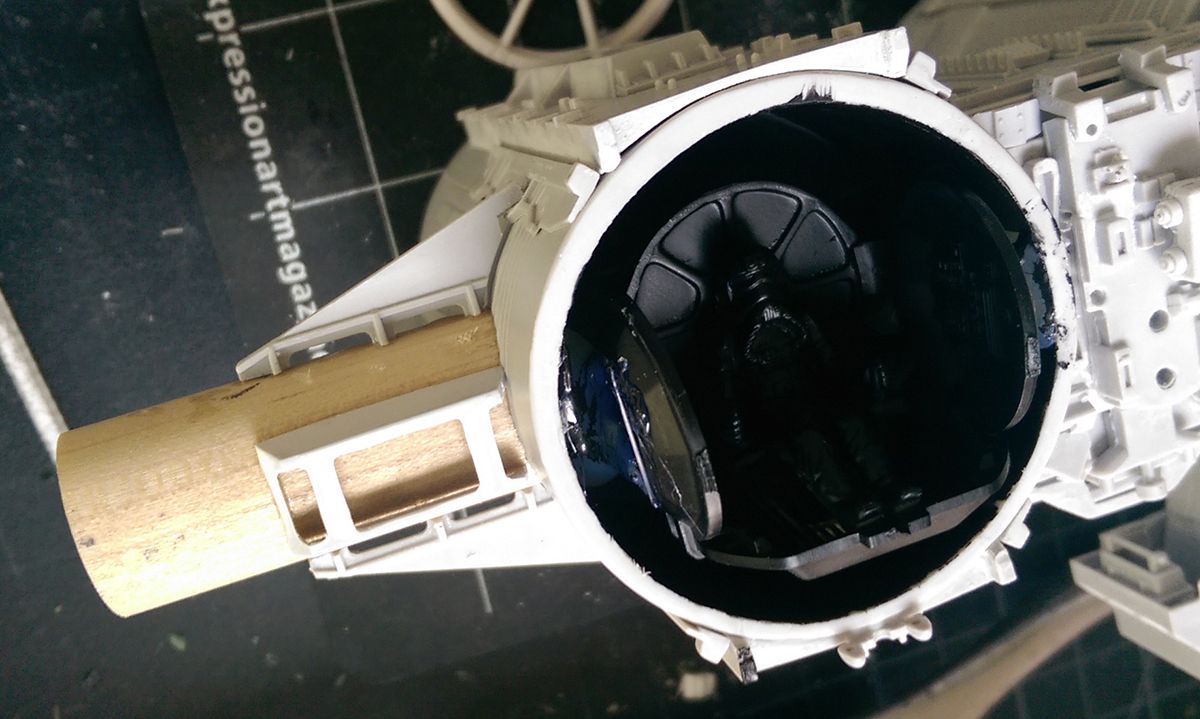
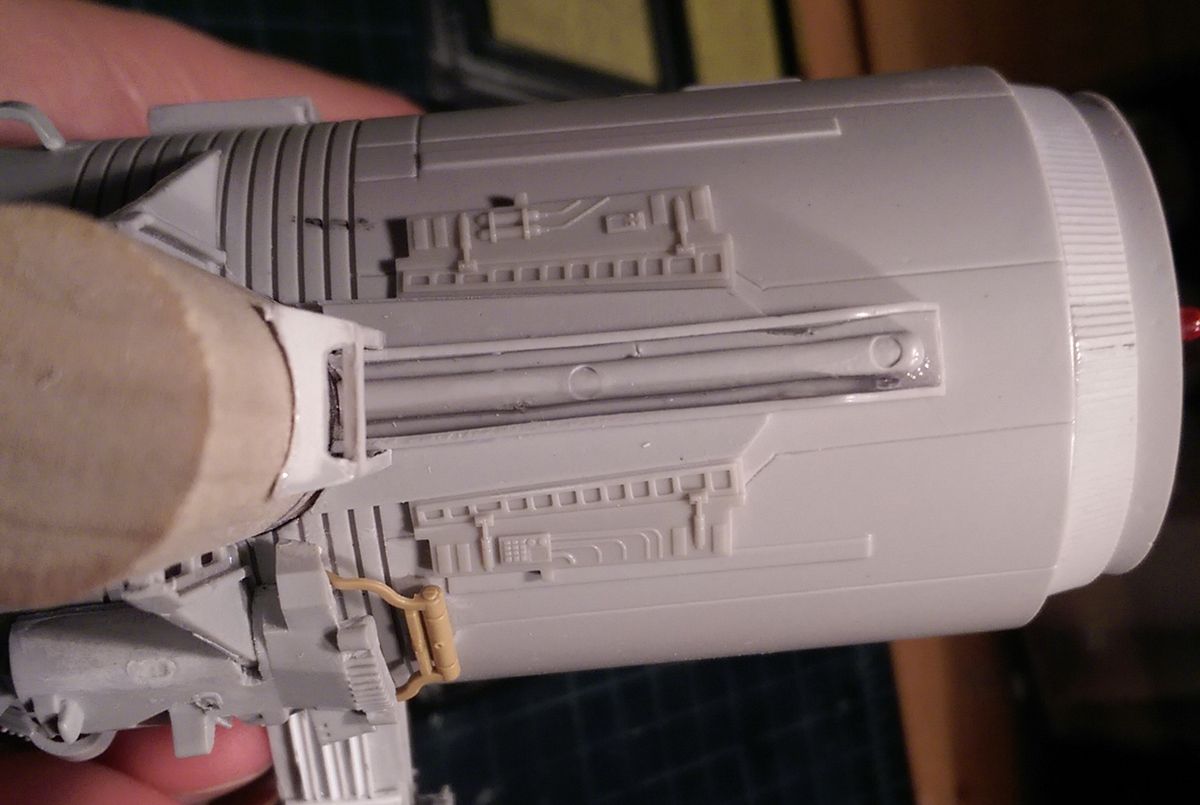
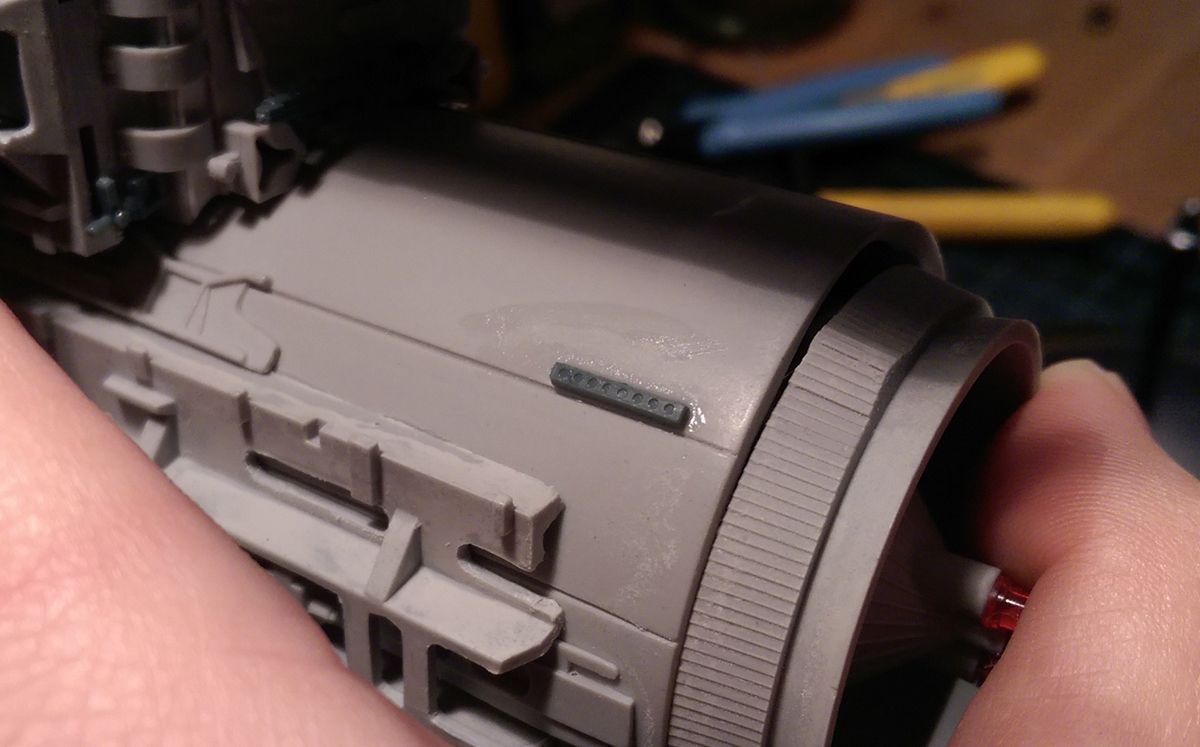
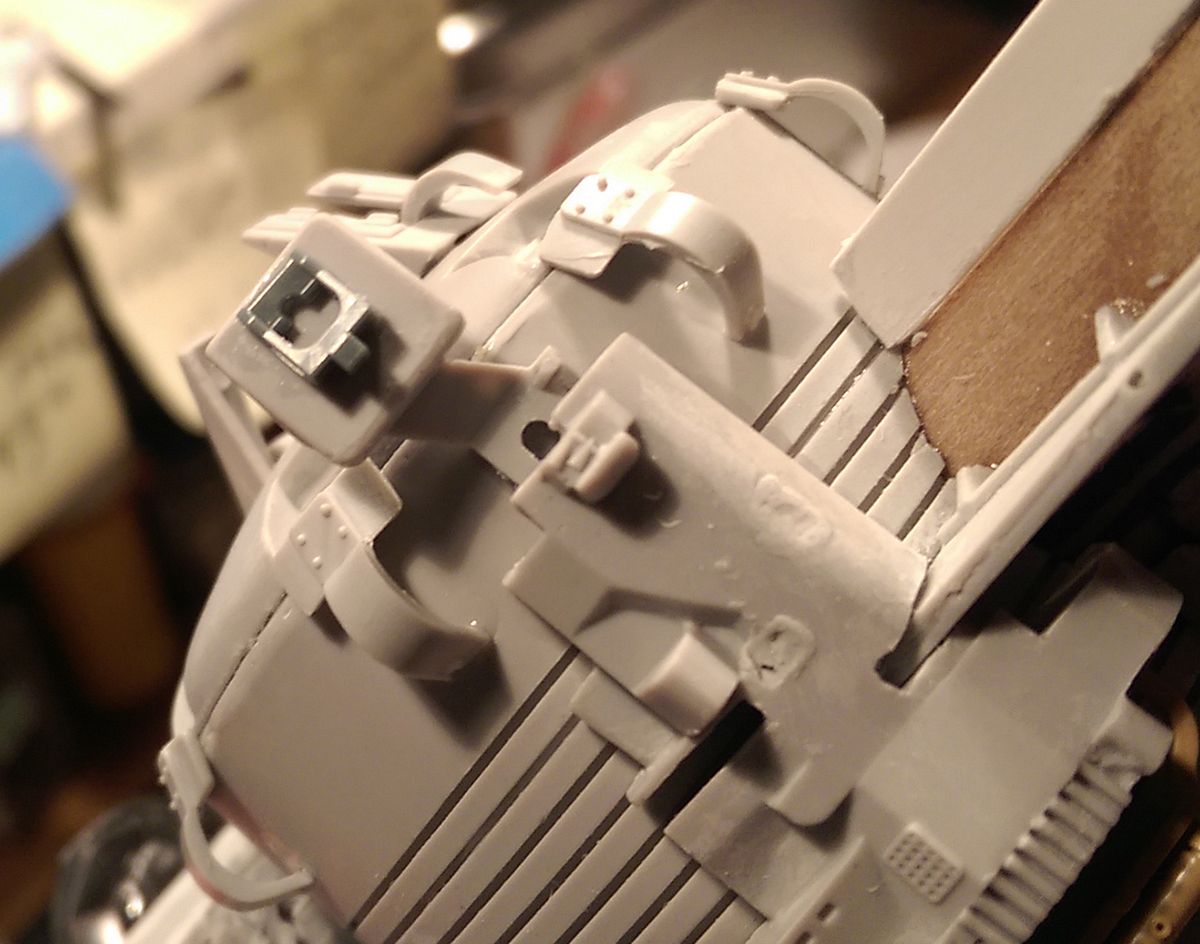
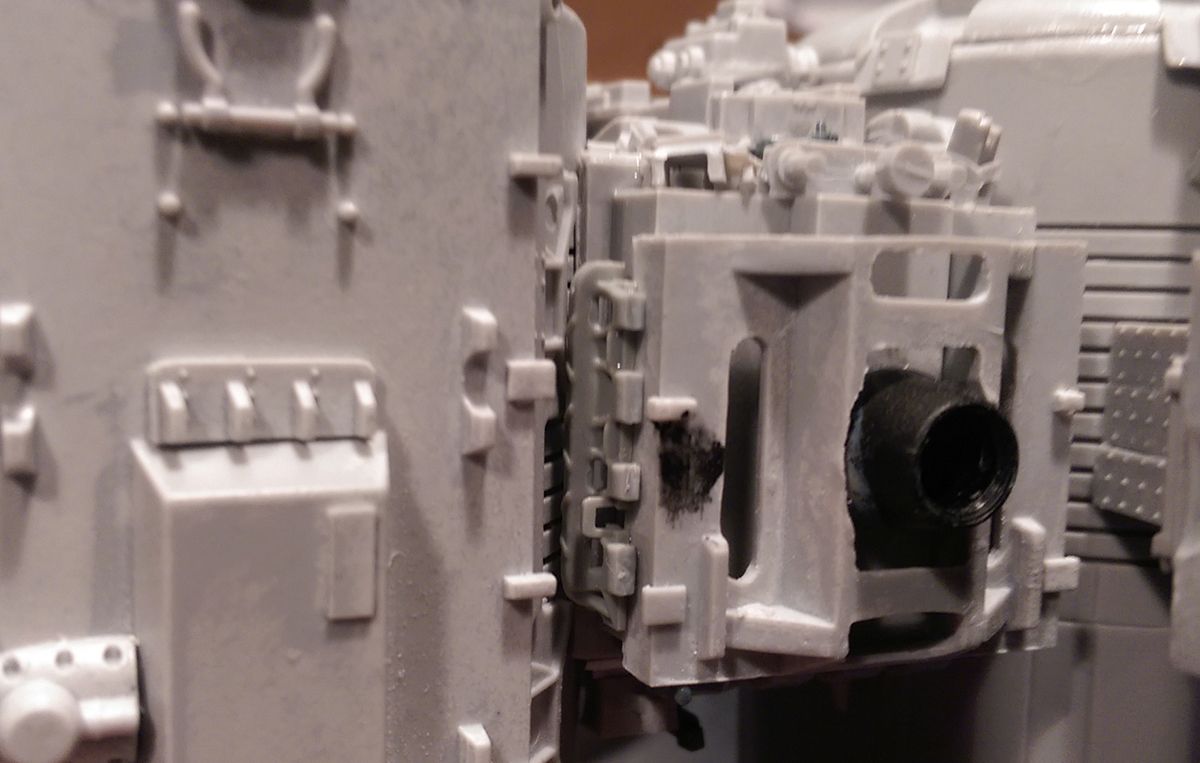
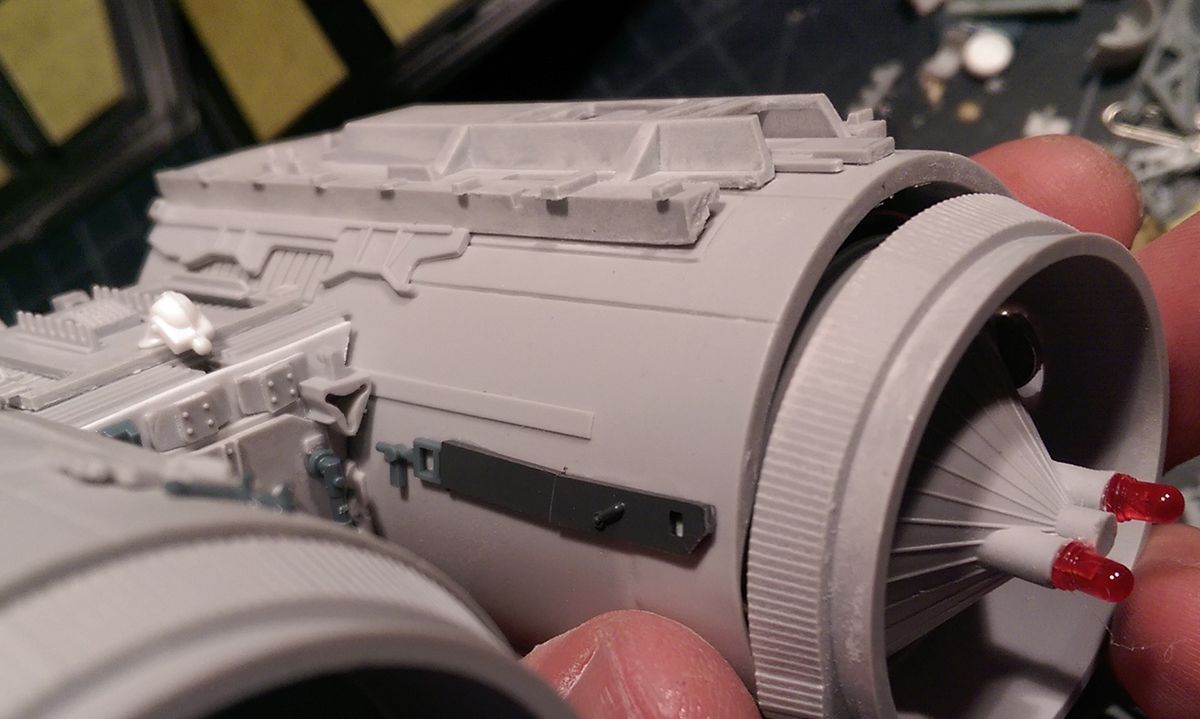
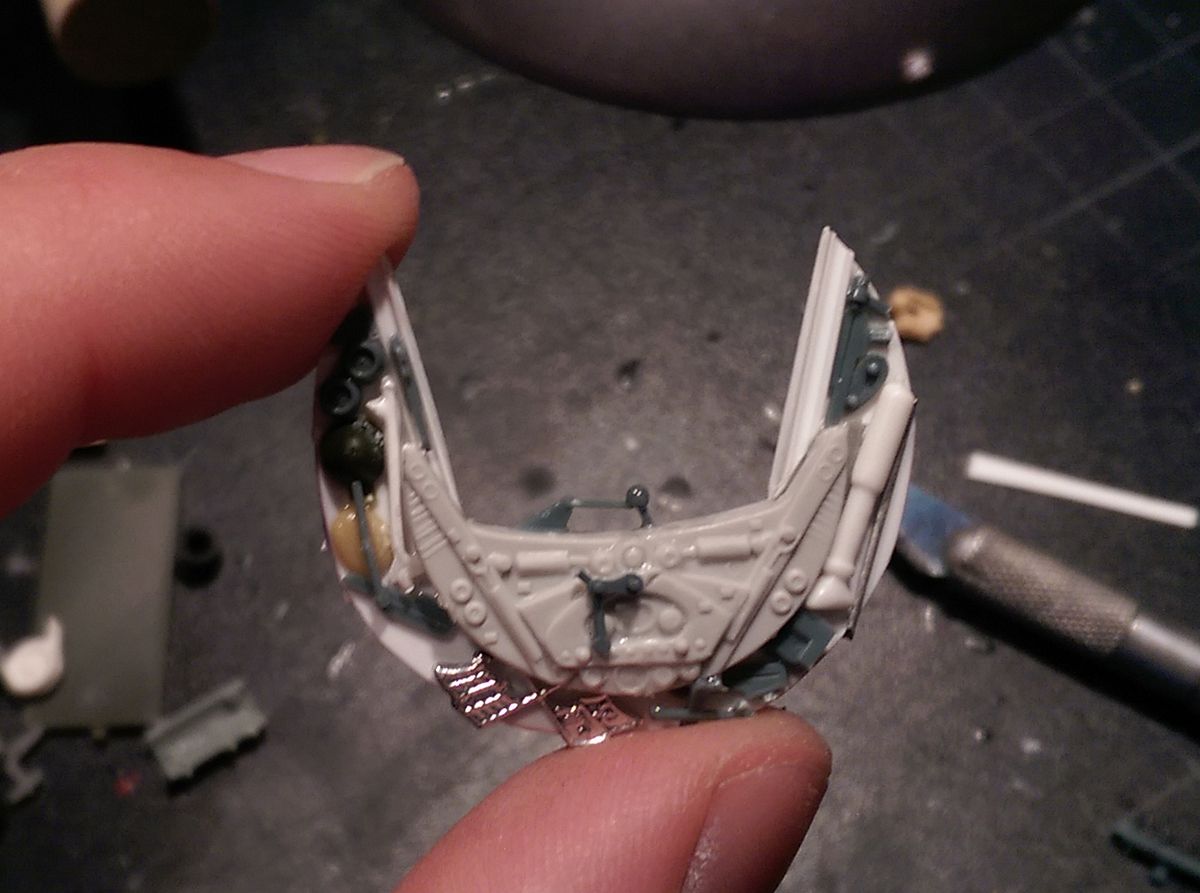
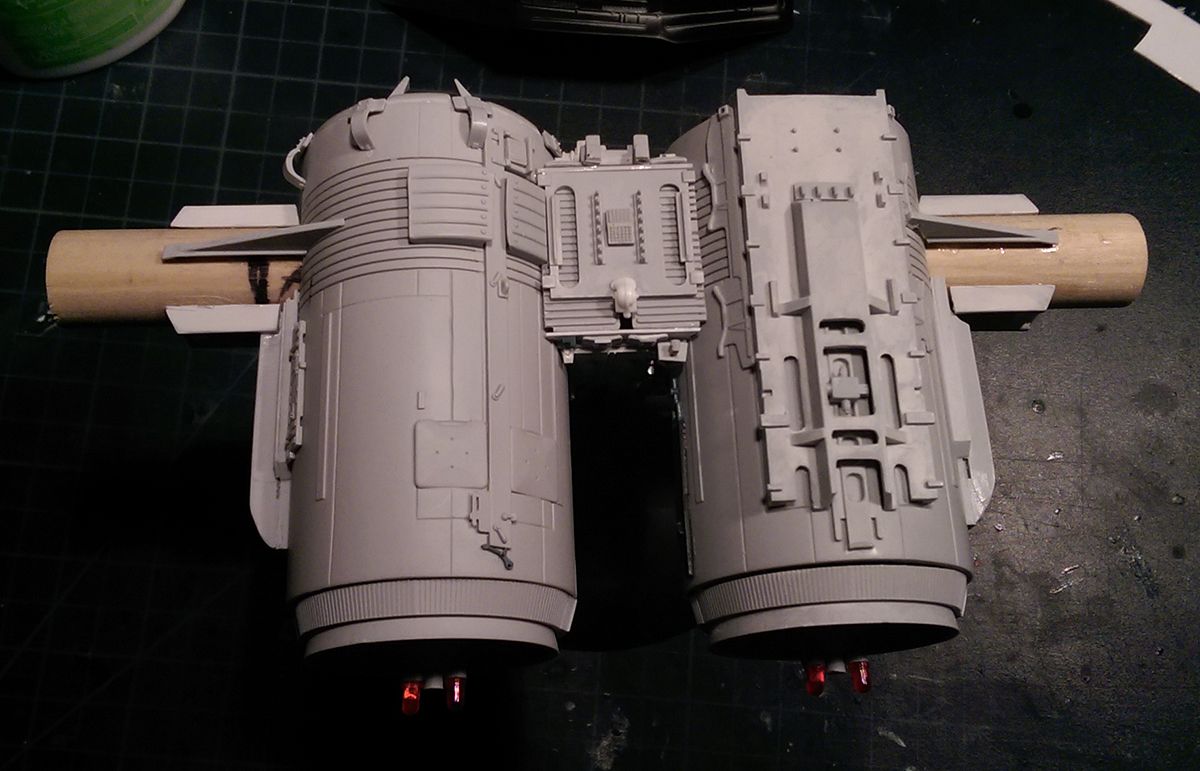
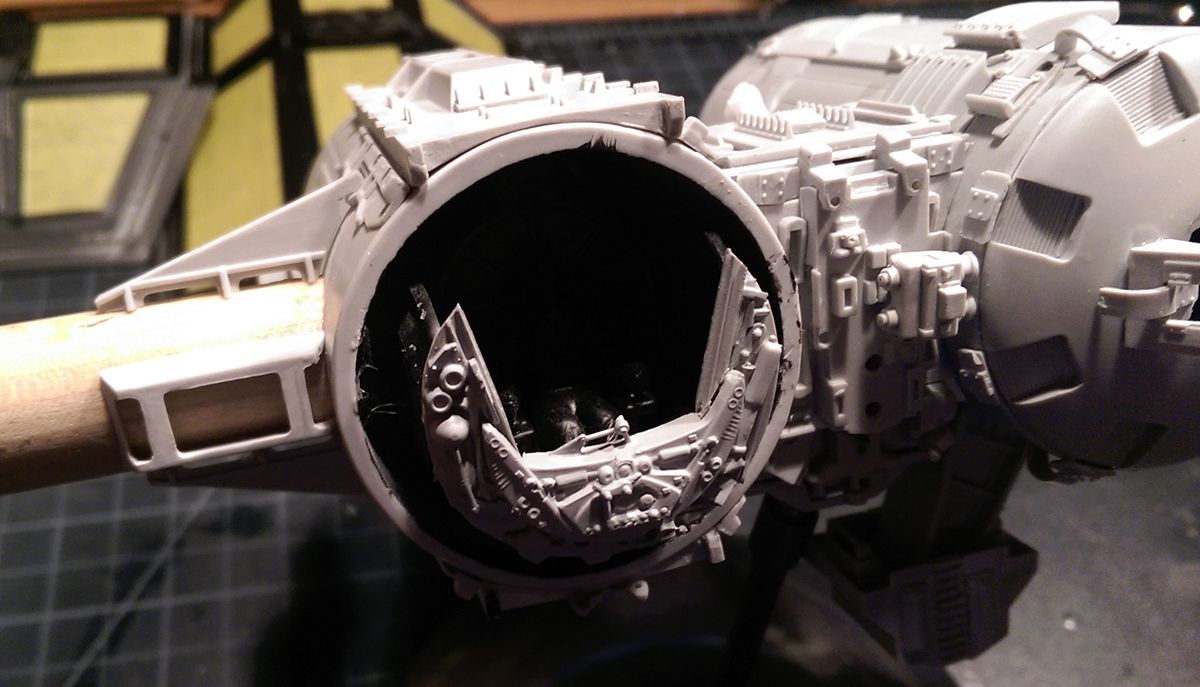
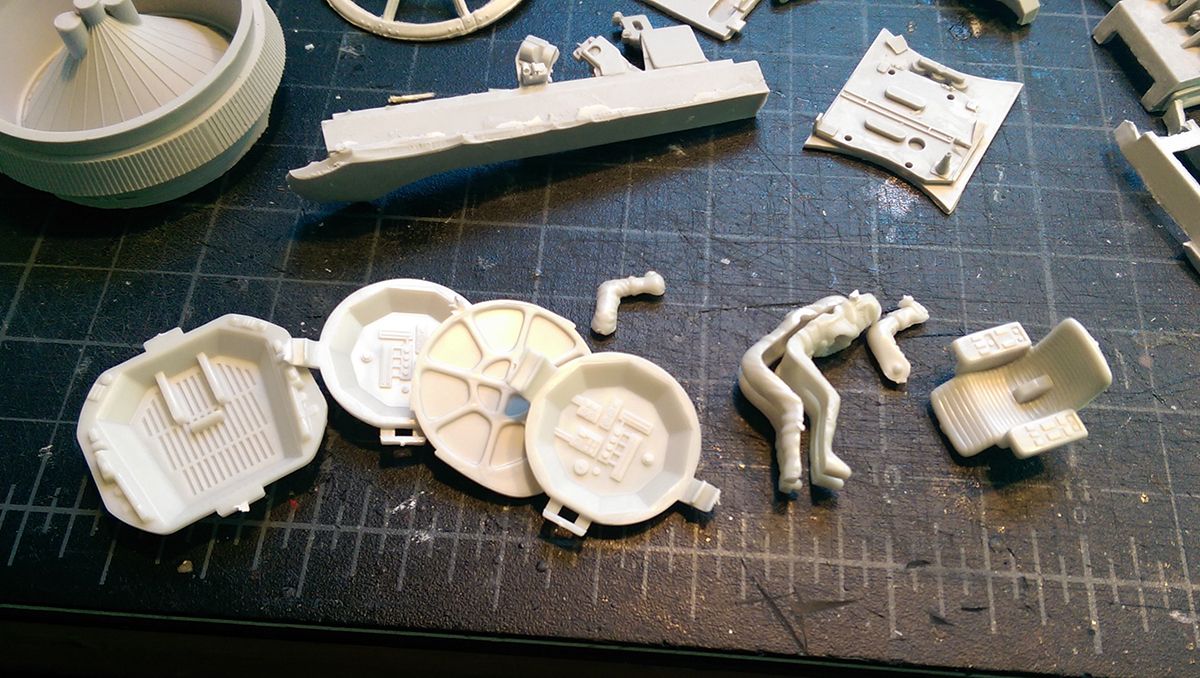
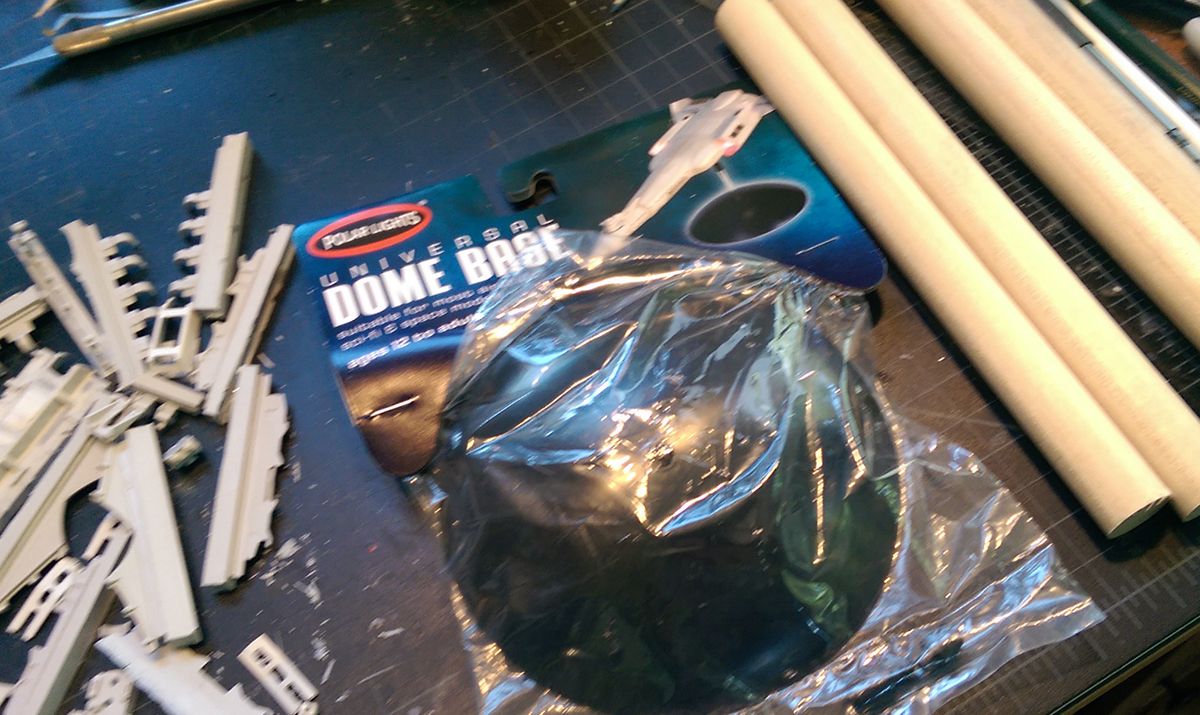
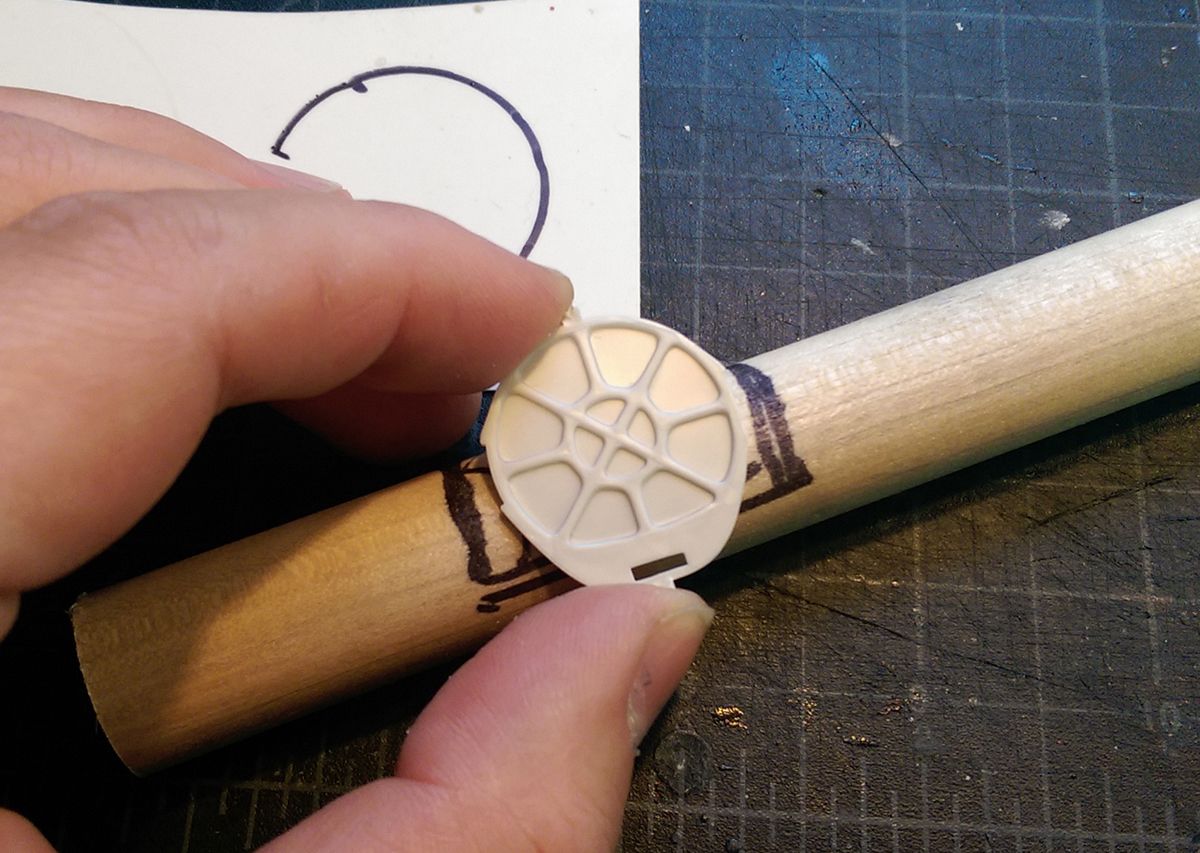
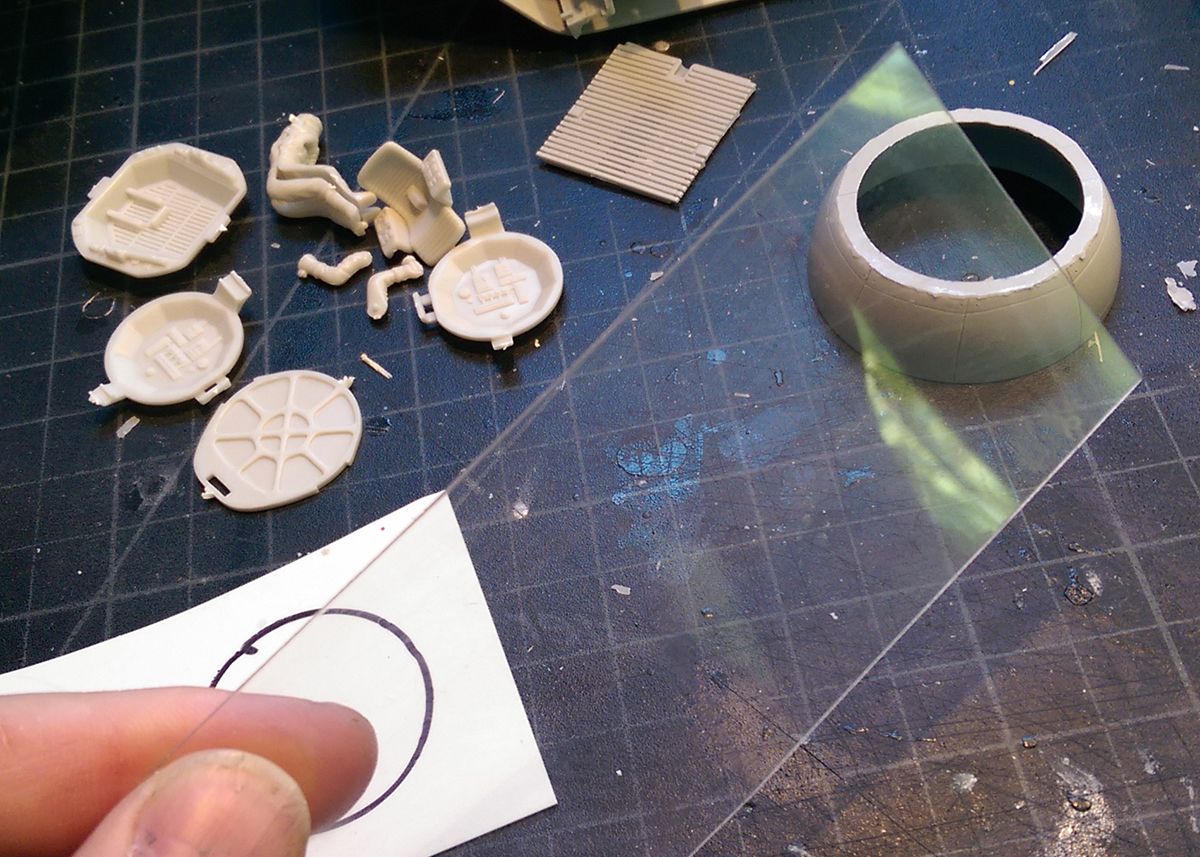
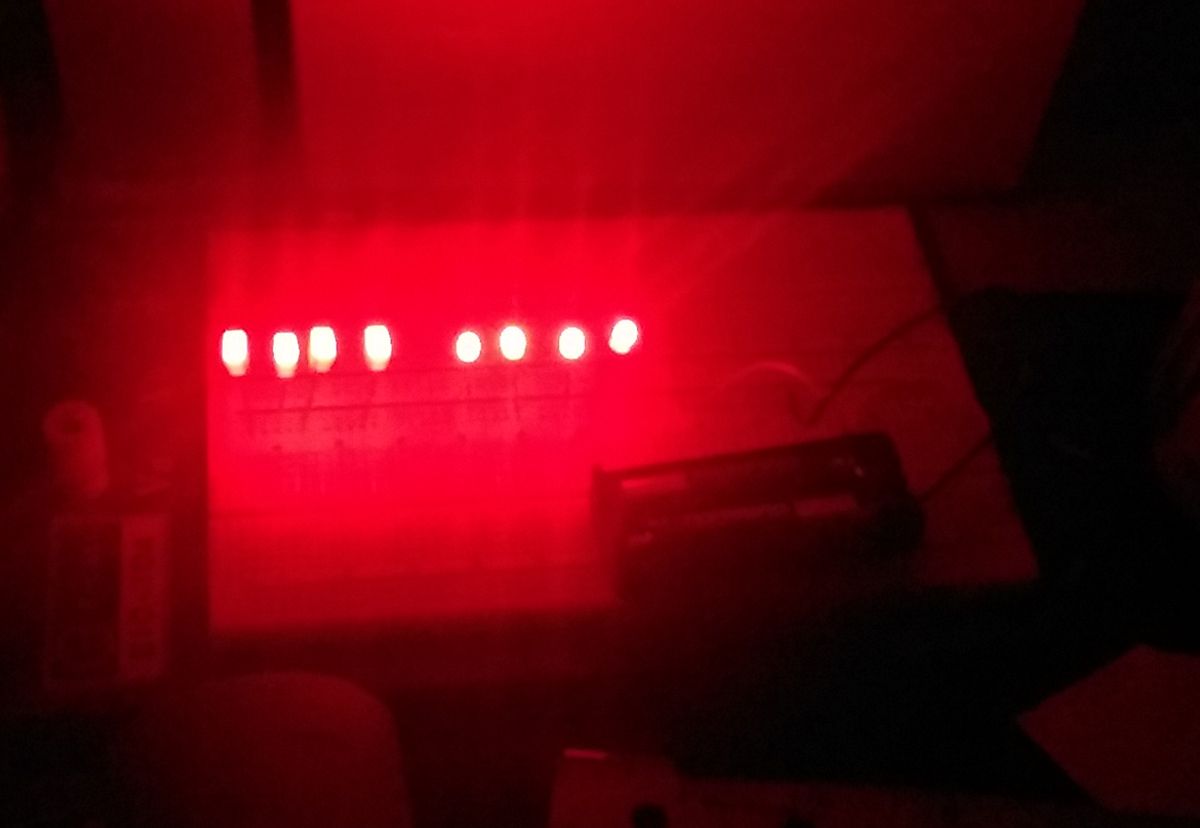
In this first stage all the parts were scrubbed and then carefully trimmed and sanded to remove and little bits and pieces of stuff. Thankfully there was a minimum of cleanup (but there are just sooo many parts!) This is a beautifully mastered and produced kit…really makes me feel like a studio modeler!! Some extra additions to my build include a cockpit sourced from the AMT TIE Fighter kit, a scratch built “behind the glass” panel thing, a Polar Lights dome stand and “full” compliment of lights.

tieb_imag1779.jpg

tieb_imag1784.jpg

tieb_imag1785.jpg

tieb_imag1787.jpg

tieb_imag1789.jpg

tieb_imag1790.jpg

tieb_imag1791.jpg

tieb_imag1825.jpg

tieb_imag1830.jpg


More posts will be coming throughout the day because I really burned through the progress on this bad boy over the past couple days. I mean...I'll be priming tonight!!!
 
Man, it's practically already BUILT!! :D I think I just threw it in a bag with glue and shook it up....
 
Assembly progress! Cockpit done, all the major pieces and the wing details! I made ONE not so major mistake and mounted the center block the tall way instead of the long way so a little bit of extra scratch building was needed to fill out the space. The main support beam was routed along the backside to make a path for the wiring and a small block was cut out to accommodate the cockpit. The engine caps were also drilled out for the LEDs. There was one spot on the bottom edge of one wing that was a little thin and needed some culling…but I think if I keep it on the bottom it’ll be fine.

tieb_imag1828.jpg

tieb_imag1831.jpg

tieb_imag1836.jpg

tieb_imag1837.jpg

tieb_imag1838.jpg

tieb_imag1839.jpg

tieb_imag1840.jpg

tieb_imag1841.jpg

tieb_imag1844.jpg

tieb_imag1849.jpg

tieb_imag1852.jpg

tieb_imag1854.jpg

tieb_imag1860.jpg

tieb_imag1861.jpg

tieb_imag1862.jpg

tieb_imag1868.jpg
 
Sweet, I think I did the same with the LEDs through the hole no heat shrink in between lol!
 
Stay tuned John...I have 4 more posts drafted. One of which shows styrene splints between the leads!!
 
Electronics!!! So I ran an overnight test of battery life and found that with 8 red LEDs the batteries drained in about 8 hours. I also realized that I didn’t need FOUR in the cockpit so I just used one as a floodlight on the ceiling. The power should stay brighter longer now. The holes for the engine LED leads also had the potential to create a short so I put some plastic splints in there to make sure there’s no accidental contact. The AAA battery box will also be accessible via the pilot pod engine cap, held in place via magnets. The drill went a little overboard so a touch of putty was needed on the back end.

tieb_imag1899.jpg

tieb_imag1900.jpg

tieb_imag1902.jpg

tieb_imag1911.jpg

tieb_imag1917.jpg

tieb_imag1949.jpg

tieb_imag1950.jpg

tieb_imag1952.jpg
 
Whoops! Forgot a post in there. :p This comes before the electronics section

More assembly progress. You can see I added some extra detailing around the center block using extra parts from the kit. I LOVE THIS KIT!!!!

tieb_imag1871.jpg

tieb_imag1875.jpg

tieb_imag1880.jpg

tieb_imag1881.jpg

tieb_imag1882.jpg

tieb_imag1883.jpg

tieb_imag1884.jpg

tieb_imag1887.jpg

tieb_imag1890.jpg
 
yeah! Nice job done so far! :eek:

Can't wait to see it ended!
The Tie pilot is great, I have to find one! 8)
 
Where was I? Oh yeah. Now comes the time for some extra detailing. Something about the spirit of studio scale building hit me and I added some bits and pieces to the exterior (including some leftover Fine Molds X-Wing parts!!). The interior cockpit panel was also a combination of scratch parts and a modified AMT TIE Interceptor panel. Looks about right. :D

tieb_imag1923.jpg

tieb_imag1929.jpg

tieb_imag1930.jpg

tieb_imag1932.jpg

tieb_imag1934.jpg

tieb_imag1937.jpg

tieb_imag1940.jpg

tieb_imag1942.jpg

tieb_imag1944.jpg
 
And lastly for today:

Some of the last touches before priming: wing panels painted and masked and the dome stand installed. The model-side socket is glued in place and makes a decent extra detail. The dome base is painted with Light Gunmetal and got a heavy clear coat. She looks pretty good so far!!

tieb_imag1893.jpg

tieb_imag1894.jpg

tieb_imag1895.jpg

tieb_imag1916.jpg

tieb_imag1945.jpg

tieb_imag1947.jpg
 
Yes John. It will. :D Seriously a shake-n-bake....but more importantly.....

PAAAAAAAAAINT!!!!!!!! Well, before that happened I had to clean up the engine cap and add the canopy cowling.
tieb_imag1958.jpg

tieb_imag1953.jpg


Then mask the cockpit and engine LEDs.
tieb_imag1960.jpg


THEN prime.
tieb_imag1975.jpg


THEN preshade.
tieb_imag1980.jpg

tieb_imag1984.jpg


The painting process was a bit of fun. It’s the first time I’ve ever decanted a rattle can, thinned down and used through my airbrush (I used Tamiya’s Haze Gray of course). I now see the appeal of spraying enamels with an airbrush. It goes down thin and like butter. So clean and even….
tieb_imag1988.jpg

tieb_imag1992.jpg


But hark! While the Haze Gray has the cool blue tone we all love on the Bomber, it was too dark for my taste. I went over and highlighted each panel with a light spraying of Tamiya’s Sky Gray (XF-19). It was thin to not cover up too much of the Haze Gray. The overall effect I think is a perfect blend because that blue undertone is still there AND it shows off the pre- and post-shading nicely. This one will barely need any weathering!! ((sorry if the coloration isn’t clear enough in this pics, I was rushed this morning and didn’t want to setup the photo booth))

tieb_imag1998.jpg

tieb_imag1999.jpg

tieb_imag2000.jpg

tieb_imag2002.jpg

tieb_imag2003.jpg

tieb_imag2006.jpg

tieb_imag2008.jpg

tieb_imag2009.jpg

tieb_imag2010.jpg

tieb_imag2011.jpg

tieb_imag2012.jpg

tieb_imag2015.jpg

tieb_imag2016.jpg

tieb_imag2017.jpg

tieb_imag2018.jpg

tieb_imag2019.jpg

tieb_imag2020.jpg

tieb_imag2021.jpg
 
Well done Nick!!

A tip for the future. If you are worried about wires shorting, just coat them with five minute epoxy. It is an insulator and it will hold the wires in place along with the LED's. So it takes care of two things at once.
 

Latest posts

Back
Top