1/48 Hobby Boss A-6A – “Flight of the Intruder”

DavidsScaleModels

Well-Known Member
Joined
Sep 16, 2022
Messages
97
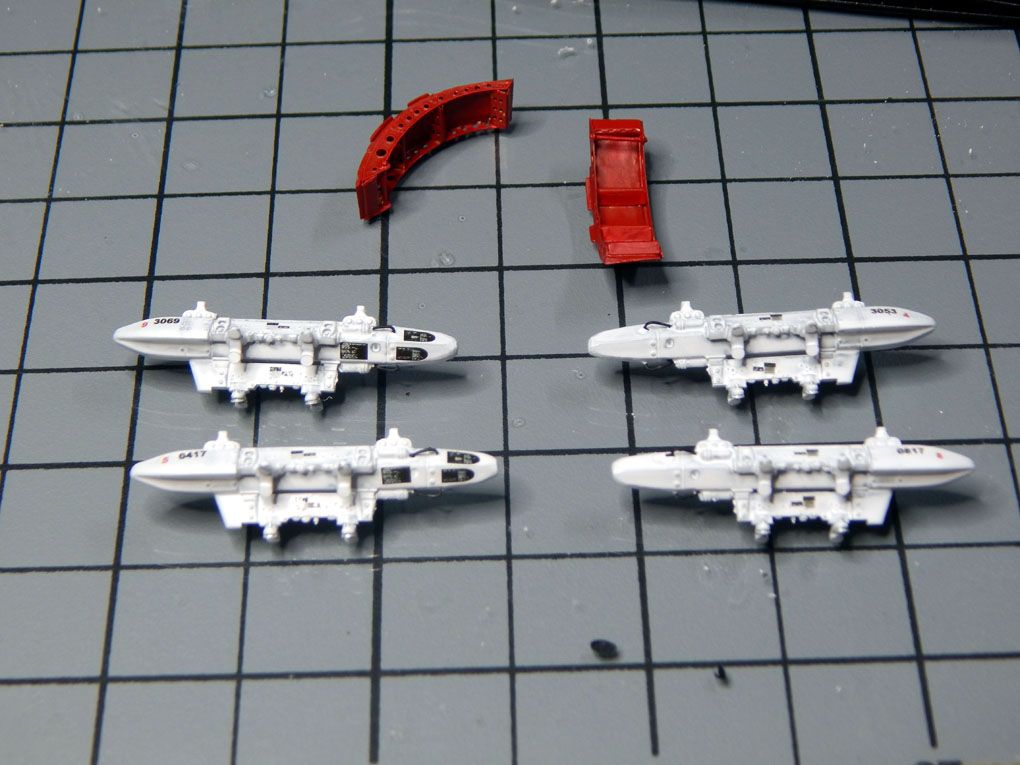
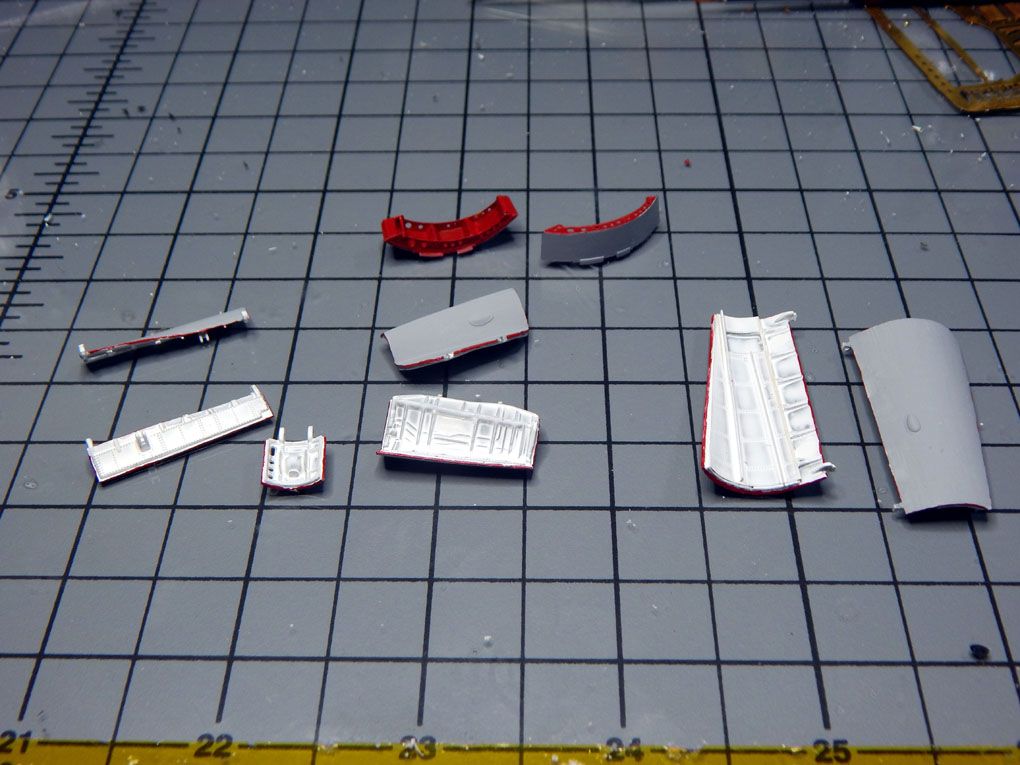
Last year I built a 1/48 R4D-5 that was featured in a movie called "The Thing from another world". I had so much fun building the aircraft to match the movie that I am doing another movie aircraft. I am using the Hobby Boss 1/48 scale A-6A Intruder and will be making it the aircraft used in the 1991 movie "Flight of the Intruder". For those unfamiliar with the movie, it is about a Navy pilot Lt Jake Grafton (Brad Johnson) and his bombardier LCDR Virgil Cole (Willem Dafoe) who flies an unauthorized mission to bomb the "SAM City" during the Viet Nam war in 1972. The aircraft will be built to replicate the aircraft as depicted on that particular mission from the movie. I will be using Eduard's "Big Edition" photo etch set as well as Eduard resin racks and Flying Leathernecks resin bombs to add details. I will be making custom decals for the aircraft for the specific names and numbers on the aircraft.

The scheme of the aircraft is that of the A-6 squadron VA-196. Since the movie is a fictitious event the actual ship used in the filming of the movie is the USS Independence (CV-62) and they kept it the same ship for the movie so I will use that for scheme. For those familiar with VA-196 will note that in 1972 the squadron actually operated aboard the USS Enterprise. The actual Navy squadron used was VA-165 and had four aircraft painted as VA-196 for 1989 filming of the movie.

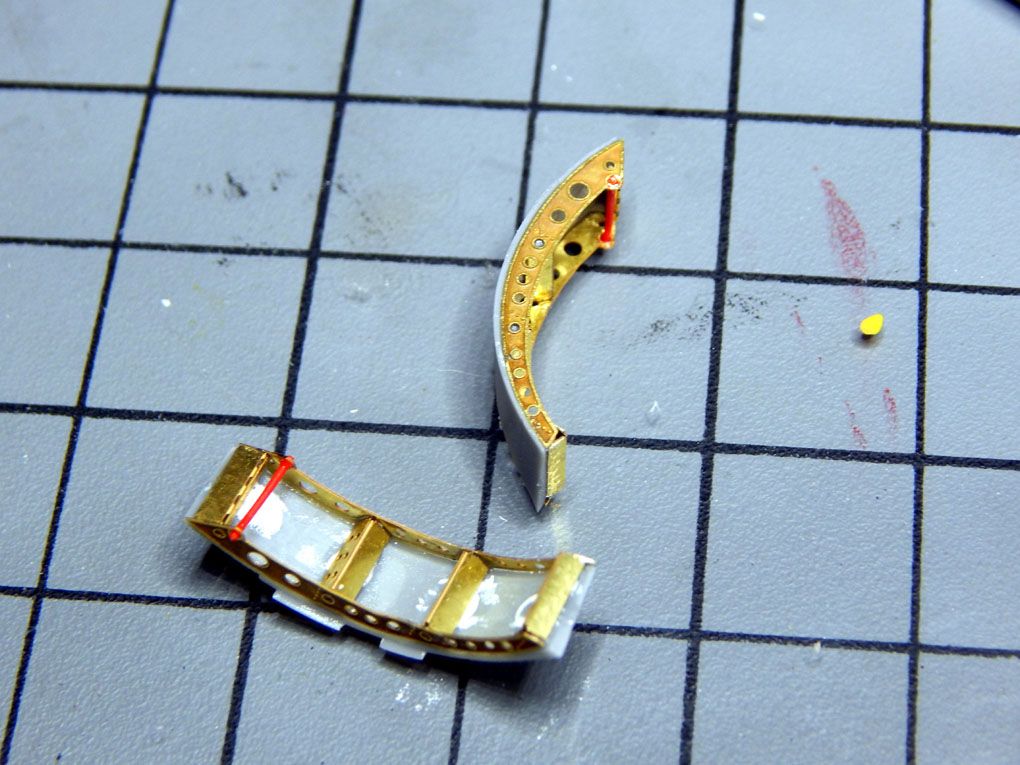
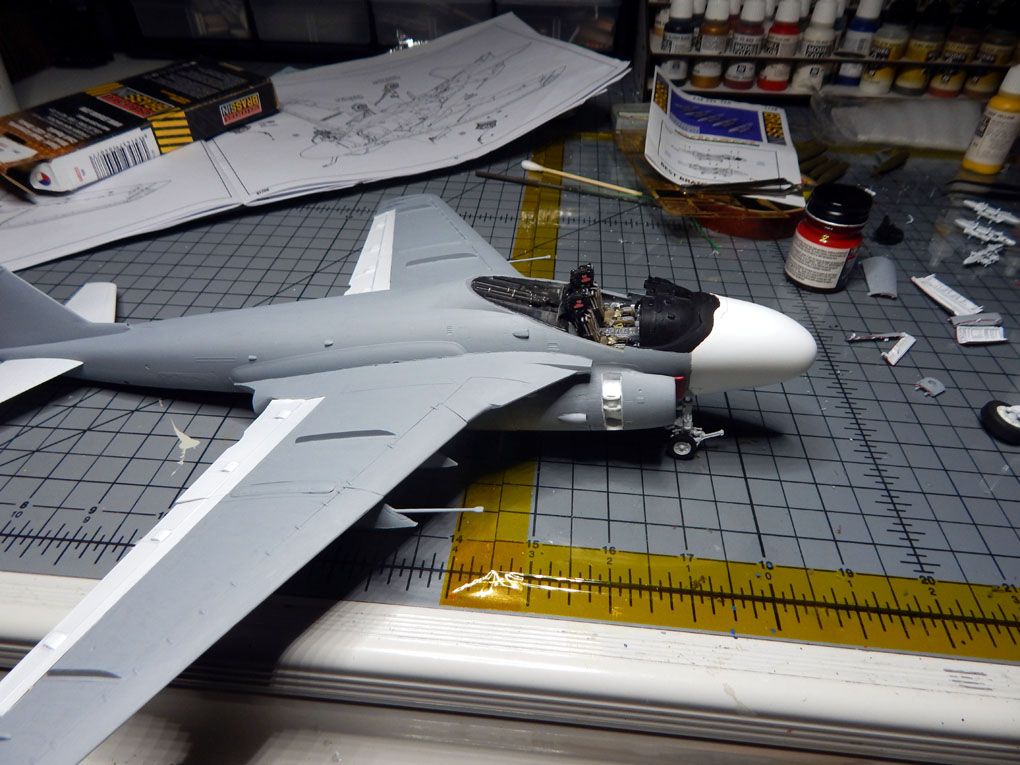
Beginning with "scene 1", I started by detailing and assembling the cockpit. The ejection seats were assembled and detailed with the Eduard photo etch. This set includes all the seat belts, levers, and placards for the seats. Once the seats were finished I then moved onto the cockpit tub. The photo etch includes side panel details, pedals and all the controls for the side panels and center console. On the instrument panel shroud I cut out the molded vent and added the photo etch version. Details were then added to the deck behind the ejection seats. Aside from the photo etch details I added some wire to replicate the cables for some of the avionics on the deck.

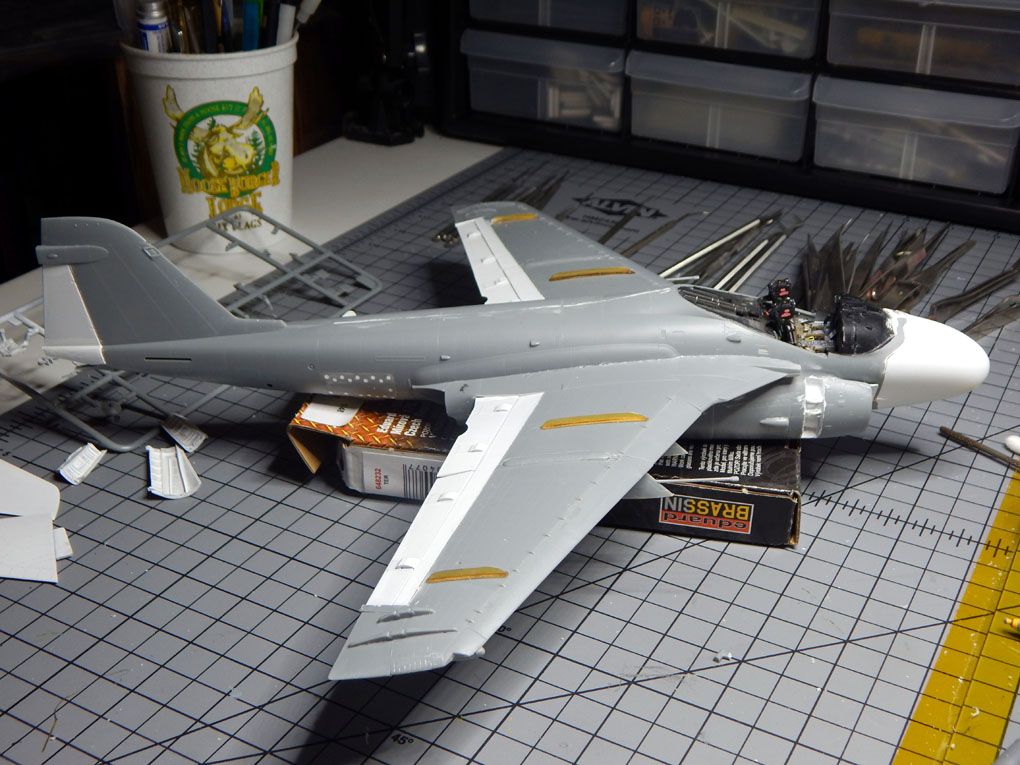
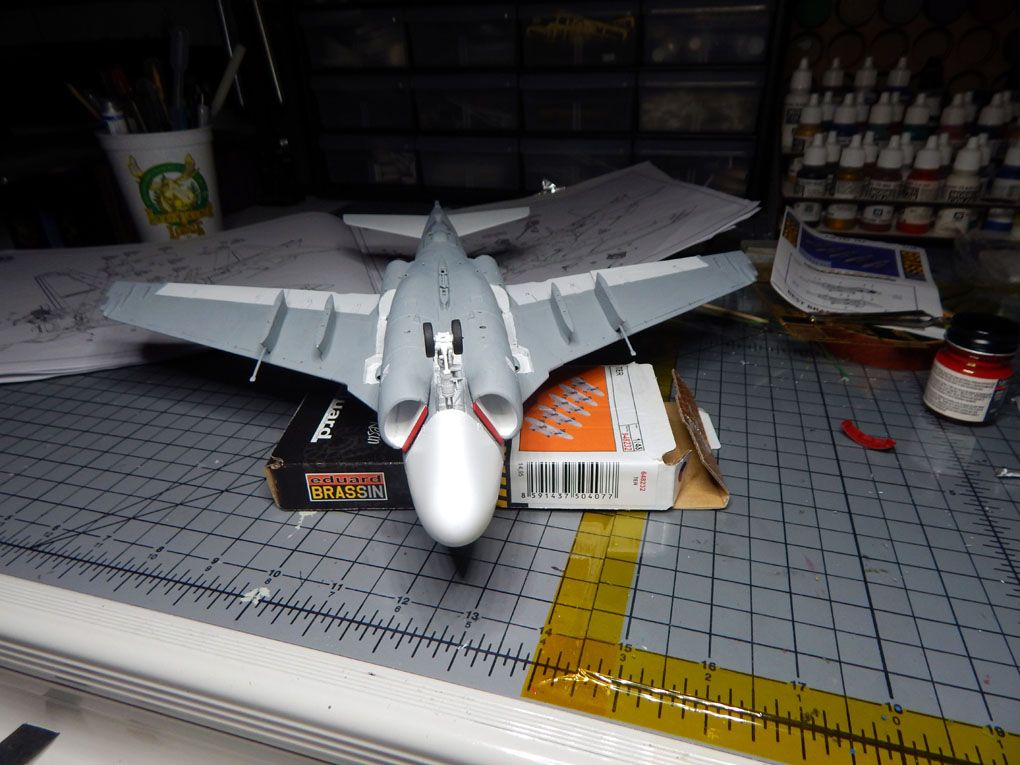
The kit instrument panel was sanded down to remove the molded details and then the photo etch sections were installed. The instrument panel was then installed into the shroud. The deck, ejection seats, and instrument panel were installed on the tub completing the cockpit assembly. I am now working on the nose landing gear bay, landing gear, intakes, and the tail hook section so the fuselage can be assembled.


You can see many more photos and details in my build log at: https://davidsscalemodels.com/build-log/1-48-a-6a-intruder-flight-of-the-intruder/


DSCN8475.jpg


DSCN8476.jpg


DSCN8479.jpg


DSCN8481.jpg


DSCN8485.jpg


DSCN8492.jpg


DSCN8499.jpg


DSCN8501.jpg


DSCN8505.jpg


DSCN8508.jpg
 
So funny I just ordered this kit from my LHS. Go figure?
Your office looks awesome but I'm going to give the Quinta set a try.
 
SCENE TWO:

For the second week of the A6-A I started assembling the other assemblies so I can put the fuselage together. Also the Flying Leathernecks 1000lbs bombs and the Eduard Triple Ejection Racks arrived so I can replicate the specific scene's ordinance load. The nose gear bay was detailed with the photo etch details. I also added some scratch built details for lines, cables, and other features. I also added some photo etch to the inside of the fuselage area. Moving onto the main gear struts there are many photo etch details that added bolt heads, wiring and lines, tie down points and strut details. The main wheels also have photo etch details for the brakes.

After the cockpit was mounted I then added details to the tail hook area using the photo etch details. One of the other things about this kit is the speed brakes. The kit comes with the vented panels. The movie aircraft has the solid panels. Typically most A-6 kits give you both the panels but this kit does not so I filled in the holes with putty and mounted them in the closed position. The fuselage halves were then assembled together. The fit was good on the tail and the main part of the upper fuselage. However, the lower area under the wings will need some putty to even out the seam. I also will need to work on the area in front of the cockpit. This is a noted issue with this specific kit. There is a forward bulkhead that mounts in the fuselage. Comparing this to the nose cone everything lines up. Once the bulkhead is mounted to the fuselage there is a 0.1" gap just forward of the cockpit. It appears this is more of a design flaw as the rest of the fuselage to the front bulkhead lines up very well but the gap is still there. The area is very small as there is a cut-out for mounting the refueling probe. I dry fit the nose and it lines up very well with the exception of the gap and the curved areas. It looks like I can reshape the curved areas to match the nose cone and then I take care of the gap. I am now working on taking care of the fuselage issues then moving onto the main wings.


You can see many more photos and details from the start in my build log at: https://davidsscalemodels.com/build-log/1-48-a-6a-intruder-flight-of-the-intruder/


DSCN8510.jpg


DSCN8516.jpg


DSCN8529.jpg


DSCN8531.jpg


DSCN8532.jpg


DSCN8534.jpg


DSCN8537.jpg


DSCN8538.jpg
 
SCENE THREE:

The third week of the Intruder was spent getting more details of the fuselage placed. The intakes fit very well. I need to clean up the upper and lower seams which I will take care of when I correct the nose issue. I painted up the landing gear and used a Molowtow chrome paint pen on the struts. One of the details I wanted to improve was the tail vent. I drilled it open and then used some fine files to smooth out and shape the vent correctly.

I worked on the exhaust by adding some photo etch details and assembled the lower fuselage sections. Moving onto the wings I cut off the very thick molded kit wind splints and replaced them with the photo etch version. I then completed the tail hook bay details and added photo etch details to the main landing gear bays.

I started looking at the horrible fit of the nose section. It looks like the fuselage molding is the cause of the problem. The instrument panel fits the width of the fuselage and the sides and bottom of the fuselage line up very well to the nose cone. The small section between cockpit and nose is very thick and incorrectly sized. The starboard side is twice as thick as the port side but is the correct length. The port side is not long enough. The front edge curves do not line up with the nose and the windscreen size as well. To correct this is going to require a couple of layers of putty and a lot of reshaping so the nose and windscreen will mate correctly and the refueling probe will sit on top correctly.

You can see many more photos and details from the start in my build log at: https://davidsscalemodels.com/build-log/1-48-a-6a-intruder-flight-of-the-intruder/


DSCN8540.jpg


DSCN8542.jpg


DSCN8544.jpg


DSCN8546.jpg


DSCN8548.jpg


DSCN8549.jpg


DSCN8554.jpg


DSCN8559.jpg


DSCN8561.jpg
 
I love it when things are misshapen, especially oversized,; 80 grit -> 120 grit-> 240 -> 600-> lapping paper.

Looking great!!! Keep the updates coming!!!!
 
SCENE FOUR:

For the fourth week of the Intruder was spent mostly working on the nose issue. First I sanded down the fuselage side down a little bit as close as I could to match the nose. I then taped the windscreen with kapton tape as the putty does not adhere to the tape very well. I tacked the windscreen down with some Elmer's glue to hold it in place and I applied the putty. Once the putty had dried I carefully remove the windscreen and wet sanded the putty down. I had to add a little more putty occasionally to aid in blending the nose to the fuselage. The kit has a small fret of photo etch which included the hinge brace for lifting the nose for access to the radar. This was attached and I then taped off the aircraft nose, flaps and rudder so these could be sprayed with the white base coat. I used one layer of Tamiya white primer then Vallejo matte white for two coats.

Once dry I removed the tape and had a slight accident. The tape pulled the ejection seat upper handles. I will re-attach these later after I spray the base coat on the fuselage. While the putty was drying I was able to assemble the Eduard TER's that will be used. The cables were molded on but they were very fragile and broke easily when attempting to trim the inside of the loop. I decided to remove them and use some wire instead. I adjusted the mounts for these to match the mounting holes on the aircraft. The Eduard set has photo etch details for the bottom of the rack mounts as well. I also built up the Flying Leathernecks resin MK-83 bombs. I also added photo etch details to the landing gear doors and had to fill in some mold marks. I still need to add the panel lines around the nose and some rivet details on the fuselage side after all the putty and sanding. I will be making the boarding ladders in the down position and it looks like these will need some work as well. There are mold marks that need to be filled and then there is a lot of photo etch details that need to be added to the them. I am hoping to get all these little details completed so I can start base coating the fuselage.

I have been reviewing the movie multiple times. The paint scheme is kind of weird. Normally the Viet Nam era aircraft were gull grey top and white underside. The movie aircraft was painted light ghost grey with a dark ghost grey around the cockpit and spine. The flaps were only painted white on top. The nose, rudder, rear stabilizers, and topside flaps were all painted white. The only other issue is in the movie they note they are using the 1000lbs bombs and the flight scenes show them with the normal free-fall tails on the aircraft. But the scenes where the bombs drop they are using the MK-82 snake eye tails. I will be using the free fall tails as shown on the loaded aircraft in flight.

You can see many more photos and details from the start in my build log at: https://davidsscalemodels.com/build-log/1-48-a-6a-intruder-flight-of-the-intruder/


DSCN8563.jpg


DSCN8567.jpg


DSCN8569.jpg


DSCN8569A.jpg


DSCN8574.jpg


DSCN8571.jpg


DSCN8577.jpg
 
SCENE FIVE:

Five weeks into Intruder and just like in the movie, I am doing the first run "downtown". It has been a busy week with my career job and with spring here I have been taking care of things around the house so my time on the bench has been limited this week. I was able to get the fuselage masked and sprayed the white areas then turned my attention to painting the other parts. The resin triple ejection racks were painted and then the decals that came with the set were applied. Since the boarding ladders will be in the down position I had to fill the mold marks with putty and then added the photo etch details to the ladders. I also used some 30 gauge red wire for the handle. These were then painted red.

Next came all the painting of the landing gear doors. I pre-shaded the edges and will finish these with some post shading prior to installing them. I also painted the edges the safety red. I also painted the splitters on the intakes red. The bombs were all painted as well. Finally, I base coated the rest of the aircraft. As mentioned previously the paint scheme is not accurate to the time period however it matches what they used in the movie. The underside was painted using Light Ghost Grey, the topside was painted with Dark Ghost Grey, and the area between nose and windscreen was painted anti-glare black.

I am now working on installing the landing gear and all the other parts as well as preparing for making and adding the custom decals to match the movie scheme.

You can see many more photos and details from the start in my build log at: https://davidsscalemodels.com/build-log/1-48-a-6a-intruder-flight-of-the-intruder/


DSCN8581.jpg


DSCN8582.jpg


DSCN8584.jpg


DSCN8588.jpg


DSCN8589.jpg


DSCN8591.jpg
 
SCENE SIX:

The sixth week of the A-6A is now "feet dry". I am slowly getting more time on the bench. This week I installed all the landing gear and most of the landing gear doors. I am saving the forward nose gear door until after the rest of the aircraft has had its top coat applied. I painted the tail hook and other details on the fuselage like the jet exhaust and CHAFF blocks.

I also added the final photo etch details for the fuselage like the antennas and panel details. I installed both boarding ladders as well. The aircraft just needs a couple of items added then it will be ready for the decals. I spent one evening studying many screen shots I pulled from the movie and created the decals I need for the specific scheme of "Devil 505".

Finishing up the weeks work, I added the photo etch details to the windscreen and canopy then hand painted the black insides of the frames. I am starting to mask the outsides so I can apply the base coat and top coat. I am hoping to complete this build within the next two weeks. I also hope everyone has a safe Memorial weekend remembering our military members who never made it back from performing their patriotic duties.

You can see many more photos and details from the start in my build log at: https://davidsscalemodels.com/build-log/1-48-a-6a-intruder-flight-of-the-intruder/


DSCN8593.jpg


DSCN8594.jpg


DSCN8597.jpg


DSCN8600.jpg


DSCN8603.jpg


DSCN8605.jpg


DSCN8606.jpg


E_FOTI.jpg
 
SCENE Seven:

Week seven has arrived and I am still having brief time on the bench. However, with the time I was able to sit at the bench I completed the painting and detailing of the canopy and windscreen. I also finished the nose gear door. I really like the Molotow chrome paint pens. I used it on the canopy mirrors and the landing light. The fuselage had some small painting to be done on the formation lights. I also built the centerline drop tank and finished it off with painting and decals. I added the placard decals to the MK-83 bombs as well.

Next I started the decaling of the fuselage. I am using a mix of the kit decals for the standard markings and the custom decals I made for the movie scheme. Hoping to finish this build over the next week but we will see how much bench time I can get this week.

You can see many more photos and details from the start in my build log at: https://davidsscalemodels.com/build-log/1-48-a-6a-intruder-flight-of-the-intruder/


DSCN8608.jpg


DSCN8611.jpg


DSCN8612.jpg


DSCN8615.jpg


DSCN8616.jpg


DSCN8620.jpg


DSCN8623.jpg
 
SCENE Seven:

Week seven has arrived and I am still having brief time on the bench. However, with the time I was able to sit at the bench I completed the painting and detailing of the canopy and windscreen. I also finished the nose gear door. I really like the Molotow chrome paint pens. I used it on the canopy mirrors and the landing light. The fuselage had some small painting to be done on the formation lights. I also built the centerline drop tank and finished it off with painting and decals. I added the placard decals to the MK-83 bombs as well.

Next I started the decaling of the fuselage. I am using a mix of the kit decals for the standard markings and the custom decals I made for the movie scheme. Hoping to finish this build over the next week but we will see how much bench time I can get this week.

You can see many more photos and details from the start in my build log at: https://davidsscalemodels.com/build-log/1-48-a-6a-intruder-flight-of-the-intruder/


View attachment 100991


View attachment 100992


View attachment 100993


View attachment 100994


View attachment 100995


View attachment 100996


View attachment 100997
Looking good. Pantherman
 
FINAL SCENE:

The Lt Jake Grafton's (Cool Hand) A-6A from the movie "Flight of the Intruder" is finished! I spent the eighth and final week completing the decals. The fuselage was then top coated with clear. I attached the forward nose gear door, the TER's loaded with MK 83 bombs and the drop tank to the underside. On the topside I installed the windscreen, refueling probe, and canopy. I then painted the back sides of the tail and wingtip lights with chrome. The clear lenses were applied and then painted with Tamiya clear paints. This completed the build.

I had a plastic base that looks like a flight deck and decided to place the aircraft on it. I have some custom decals to make for a client and will add a decal that I can add the trim of the base later.

As for a review of this kit, it is a mostly decent kit. The biggest issue was the fuselage fit just forward of the cockpit. This required the most work to correct. The rest of the kit had a good fit with minimal putty along the seams. The shape of the top of the tail is also slightly off from the real aircraft. The top is a little flatter on the kit. A few minutes with some sandpaper and the shape was corrected. The instruction sheet is well laid out with a good assembly flow. Even though many of the aircraft scheme decals were made by me I did use the kit decals for the general things. The kit decals are very nice. They went down and adhered to the surface very well. The finished model looks great. The Eduard photo etch sets add nice details. The resin accessories worked out great. I am on the fence about recommending this kit only because of the fuselage fit. Overall I am pleased with the finished product. Thank you for following along on this build. Happy Modeling!

You can see all the photos and details from start to finish in my build log at: https://davidsscalemodels.com/build-log/1-48-a-6a-intruder-flight-of-the-intruder/


DSCN8631.jpg


DSCN8632.jpg


DSCN8633.jpg


DSCN8638.jpg


DSCN8644.jpg


DSCN8649.jpg


DSCN8650.jpg


DSCN8652.jpg


DSCN8654.jpg


DSCN8664.jpg
 
FINAL SCENE:

The Lt Jake Grafton's (Cool Hand) A-6A from the movie "Flight of the Intruder" is finished! I spent the eighth and final week completing the decals. The fuselage was then top coated with clear. I attached the forward nose gear door, the TER's loaded with MK 83 bombs and the drop tank to the underside. On the topside I installed the windscreen, refueling probe, and canopy. I then painted the back sides of the tail and wingtip lights with chrome. The clear lenses were applied and then painted with Tamiya clear paints. This completed the build.

I had a plastic base that looks like a flight deck and decided to place the aircraft on it. I have some custom decals to make for a client and will add a decal that I can add the trim of the base later.

As for a review of this kit, it is a mostly decent kit. The biggest issue was the fuselage fit just forward of the cockpit. This required the most work to correct. The rest of the kit had a good fit with minimal putty along the seams. The shape of the top of the tail is also slightly off from the real aircraft. The top is a little flatter on the kit. A few minutes with some sandpaper and the shape was corrected. The instruction sheet is well laid out with a good assembly flow. Even though many of the aircraft scheme decals were made by me I did use the kit decals for the general things. The kit decals are very nice. They went down and adhered to the surface very well. The finished model looks great. The Eduard photo etch sets add nice details. The resin accessories worked out great. I am on the fence about recommending this kit only because of the fuselage fit. Overall I am pleased with the finished product. Thank you for following along on this build. Happy Modeling!

You can see all the photos and details from start to finish in my build log at: https://davidsscalemodels.com/build-log/1-48-a-6a-intruder-flight-of-the-intruder/


View attachment 101189


View attachment 101190


View attachment 101191


View attachment 101192


View attachment 101193


View attachment 101194


View attachment 101195


View attachment 101196


View attachment 101197


View attachment 101198
That's some lovely work, loving the base.
Nice one. Pantherman
 

Latest posts

Back
Top