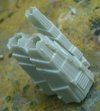
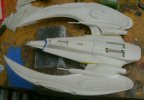
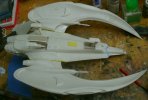
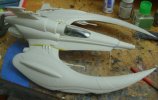
1/32 "Shadowdemon" for 2014 BSC

Quaralane

Well-Known Member
Joined
May 22, 2009
Messages
11,262
It is OFFICIALLY Big Spring Contest time!

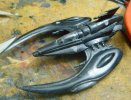
For my first entry into this year's contest, I'm going to be revisiting a build that was originally done in 1/72 secale.
This will be a hybrid of a Colonial Viper Mk7 and a Cylon Raider from the re-imagined Battlestar Galactica.
The original concept was created by a lady I know as "Cryptic," and brought to life by me in resin.
Here is the 1/72 sacle version that I did, and the look that I'm shooting for
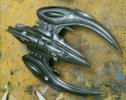
SMA-BSC-2014-Shadowdemon-02.jpg
SMA-BSC-2014-Shadowdemon-03.jpg

The new version will be done in 1/32 scale using the kits from Moebius Models.
I've also purchased the phoitoetch from ParaGrafix to address the Viper's poorly-executed cockpit.

Now, off to work.
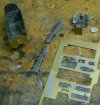
First, we have the obligatory proof the models hadn't been started pic
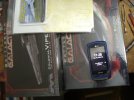
SMA-BSC-2014-Shadowdemon-01.jpg

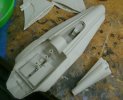
Work started with the Raider and its various subassemblies:
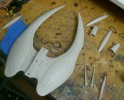
SMA-BSC-2014-Shadowdemon-04.jpg

Finished the construction of the Raider, minus the head.
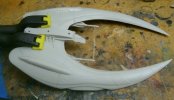
SMA-BSC-2014-Shadowdemon-05.jpg

With a razor saw, I then cut the wings from the center piece
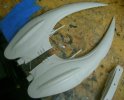
SMA-BSC-2014-Shadowdemon-06.jpg

Youtube link:
 
Last edited:
Thanks, guys

STock parts of the build should go fairly quickly.
The etch cockpit may take a bit, though. We'll see
 
Sci Fi is not my area of interest but i will be sitting in on this 1 keep up the good work buddy

Dan B
 
This one 'should' go fairly quickly.
Like I mentioned earlier, a lot will depend on the cockpit, but I've had no problems so far
 
The king of choppers has chopped again!
Much looking Forward to your Project, Q!
Good luck!
 
I don't know about "King of the choppers," but thanks.

With work, for the most part, completed on the Cylon pieces of this build, I turned my attentions to the Viper parts.

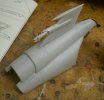
Started by putting together the upper engine cowling.
Not seen in the picture is where I filed the underside of the end with Aves Apoxie Sculpt to make things look more "complete"
SMA-BSC-2014-Shadowdemon-07.jpg

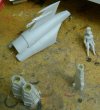
More sub-assembly work. The main engines, upper engines, and pilot are all assembled.
I haven't glued the ends of the engine tubing in yet in order tgo make it easier to get things aligned.
I've also glued the etch pieces into the engines to conceal the seams in the exhausts
SMA-BSC-2014-Shadowdemon-08.jpg
SMA-BSC-2014-Shadowdemon-09.jpg

Tubes on the main engines are glued into place, and the upper engine is glued into position, finishing the assembly
SMA-BSC-2014-Shadowdemon-10.jpg

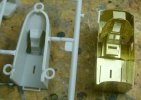
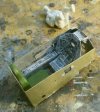
With that done, I started working on the photoetch cockpit tub from ParaGrafix.
Here is a comparison between the kit tub, and the etch one. The difference in the level of detail is plain to see.
SMA-BSC-2014-Shadowdemon-11.jpg

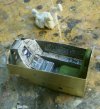
Prior to final assembly of the cockpit, I painted the panels with a light grey primer, followed by a black wash.
SMA-BSC-2014-Shadowdemon-12.jpg

I installed the backlight films into the pieces and then finished assembly.
To lighten things back up, I drybrushed the etch pieces with a mix of silver and white.
The kit seat was painted in interior green and given a light black wash to bring out detail
SMA-BSC-2014-Shadowdemon-13.jpg
SMA-BSC-2014-Shadowdemon-14.jpg

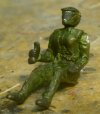
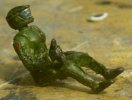
The pilot figure was assembled OOB, but her lower legs were trimmed with a grinding bit in my dremel to help them fit around the etch control panel.
After that, she was given a base coat of interior green. Details were picked out in gold and dark grey primer.
The patches on her shoulders were painted on, and then the whole figure was given a black wash.
Once the was was dry, I drybrushed the figure with gold to better simulate the sheen found on the show's flight suits. As a final touch, her visor was painted in with a light metallic blue
SMA-BSC-2014-Shadowdemon-15.jpg
SMA-BSC-2014-Shadowdemon-16.jpg

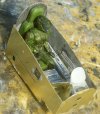
With the pilot figure finished, I glued everything into place, including the kit's part for the HUD
SMA-BSC-2014-Shadowdemon-17.jpg
SMA-BSC-2014-Shadowdemon-18.jpg
SMA-BSC-2014-Shadowdemon-19.jpg

Youtube link:
 
Last edited:
Update time on the Shadowdemon build.

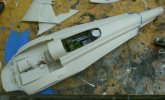
I temporarily inserted the kit cockpit to give me some stability while making the cuts to shorten the fuselage, and cut the wings off.
Cutting was done with a razor saw
SMA-BSC-2014-Shadowdemon-20.jpg

The etch cockpit was installed with CA glue after some grinding to improve fit, then I glued the fuselage together and inserted the cut off nose portion to give me the shorter look found on the 1/72 version.
Any gaps here were filled with Aves Apoxie Sculpt
SMA-BSC-2014-Shadowdemon-21.jpg
SMA-BSC-2014-Shadowdemon-22.jpg

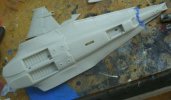
I glued sheet styrene over the wing cuts and then trimmed it to shape with my Dremel.
After that was done, I glued the Raider wings on with Tamiya Extra Thin cement
SMA-BSC-2014-Shadowdemon-23.jpg
SMA-BSC-2014-Shadowdemon-24.jpg

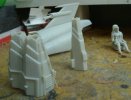
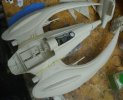
Once the wings had set up, I installed the landing gear struts and gear doors.
I also placed a piece of styrene over the hole meant for the kit base as I won't be using it.
With that done, I dry-fitted the Viper engines and cowling to see what we had
SMA-BSC-2014-Shadowdemon-25.jpg
SMA-BSC-2014-Shadowdemon-26.jpg

Youtube link:


A HUGE side note here.
I learned that, contrary to what I had been saying previously, the kit WAS designed to insert the canopy from the inside.
This works with both the kit cockpit and the etch cockpit I used here.
My problem on the Solaria Flight build was from the way I cast my cockpits into the fuselages and NOT from kit design
 
Last edited:

Latest posts

Back
Top