1/20 GroberHund "ALTAIR"

CheesyGrin

New Member
Joined
Sep 1, 2012
Messages
152
Fellow SMA's,

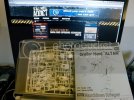
My entry for the 2013 Big Spring Contest will be Hasegawa's 1/20 GroberHund "ALTAIR" from the Maschinen Krueger genre. I picked this kit up at the 2012 IPMS Nationals last August. I've watched a few MaK WIPs from our SMA brethren and got the bug.

Hopefully the pressure of a deadline will encourage consistent progress! :)

2013BSC_00_zps8c17fea4.jpg
 
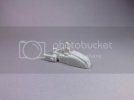
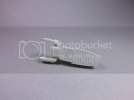
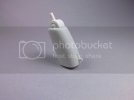
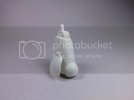
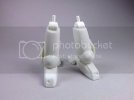
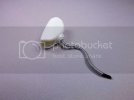
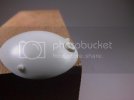
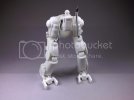
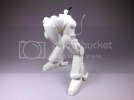
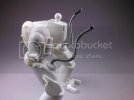
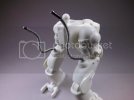
Feet and lower legs are moving along (no pun intended). I'm not adding the rubber piping pieces on the feet until later. I may scratchbuild more paintable piping but need to experiment with some ideas. Progress pics:

2013BSC_01_zpsc7d786c5.jpg

2013BSC_03_zps25e3922b.jpg

2013BSC_04_zps28dbe02f.jpg

2013BSC_05_zps0e56957a.jpg

2013BSC_10_zpsf3772caf.jpg
 
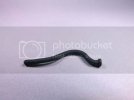
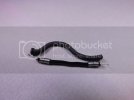
The rubber piping that Hasegawa includes with the kit has nasty seam lines. This is a very soft rubber and does not take kindly to scraping. I've seen others on this forum note the same frustrations with other MaK kits.

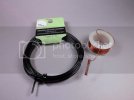
Anyway, I bought some 12g aluminum wire from the craft store. I'm going to try a wire wrapping technique and see if I can recreate the part. Success will bring no seam lines and better paint adhesion, I suspect.

Ugly seam:
2013BSC_12_zpsfe8681a2.jpg

Wire, a little gumption, and we'll see what happens:

2013BSC_13_zps036f9883.jpg
 
Nice dude! I just did the ground version of this, interested to see the space version. It was a very cool kit, challenging. And yeah those rubber hoses suck!
 
Good idea on the hoses. The kit hoses are a soft plastic, similar to the kind Airfix uses for its figures. The wire wrapping technique is popular and produces good results. I recommend hitting it with Mr Surfacer or with a thin mix of putty and acetone, when you've finished. It helps even out the contours of the finished hose, or like the carpet in "The Big Lebowski", it ties everything together.
 
Good idea on the hoses. The kit hoses are a soft plastic, similar to the kind Airfix uses for its figures. The wire wrapping technique is popular and produces good results. I recommend hitting it with Mr Surfacer or with a thin mix of putty and acetone, when you've finished. It helps even out the contours of the finished hose, or like the carpet in "The Big Lebowski", it ties everything together.

Thanks Baron. Your tip is timely! I have some Mr. Surfacer and will give it a go. ;D

I tried the wire wrapping technique. I'm going with it. The process goes quickly and, now with Baron's tip, I avoid time spent trying to clean up the rubber parts. Here are some progress pics:

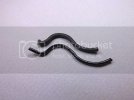
Here's a test with two different gauge wires. 28 gauge (larger) and 30 gauge (smaller). I think the 30 gauge better mimics the rubber part:

2013BSC_14_zpsfc88755e.jpg

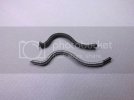
Aluminum 12 gauge wire (roughly) bent to shape:

2013BSC_15_zpsdba59bbc.jpg

After wrapping:

2013BSC_17_zps92f263a5.jpg

Replicating the end cap using my handy Waldron punch set:

2013BSC_18_zpsb767dfa3.jpg

And a test fit for good measure:

2013BSC_19_zpsf9e3d473.jpg

I'll clean this piece up and try Baron's coating tip. More pics soon. Thanks guys!
 
Thanks Cave-Dweller. I'm waiting until closer to build completion to coat them, I think. I may need to bend and adjust and would hate for the coating to crack.

Hopefully more progress tonight!
 
That's an interesting idea, to duplicate the cap or flange end, to keep the hose in place. I'm interested to see if it will stay in place. I usually just leave a kink or bend in the anchor end of the core piece.

MaK kits are a lot of fun, because of things like this. Scratchbuilding or even just modeling puzzle-solving is really part of the build, and you can do so many things that will be unique to your build, and you're still within the MaK world.

And the most fun is beating up the finish! :D
 
That's an interesting idea, to duplicate the cap or flange end, to keep the hose in place. I'm interested to see if it will stay in place. I usually just leave a kink or bend in the anchor end of the core piece.

I haven't attached the cap yet but planned to try 5 min epoxy. I'm using the epoxy to attach the cap and secure the wire at that end of the piping - to inhibit unraveling and slippage.

It sounds like you've built a few MaK kits, Baron! This is my first so I really appreciate the insights. I've tried for two weeks to get on the maschinenkrueger.com forum but cannot get an authorization email! I can't find contact info for moderators either. I was hoping to learn from the WIPs there. Very frustrated about that.

Please keep the suggestions coming. ;D
 
Some progress made this evening. One leg is complete except for some minor seam cleanup and a couple of bolt head details. I decided to punch a hole for the hose and let the extra length of 12 gauge core poke through. It should hold well once it's time for final glueing.

2013BSC_20_zps2e153d30.jpg

2013BSC_21_zpsbcb39ef4.jpg

2013BSC_22_zps46c8a7fe.jpg
 
CheesyGrin said:
...It sounds like you've built a few MaK kits, Baron! This is my first so I really appreciate the insights. I've tried for two weeks to get on the maschinenkrueger.com forum but cannot get an authorization email! I can't find contact info for moderators either. I was hoping to learn from the WIPs there. Very frustrated about that.

Please keep the suggestions coming. ;D

"I didn't, but I did stay at a Holiday Inn Express last night" ;D

Seriously, I've only finished one, the SAFS Mk II Raptor suit. My buddy Scott Hershbell gave me the kit, out of his stash, and I got hooked. I now have a MaK substash to my main stash, with a couple projects underway. One is a merc patrol returning from a sweep, which will include the Raptor plus 2 or 3 other suits and some figures. Another will use Lincoln Wright's new figure of the female Strahl officer, "Gertie", but I'm not giving out any more details on that one.

It's a great subject, reminds me of other sci-fi and anime that I enjoy, and the kits are great. A beginner can build one, or an experienced modeler can go nuts.

Keep trying at Krueger's forum, it's an excellent forum, lots of really great modeling skill on display, as well as a ton of info on Maschinen Krieger. There is also a Facebook group, if you're on Facebook, for Kow Yokoyama, and a lot of the forum members post things there, too.

One thing I've noticed about seams on MaK kits--you don't necessarily need to clean all of them. I found that out with the Raptor. There were seams where the collar and the side pieces all met. To my aircraft modeler eye, they looked like they needed filling. After filling and painting, I realized that on the "real" suit, those seams belonged there, it's where all the parts of the suit meet, when the pilot has climbed in and closed it up. But beyond that, you'll find a lot of guys use their imaginations.

There is a preference for a well-worn and well-weathered look, in the genre, something else I noticed.

Thanks again for the compliment and I look forward to your progress on the "Big Dog" :)
 
Thanks to all for tracking the thread and for the feedback! It's much appreciated.

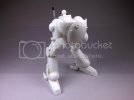
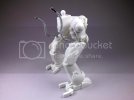
I got some time at the bench today and completed the lower half. I haven't added or modified anything beyond building wire-wrapped hoses. These MaK kits are stellar! Well engineered and clean build.

I did do a weld bead and I think it turned out OK. Here's some new progress pics:

Weld Bead:
2013BSC_24_zps81bb9560.jpg

360 beauty shots:
2013BSC_25_zps8596cbe2.jpg

2013BSC_26_zps50b7dd09.jpg

2013BSC_27_zps8e81f5da.jpg

2013BSC_29_zpse2c0f341.jpg

2013BSC_30_zpsb935c839.jpg

2013BSC_31_zps92a66901.jpg
 
Hi guys,

I've made steady progress over the last few nights. I have most assemblies completed except the head and torso. I thought I'd post a blow-by-blow on a scratch built component - Coil-over shocks. The kit part is OK but clunky. I made a new version faster than I could have cleaned up the seams on the kit part! It only took ~20 minutes, start to finish. Here are some pics:

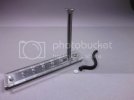
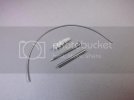
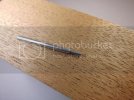
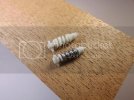
Here's the kit part and the materials for the scratch built version (20 gauge aluminum wire, small aluminum tube, and a nail):
2013BSC_32_zpsba15817e.jpg

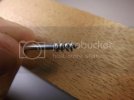
Coiling around a slightly larger nail:
2013BSC_33_zps0f74568b.jpg

Coil ready for trimming:
2013BSC_34_zpsa4ea45a7.jpg

Trimmed to size:
2013BSC_35_zps9c6e211a.jpg

Shock guts minus coil:
2013BSC_36_zps5da04795.jpg

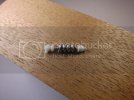
Shock guts with coil:
2013BSC_37_zps63e6a45d.jpg

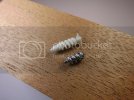
Comparison:
2013BSC_38_zps3da5e84e.jpg

No turning back now. Stay calm and carry on:
2013BSC_39_zpsa4a6f11f.jpg

Finished:
2013BSC_40_zps10ab690b.jpg
 

Latest posts

Back
Top