1/1000 Olympic Carrier(s)

thanks guys....a smallish update: sanded the top to get it more smooth and added the topside antennas. I put some primer on it before I left this morning so possible a tiny update tonight or tomorrow…

oc_img_2535.jpg

oc_img_2536.jpg

oc_img_2537.jpg
 
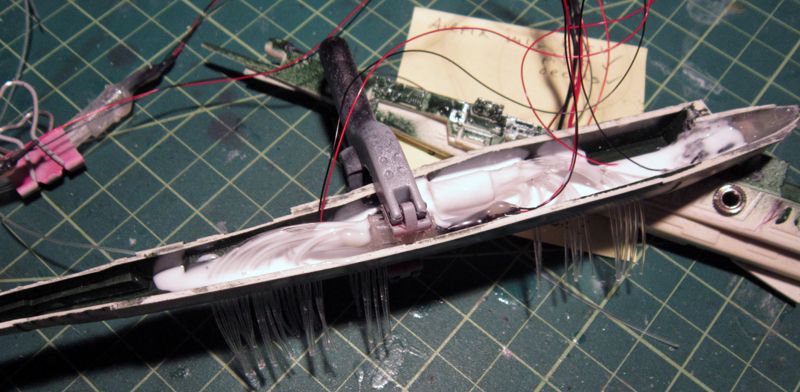
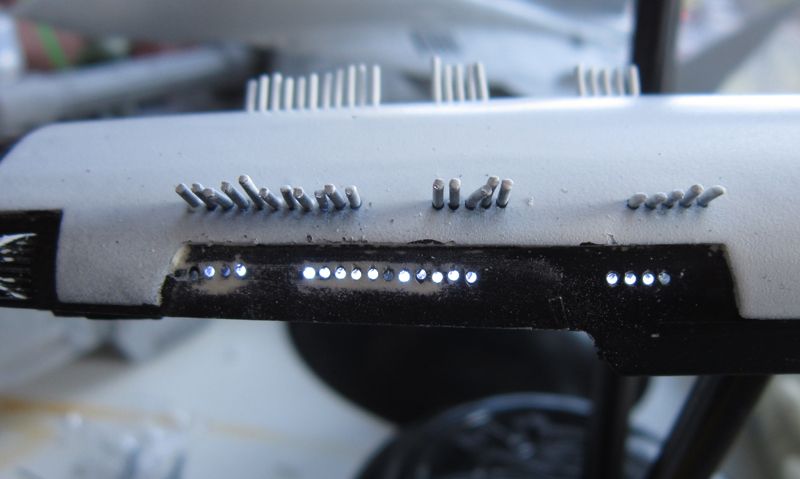
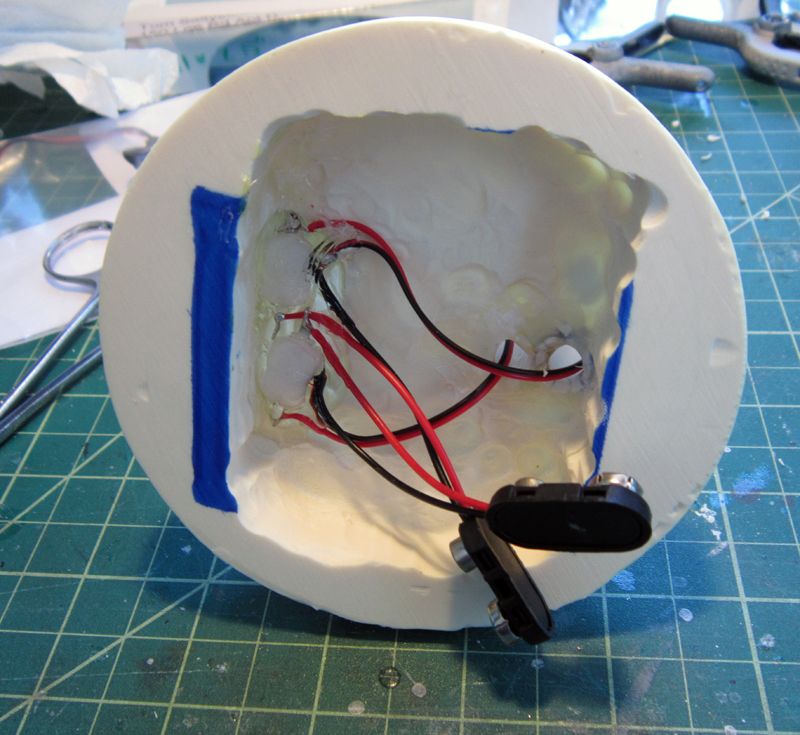
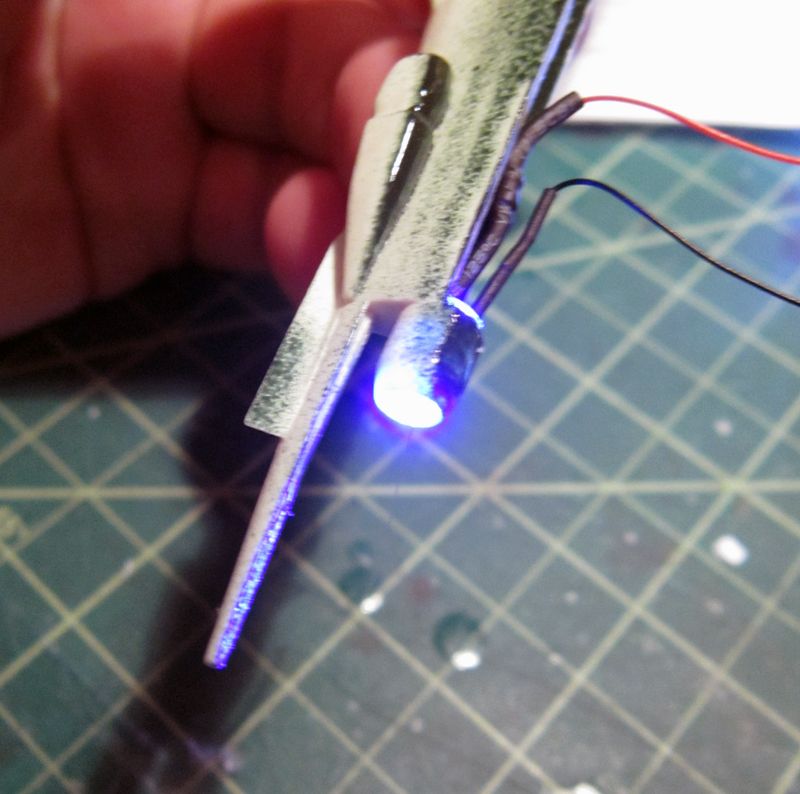
What are you using to connect your fiber optics to the light source. It looks like some sort of clip. I am new to this so please bear with me if the question seems obvious to most. Also, where can I find the "power" tabs you use to connect your wires to?

Thanks for any help you can give.
 
to connect the fibers to the LEDs i cut short lengths of 5mm diameter styrene tubing and threaded as many fibers as would fit. then when it was packed full, i shot some hot glue into it, filling it so it would grab all the fibers. then while the glue was still hot-ish, i stuck the 5mm LED into the opposite end of the tube, compressing the glue and adhering everything. since the tube was clear i silver coated the outside to contain as much light as possible. it actually made a good difference in the luminosity at the ends of the fibers.

and by "tabs" do you mean the plugs? they are just mini-stereo jacks and you can find them at radio shack or online (i think i got mine through jameco).

alternatively, evans designs is where i get my LEDs and wiring these days. they are really good about connecting circuits and everything so all you have to do is insert the circuit.... http://www.modeltrainsoftware.com/
 
Finished the base!! It was a little tricky planning the angle and finding the proper diameter tubes for the plugs. I even had to grind down the threading to get them to fit. Both craft will look pretty nice on the base though.

oc_img_2550.jpg

oc_img_2612.jpg

oc_img_2613.jpg

oc_img_2615.jpg

oc_img_2617.jpg


I also started masking but realized it would be easier to do the dark coat on the bottom then mask. I used a ton of Micro Mask on the sides and it will be a nice clean-edged white shell. The engine/fin areas will be a little trickier to mask.

oc_img_2551.jpg

oc_img_2618.jpg

oc_img_2620.jpg


I noticed that the ZOIC renders all have these little static vane things sticking off the back edges of the fins. So I’ll have to add those. No biggie because I have some leftover PE from my F-16 build… I also began the process of lighting the 2nd carrier and it looks like it has the same seam issues….so fun times ahead….

oc_img_2602.jpg

oc_img_2605.jpg

oc_img_2608.jpg
 
Lighting definitely looks good.

Looks like the paint on ship 1 is off to a good start.
And you've gotten practice for those seams
 
Finally got some progress done on Carrier #2! It was just a matter of threading all the fibers and joining the halves…for the most part. This one went together much more easily with fewer gaps. Also, this time I opted to use my friend Aves to fill the gaps. It’ll sand much more smoothly, too….

oc_img_2730.jpg

oc_img_2731.jpg

oc_img_2736.jpg

oc_img_2753.jpg

oc_img_2754.jpg

oc_img_2755.jpg

oc_img_2756.jpg

oc_img_2757.jpg

oc_img_2758.jpg

oc_img_2759.jpg

oc_img_2760.jpg

oc_img_2761.jpg
 
I don't think you have enough lighting ;) ,i hate filling seams but coming together nicely!.
 
Big update on the Carriers. All the detailing on #2 was wrapped up, including adding the rear fins. Less was needed because the seam on the bottom joined more cleanly.
oc_img_2771.jpg

oc_img_2775.jpg

oc_img_2776.jpg

oc_img_2777.jpg

oc_img_2778.jpg


It of course got it’s coat of primer, too.
oc_img_2785.jpg


The tails for both of them received their static discharge vanes.
oc_img_2773.jpg

oc_img_2779.jpg


The masking on #1 was removed and peeled some of the black off with it. It’s really a happy accident because the black was way too dark and didn’t match the references.
oc_img_2787.jpg

oc_img_2790.jpg

oc_img_2791.jpg


So I came back in with some Testors Gunship Gray and it looks TONS better.
oc_img_2985.jpg

oc_img_2982.jpg


The rear “grill” area was painted with black on #1 and gunmetal on #2. Before going to far along I did some drybrushing and detailing with chrome on #1. This step still needs to be repeated on #2. I did get the white and gunship gray on though.
oc_img_2988.jpg

oc_img_2989.jpg


A healthy coat of future was also applied to #1 in preparation for decals. Once those are on I’ll do some washes and heavy weathering…
oc_img_2987.jpg

oc_img_2996.jpg

oc_img_2997.jpg
 

Latest posts

Back
Top